Riding the NEBDR with some Awesome Players

It wasn’t the tour I planned for the summer, but it was eventful.

photo credit: Riley Harlton

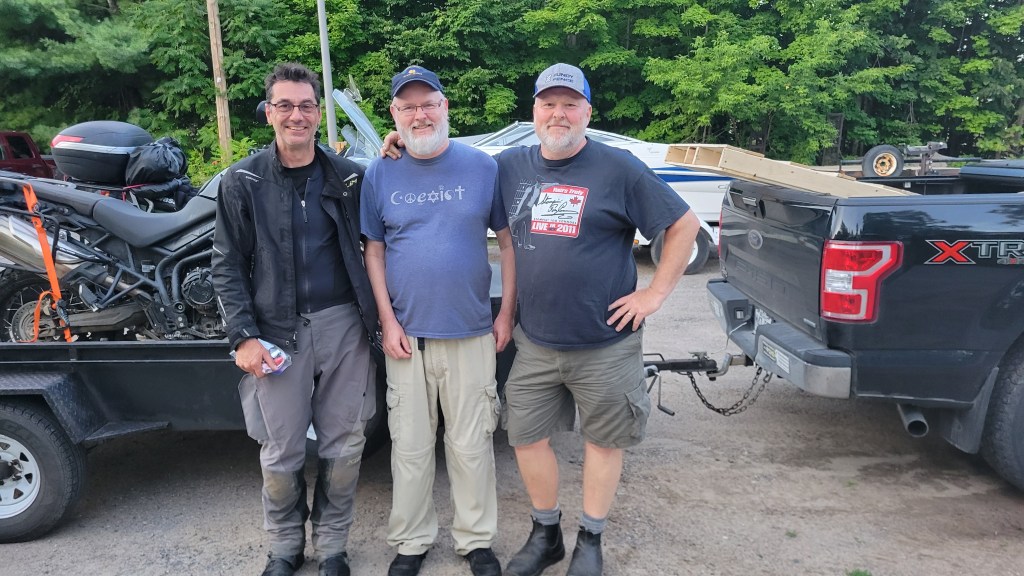
The initial plan for my big tour of 2024 was to ride The Blueridge Parkway down to West Virginia and then come back on the MABDR and NEBDR. It would have taken me probably close to a month. But then those plans got kiboshed by unforeseen circumstances and for a while there it seemed I wouldn’t get away at all. In the end, I managed to spend four days in August touring Vermont with Riley and Marc from The Awesome Players Off-Road MC doing Sections 4 & 5 of the NEBDR.

We decided to do a spoke-and-hub type trip, using Silver Lake State Park in Barnard, VT, as our home base. This meant not only that we didn’t have to move camp each day but also that we could ride for a few days without luggage. I’ve stayed at that campground several times and it never disappoints. The general store in Barnard has gas and makes a great breakfast sandwich.

We decided to ride Bailey-Hazen down. B-H is an old military road dating back to the war of independence (1776). It’s primarily dirt and gravel and runs from Montgomery Centre down through Lowell, Albany, Craftsbury, Greensboro, Walden, Peacham, and into East Ryegate. I’ve ridden it a few times but never the hero section. In fact, the last time I rode B-H, I attempted the hero section and had to turn around. It’s basically an ATV trail filled with babyheads, and I was alone and on street tires. It’s definitely a challenge.

So I was thinking of that section as we rode down toward the border and thinking of it some more as we approached Montgomery Centre. (The hero section is early in the track.) This time I had Michelin Anakee Wild tires on and there were three of us, but I was fully loaded with all the camping gear. Riley and Marc have a lot more off-road experience than me and the last time I rode with them it didn’t go well. You never want to be the guy holding everybody up.

We headed up the nasty little hill climb and I got loose a few times but kept it upright. Riley said later that he was thinking I must be happy not to be on the Beemer and I was. The Tiger is definitely more capable with the 21″ front wheel. There was a crew working on the trail and soon we hit some deep gravel they were spreading and that was interesting. But somehow I made it to the top without dropping the bike and felt pretty good about that. Unfortunately, things were about to take a turn for the worse.

For those unfamiliar with Awesome Players lingo, a douche rope is a fabricated rope with a steel karabiner on one end and loops along its length for handles. It’s used to pull out the douche who is stuck in mud or, in my case, whose bike is down a ravine. I don’t know why I was going so fast, except I guess because adrenaline was pumping through me and maybe I was over-confident, having just done the tough part. I think I also relaxed my concentration. You can see my front tire slip out on the muddy downhill corner which threw my balance, and then I was struggling to keep the bike on the trail. Riley thinks I hit a false neutral because you can hear the bike rev a few times but I think I just panicked. Fortunately, what I lack in riding skills I make up for in tree avoidance technique. When I saw it coming up fast, the bike went one way and I the other.

I’m breathing hard into my helmet because I was in some pain and thought at first I might have pulled an Itchy Boots and broken my collar bone. But in the end, it was just a separated shoulder and, a month later, I’m almost fully recovered. The tendons have healed and I’m just working on strengthening and stretching the scar tissue. It could have been much worse. If the bike had hit the tree, I imagine there would have been structural damage and it would have been a write off. In the end, it just made for a few uncomfortable days around camp and especially trying to sleep in my tiny tent.

I was pretty mad at myself, as you can hear. It was an auspicious start to the tour and I was living up to my reputation. But here’s the thing I’ve come to realize after reflecting on the crash over the past month: crashing is not only an inevitable part of off-roading but part of learning. In fact, Brett Tkacs lists dropping your bike as an indicator that you’re improving your riding skills, which at first seems counter-intuitive, but when you think about it, if you aren’t dropping your bike once in a while, you aren’t pushing beyond your limits where both sh*t and learning happens. I’m pretty familiar with riding on dirt and gravel roads but haven’t done much trail riding. By contrast, Riley and Marc have been doing trails for years, so I knew that riding with them would be a learning experience.

Their experience was essential to getting my bike back on the trail. They had the gear and know-how. Here’s Marc explaining the procedure.

video credit: Riley Harlton

Once the bike was taken care of, we had lunch and I took a bunch of meds for the pain. I wasn’t sure how it would go on the bike but it was surprisingly okay; the shoulder is relatively immobile while riding, and it was actually off the bike around camp that I felt the injury most.

When we headed off again, I decided to let Marc go first and went slower on the downhill.

That’s my windscreen rattling; I lost some hardware in the crash that I replaced at the next rest stop. Later, Riley lead and I followed his line.

Bailey-Hazen actually isn’t a technical road, aside from a few bits. This clip is more indicative of what most of it is like—hard-packed dirt lined by trees and periodically opening up to nice views of the surrounding hills. It’s a fun ride and appropriate for big bikes.

The next day we headed south on Section 4 of the NEBDR but not before the amazing breakfast sandwiches of the Barnard General Store. There we met Bethel, who was visiting from California and had rented a Ténéré 700 from MotoVermont. She was enamoured by the general stores and bucolic countryside of Vermont, and who wouldn’t be, especially if you live in Superslab City. (I might have this wrong, but I think she said she lives in Los Angeles.) We shared stories over breakfast of falling in mud puddles and down ravines. It’s always nice to meet fellow bikers; there’s definitely a bond between like-minded people enjoying the freedom and thrill of motorcycling. Unfortunately, she was heading north to return the bike in Burlington and we were heading south.

If you know anything about the NEBDR, you know that it’s one of the harder BDRs and that Sections 4 and 5 are the toughest sections, so we were expecting some challenging terrain. I was trying to figure out where the by-passes were because I’d already decided I would take them with my gimpy shoulder; I just couldn’t risk another fall. But to our surprise, the section was relatively tame, more of the same winding dirt and gravel roads. When we finally stopped for coffee and a pastry at Sweet Birch Coffee Roasters and Bakery in Wallingford and Marc got out his map—yes, his paper Butler NEBDR map—we realized we had done all the bypasses. It seems that the most recent gpx tracks (March 2024) had the bypasses as the default and you had to load the harder sections separately if you wanted them. When I downloaded the tracks, there was much description of flood damage, so I suspect the organizers decided to steer riders away from those Class 4 roads for now. It worked out for me, but I think Marc was disappointed.

Despite that, Section 4 has some very nice riding. One of my favourite roads was the Forest Service Rd. 30.

Lower Podunk Road is also sweet, as is Hale Hollow.

Sorry about the bad angle of the action cam. If it’s not the wind deflector that obstructs the view, as was the case with my Newfoundland footage, it’s the bad angle unbeknownst to me. I’ll eventually get it right.

We ended up in Readsboro before high-tailing it back up to Barnard on asphalt, stopping en route for groceries and beer.

The next day we headed north on Section 5 and decided to split up so Riley and Marc could get their Class 4 fix. Unfortunately, while doing the harder section north of Stockbridge that follows the White River, Marc suffered the same fate as me. He said it was an easy section but he got target fixated on a rut and was thrown violently off the bike, separating his shoulder too! Now there were two of us gimpy. Even before his accident, he had decided that he was going to head home a day early because camping was not agreeing with him. That’s a polite way of saying he’s a wimp. No, seriously, some people are campers and some are not, and to his credit, he at least gave it a try. He said he enjoyed the campfire and time around camp, but I think he wasn’t sleeping well.

Even experienced riders periodically take a tumble. We’ll blame this one on sleep deprivation. photo credit: Riley Harlton

So after riding the exhilarating Lincoln Gap Road, we said our good-byes and Marc headed north on the 100 back to the border. It was already mid-afternoon and rain was in the forecast, so Riley and I decided to call it a day too. We picked up steaks and potatoes and, being the final night, some port. As we rode back to Barnard the rain started and never really stopped the entire evening, but we strung a tarp over the picnic table so all was well.
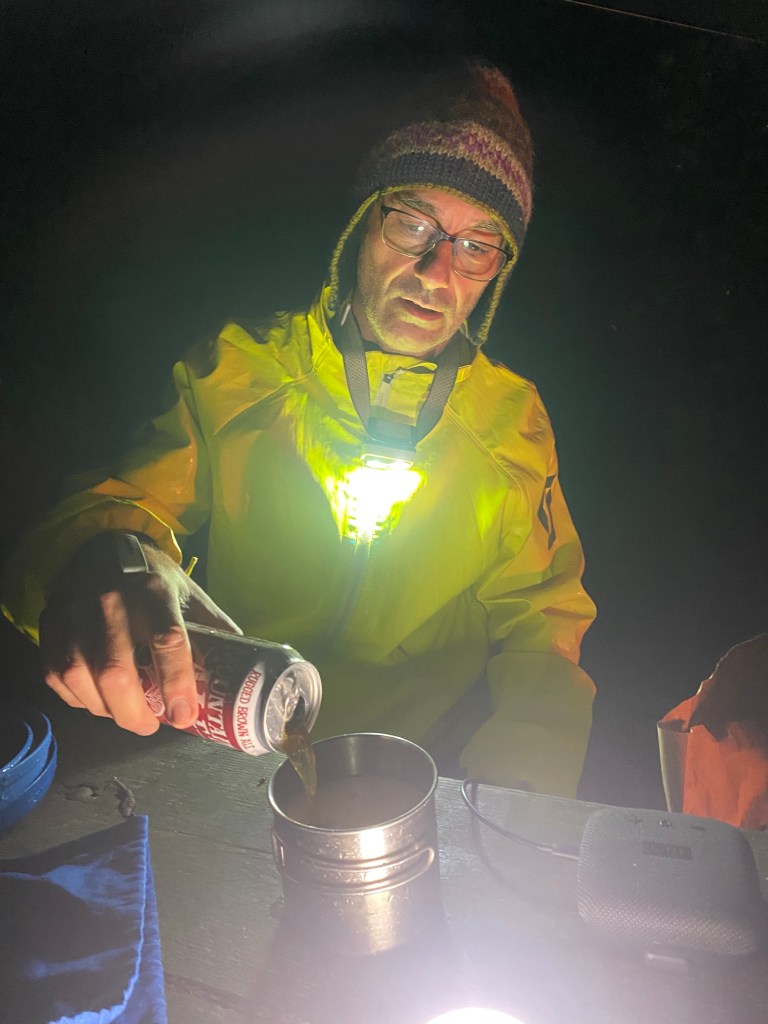
A tarp, woollen hat, Rugged Brown Ale, and bluetooth speaker. What more do you need? photo credit: Riley Harlton

For the ride home, we figured we’d ride the Puppy Dog Route, which passes through Barnard and goes right up to the border. I’ve ridden it a few times and it’s an easy dirt route, but I’d only ever done it when dry. After the heavy rain of the night before, it was greeasy! We were crawling along in 1st gear when I stopped and asked, “Do we really want to do this?” Riley agreed that it would take us forever, so after a few miles of that we hit asphalt and stayed on it, but the drama was not over yet.

As we rode toward the border, the rain got heavier and heavier. When we crossed the border, it became torrential, and as we came over the Mercier Bridge it was apparent that there was major flooding, including on the main highway. Traffic had come to a standstill, so we had to find another way home and that included some deep water.

154 mm of rain fell on Montreal on Aug. 9, shattering all records.

When I got in, Marilyn was none too pleased. She’d texted early in the day that we should just come straight home, but I didn’t know why since the rain wasn’t that bad in Vermont. Little did we know that Montreal was in the midst of more extreme weather and that many people were either stranded or had basement flooding. Apparently 80% of the basements in Dorval, the city next to where I live, were flooded.

A pretty hard crash, two, in fact, some challenging riding, extreme weather—this ride had it all and was the true adventure I needed before heading back to the doldrums of work. It also gave me a taste of the NEBDR and how difficult, maybe foolish, my original plan would have been to ride the entire thing alone, fully loaded, including the Class 4 roads “as a challenge.” The riding on the NEBDR is enjoyable and as challenging as you want it to be. We’ll see how I feel next summer but at the moment I’m feeling like I can skip the Class 4s if I’m alone.

The best part of this ride actually wasn’t part of the route at all but reconnecting with The Awesome Players. When I tried riding with them before, I just couldn’t keep up on the big GS when they were on smaller bikes. Now that I have the Tiger, I’m willing to try again. It’s the kind of riding I’ve wanted to do for some time but most of the riders I know don’t do dirt. I know I’ll be a little out of my comfort zone but in a good way, and there isn’t a better bunch of supportive, fun guys to ride with than them. You only have to watch a few of their videos to see what I mean.

But that will be probably next season, to be honest. Next week is the Ride for Dad to raise funds for prostate cancer research. It’s a great cause, and you can contribute to my team’s campaign here. Anything helps and is greatly appreciated.

After that, Marilyn and I are riding the Saguenay Fjord, which neither of us has seen, and I’ll be changing tires and windscreen for that tour so I don’t know if I’ll be back on the dirt until spring. Look for an upcoming post on Saguenay/Lac Saint-Jean, and a few more rides through the glorious fall season here in Canada when the leaves turn colour. Who knows: maybe I’ll even make it down to Vermont again before the snow flies.
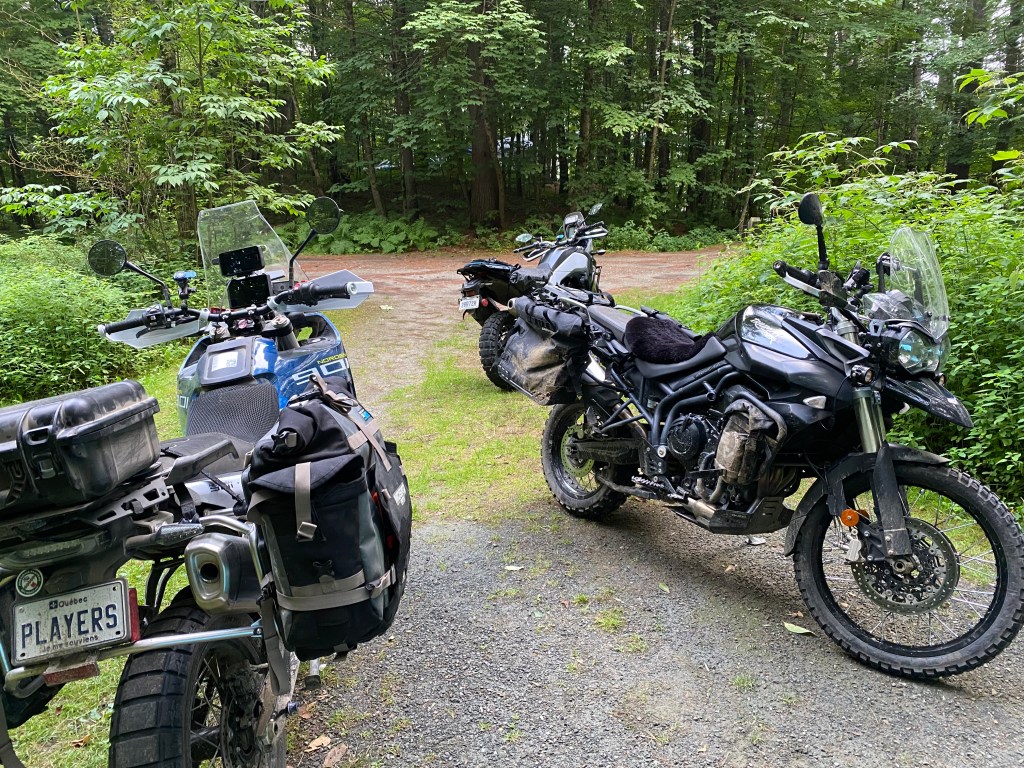
At Silver Lake State Park. Norden 901 Expedition, Tiger 800XC, and Yamaha T7.

Review: Dunlop Trailmax Mission Tires

Photo credit: https://www.dunlopmotorcycletires.com/tire-line/mission/

A great long distance adventure touring tire with one major flaw.

When Dunlop decided to design a new ADV tire, they smartly asked adventure riders what they wanted. Of course, we all want a tire that does everything well—excellent street performance with no compromises off-road. That’s not physically possible, but Dunlop claims to have come pretty close with the Trailmax Mission, saying it offers “knobby-like performance” off-road and “great ride quality” and “impressive grip” on the road. I ran the tire for 20,000 kilometres and it was a very good tire on the road but had limitations off-road. Aside from these limitations, I would hesitate to buy it again because of one major drawback.

On Road

Dunlop claims that the Trailmax Mission is a 60/40 tire. I’m glad they revised those numbers, because when the tire was launched they were calling it a 50/50. I think it’s more like a 70/30. You can see at a glance that it’s designed primarily for the street, with a rounded profile and not blocks but deep grooves. That results in a very comfortable street ride with easy turn in and relatively little vibration coming up into the handlebars.

One specific request many ADV riders had was longevity; we’re simply tired of having to change our tires every 5-6K. The Trailmax Mission tires have a very hard compound and you can expect to get 20,000K out of a set. I put a set of these on at the beginning of last season and rode them out to Newfoundland and back 2-up fully loaded. After 20,000K, there was plenty of tread left in the front and some left in the rear.

So apparently if you can see all of Lincoln’s head the tire is finished. The rear is pretty close to done, although I’m not quite down to the wear marks. The front has some life but wear is uneven (probably my fault with under-inflation). Despite that hardness, I never had any problems with the tire skidding in the rain, an issue some riders have reported with the Heidenau K60 Scout that has similar longevity.

So if you are going on a long tour that will be primarily asphalt, the Trailmax Mission would be a good choice.

Off Road

I used this tire in the Classique Plus ride on Class 2 roads. It handles well in hard-packed dirt, gravel, and even shallow sand. I also had it on my 650GS before I sold it for a final tour through the New England states that involved some fairly deep gravel, and I have to say, I was having an easier time than my riding buddies on Shinko 705s, a similar 70/30 tire. Yes, it slides out from time to time, but predictably, which actually makes it a fun tire to run on dirt and gravel if you’re into powersliding.

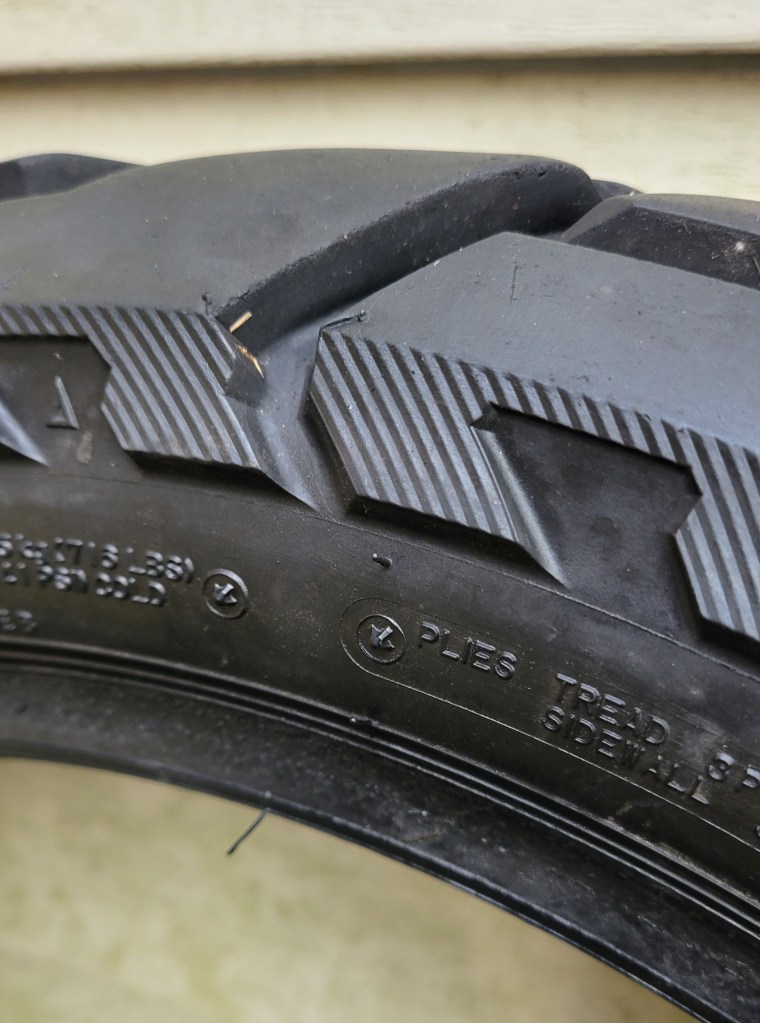
There are a couple of features of the Trailmax Mission that make it especially good in dirt, despite its round profile. One is the sidewall lugs, a technology borrowed from ATV tires that allows the tire to bite when sunk into deep sand or mud. Yes, it does surprisingly well. Dunlop also claim the lugs help prevent sidewall punctures from sharp rocks.

You wouldn’t think these little ridges do much to pull a 500 pound bike through deep mud, but they do.

Another feature is the Staggered Step design. I can’t really say if these did anything but Dunlop claims they add rigidity in the contact patch for improved stability. The idea is that as one step wears down, there’s another ready to take over.

Staggered Step System

Obviously we are talking about stability on the sidewalls as you are leaning through a corner. I guess this is Dunlop’s attempt to reduce the “wandering” sensation some tires have when on the side blocks. Perhaps a Physicist reader will explain it to us because I’m a bit at a loss as to how these cut-outs are going to improve stability. That said, I never noticed the tire wandering, which is something I now feel on the Anakee Wilds I just put on.

“Knobby-like performance”?

Not really, although good enough for even deep sand if you are suicidal or mud if you are masochistic. It’s here where the tire has its limits. I found myself going through mud on the Rideau Trail north of Merrickville, and while the tires got me through the first few puddles, they soon caked up.

Impressive initial performance for a 70/30.

The problem is that, unlike a knobby, the mud does not evacuate from the grooves of the Trailmax Mission. You can spin the rear to clear it, but it’s the front that you need planted, and once it’s caked, you might as well be riding on ball bearings.

Yes, you can blame me for taking a tire like this into mud. It’s not meant for that. I’ve seen GS instructors take their 1200GS’s through a mud bath on Anakee 3s!, but I’m no GS instructor. So for the average rider, either stay out of the mud on these or put on a more aggressive tire.

Riders in the Quebec area will be familiar with Marc Chartrand. He is the founder of RidAventure.ca forum, La Classique Rally, and lead planner of the Trans Quebec Trail. Basically he’s The Man in Quebec and probably has more off-road experience exploring Quebec trails than anyone around here, so when he gives advice, I listen. I once read a reply of his to the ubiquitous question of “What tire should I put on my motorcycle?” His answer (I’m paraphrasing and translating) was basically that if you get, say, 6,000K out of a tire and “only” do about 10% off-road, that’s still 600K in the dirt. And that’s a lot of kilometres to be crapping your pants if you have on a street-biased tire. That’s why, he said, experienced ADV riders always put on aggressive tires.

I’m thinking of this advice in relation to the Trailmax Mission tire. If you are riding hard packed dirt, gravel, even some loose rock and shallow sand, these tires are great. But if you are going anywhere near deep sand or mud, you’re on the wrong tire.

The Major Flaw

Regardless of the tire’s off-road limitations, I’m not sure I’ll be putting these on my bike again. That’s because I do remote and long-distance riding and need to be able to change tires by hand. These tires are so tough it’s nearly impossible, and that’s not an option when you’re running tubes. Maybe some people can, but I couldn’t, and that’s what counts. Those 20,000K are the product of very tough rubber used in the manufacturing.

Now before you start saying “It’s all a matter of technique,” let me say that I’ve been spooning tires on and off my bikes for years. I’ve made it a matter of principle, thinking the more I struggle through the process the easier it will become when I have a puncture in the field. I’ve changed many different types of tires, including Metzler Tourance, Shinko 705 and 805, Pirelli Scorpion Trail II, Anakee Adventure, Kenda Big Blocks, and even the dreaded Heidenau K60 Scouts. But I could not change the Trailmax Mission tire.

Getting the tire on was not the problem; it was getting it off. I could get both beads off the rim, but couldn’t get the wheel out of the tire. Usually I put the big 15″ lever through and lever it off the same side, using my knee to press it the rest of the way off. You can watch Ari Henning do that here. But the tire he is changing has a minuscule sidewall, making it easy. The Trailmax Mission has a deep and very tough sidewall. There was no way it was coming off.

I eventually called in the support . . . but my wife was no help. I then texted my buddy Riley from Awesome Players Off-Road MC. He suggested another method of getting the tire off. Instead of same side, remove the other bead on the other side and drop the wheel down into the tire. For example, you can see this method done here. I tried this and got the wheel down into the tire just fine, but no matter how much I struggled with the tire fully lubed up and in the heat, I could not then get the wheel out of the tire. After much cursing, and sweat, and some blood, I got it half off, which is to say, I threw in the towel with the wheel stuck 45˚ relative to the tire. I took it to a shop which charged me $15 to get it off.

I’m not sure the Trailmax Missions are designed to be changed by hand, and I don’t blame Dunlop for abandoning those of us who still do this work. The vast majority of riders take their bikes to a shop for a tire change, and the vast majority of adventure riders aren’t going off-road and aren’t running tubes. Even the latest bikes with off-set spoked wheels don’t run tubes, so you can fix a flat using a plug. To compete in the longevity game, manufacturers are using tougher and tougher rubber. The industry is slowly abandoning those of us who still ride with tubes and need to remove our tires by hand.

I’ll admit, you can get a tube out to patch it without removing the tire, although even that will be difficult with a sidewall this tough. So I’ll step down from my soapbox now by just saying that the difficulty of changing the Trailmax Mission by hand is a consideration.

The Beast. That bruised thumb is the product of a tire lever in trying to get it off. I would suggest also wearing eye or maybe face protection because I had a lever fly out with force.

Conclusion

Dunlop has swung for the fence with the Trailmax Mission tire. It’s a premium tire at a premium price, with a 150/70 18″ (a common rear size) running for about $320 CAN and $250 USF. They listened to riders and studied the market, then came up with a tire capable of going long distances on the large adventure bikes of today. Apparently something like 80% of BMW 1200 (now 1250 and 1300) GS’s never see dirt, and that’s clearly the market Dunlop were aiming for with this tire. If that’s the type of riding you do, the Trailmax Mission is definitely worth a try. Like I said, I used it to ride out to Newfoundland, a tour which was primarily asphalt, but it was nice to know if the asphalt ran out (and it did a few times), we would not be in trouble. Overall, I was very happy with how the tire rode and how long it lasted, even fully loaded with a passenger through the heat of midsummer.

If you are looking for something beefier, capable of mud and sand, consider the Trailmax Raid, a 40/60 tire in the Dunlop line.

The Major Service

Getting ready for the new season this year meant a little more than adding a few farkles.

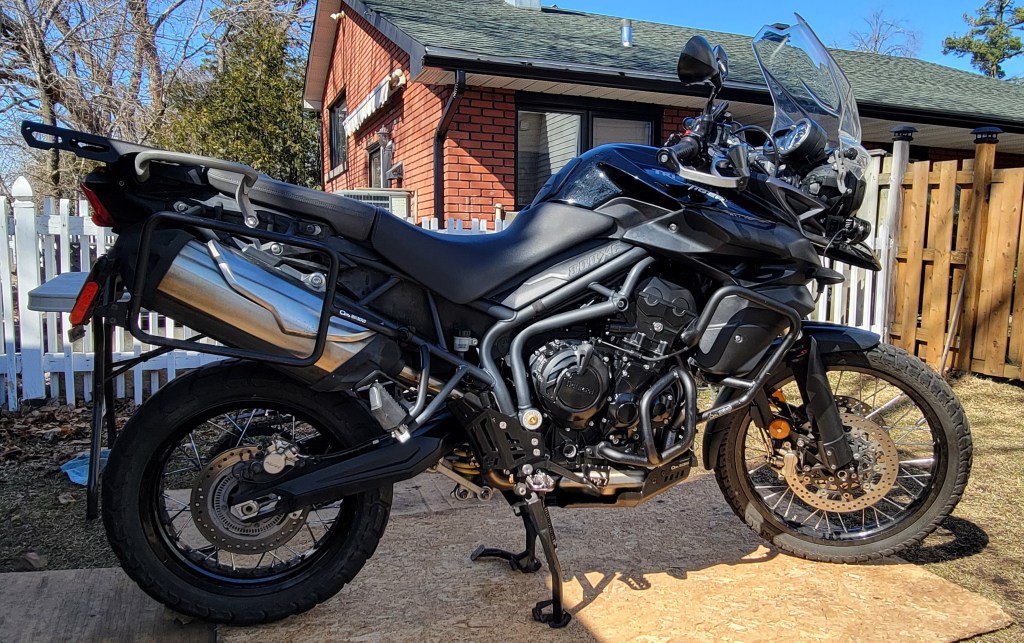
When I bought my 2013 Triumph Tiger 800XC in May 2022, it had only 14,500 kilometres on it, despite being nine years old. In the following two years, I’ve put another 34,000 on it. I’ve done basic service during that time, like changing the oil, coolant, brake fluid, and cleaning the air filter. I’ve also changed the plugs. But it was time for some major service.

Last fall I did the dreaded valves, swingarm and rear suspension bearings, and cleaned the starter motor. This spring I’ve fixed a problem with the shifting mechanism, cleaned and lubed the steering head bearings, overhauled the front forks, and made a few mods to get it ready for the BDRs. It’s been a long process, but it’s finally ready for the new season.

Valves

It’s the job everyone loves to avoid, and I did too. In fact, when I bought the bike, the dealer said they no longer recommend checking the valves at the manufacturer’s recommended 20,000K because, more often than not, when they get in there at that mileage, the valves are fine. I guess if you’re paying the dealer $1000+ to check them, it’s bittersweet when they don’t find anything out of spec. I was happy to wait. My buddy who rides a Triumph Scramber 1200 XE has never checked his and he’s got I think now over 78,000K on it. “If they’re slappy, they’re happy,” he said, although I always thought you don’t want to hear the valves. At any rate, with now over 48,000 kilometres on the Tiger, it was time to get in there and see how happy they are.

All the intakes were fine, but all the exhausts were tight, some significantly. Here are my calculations. Sorry about the grease.

Highlighted is the amount out of spec. I’m using metric.

As you can see, all the intakes were spot on at 0.15 (specs are 0.10 – 0.20). The exhaust specs are 0.325 – 0.375, so ideally you want them at 0.35. Some of mine were 0.20, so .15mm out of spec. I’m glad I didn’t wait any longer or I might have started causing damage to the valve seat. Live and learn: sometimes there’s reason behind the manufacturer’s recommendations.

An egg carton works well for keeping all the buckets and shims organized.

You want the same bucket to go back on the original valve, so keep any happy dogs with long tails out of your workspace. Nobody likes removing the cams, but just make sure you’ve got it locked at top dead centre and turn the engine over several times by hand once you get it back together to make sure you didn’t slip a tooth on the timing gear. I almost did because I didn’t put enough tension on the timing chain while torquing down the holder. (You have to remove the tensioner.) So you have to find a suitable wedge of some kind to manually tension the chain while tightening. The first two (2!) times I torqued down the holder the chain climbed a tooth.

Timing marks should line up parallel to the crankcase on the inside.

Thanks to MuddySump for his excellent videos. I was following my Haynes manual, but it’s always good to watch someone else do it first, especially when that person has the same bike as you and is a licensed Triumph mechanic! Once I got everything buttoned back up, I checked the valves again and they are now all spot on.

It’s always a little unnerving starting the bike back up again afterward, but it fired right up. I’m hoping the bike will run a little easier now with less tendency to stall.

Starter Motor

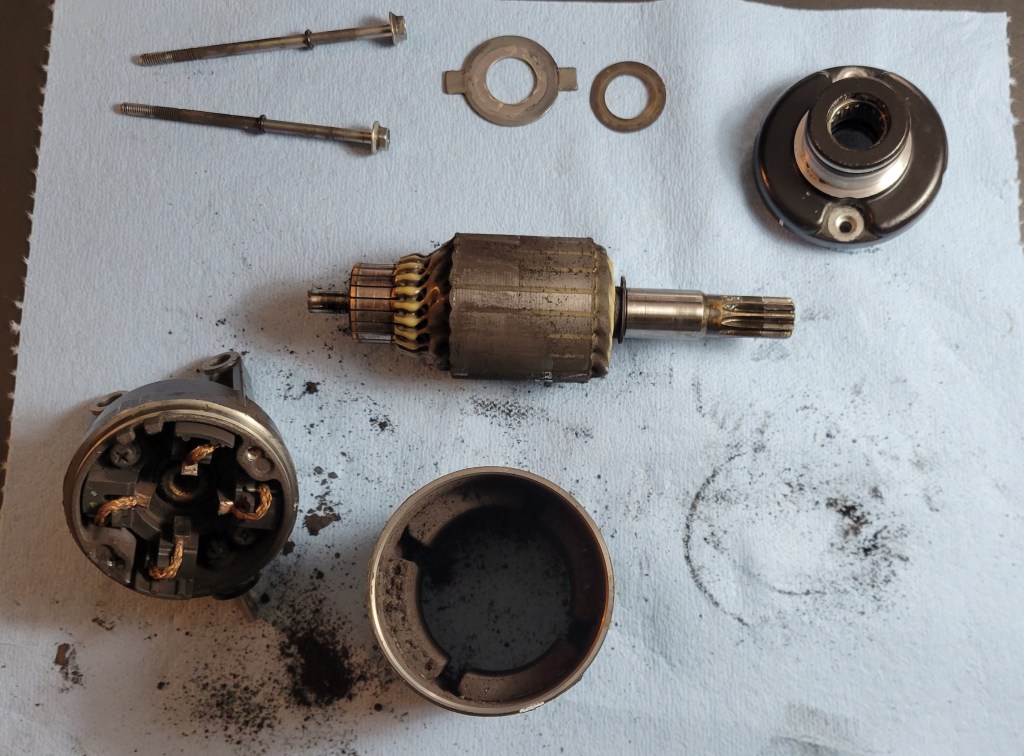
A known issue with the Tiger 800, at least the first gens, is a weak starter motor. There is a tendency when the engine is hot for the starter to fail. I’ve had it happen to me a few times. You stall the bike and the starter is reluctant. I’ve managed to fix it by keying off and on, but it was getting worse. Many guys swap out the starter with Rick’s and I considered it, but since I was already down to the throttle bodies, I figured I’d lift them to access the starter and give it a good clean.

I took it apart and there was a lot of carbon dust in there, and some discolouration on the armature. Some 1000 grit emery paper cleaned everything up, including the shoes. The bearing was fine, and I’m hoping I’ve breathed another few years at least of life back into the OEM starter.

Swingarm and Suspension Linkage

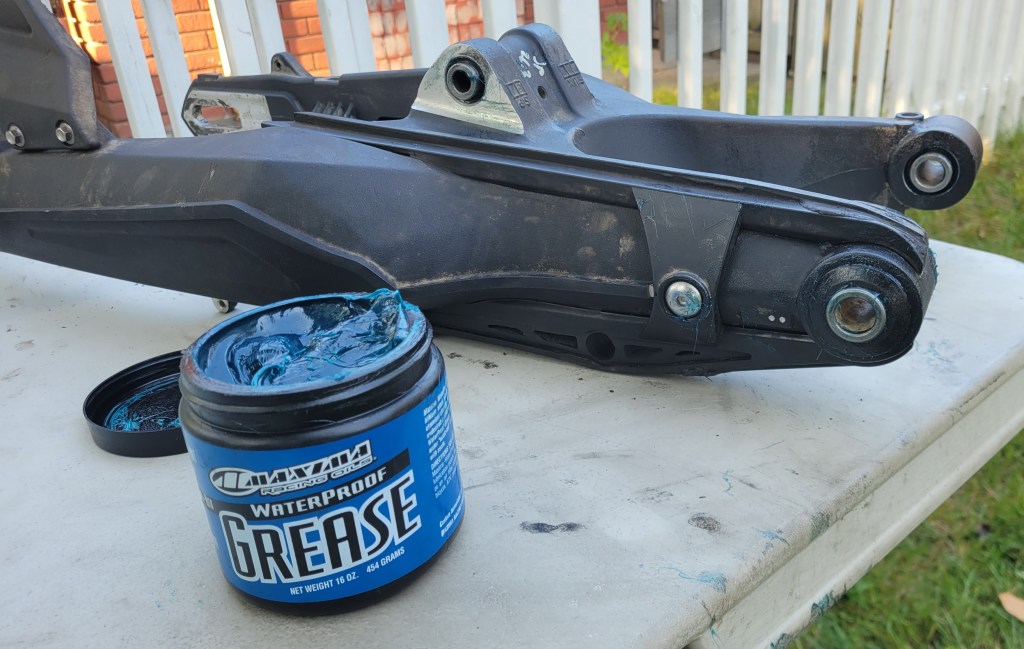
The swingarm bearings take a lot of abuse down there right in front of the rear wheel. Even if you aren’t doing water crossings, they’re going to get water and grit and grime thrown up at them. And when there’s crud or corrosion, you won’t feel it as you will with steering head bearings. I remember when I finally did this job on the 650GS, one of the bearings was in very bad shape and I had a bugger of a time getting the pivot bolt out due to the corrosion. This is one you want to do on the recommended interval, and it’s one of the easier ones so why not? You aren’t opening up the engine, just taking the rear wheel off, unclipping all the wiring from the swingarm, then removing the pivot bolt.

Thankfully, it wasn’t that bad this time, but I still left it a little too long. There was some discolouration on the bushings, but the bearings looked fine, albeit missing some grease. I cleaned everything up as best I could using 1000 grit emery paper and repacked the bearings with waterproof grease.

It’s always a good feeling when you restore these crucial components.

Shifting Mechanism

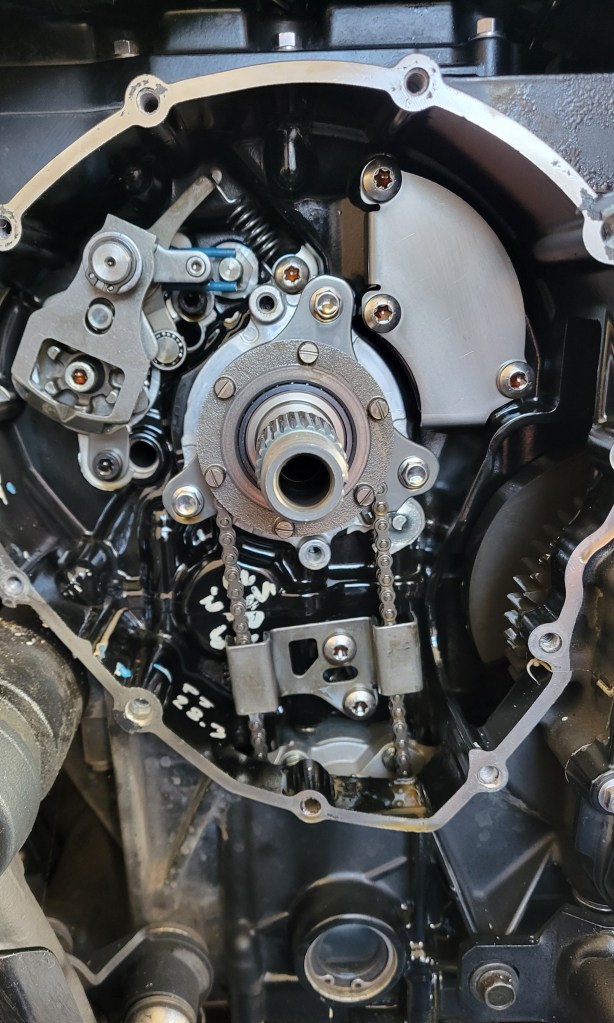
Problematic selector arm is top left. Centralizing spring is blue, indicating it’s been upgraded.

On the last ride of the season last year, the Tiger started being reluctant to downshift. I noticed it as I pulled away from the house and came to the first stop sign. I was heading to Vermont and would have turned around, except I was leading a club ride and there were people counting on me, so I continued.

My first thought was that the clutch cable needed adjustment. It’s normal for those to stretch over time and need to be tightened. But adjustment didn’t help, and as the day continued, the problem got worse. I somehow managed to finish the day, but coming up through Smuggler’s Notch wasn’t much fun and I was happy to get home. That was the final ride of the season. I decided I’d use the remaining nice weather to do maintenance but before I could get to this job the snow arrived, so it had to wait.

I store my bike in an unheated shed, so working on it over the winter wasn’t an option. As you can imagine, my curiosity nagged at me all winter. Was it the clutch, the shifting mechanism, the gearbox? Some research online revealed that there are some known issues with the shifting mechanism on this bike. There’s a pin on the shifter spindle that holds the centralizing spring and it’s known to break. When that happens, the shift lever doesn’t return to centre, ready for the next downshift, but flops down. You can still shift the bike, but you have to lift the lever first with your foot.

That didn’t appear to be my problem because, while there was a little play in the lever, it wasn’t flopping down. But I wondered if it was starting to break. Also, there was a recall to upgrade the centralizing spring, which is known to fail, and I didn’t know if my bike had the old or new spring. I also wondered if the problem was as simple as a worn clutch.

At the first warm day, I finally got in there to see what is happening. To get to the shifting mechanism, you need to remove the clutch. That was fairly straightforward, and the plates looked good. In fact, the stack measures 42.25mm and the tolerances are 41.54 to 42.54, so I’ve only burned .29mm of my clutch over 48,000 kilometres. I’m happy about that.

I had some trouble removing the bushing and bearing but with a friend’s help, we got them and the basket out. What we noticed is that on a downshift, the shifter arm slips off the pins of the detent wheel. A close inspection of the arm revealed wear on the respective pawl.

Wear in the corner of the pawl where it engages with the detent wheel pins. This arm is under tension from a spring (behind, out of view) and it’s also possible that the spring was fatigued.

There has been a redesign on this part as well as the detent wheel that engages with it. I decided to change the whole spindle because Triumph has also redesigned the problematic pin for the centralizing spring. Here are comparisons of the crucial parts, old (on top) versus new.

Dear reader, do you care? If you are a mechanical engineer or just a mechanical nerd like me, maybe you do. If you have a 1st gen Tiger 800, you should. These are the wrinkles that were ironed out sometime during production. I’m glad to have the stronger parts in my bike, and it’s shifting great again. Here in Canada, the spindle unit is under $200 and the detent wheel and selector arm come as a kit for under $100, so the hit wasn’t too bad.

Forks Overhaul

I don’t think the fork oil or seals have ever been changed on this bike. I’d never done inverted forks before. They are a little more difficult and require a seal driver. (You can’t use plumbing ABS pipe to drive the seals because the outer tube is in the way.) Figuring this would not be my last bike, I went with the adjustable kind that will work on a variety of bikes but are a little more trouble to use.

Everything came apart easily enough, once I bought a set of thin spanners. (Every job requires at least one trip to Canadian Tire.) There isn’t much room between the spacer tube and the top cap, and you have to get a wrench in there to hold the lock nut while you remove the cap. That was the only snag on the disassembly.

Laying everything out in the order it came off.

The bushings were discoloured with wear, but I didn’t want to wait for new parts so cleaned them up as best I could with fine grit emery paper. For the new seals, I decided to go with SKF because I’d read good things about them. Thanks to Triple Clamp in Toronto for stocking these. A neat trick I learnt from Tusk is, when using those tricky adjustable fork seal drivers, use safety wire to avoid driving your fingers instead of the seal. Nice!

The only weirdness of this job was that the amount of oil listed in my manual was way off. It said 619mL for the XC and 107mm from the top of the tube, but I had to pour out about 100mL to get the correct height. Yes, I drained all the old oil, and yes, I pumped the damper rod several times to dispel all the air when adding the new. I asked my dealer about this and he said they only use the height measurement. When I tipped the old oil into a measuring beaker, it was about 1L for the two forks, so with loss, 519mL sounds about right. Anyway, fresh oil, seals, and socks will help the front end this summer.

Steering Head Bearings

This one too had never been done. You can see in the image above that there isn’t much of the factory grease left in there. For this one, I didn’t use the waterproof general lithium grease but bearing grease. The only difficult aspect of this job was avoiding paying for the Triumph tool for accessing the head-stock. Instead, I used a C-spanner and Ryan F9’s tip on using a luggage scale to get the correct torque. The initial preload once you get everything back together is 40Nm, then you back it off and tighten the bearings to 10Nm, which is a little over 7ft/lbs. My C-spanner is about a foot long with a hole at the end of the handle, so all I had to do is convert Nm to ft/lbs.

After having the forks and triple-T out, I needed to align everything again. Thankfully, Delboy’s Garage just put out a video on how to do that.

Fuel Tank Breather Tube Fix

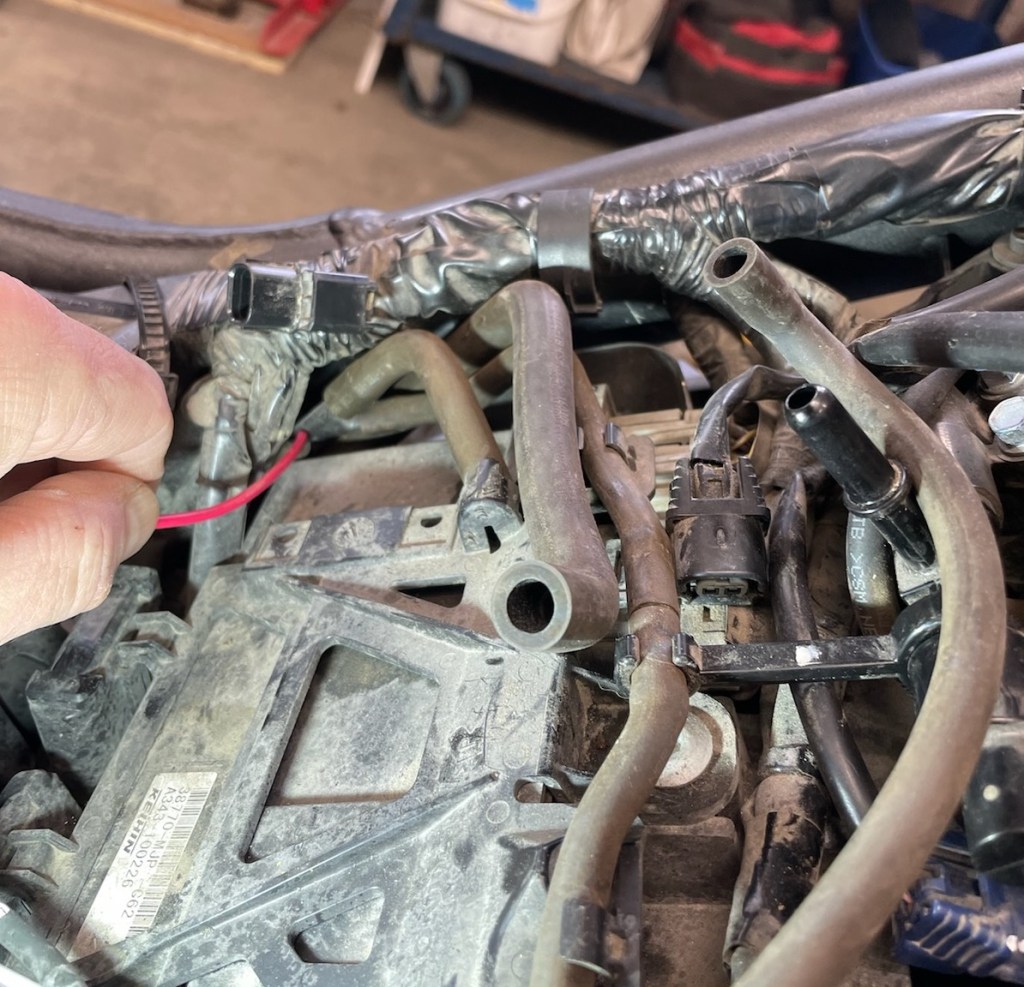
In my last post, I talked about how I ended up with about 3 litres of water in my fuel tank after a failed water crossing. In the post, I presented the theory that the water was sucked up from the tank breather hose when the tank had negative pressure. I considered rerouting the breather tube to keep it out of potential water, but my friend Mike came up with a better solution. While servicing his Africa Twin, he noticed that the tank breather on that bike has a Y-fitting with a length of hose staying high on the bike and the other draining down.

My buddy Mike’s Africa Twin. He’s pointing to the Y-joint with the piece of red wire. The short tube fits into that little cup, presumably to keep it clean. That’s the battery area.

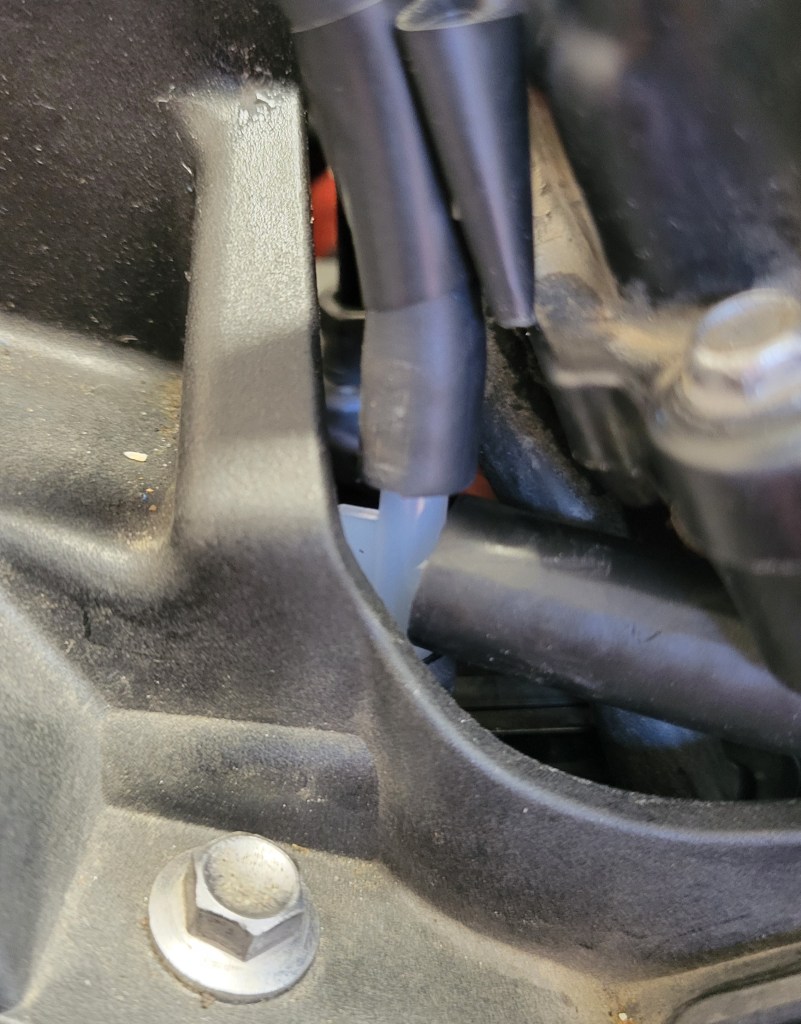
So I picked up a set of assorted vacuum T-connectors and a length of rubber tubing at Canadian Tire and did the same on the Tiger. I cut the tank breather tube and inserted the T-connector, then added the extra tubing. I haven’t decided yet where it will terminate but for now it comes up the siderail and loops across under the fuel tank and is tucked in the other siderail. I think I will shorten it and add a loose end cap like on the AT.

If you have a Tiger and want to do this mod, just be sure to cut the right hose. There are two leading out of the tank. One is the drain tube and one is the breather. The drain tube has a check valve on it so doesn’t allow water to come up. The breather tube is the larger of the two where they attach to the tank.

A Few Mods for Dirt

Fender Extender

I saw MotoBob add a front fender extender to his Triumph Tiger and thought it would be a good modification, given the dirt I plan to ride this summer. It keeps a lot of mud off the front header pipes and radiator, not to mention rain water off your pants. He used the Pyramid Plastics version, but my dealer, Montreal Moto, actually had a Triumph one in stock so I snapped it up.

Some extenders come with sticky pads, but I was advised to use silicone. I decided to make things easy for myself and remove the fender. Sounds reasonable, right? I could have done this mod just by removing the front wheel, but I decided to give myself some extra room and removed the fender. It was three bolts on each fork, so how hard can it be, right?

Little did I know that someone had used red threadlocker on the bolts, and one snapped off in the fork. Perhaps someone at Triumph can explain to me how a front fender is a permanent install?

So I lost a day there. I drilled it out and was retapping it when I got distracted and broke the tap inside the old bolt. Ugh! What a mess, going from bad to worse. I bought some carboy drill bits (after some research on what the hardest, sharpest drill type is), but even a carboy bit wouldn’t touch the tap. Fortunately, my friend Mike, whom I’ve already mentioned a few times, came to my rescue. (He was the guy who refinished the bodywork of my old GS.) He has a proper workbench on a cement floor and drove the tap out with a punch, and then we could re-tap. The thread was a little loose from the abuse it had taken, but he showed me a trick to strengthen it with some 5 minute epoxy. Apply the epoxy like threadlocker but coat the bolt in WD40 so it doesn’t glue inside. Thread it in and after a few minutes remove the bolt and let the epoxy harden to the old threads. Neat! When I reinstalled the fender, I used blue threadlocker.

Lowering Footpegs

My Fastway Adventure footpegs give you the option to mount them standard or lowered. I mounted them standard so I wouldn’t have to adjust my foot levers, but with the dirt coming up, I thought I’d swap to the lowered position. Fortunately, Fastway provide a tool to use to press the pin out. Then you simply press it back in from the other side—from the top of the peg.

Unlike the fender extender and most other jobs, this one went smoothly and I had the pegs back in again in no time. It was easy to adjust the height of my brake lever; just undo the lock nut and screw the adjuster into the master cylinder. Because I was screwing in, I didn’t even need to bleed the brake. And when I put the shift lever back on, I rotated it slightly from its previous position. This set-up lowers my pegs 8-10mm, which may not sound like much, but I suspect will be significant for knee comfort on long days and lowering centre of gravity when off-roading. The downside is that the pegs are a little closer to the road, but I don’t think I’ll be dragging them anytime soon. Or so we’ll see.

Before I reattached the brake lever.

Sidestand Extender

Another mod for the dirt. I’ve always gotten by without one of these, although it’s sometimes a pain to find a stone or stick to use instead when you are forced to stop in mud or soft grass. I went as far as to install a Touratech one on the GS once, but it lasted all of one ride. I got hung up on some rocks and when I got home I noticed I had an extender no more . . .

Needless to say, I was skeptical about buying another from Touratech, but different bike, different design. Besides, I got this one half price. One of the benefits of riding a discontinued bike is that if you keep your eye out you can sometimes snag accessories at discontinued prices. We’ll see how long this one lasts.

Now I remember what I don’t like about sidestand extenders: they interfere with the centre stand. Oh well, I’ll just have to put the sidestand down first before using the centre stand. No big deal, and maybe it will help stop my centre stand from rattling so much. Or maybe now there will be two stands rattling together. Anyway, I’m not wedded to this accessory and we’ll see how long it lasts.

Oil Filter Guard

The Outback Motortek skidplate for the Tiger 800 does not protect the oil filter. Some would say that’s a design flaw, but I suspect OM did it that way so you can change the oil without removing the guard. (They put a cutout in the guard for the sump plug.) But it does leave the oil filter a little vulnerable at the front of your engine. Triumph make a push on metal guard. It’s a simple design with indents that engage with the filter for an interference fit. Easy to remove when it’s time to change the filter, which I will do after running the bike a bit this spring. The engine’s been open for some time as I worked on everything, but with oil being so damn expensive (it costs me now over $80 for an oil change), I will just change the filter. Anything that might have strayed in will be captured in the filter.

It’s been a long haul but I think I’m ready now for another season and another 50,000K. I took the Tiger for a test ride yesterday and it’s shifting smooth again and the clutch feels great. The engine is running well, and I’m happy to be back on the road.

Here in Montreal, it’s Easter Monday and I think I can safely say we’ve had our last snowfall. Crocuses are pushing up and there are buds on the trees. Geese are returning and everywhere the signs of spring are upon us, including the sound of motorcycles back on the roads. For Canadian riders, it’s the best time of year. I wish everyone, wherever you are, a safe and enjoyable 2024 season.

Please leave below any comments you have and consider following. What mods and maintenance did you do in the off season? What are your plans for the coming season? I love hearing from readers, so drop me a line.

The Ottawa Valley Overland Route

My friend Ray and I went looking for adventure and got more than we bargained for.

When I got back from Newfoundland, it was the end of July and I was already starting to think about teaching. More accurately, I was beginning to dream about teaching. (My school begins mid-August, unlike most universities that begin after Labour Day.) I get these dreams toward the end of summer. In them it’s the first day of the semester and I’m not ready—my outlines are still at the printers, my textbooks aren’t in, I’m running late and can’t find something I need in the office, and when I arrive to class, a senior respected colleague is sitting at the back, having decided to audit my course. That kind of thing. I thought I was the only person who got them, but apparently they’re so common among teachers that they’re called Teacher Dreams. Anyway, I was already getting them so decided I’d put off that second planned trip to The States and the BDRs until the following summer and use what little time there was left in my summer vacation period to do shorter trips.

I asked my buddy Ray if he’d join me in doing a local overnight adventure ride. Ray likes the big gleaming classic bikes and rides an Indian Chief Vintage, but we won’t fault him for that. He’s also got a 2003 KLR in army green and joins me on off-road adventures when he’s feeling especially masochistic. We’ve had some adventures in the past, usually involving a hydro line, water, mud, and something semi-legal, so I think he was a bit reluctant. But I assured him I’d find something mellow this time, and like the good sport he is, he agreed, so I started researching the ride. The idea was for a relaxed dirt and gravel ride that had some nice scenery in the mix.

My first choice was The Bytown Adventure Loop and went as far as to pitch it to my editor at my paying gig, northernontario.travel. It’s always nice to ride, even better when you get paid to do it. The Bytown Loop was announced a few years ago to great fanfare, including a whole YouTube video to present it, and it looked pretty perfect for our purposes—big-bike friendly, close to home, with food and accommodations available should we want to avoid camping and cooking. Easy peezy. The only problem is that I couldn’t find the GPS files anywhere. You can see my query on the YouTube page, with no response. Same when I asked the channel owner directly. Hmm . . . seems like a lot of work went to waste at the final stages of development or there’s something I don’t know.

A little more sleuthing brought me to GravelTravel and he has lots of files available for a small fee, including the TCAT, and another that caught my eye, the Ottawa Valley Overland Route. It seemed similar to The Bytown Loop so I checked it out on YouTube. The videos I saw looked pretty mellow—apparently a large section of it is on abandoned railway line, which is usually flat, straight, and easy. Forums did not reveal anything concerning. In fact, I saw one post asking if it could be done in a non-modified AWD car, so I thought we’d give it a go. It would mean camping and cooking, but to be honest, I prefer that to venturing into town. I bought the files, reserved a campsite at Granite Lake, about halfway through the loop, and bought Lanark County trail passes for Ray and me.

The route is listed as 2-3 days. We were going to do it in 2, which was a bit ambitious since it would take us 1.5 hours to get to Merrickville, where we would pick up the route. To make matters worse, no sooner had we begun when we had a delay. We had done some service on Ray’s bike earlier in the summer and as we rode toward the Ontario border I began to doubt that we had re-oiled his K & N air filter. I remember washing it, and setting it out to dry . . . but not oiling it. You really don’t want to run those filters dry at risk of damaging your engine, so when we reached Alexandria, we pulled into a Tim Horton’s and discovered that yes, it was dry. Thankfully, the ubiquitous and life-saving Canadian Tire there had a K & N maintenance kit so we oiled the filter and let it sit while we had our coffees. It was a small delay, but on a tight schedule, every unplanned stop costs you dearly later on.

Arriving in Merrickville in time for lunch at Bob’s Fresh Cut Fries.

Merrickville is a charming historic village with more heritage buildings for its size than any other town in Ontario. I’ve written about it as a favourite destination for bikers here, but in this case we were just passing through. Soon after lunch, we picked up the OVOR track and, to my great surprise, almost immediately hit mud.

I didn’t have the tires for mud. I still had on Dunlop Trailmax Mission tires from my tour, so I stopped to assess the situation. I was also thinking of Ray, to whom I had promised an easy ride. I waded in and it wasn’t deep, just a bit slippery. I looked at the map and it appeared to be a short section. Now in this situation, Clinton Smout advises to let your buddy go first, but since I’d got us here, I figured I was the test probe. Ray got out his phone to catch any action.

On the Rideau Trail north of Merrickville.

“It’s not bad”? Soon I’d be eating my words when my tires caked up. Some of this easy trail wasn’t so easy.

The Tiger doesn’t have much low-end torque and I have to keep the revs way up whenever off-roading or it stalls. Soon after this ride I did my valves and all the exhaust valves were tight. I’m hoping that opening them up will help with the stalling. A little further on we turned left onto some two track, crossed a swamp, and popped back out onto gravel.

Once back on the road, it was smooth going again up into Carlton Place, another pretty town that was on my Top 5 Ottawa Area Destinations list.

You can see me glance at the hydro line as we crossed beneath. Premonitions of things to come?

We filled up in Almonte before heading down into the bush south of Ottawa. The highlight of the day was riding the Lanark County Trail System south of Ottawa.

California Road in Lanark County.

I was loving this and could have done it all day! The Tiger is in its element here and the Tailmax Mission tires are fine for this stuff; the back end slides out but consistently. We stopped for a photo out over White Lake during the golden hour and the ride was now everything we were hoping it would be. We had a little ways to go to get to our campsite and were looking forward to the steaks I had packed in one of my panniers.

Sadly, the fun would come to an end too soon. We crossed a hydro line, then rode the line for a few hundred metres before exiting onto another gravel road. Unfortunately, what we didn’t know is that the bridge crossing the river that feeds into Duncs Lake was under construction and was out. We got off our bikes and surveyed; sometimes you can find a way through even if it’s closed (the semi-legal stuff I alluded to earlier). In this case, that wasn’t possible at all, and we happened upon a workman finishing up his day and he confirmed what we already knew: end of the road. (What was especially frustrating is that they were building a new road called, appropriately, The New Road, and it was smooth sailing on the other side. We looked at our map and figured we were about 2 kilometres from Highway 511 and the best bet was to return to the hydro line and follow it out to the road.

Hydro lines. When you’re stuck in the bush, they’re a lifeline to civilization, a man-made geometrical order imposed on the chaos of wilderness. But they can also lure you into that chaos, the fisherman’s line drawing you into dark waters. And speaking of water, what I’ve found is that they almost inevitably involve some of it at the low points as the terrain rises and falls. A ride along the primitive access trail of a hydro line is a rocky descent to a water crossing to a steep rocky hill climb to a moment of respite before another descent, and on, for hundreds, thousands of miles if you want, from dams to urban centres, traversing great swaths of Canadian boreal forest.

We got through that without incident but by now it was getting late, we were getting tired, and our off-road skills were suffering as a result. I offer these two videos for your amusement, at our expense.

Ray took his own tumble and decided, while down there in the tall grass, to take a little nap.

In the first video, you can hear concern in my voice. I was worried that we would come upon a crossing that was just too deep to cross and that would block us from the highway. At this point, I was getting some serious arm pump and had pretty much given up on making it to Granite Lake and our planned campsite. We’d figure out where we were going to spend the night once out of the bush.

But we never made it that far. At one water crossing, I got hung up on some rocks and dumped the bike. I hit the kill switch before it dunked but the bike wouldn’t start once righted. After trying for a while, I left it sitting there while deciding what to do.

Eventually, we ended up just pushing the bike out by hand and it was surprisingly easy. But it wouldn’t start, no matter how many times I cranked it. Thankfully, Ray got across without incident. I have to say, the KLR really showed its capabilities on this ride. Where I was struggling on the Tiger, Ray was getting over stuff using the tractor factor of the KLR.

I figured the Tiger was hydrolocked, but to get to the spark plugs on this machine you have to remove a lot of plastics and lift the gas tank. I didn’t want to start that work with 30 minutes of light remaining, so we made the decision to camp on the hydro line. I left my bike where it was, Ray rode his up to a clearing on the line, and we set up our tents there. I fired up my stove and cooked us the steaks. We had a little something from the liquor store in Alexandria, and I had a pipe and Ray had a cigar. It wasn’t exactly the campsite at Granite Lake I had imagined, but we made the best of a bad situation.

Still smiling, despite the bugs and our situation.
Not smiling.

That night in my tent I had a restless sleep, worried that I might not have packed the spark plug socket. I wasn’t sure because it’s such an involved process to access the plugs that I might have concluded I’d never be lifting the tank trailside. But thankfully I had, and after morning coffee and porridge, we started tearing apart the Tiger.

In this photo, you can see a section of hose coming out of the bottom of the tank. That is a hose I carry for emergency syphoning should someone run out of gas. We found that when we lifted the tank, gas flowed out of the overflow drain. I’ve had that tank lifted before and it’s never done that. It was a clue that I should have paid more attention to.

We took out the plugs and they looked dry. We turned the engine over and no water came out of the plug holes. Next we thought that maybe the air filter was soaked and choking the engine. Unfortunately, Triumph put a weird 7mm hex screw on the airbox and I didn’t have that socket on me. I pride myself on being prepared but I came up short on this occasion.

We decided that I would ride Ray’s KLR out and up to the Canadian Tire in Renfrew. Why me? Ray said I had more experience off-roading and would have a better chance of getting out. There was some really gnarly terrain and a pretty significant water crossing, but I made it out, again, impressed by the KLR’s capabilities off road.

Shortly after I started heading up toward Calabogie, the skies opened up and it started to rain cats and dogs.

Wishing I’d zipped up my vents earlier.

It was weird weather. In Renfrew it was dry with blue skies. Little did I know it was still coming down hard back on the trail. Canadian Tire had the 7mm deep socket, and while in town I picked up lunch and water and gassed up Ray’s bike. I was planning for the worst case scenario.

As I rode south on the 511 toward the trailhead, I rode back into the torrential rain. It was bad! In fact, unbeknownst to us, this extreme weather was causing major flooding in nearby Ottawa and back home our wives were concerned. I got to the trailhead and started heading back in, but before I reached the bike, who did I see walking out but Ray. He was soaked to the skin and looked pretty miserable. Our “easy ride” had turned into 24 hours of hell, stuck in the bush in extreme weather. I was never going to live this down.

Ray had determined that the trail was now impassable and that I might be waiting for him at the highway. I guess he doesn’t know me as well as I thought. No extreme weather was going to prevent me from getting back to my bike. But he looked cold and miserable and it was teeming, so we agreed to abandon the troubleshooting and get a room in Calabogie. There was nothing more to do but turn around and splash Ray, who couldn’t get any wetter, then double him out to the highway.

“Hop on. This part is pretty tame.” Camera shuts off by itself at the worst time. Sorry about that.

Unfortunately, he had started walking without his helmet, so I doubled back, tidied our gear, grabbed his helmet and jacket, and returned to ride us up to the Calabogie Motel.

It was sunny in Calabogie but probably still raining 20 kilometres south on the trail. I didn’t feel very good about leaving my bike on the trail overnight but tried to put it out of mind. We went for dinner at The Redneck Bistro.

The next day we were up and out early, eager to get the airbox open and hopefully solve our problems. I’d been communicating with my buddy Riley from The Awesome Players, who has more experience with bikes than me. He too was confident that when we got it open, we’d find a soggy filter and after drying everything out the bike would fire right up again.

The trail was still waterlogged and I was worried about doing the deep crossing again. We didn’t need two hydrolocked bikes. But the KLR is a beast, and I told it so.

Things went a little sideways on me there but we got safely across. I left his bike at the top before the gnarly stuff, then walked down to the bike. With great anticipation and suspense, I got out the new 7mm socket and opened the airbox . . .

It was dry, bone dry. I was deflated. Ray had been walking in from the road and soon arrived. We continued our troubleshooting but were running out of ideas. We tested the plugs and there was spark. We took out the filter and the Unifilter prefilter. We checked all the fuses. The one for the auxiliary socket was blown and we thought we’d solved it then, but after replacing it, the bike still wouldn’t start. We looked down inside the throttle bodies for water. We inserted twisted paper into the throttle bodies and it came up dry. We put a drop of fuel from my stove bottle into each throttle body and still it did not fire! Not even a cough.

As a last resort, I walked up to where there was reception and called Riley to see if he could think of anything I hadn’t. He asked if I could hear the fuel pump cycle on with ignition. I did. He said he’d consulted with Player Ivan and it didn’t make sense: we had fuel, we had air, we had spark—the bike should run! We were all stumped, and with it already getting on the afternoon, I decided to throw in the towel. I didn’t want to spend another night on the hydro line and knew there were limits to what I could ask of Ray. Riley offered to trailer me back to Montreal if I got the bike out of the bush. So we took Ray’s bike again and rode back into Calabogie where I found someone who does trail rescue. It cost me a pretty penny but I was out of options.

Throwing in the towel.

Back in Calabogie, Riley and his brother arrived and we loaded both bikes onto their trailer and headed for home.

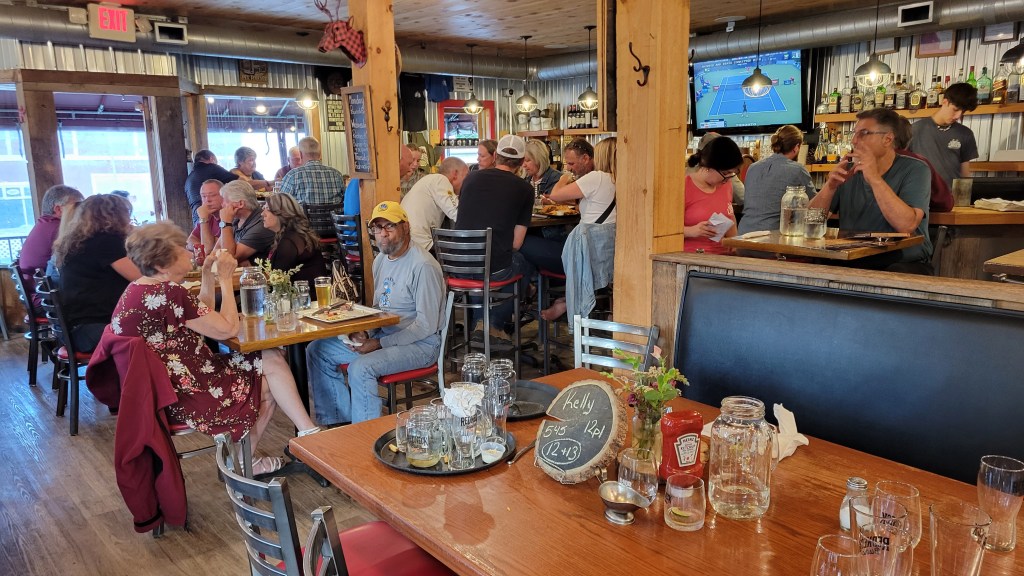
With Riley (right) and his brother Kelly. I owe these guys one large favour! photo credit: Ray Bourgeois

I will admit I was feeling more than a little deflated on the drive back to Montreal. It reminded me of when the water pump went on the 650GS while at Dirt Daze and, for a moment, I considered selling it for something more reliable. Perhaps Riley knew what I was thinking and told me about Super Dave’s mint 1200GS he got for a song.

And I was disappointed in myself. How could I ride into remote areas if I couldn’t be sure to get myself out? It felt like, after all my preparation over the preceding years to learn about bike mechanics in order to do that kind of riding, I’d been tested and had failed. I also felt bad for Ray, who had suffered hypothermia and water-damaged his phone. When I got back to Montreal, I stuck the bike in the shed and couldn’t bring myself to touch it for a few days.

When we are at our lowest, it’s our friends who lift us back up, people like Riley who drove out from Montreal to fetch me, and my buddy Mike who came by to shake me out of my doldrums and help troubleshoot the bike. He noticed almost right away the presence of water around the fuel line in the way the fuel was beading on parts, and we decided to drain the tank. I make home-brew beer and had an empty carboy to use. This is what we found in the tank.

Gas on top, water on bottom. Several litres of dirty water in the gas tank!

Gas and water are insoluble and water is heavier than gas. This is a 23 litre carboy so I estimate that there was at least 3 or 4 litres of water in the bottom of the tank, and since the fuel pump draws from the bottom, the bike wasn’t getting any fuel. No wonder it wouldn’t start!

How did the water get in the tank? The fill cap seal is good, so it didn’t get in there. The bike was running fine up until it wasn’t, so I didn’t get bad fuel in Almonte. No, the only theory that makes sense is this: at the river crossing, the engine and tank were hot. When I dunked the bike, the tank cooled rapidly, creating a vacuum, and water was siphoned up through either the tank overflow or breather tube that was hanging in the water. It would only take a bit of water to foul the injectors and prevent firing, but with this much water in the tank, now I think the bike was drinking water the entire time it was in the river.

I’ve posted this theory on ADVRider to see if anyone else has experienced it and no one said they had, but I did find some threads on ATV forums supporting it. There’s supposed to be a check valve that prevents water or sand entering and also serves as the tip-over sensor. It’s a simple ball bearing valve, but I haven’t been able to locate it on the Tiger. The solution, I think, is to reroute the tubes to a higher point. This is what the ATV guys have done. You don’t want to just cut the tubes because you don’t want fuel draining onto a hot engine, so I’m thinking I will run them back along the frame toward the rear of the bike and have them drain somewhere safely behind the engine.

I’d be very interested to hear what others think about this. I’m surprised more bikes don’t have this problem, which makes me wonder if it’s particular to the Tiger or my bike. I’ve seen guys completely submerge their bikes and they don’t get any water in the tank, so what goes? If you have any ideas, drop a comment below. I’ll be getting out to the shed in the coming weeks to do a bunch of work on the bike in preparation for the season, and I understand there are some water crossings on the MABDR.

Anyway, Mike and I removed the fuel pump and squeezed as much water out of the filter as we could, then let it dry and reassembled. We purged the fuel rail and I changed the spark plugs. With clean fuel, the bike reluctantly started, first on two cylinders, then three. I added some Seafoam to a tank of gas and gave it the Italian tune-up all the way to Cornwall and back. Now it’s running great again. I also put in some cheap oil for a few hundred kilometres, then drained and refilled with the good stuff, just in case some water got in the oil. The bike is running fine now, especially since doing the valves. I feel better for having an explanation for what happened and am no longer thinking of selling it.

Some people say that the essence of adventure riding is adversity. We watch Itchy Boots riding through Nigeria and Cameroon with their bad roads, bad gas (if you can find it), security check points and security risks and are impressed by her courage. On the other hand, there are lots of people in my club who just want to ride and skip the adversity. I remember Ray once said at a club event that “riding with Kevin makes you feel alive,” and I’m reminded of what D. H. Lawrence once said along the same lines, something like, “Only once you’ve accepted death can you truly live.” I’m paraphrasing, but I think I know what he’s on about: if you don’t face risk, you are only existing, not living. I don’t go seeking danger—I love life too much—but neither do I let “what ifs” stop me from living the life I want to live.

Memento mori. When I’m old and feeble and no longer able to ride a motorcycle, I’m sure I’ll be thinking wistfully of Ray’s and my Ottawa Valley Extreme Weather Misadventure.

Pin marks where my bike crapped out. You can see the trail along the hydro line. It ducks into the forest and exits onto the 511 just south of the line. The big water crossing is just left of the circular lake.

The Wish List, 2023

I interrupt the journey across Newfoundland for the annual holiday wish list.

It’s become a tradition on this blog—the annual Christmas wish list. It’s probably one of the least favourite posts of the year for readers, but it sure is fun to write. The season has recently come to an end, the long winter months still lay ahead, and all we have to propel us out of bed in the mornings are thoughts of spring and planned journeys. And part of that planning is dreaming of the mods we will do and the gear we will buy to help prepare for the adventures to come.

This year’s list is pretty short. Yes, inflation is hurting everyone, and we find ourselves buying the cheap tomatoes instead of the fancy vine ones (and regretting it later). Marilyn is paying tribute to her late father by scanning the grocery store flyers and clipping coupons. Even the dog has sacrificed his Greenies (and his breath is the price we all have to pay).

But honestly, the bike is pretty much done. It’s got the auxiliary lights on it now, the crash protection, skid plate, pannier racks, hand guards, off-road pegs, and tail rack. I got soft panniers last year and they have been great. So it’s pretty modded out. What the bike needed most was some maintenance, so I spent a chunk of time before I put it into storage doing the valves and servicing the starter motor, which was acting up. By the way, I’m now advocating checking your valves on the recommended service interval. I waited until the bike had 45,000K and all my exhaust valves were tight, some significantly.

Shorty Levers

The only thing it could use are some new levers. The stock levers are okay, but they are long and I’ve already bent the brake lever once. Actually twice, since I bent it back. I think I’m the only one in my club who rides two-fingered and I asked myself the other day why on earth haven’t I ever had shorty levers?

I looked at all the options and am undecided between Vortex and Pazzo. Both are top-quality levers that fit well without any slop, which is often the case with cheap Chinese aftermarket levers. At about $200, they are comparable in price.

Vortex V3 levers

The Pazzo levers have quite a swooped design to them, which brings the lever down close to the grip. I know there’s some adjustment but this still makes me nervous because I like to have a short clutch that completely disengages before the lever hits my knuckles of the remaining fingers wrapped around the hand grip. For this reason, I’m leaning towards the Vortex design. Is it just perception, or do they look straighter? My ideal lever would be a Pro Taper, but I don’t think they make one for the Tiger.

Pazzo also gives the option of a folding lever, but I don’t think I need that since I have the Barkbuster guards. It would have to be a very unfortunate fall for a rock to come up inside the guard and break a shorty lever. But I guess it could happen. My sense, however, is that folding levers are for true dirt bikes that have wimpy, folding hand guards. If you have any experience or thoughts on this, drop a comment below. I won’t be getting anything until the spring so I have some time to decide.

A new helmet

Honestly, that’s about it for the bike (my wife will be happy to know). But wait! My current lid is at least five years old, so I probably should get a new one soon, despite what Bret Tkacs has recently said about that 5-year limit being bogus. If I were forced to, I’d probably go with the Arai Tour-X5 or maybe find a deal on the now discontinued X4.

No, I’m not trying to emulate Itchy Boots. This would go well with my touring jacket that is grey with matching hi-viz accents.

I’ve been very happy with my Arai Signet-Q helmet. The brand speaks for itself and the shape fits my intermediate- to long-oval noggin well. This time, however, I’d go with the Tour X because I want a peak. There have been many times while riding into the sun when I wanted a peak. Sometimes I have to shade my eyes with my clutch hand, it can get that bad, even with the Pro Shade system.

Knee braces

To be honest, I’ll probably forego the helmet for another big-ticket item. I plan to do some pretty serious dirt riding next year, and the only thing that scares me about that is the potential to damage a knee if the bike falls on one. I’ve somehow managed to play 15 years of beer league soccer without any major damage to a knee, and I’d like to keep it that way so I can enjoy my retirement with full mobility. I therefore am adding to my wish list a pair of Pod knee braces.

Anyone who is serious about dirt riding should be wearing knee braces. I know, they are uncomfortable, but so is tearing tendons and surgery. I’ve heard The Awesome Players advocate the use of braces, and recently a video by Riemann convinced me I should just bite the bullet on a pair.

At $750 a set, these babies aren’t cheap, but money well spent if it prevents a serious knee injury, especially if you are riding solo as I do.

Dirt Gloves

There’s one more piece of off-road gear I’d like before attempting the BDRs next summer. That’s a pair of light MX or rally gloves. I have a pair but Marilyn has appropriated them, so I’m in the market for another pair. When riding dirt, it’s important to have maximum feel on the levers so you can modulate both clutch and brake. It’s similar to how football (i.e. soccer) players are always looking for a boot that provides the most feel on the ball, for example one with kangaroo leather instead of cow hide.

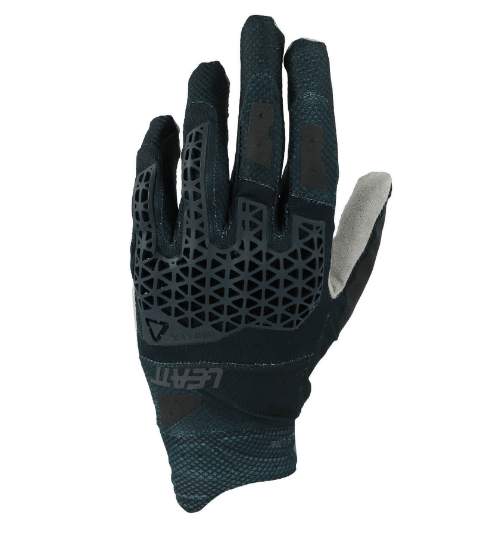
That might be something like the Leatt Moto 4.5, a popular choice or, going even lighter, the 100 Percent Airmatic.

DOUBLETrak Multitool

Finally, what wish list would be complete without a tool of some kind on it? I came across a great little multitool in a video by Chris Birch on his favourite tools.

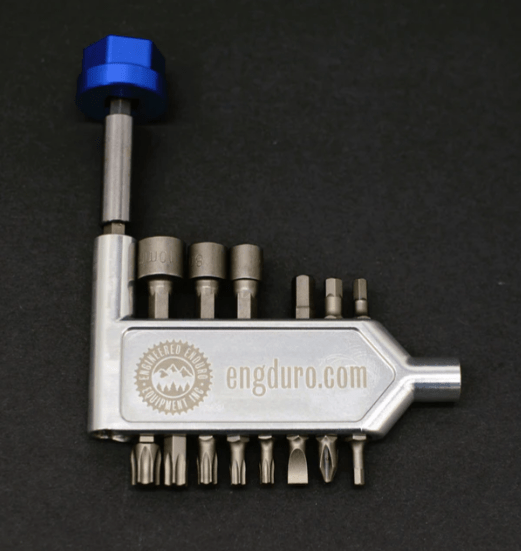
The DOUBLETrak multitool by engduro here in Canada consists of several hex, torx, Phillips, and flat head drivers, and 6, 8, and 10mm socket drives that fit into the handle itself and stay there by magnetic force until needed. There’s also a 1/4″ hex to 1/4″ square drive adapter. If you want a comprehensive review of this tool, check out this video in which Dude does an oil change using only the DOUBLETrak. Okay, I’m not going to be doing trailside oil changes, and this will not replace tools that are in my tool roll, as he suggests, but it’s a convenient tool to keep at hand for small adjustments or tightening something on your or someone else’s bike. Best of all, for a few dollars more, you can get a vanity engraving on it and tell yourself it’s to prevent theft.

That’s it. Like I said, a small list this year. That’s okay because we’re still paying off expenses from the Newfoundland trip last summer and I’ve got more ambitious plans for next summer. This time it will involve dirt and I’m both a little nervous and excited about taking the Tiger off road . . . like, really off road, not just gravel and dirt roads but trails and Class 4 roads, water crossings, mud, sand, rocky hill climbs . . . the works. It’s known as primarily a street bike that is capable of doing “light off-roading,” so I’ll be pushing it beyond its intended limits as I do the MABDR and NEBDR back to back. I’ll either die or bond with this bike in ways I haven’t yet.

What are your plans for next season? I’d love to hear them because the best wishing is not the accessories or gear we want to buy but the places we’d like to visit on our bikes, or even the roads we want to ride. We can’t all be Itchy Boots, but we can explore a little piece of paradise close to home, whatever your paradise might be. I wish you happy holidays, and happy dreaming of another season doing what makes our souls sing.

La Classique 2023

If you like dual sport riding, you’ll love La Classique.

La Classique, organized by RidAventure.ca and with close to 1000 riders, is the largest dual sport rally in Canada. It’s so popular that I’d never managed to get in. Registration fills in about 2 days—you blink and you miss it—and always seems to fall when I’m busiest at work grading mid-terms. I almost missed it again this year but snuck onto a team last minute.

It used to be you had to organize a team, and I could never find riders willing to join me. Now RidAventure has simplified the process and you can register as a single rider and join an existing team. That’s what I did and found myself on Les Amis de la Motorcyclette, a great group of Francophone guys. RidAventure has also separated the Saturday and Sunday rides to allow wider participation in the event. That’s a great idea because even if you aren’t riding, there are vendors and test rides available for a more relaxed day of hanging about.

I registered for the Saturday Classique Plus route, which is about in the middle of the skill level of rides. You have to be comfortable riding Level 2 Trails. I felt pretty good about that but was a little concerned about my tires. Organizers are clear that you need knobbies for anything Classique Plus and up, and because of the long-distance touring I’m doing this summer, I had on Dunlop Trailmax Mission tires, a street-biased 70/30 tire. In the end, I probably should have had a more aggressive tire, but I managed.

This rally falls nicely for me right at the end of the school year. I worked hard in the weeks prior to the rally, pushing to complete all my end-of-term grading so I could ride away with a clean conscience. In fact, I did so much intensive grading toward the end that I developed a mild case of carpal tunnel syndrome in my writing hand. Thankfully, it didn’t significantly affect my use of the throttle and front brake except in the most intensive sections.

Parts arrived from Dual Sport Plus just in time, and I spent the Friday of my departure adding hand guards and folding mirrors; I was worried about breaking a lever or a mirror in a crash, which is not uncommon in dirt riding. I was also worried about breaking my bones so geared up in my Knox Adventure Shirt, neck guard, and tucked some wrist braces into my bag. (Yeah, a little tip-over can cost you the better part of the season, so I’ve started using these if there is a chance of falling.) I left unfortunately at rush hour on a Friday, so after the requisite hour to get off the island, I was on my way.

One nice thing about these rallies is that you can camp on site. The rally this year was in a new location in Saint-André-Avellin, north of Montebello, and there was a big open field for all the tents. RVs were parked in another area, and there were a lot of them!

Camping at La Classique 2023 in Saint-André-Avellin.

Now if there’s one thing I know about camping in Canada, it’s that you don’t want to do it before July. The bugs are bad! In my last minute haste, I forgot to pack bug spray (doh!), so the first order of business once I got my tent pitched was to find some. Then I checked in at registration, got my sticker and T-shirt, and spent the rest of the evening hanging with The Awesome Players at their camp. As you may remember, I did a few rides with them a while back, and they are a great bunch of welcoming guys. In fact, although I was on my own for the weekend, I never felt alone; there’s a strong sense of fellowship within the RidAventure community.

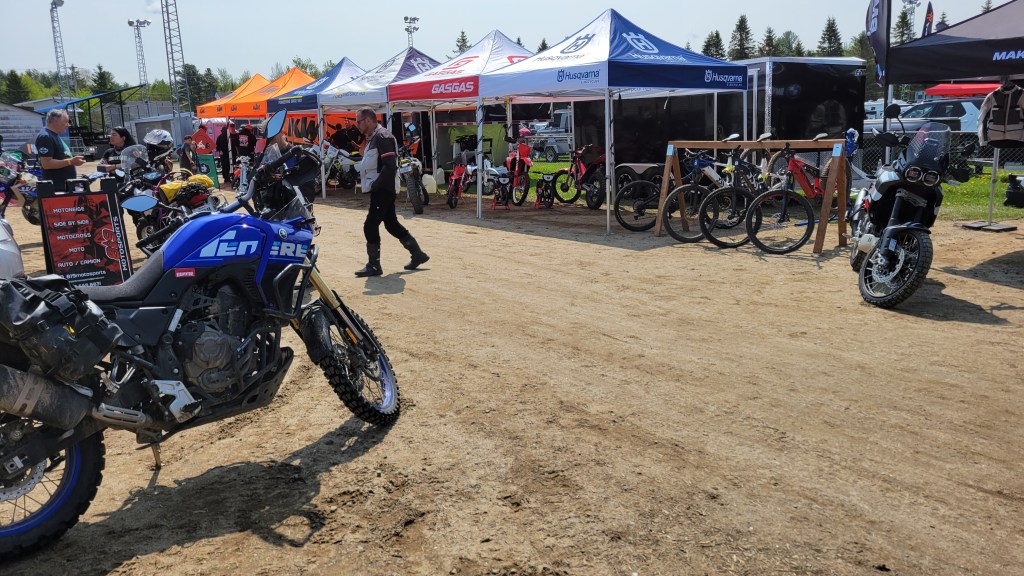
One of the things I like about these rallies is checking out all the bikes. The next morning, before forming up for my ride, I took a stroll along where the campers’ bikes were parked.

Better than the Montreal Moto Show.

Yes, that is an action camera I’m using. As I pondered in a previous post, I’ve decided to join the crowd of YouTube content creators, although I’m not a hero—as in, I didn’t get a GoPro. After much research, and heavily influenced by this video review by Dork in the Road of several action cameras, I decided to get an Insta360 One RS. I’m not interested in the 360 lens; I think that’s a gimmick that will quickly lose its appeal, and I don’t like how it makes every shot look unnatural, like through a fish-eye lens.

I got just the 4K boost lens and will be incorporating some short video footage into my posts in the future. I’m not interested in “competing” with full-on YouTube channels because that’s not my genre: I’m primarily a writer, not a videographer. I wouldn’t know my way around a massive video editing program like Final Cut Pro or Adobe Premiere, and I wouldn’t want the interruption in my rides of setting up a tripod for a ride-by shot or sending up a drone, although drones capture some amazing footage. So my footage will be minimal and serve to complement the written accounts of my rides. Anyway, we’ll start with that and see how it goes. All the videos I use will be available separately on my YouTube channel. Let me know in the comment section what you think of the new multi-media format.

Enough about that. After perusing the bikes, I had to get up to the start area and introduce myself to my adoptive team.

Marc Chartand giving the pre-ride talk.

The rally is extremely well organized. At registration check-in, your bike is inspected, you sign a waiver, then receive a wrist band and a sticker for your bike. The sticker indicates what group you are in, and there is a corresponding marker to line up with your group. Here we all are, lined-up and waiting for the signal to pull out.

500 riders waiting to start.

I was a little nervous, being my first Classique and not knowing if I’d chosen the right level. You don’t want it boring, but then you also don’t want to slow the other boys down. In the end, it was the right choice, but I faced some challenging sections. My philosophy in riding and in life is that you want to push yourself slightly out of your comfort zone once in a while; that’s when growth occurs. My French and my off-roading skills got an injection this weekend.

Finally we got the signal to start our engines and pull out. We were on our way.

Starting out on the Classique Plus ride.

Right away you can tell that my bike is different from most other dual sports. You can hear the high-pitched induction whine of the Triumph triple instead of the growl of a parallel twin. But that’s what I love about this bike: it’s a sport bike engine shoe-horned into an adventure chassis. It’s smooth with a ton of torque and loves to be revved, and it handles through the twisties like a sport bike. Okay, it doesn’t have the tractor factor of a big thumper or a parallel twin, and that’s something I have to keep in mind when off-roading. I have to remember to keep the revs up or it will stall climbing hills or working through sand and mud.

Soon we left the asphalt and were enjoying the countryside on some easy dirt roads. No doubt the route planners considered this as warm-up for what was to come. The trees closed in and then we were snaking through the forest on a twisty dirt road, and lacking knobbies, I had to remember to weight the outside peg on each corner or risk low-siding.

Sorry about the wind noise. This was my first time using the camera and I’ve since discovered the audio setting for wind noise reduction. There’s an option in the Insta360 Studio application for post production noise reduction, but for some reason, this particular noise gets “reduced” to a sound similar to fingernails being dragged down a chalkboard.

Soon we turned off this road and entered Parc Papineau-Labelle, and that’s when things became a little more “interesting.” Our entrance was a rocky hill climb, and although it wasn’t super difficult, as anyone with a GoPro knows, the action cameras flatten out all hills and the image stabilization smoothens out the ride. In fact, my suspension was working hard, and it wasn’t long before the ABS on my bike sent an error code to the ECU.

Rocky hill climb into Réserve Faunique Papineau-Labelle.

To sit or stand? There’s an excellent podcast by Adventure Rider Radio (April 15, 2022) with an aerospace physicist and Chris Birch on this topic—well worth a listen—but one thing I remember from it is the simple maxim to sit when you can and stand when you have to. Some terrain requires that you stand so you can control the bike through the footpegs, but standing all day would be tiring, so sit when you can. You can see me stand when I enter a climb or a sharp corner. You can also see me glance down a few times to check what gear I’m in. Sometimes I’m concentrating so much on the terrain I forget and want to verify.

This was fairly easy dirt riding so I decided to keep my ABS on. I thought you really only have to turn it off if you’re doing steep descents in loose terrain where you might find yourself suddenly without brakes. But one thing I learned this weekend is that my bike is not happy with ABS on in even this degree of chatter. You can see in the following clip that I have a couple of warning lights on. They would turn out to be the check engine and ABS lights, so I put two and two together and figured it was an ABS/speed sensor error. (Later back home, I confirmed this using an OBDII scanner.) I got pretty good at navigating through the set-up menu on my dash to turn ABS off since it resets every time I turn off the bike. For short stops, however, I was able to use the kill switch but keep the ignition on and it didn’t reset.

I’m not sure which caused me more concern: the warning lights or that I was losing my sticker.

At one point, we came across a moose. I could see something running up ahead in the road and thought at first it was a horse, but soon realized it was a moose. We backed off and let it run ahead until it could get off the road. In all my years of canoe camping, I’ve actually never seen one, so this was exciting.

Also exciting were the patches of sand that sent the bike snaking. You just gotta hold your nerve and let the bike sort itself out. Nobody went down that I’m aware of, although there were some close calls. Here, I’m watching the guy in front almost lose it on a sandy corner, and then when I reach up to turn off my camera (I had it on loop mode), my front slides out and I almost lose it.

Almost overcooked.

Finally, with the ABS turned off and a few hours of this, by lunchtime I was feeling more confident in the sand.

Finally feeling confident in the sand.

Unfortunately, that would be the final clip of the day. For some reason which I would only discover at lunch, my camera would not turn on and would not record anymore. When I could finally unmount the camera and have a look, it was displaying a message that an error had occurred in my last video and would I like to fix it. (I did but the above clip is missing metadata.) It had started to rain hard and I was feeling a bit stressed about keeping up and decided that perhaps this was not the best time to test and troubleshoot the new camera so I put it away. That’s unfortunate, in retrospect, because the real fun was about to begin.

Shortly after lunch we had a sandy hill to climb, and even the best riders in the group were having a hard time with it. This is where I really needed some knobbies. I was looking at the hill and thinking this isn’t going to go well, but what choice did I have? Go back to camp or go for it. So I went for it and surprised myself. It wasn’t pretty—I had to dab several times—but I got most of the way up. Having done the hard bit, the last part I did less well. Like I said, I have to keep the revs up on this bike or it will stall. But with some pushing from others, we all made it to the top and lived to ride the rest of the route.

Not me but someone else getting a push. You can see how deep the sand is. Photo credit: Jean-Charles Paquin

There were some easy water crossings but no other major obstacles and we were back at camp by 5, in time to clean up before dinner.


The next day I was going to head home early but decided to do some test rides. First up, just out of curiosity, was the new Harley Davidson Pan America. It was, shall I say, a little underwhelming. If you imagine what a Harley adventure bike might be, that’s pretty much it: a little loud and rough and brash. There was a lot of vibration up through the handlebars, which was surprising because they had street shoes on. The best part of the test ride was that the sun finally came out! It had rained hard through the afternoon and night and everything was soaked, so it was nice to see the sun and to know my tent would dry out before I had to pack it up.

Test riding the new Harley Davidson Pan America.

There’s definitely some interesting technology built into this bike. The suspension lowering feature when you stop is innovative and will open up the adventure market to those who struggle with the seat height of most adventure bikes. And hydraulic valves sound neat. I don’t know exactly how they work but the bottom line is apparently you never have to adjust the valves. There were some Pan America bikes at the rally so they are selling, but I don’t think this bike is going to cause a major splash like the Teneré 700 did or the BMW GS.

Speaking of the GS, I’ve always wanted to try the iconic bike. As followers of this blog will know, I had the single 650GS for years and loved it and always wondered what the big boxer would be like. Many said that the big cross-Canada trip I did would normally be done on the big bike, and I have to admit considering it when I decided to change my bike, but I’m nervous about taking a big bike like that off road into remote areas. It’s close to 600 lbs. and, with gear, that’s a lot to lift on your own if you dump it.

Anyway, this was my chance and so I did a test ride on a 1250GS. I have to admit, what everyone says about how it carries its weight is true. You can turn this bike easily at slow speed. But what I found most impressive—not exclusive to the GS—were the rider modes. I’ve never ridden a bike with rider modes before, and after 20 minutes in Enduro Pro mode, I was sliding this baby around corners. You can hear me making exclamations into my helmet.

Test riding a BMW 1250GS.

It’s very confidence-inspiring, but I couldn’t help thinking that I was cheating; it wasn’t me doing the powerslides but a computer. Call me a purist, call me a technophobe, call me a Luddite, or just call me poor, but I’m glad my 2013 bike doesn’t have rider modes. I know they’re the way of the future, but for now, I’m happy to have to learn throttle and clutch control and braking using manual inputs. Speaking of which, my throttle/clutch control sucks (!) and I’ll be targeting it with some practice in the coming weeks.

Upon reflecting on my ride of the day before, perhaps what I am most proud of is not that I kept up on the tires I had, but that I did it without any rider aids, including ABS. It was all me. I’m not a great rider, not yet anyway, but if I had a bike with that level of computer input, I wonder if I’d ever be. What are your feelings about rider modes? Greatest safety advancement in motorcycle technology in the recent past, or making us all lazy, unskilled riders?

Finally it was time to start heading home. I packed up and headed down the 321 to the lovely 418 East that took me into Grenville.

Heading along the beautiful 418 that hugs the north shore of the Ottawa River.

It had been a great weekend at my first Classique. The sun was out and I had the whole summer vacation ahead of me. I was feeling pretty bouyant, and since I was in an indulgent mood, there was only one more thing to do to make the moment perfect.

2023 NE USA Tour: Preliminary Plans

The second tour of the coming season will be down memory lane.

Jumping waves on the Outer Banks, NC, circa 1970.

When I was a boy, my parents used to take us down to Cape Hatteras on the Outer Banks of North Carolina for our family vacations. I was the physical barrier separating my two older sisters in the backseat of our Pontiac Strato-Chief. My dad had installed seat belts in our favourite colours according to this arrangement: red, blue, green. Or was it green, blue, red? I can’t remember, but I remember quite a lot about those vacations. They were among my happiest memories growing up, despite the backseat shenanigans.

Not my dad’s Strato-Chief but similar.

We went with another family, and apparently those vacations left an impression on them too, for one of the children named her future child after me. En route, we camped at Shenandoah National Park in the Blue Ridge Mountains. I still remember the nature hikes led by a ranger (who taught us to recognize a particular birdsong by its resemblance to “Drink your teeeeeea!”), the nighttime slide shows at the amphitheatre, walking back to our campsite afterwards, the fog so low you could bounce your flashlight off the underside of a cloud, and the rainstorms. The rainstorms! To this day, I love a good rainstorm from inside a good tent.

Since getting my licence in 2016, I’ve wanted to return and ride the Blue Ridge Parkway, and this summer I finally will.

We would drive much of the Blue Ridge Parkway before spending a day in Williamsburg, then head over to the coast and camp along the Outer Banks. The campground was so close to the ocean you only had to walk along a boardwalk over the dunes to the beach. I wasn’t a strong swimmer and the sea always frightened me, but I enjoyed playing along the shoreline. One year, we went to The Wright Brothers Memorial at Kitty Hawk, and I think my first ever book was a staple-bound biography of The Wright Brothers I purchased from the gift shop there with the few dollars we were given for “spending money.” That seed of interest later sprouted into a dream of being a pilot when I grew up, and although my career ultimately went in a different direction, it has combined with another interest of mine—poetry—to produce a collection of poems that explores the theme of flight. I might not be a pilot, but I can imagine being one; the opening section is in the voice of Wilbur Wright.

A postcard of this famous photo of the first flight sat on my desk and served as inspiration.

The last time I went down there I was 14. My sisters by this point were already doing their own thing and didn’t go, so I had the backseat all to myself and Supertramp playing on my cassette recorder. During one rest stop on the Blue Ridge Parkway, we came out just in time to watch three motorcyclists start up their bikes and roar off down the parkway. One was a woman on a BMW. I’d never heard of that manufacturer but my dad clearly had. “Did you see that young woman take off on that BMW?” he remarked to my mom.

Perhaps another seed was planted on that holiday because, since getting my licence in 2016, I’ve wanted to return and ride the Blue Ridge Parkway, and this summer I finally will on my Triumph Tiger 800 named Jet.

The trip so far is pretty sketchy, but that’s generally how I like to tour when I’m on my own. In the earlier trip planned for this coming summer, my wife and I are going to visit Newfoundland, and much of that trip has been scheduled. For this one, however, all I know so far is that I’ll ride The Blue Ridge Parkway and Skyline Drive at some point, camping at Shenandoah National Park. I also know that I’ll ride some dirt in the MABDR and NEBDR (Mid-Atlantic and North East Backcountry Discovery Routes respectively). The MABDR and Blue Ridge Parkway plus Skyline Drive cover similar geography, so it makes sense to do one down and one back. One is asphalt, the other primarily dirt.

I’m thinking I’d also like to get out to the Outer Banks and ride them too if I have the time. They are less than a day’s ride from the Blue Ridge Mountains. Lea of Got2Go recently rode them and titled her YouTube video “The BEST road trip of the USA East Coast?”

Got2Go Rides the Outer Banks

At the time of this writing, there are lots of unknowns. Will I be touring solo or with a few friends? I’m good either way, but it would be nice to ride the technical sections of at least the NEBDR with a few buddies, and I’ve put a few feelers out. If I get some takers, will they do the whole tour with me or only one or both of the BDRs? If they can only do the dirt with me, I might change the order of things and ride the BDRs down and the asphalt back, to accommodate them.

I also don’t have a precise route mapped out yet from the Canadian border to the top of Skyline Drive. I’ve got Google Maps, Kurviger, and Rever open in separate tabs of my browser with the “Avoid Highways” option selected and am studying their suggested routes. Depending on which router I’m looking at, it’s between 1000 and 1100 kilometres from my house to where the scenic drives begin. This is prime Civil War geography through Pennsylvania and I’ll be tempted to stop often at historic landmarks.

Will I ride Tail of the Dragon while I’m down there? I’ve heard from several people that it’s not worth it and, in fact, is a little dangerous with superbike and sports car idiots treating it like a track instead of a public road. There are apparently many roads in that area just as good or better and less populated. Do you have any suggestions? Let me know.

So there’s a lot still to decide about this one but one thing I do know is that I’ll be leaving sometime in the fourth week of July and will have a little under three weeks before I have to be back for work mid-August. That’s not a lot of time but my parents did it in three weeks, if memory serves me well, and they had three kids in tow.

I know a lot will have changed and I can’t expect everything to be as I nostalgically remember it. You can’t go back in time or relive your childhood, nor would I want to. But I suspect the mountains and the ocean won’t have changed much since I saw them last, and that’s what I’m going there to see. And this time, instead of being stuck between two sisters in the back seat of a car, I’ll be riding my Tiger 800XC, putting it through the full range of its abilities as I carve new memories through the Appalachian, Blue Ridge, and Great Smokey Mountain ranges.

ADV Riding as Thrill-Seeking

Is extreme remote riding simply gratuitous risk-taking?

Video credit: Troy R. Bennett

Recently a story was circulating about Eric Foster, a guy who crashed on the Trans-Taiga Highway. Perhaps you’ve seen it. He was riding solo and woke up eight hours later in a hospital in Montreal. It’s actually an old story from 2017 but was republished end of November and that’s when I saw it. It’s a pretty gripping story, as far as crash stories go. He was riding in perhaps the remotest area of North America when he crashed, breaking his back and a leg. Some trappers saw the smoke from his motorcycle on fire and came to his aid, but it took hours for first responders to get to him, and then hours to get him to a hospital. The story has a happy ending; he returns to the spot where he had the accident and finishes his trip, stopping to thank the trappers along the way who helped him.

I’d never heard of the Trans-Taiga, so the article got me looking. It’s a dirt road built by Hydro Quebec to service their dams, and it is indeed about as remote as you can get in Quebec. According to Wikipedia, it’s the “northernmost continuous road in Eastern North America,” snaking 582 kilometres (362 mi) through forest from James Bay Road to the Caniapiscau Reservoir. That’s right—that’s all there is at the end of a dangerous journey: a reservoir. Then you turn around and ride the same road back.

Why would someone want to do such a ride? Well, the answer is in the article. Eric Foster describes himself as “a challenge guy.” When asked why he wanted to ride the Trans-Taiga, he replied, “Just to say I did it,” then added, “I love a good challenge.” I’ve found myself saying the exact same words of that last sentence, and I’ve written about risk-taking in an earlier post when discussing my decision to try The Dempster, another dangerous highway. Quoting Jordan Peterson, I wrote at the time:

“When untrammeled—and encouraged—we prefer to live on the edge. There, we can still be both confident in our experience and confronting the chaos that helps us develop. We’re hard-wired, for that reason, to enjoy risk (some of us more than others). We feel invigorated and excited when we work to optimize our future performance, while playing in the present. Otherwise we lumber around, sloth-like, unconscious, unformed and careless. Overprotected, we will fail when something dangerous, unexpected and full of opportunity suddenly makes its appearance, as it inevitably will.”

12 Rules for Life

Research on the Trans-Taiga led me to looking at James Bay Road, a highway so remote that you have to sign in at a check point before riding it so officials can keep track of who’s up there. I watched a YouTube video of a group of guys who rode it to James Bay, including a few kilometres of the Trans-Taiga, “just to say they did.” And then the YouTube algorithm did its thing and showed me another series of videos of a father and son riding the Trans-Labrador Highway, which was right up my alley because I was considering riding it back from Newfoundland this summer after crossing to Blanc-Sablon.

Coincidentally, this series is also by Troy Bennett.

The Trans-Labrador Highway is one of those classic ADV rides you’ve apparently got to do to call yourself an ADV rider. It also snakes through some pretty remote territory, and until recently, was mostly gravel. (The final remaining section of dirt has recently been paved.) I watched the six-part series and the riders did have some adventure. They had a break-down and had to be saved by some locals, and they encountered some unseasonable weather and were held up for a few days by a late snow fall. There was some good bonding time, for sure, but in terms of the ride itself, it seemed like hours and hours of mind-numbing coniferous forest. No lakes, no mountains, no cliffs, no hill climbs, and as of last summer, no dirt.

Why would the Trans-Labrador be such a popular ADV ride? It has to be its remoteness, and if you live in the northeast of North America, the Trans-Lab is one of the few remaining truly remote roads.

If you’re looking for a challenge, remoteness will provide it. For one, there is the not-so-little issue of fuel; you have to be able to cover upwards of 400 kms between fuel stops, which can be done by carrying extra fuel in a Rotopax or another fuel container. With remoteness usually comes some challenging riding too since no one wants to pave a road that has limited use. And if it rains, that challenge increases significantly, especially on roads like The Dempster or The Dalton that are sprayed with calcium chloride as it makes the mud greasy. Then there’s the danger of wildlife, whether it be an aggressive grizzly bear or, worse, the black flies.

Stuck in otherwise pretty safe lives, we seek danger in answer to an ancient call somewhere in the reptilian brain that harkens back to another era when we lived close to death.

But the real challenge of riding remote is simply the lack of assistance should you have a mechanical or medical problem. I won’t say you are on your own because even on these remote highways there are still trucks passing periodically, but parts and medical assistance become scarce. This is where you have to be prepared: know how to fix your bike, carry spare parts, bring a first-aid kit, and have on you a satellite tracker like the Garmin inReach units that are connected to emergency services.

Is it worth it? Well, to each his or her own, but for me, the risk itself is not enough. In fact, I’ve been wondering if riding remote for its own sake is really just a way for some people to feel alive again. Stuck in otherwise pretty safe lives, we seek danger in answer to an ancient call somewhere in the reptilian brain that harkens back to another era when we lived close to death. Some people skydive. Others bungee jump. Some climb mountains. And some race The Isle of Man TT in search of what Guy Martin calls “The Buzz,” that adrenaline hit you get when you are on the edge of life and death.

But watching these videos has led me to rethink my upcoming tour. I don’t think I’ll be coming back from Newfoundland via The Trans-Lab. It’s not because I’m scared of remote riding, but in my world, there has to be some pay-off for the risk, and bragging rights just isn’t enough. When I rode up The Dempster, every kilometre was worth the risk for the magnificent views the highway provided. I’d never seen geography like that before and likely won’t until I get up there again.

Golden Sides Lookout just north of Tombstone Territorial Park, Yukon.

But the Trans-Lab, the James Bay Road, and the Trans-Taiga don’t offer much beyond hours and hours of forest. From what I can determine, there aren’t even places to pull off safely for a rest or to camp. These are roads built exclusively for trucks to get from Point A to Point B, cutting a single line through otherwise impenetrable bush. I’ll leave it to the black flies.

For a challenge, I’ve decided instead to ride this summer the NEBDR and MABDR (North East and Mid Atlantic Backcountry Discovery Routes respectively) down to The Blue Ridge Parkway, and while there, I’ll probably do Tail of the Dragon, although riding a curvy section of road at the limit of my skill and the bike is not my preferred mode of challenge these days. Rather, I’m looking forward to testing my metal on those Class 4 roads of the NEBDR. I’ll take a rocky hill climb over speed or gratuitous remoteness any day; it’s what drew me to ADV riding in the first place. Off-roading provides a challenge that is relatively safe. That might sound like an oxymoron, but you don’t have to risk your life to get “The Buzz.” Successfully completing a technical section of road or trail will give you a hit too, and if you don’t make it and drop the bike, well, you live to try another day. And along the way, there are some pretty great views, villages, and campgrounds.

What do you think? If you ride a motorcycle, you’re familiar with managing risk. Is remote riding your thing, and if so, why do you do it? If not, what kind of riding gives you The Buzz? And if you don’t ride, what do you do to step outside your comfort zone and feel alive? Drop a comment below; I’m always interested in hearing from readers.

The Wish List, 2022

It’s time to modify the Tiger for dirt.

There’s a balance between customizing a bike and over-modifying it. I remember an episode of Adventure Rider Radio in which Jim Martin talks with Warren Milner, who worked at Honda for 30 years in product planning and R & D. Warren warns against rashly modifying your bike, especially based on advice given on internet forums. For example, at one point in the interview, he talks about the exhaust system, describing how manufacturers spend hundreds of hours developing and testing it before the bike goes into production. That’s because today’s bikes use back-pressure from the exhaust as an integral part of the combustion process to optimize fuel efficiency and emissions, yet one of the first mods owners often do is to slap on an aftermarket exhaust. One can almost hear the collective groan of the engineers as they do.

At the same time, every bike that rolls off the assembly line is built for the average rider—average build, average riding (whatever that is), average skills, average goals. That’s why it’s important to customize it for your specific needs. Tall rider? You might want a taller windscreen to avoid buffeting, or add a wind-deflector. Long legged? You might want to lower your pegs or raise your seat. Or the opposite: you might want a lowering kit so you can flat-foot. Going off-road? You’ll need different tires, etc.. There are a lot of considerations, and fortunately, a lot of options available. The industry is healthy with aftermarket products.

I decided to ride the Tiger for a season pretty much as I bought it. I wanted to get a feel for it stock before making changes. I still have the stock front tire on that came with the bike. The only changes I made were in the realm of protection: crash guards and a beefier skid plate. I’d learned my lesson with the BMW, waiting to buy some upper protection and ending up buying a new radiator along with the guards when I eventually did. After studying the market, I went with Outback Motortek. The guards and plate set me back a cool Grand, but I think they’re the best on the market. The only other mods I’ve done to the Tiger so far were to add an AltRider rear brake extender and a wind deflector.

But with two big tours planned for 2023, it’s time to ask Santa for some items to get the bike ready. Here’s what’s on my wish list for 2023.

Panniers

The Tiger came with Triumph racks and cases. The system is fine for commuting and light touring, but those side-opening cases aren’t practical for moto-camping.

I deliberated (read, “agonized”) over this decision for a long time. I love my Touratech hard cases, but the Tiger has a high exhaust on the right side so I really should go with an asymmetrical system. When I had the 650GS on the market, I had offers just for the racks and cases, but I was reluctant to separate them from the sale of the bike. The new owner wanted to buy them too, but in the end, I decided I couldn’t separate from them either.

They are great cases and contain a ton of memories with all the stickers from where I’ve been. They are the original puck system, which you can’t get anymore, and I like that you can lock them. I’ll probably use these when I tour the East Coast with Marilyn because they are big and we need the space and I won’t be doing much dirt on that tour anyway. We’ll just have to pack them so the bike stays reasonably balanced.

However, I also plan to ride the NEBDR and MABDR next summer, and from what I’ve seen on YouTube, there are some challenging dirt sections of the NEBDR in particular for which I’ll need a smaller, soft-pannier system. (Soft panniers are generally considered safer for off-roading; there is less chance of breaking a leg.) I know everyone is getting the Mosko bags these days, and they are beautiful bags, but I decided to go with the Enduristan Monsoon Evo 34L/24L system.

I’m using the past tense because Santa took advantage of a Black Friday sale and got these 20% off. I picked up at the same time the matching bottle holster (for my stove fuel) and a can holster (for water, chain lube, or bear spray). One of the nice things about this system is that it’s modular, and I’ll probably be adding more to it as I figure out my needs.

Marilyn and I used the Enduristan pannier topper through the West Coast and loved it. Enduristan products are completely waterproof and designed by ADV riders to withstand the abuse of adventure touring. But the main reason I went with this system is the weight; they are the lightest panniers on the market, with no backing or mounting plates to worry about. This also means that the bags and cases will be easily interchangeable.

Racks

It’s Outback Motortek all the way. They put a lot of R & D into their products and back them up with some brave testing, dragging expensive bikes along the ground. Even though the bars do not come up as high as Heed’s and others, they are sufficient to keep the plastics and vital parts off the ground and protected. The bars look like crap afterward but have done their job and can be re-powder coated.

The rear racks offer protection for the silencer and rear of the bike, in addition to carrying the panniers, so again, I went with the strongest. These are a full 18mm + with the powder coating. In fact, they are industry leading in their size, so big that Dual Sport Plus, where I bought the Enduristan bags, includes a workaround kit of washers so the bags fit these bars.

To these bars, I’m going to add on the left side an X-frame plate so I can mount a RotoPax 1G fuel container inside the bars. This will increase my range when remote riding and help balance the bike, especially when using the symmetrical TT cases. Clint at Dual Sport Plus has my exact planned set-up—racks, panniers, and RotoPax—seen here.

Hand and Lever Protection

The final bit of protection I’ll need before attempting those gnarly sections of the NEBDR is some protection for the levers. I considered going again with foldable levers but that would still leave the front brake reservoir and my hands unprotected. After looking at all my options, I decided to go with Barkbusters. They have a model that is made for my specific bike so the install is straightforward. And if I had any lingering doubts, they were quashed when I saw that BB make a plastic with my bike’s name on it. I know the Jet plastics don’t provide as much wind protection as the Storm and other plastics, but I think they suit the styling of the Tiger, and sometimes you just have to sacrifice a little practicality for vanity . . . I mean, aesthetics.

I’m not going to change my mirrors for now. I’m really not fond of the look of the double-take mirrors and am hoping the crash guards will sufficiently protect the OEM ones. And if they don’t, well, the decision will have been made for me.

Foot Pegs

What’s the most important part of the bike when off-roading? Given that I’ve posed this question in the subsection titled Foot Pegs, you’ve probably guessed correctly. If your body position while off-roading is correct, you really shouldn’t have much weight on the bars; you should be pretty much balanced on the pegs and steering the bike with your feet (i.e. peg-weighting). Of the four contact points with the bike (hands and feet), the pegs are the most important, so a good set of foot pegs is a must if you are going to do any technical riding.

The Triumph pegs aren’t small but they aren’t large either. I’ve heard that a large foot peg can make a big difference (sorry, bad pun), changing the entire feel of the bike and inspiring confidence. They will also save you resoling your boots quite as often. I looked at IMS, but they don’t make pegs for the Tiger. When I found that Fastway did and that there was a Canadian distributer, I jumped, Black Friday sale or not.

As you can see, at 2.25″ x 4.75,” these pegs are huge. They have adjustment for height and camber, and come with two lengths of cleats: 10mm and 12mm. I’ll probably start with the 10mm since my adventure boots already have a tread. They are expensive, but you only have to buy them once; Fastway sell bike-specific fit kits for mounting, so I will hold onto these babies when the time comes to sell the Tiger.

Honestly, I never thought I’d pay $300 for foot pegs, but I’ve been watching YouTube videos of guys doing, or trying to do, the Class 4 roads on the NEBDR and thought, “I’m going to need all the help I can get.”

Tail Plate

The OEM tail plate is too small for a duffle and has no good strapping points. It also shifts side to side as part of that Triumph system that shifts as you corner. I really like the AltRider tail plate, but at $260 for a piece of metal, I’m considering other options. You can get an eBay Special from China for 1/3 of that price, but will it be the same? Will the cut-outs be bevelled so they don’t cut into your straps? Will the powder coating begin to wear off after a season or two, as happened on my Kildala rack? AltRider make good stuff, and I like how this one projects out the back of the bike so there’s still plenty of room for Marilyn behind me. I might just watch and wait for this item to go on clearance somewhere, but I’ll definitely need a new tail rack before I tour.

Tires

I’ve had the Dunlop Trailmax Mission tire on the rear of the Tiger, and I had them on the GS when I took it to Vermont last summer. This 70/30 tire is a good choice if you are doing a lot of street with some dirt or gravel roads. That’s what I expect when Marilyn and I go through Gaspé, PEI, New Brunswick, Nova Scotia, and Newfoundland. So I’m going to put the matching tire on the front first thing in the spring before we head off.

For the tour in the US, that’s a little different and more complicated. I plan to start out on some BDRs (Backcountry Discovery Routes) that will take me from the Quebec border down to Pennsylvania, then I’ll be riding principally asphalt as I make my way over to the Outer Banks, including The Blue Ridge Parkway—a bucket list ride for me—and, why not, Tail of the Dragon while I’m in the area.

What do you do when faced with such diverse riding, everything from Class 4 (i.e. unmaintained) roads to the most renown section of twisties in The U.S.? Well, based on my experience, you have to go with the most aggressive tire required for your off-roading needs. You can ride a knobby on asphalt but if you try to take a street tire into mud and gnarly stuff, you can get yourself in trouble. Of course I could by-pass the gnarly stuff, but where’s the fun in that, and besides, I like a challenge!

I’m currently deliberating between Shinko 804/805s and Michelin Anakee Wilds. I know the Shinkos are surprisingly quiet and smooth on the road, despite being a 40/60 road/off-road tire. However, they aren’t great with lateral stability. The Wilds are listed as a 50/50, but I have a sense they might be better in the dirt but louder on asphalt. (I’ve never ridden a set of these before.) I also like that the Anakees are a radial tire, so they will run cooler in the heat at speed. And for what it’s worth, Lyndon Poskitt just put a set of these on his Norden 901 for his tour of Iceland where he’ll be doing similar riding.

The Shinkos are about half the price of the Anakees, but for a tour like this, having the right tire is more important to me than a few hundred dollars. I have run the Shinkos before and they were great . . . until they weren’t. From one day to the next, they started skidding and sliding out on me.

What do you think? Anyone tried either of these tires?

Tools, More Tools . . .

Finally on my wish list are some tools for helping me with these tire changes. I’ve always worked off the grass, but it’s not ideal; you’re grinding dirt into your bearings as you wrestle with the tire, and it’s hard to stabilize the wheel while levering. I think I’m going to ask Santa to get me a tire changing stand and some Motion Pro tools to facilitate this work and protect my rims.

The Tiger is basically a sport bike in adventure clothing; it rips, and I love how it handles through twisties. But I’ve yet to really test it off-road in technical terrain. Fully protected, with an aggressive knobby and soft panniers, Jet will be ready to hit the dirt and I’ll be eager to get back to exploring. Gros Morne National Park is a bucket list item for Marilyn and me, and I’m hoping we’ll be able to get deep into the park on the bike.

In the meantime, we’ve just received here in Montreal the first big snowfall of the winter. I’ve been shovelling the driveway for the past 24 hours, but I really don’t mind. It will be nice to have a white Christmas. I’ve just finished all my grading in my teaching work, and we are sufficiently stocked with holiday sweets and treats.

I was just remarking to Marilyn that, in many ways, I prefer the midwinter holiday to the summer one. While I can’t ride, being a bit house-bound provides an opportunity to step back from everyday life and reflect—a sort of retreat. And what comes to me this year as I do that is how incredibly blessed I am in so many ways. I and my loved ones are healthy, we have enough money, I have a fulfilling job . . . I could go on, but I’m thinking mostly of the people in Ukraine and other parts of the world who are less fortunate. In the immortal words of Ron MacLean, “count your blessings, not your presents.” It’s nice to dream and plan to buy stuff for what we are passionate about, but the most precious gifts cannot be bought.

I wish you and yours a healthy, happy holiday, and safe riding and travelling in 2023.

You Can’t Get There From Here: Navigation Apps

In this final post in a series on gear, I discuss the navigation apps I use when touring.

Old-School Navigation. I still like to tour with a map on my tank bag.

“I learn by going where I have to go,” Theodore Roethke says in the refrain of his famous villanelle “The Waking.” That may be a good philosophy in life, but when motorcycle touring, it’s downright dangerous. There’s nothing worse than not knowing where you’re going and fumbling with a GPS in traffic while riding. Yeah, I’m all for exploration and adventure when you don’t have to be somewhere, but when the light is fading and you still don’t know where you are pitching camp, or when your fuel gauge is on one bar and you don’t know where the next gas station is, that’s a problem.

Charging

I learnt early in my touring experience that navigation is huge, maybe because I had so many problems keeping my phone charged. If the USB port detects moisture, the phone stops charging, and it doesn’t take long for a GPS app to drain your battery. And then there’s the cord. If your phone isn’t charging and the port isn’t wet, it’s probably the cord. They make them so cheap these days that the internal wires break. I once had to ride from the Cabot Trail over to the Best Buy in Sydney, NS, just to buy a new cord to get me home. What a pain!

So let me say at outset that if you don’t yet have wireless charging on your bike, you should. It’s a game changer. It avoids 90% of the issues you are going to face on tour. For years I worked around the charging problem by using the type of cord that has magnetic adapters. I siliconed the appropriate adapter into the port of my phone, then just attached the USB cord via the magnet to charge the battery. Rain didn’t affect the charging. The cord was still liable to break, but they are cheap and you can buy, like, a 4-pack on Amazon for $20 so can carry several.

The problem with this set-up is that the magnetic adapters are fine for charging, but most can’t transfer data, so now your phone is limited off the bike. Maybe you don’t want to silicone an adapter into your $1,100 iPhone 14. I worked around this by buying off eBay a cheap, used, military grade phone that I dedicated for bike navigation. It didn’t have a SIM card in it and was locked, but it didn’t matter: I used it in Flight Mode. That’s right, I don’t have a huge data plan and I ride in places that often don’t have cell service, so I download all my maps before leaving.

Navigation

The main app I use to navigate is OsmAnd+ because it is open source and includes free maps to be used offline. This is also great when I travel in The States because I don’t get hit with roaming charges. Last I looked, OsmAnd+ was about $20. I bought the Plus (paid) version because it imports GPX tracks, which I need for leading club rides, but the free version works perfectly well for navigation, if that’s all you need. OsmAnd also includes contour lines and hillshades layers. When I venture off-road, it’s nice to know how steep the mountain is going to be. There is also a Points of Interest (POI) layer so I can see gas stations, restaurants, healthcare, parking, and convenience stores and supermarkets on the map (configurable), and a Wikipedia layer, so I can see what significant landmarks I’m riding past or near. It’s a great little app, available for both Android and iOS.
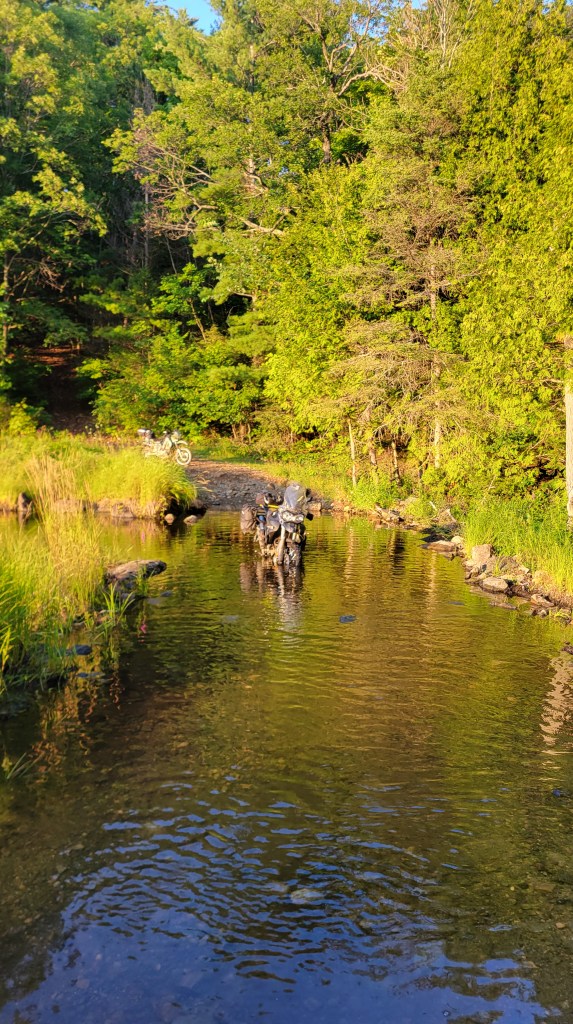
OsmAnd Screenshots

I’ve tried maps.me, Gaia, Locus Map (Pro and Classic), Scenic, Eat Sleep Ride, and others, but I always come back to OsmAnd. It’s easy to use yet full-featured, a rare combination. It does what I need it to do and no more. Do I really need to know how far over I leaned the bike on my latest ride? Do I really need crash detection? Does my wife prefer to hear that I’ve crashed from an app or a person? But the main reason I like OsmAnd is for the free maps. I started using Locus Map Pro but maps are $1 per country. That sounds cheap—$1 for all of Canada—but for some reason they consider each state in the US a country, so that can add up fast. I still have these other apps on my phone as back-ups but I don’t really use them.

The other main app I use to navigate is Google Maps, now called just Maps. (I guess Google figures it’s so ubiquitous we no longer need the brand name.) Maps handles addresses better than any other app, thanks to Google’s AI. Need to know where a specific place is but you don’t know the address? Just Google it, then press the navigation arrow icon and it loads in Maps and guides you there. Easy peasy. As much as I like OsmAnd, you need a specific address for it to find your destination. (You can, however, press and hold on the map to choose a specific point of destination.)

You can use Maps also offline, but like OsmAnd, you have to download offline maps before leaving home. (The search feature, however, does require cell service.) In the upper right hand corner, press your identity icon, then select Offline Maps from the menu. Press “Select Your Own Map,” zoom and position the frame using two fingers to select the area you want, then press Download. I name each map so I can keep track of them. They will expire if left unused for a certain amount of time, but you can update them all quickly and easily every once in a while when you are in a Wi-Fi zone. I downloaded maps for all the provinces I planned to tour before heading across the country. I didn’t need the northern part of most provinces, but I grabbed everything where I thought I might be riding. This was important since I was often not in a region with cell service.

The only other navigation app I use is Waze, and I only ever use it around town, frankly. That’s because it shows where the cops are. Nice! (Not that I ever speed.)

Route Planning

For route planning, I use the web-based Kurviger. Forget BaseCamp. Kurviger is intuitive and full-featured. I choose the type of route (highway, straight, curvy, very curvy; one-way or round trip), the origin and destination, and Kurviger comes up with an interesting route. I then drop in shaping and waypoints to shape the route exactly how I want it, flipping back and forth between Kurviger and Maps in street view to check the quality of the road. (Drag the little yellow man, ur, person, icon onto the map to see a street view.) When I’ve got the route exactly how I want it, I export it to a gpx file. Kurviger can generate a QR code for the file or hyperlink to share, or send it directly to Scenic, if that’s your preferred navigation app. I usually email the gpx file to myself then open it on my phone, which knows to open gpx files in OsmAnd.

Screenshot of the web-based Kurviger route planning app.

I have Kurviger Pro on my phone as well, and it uses BRouter to do the routing. BRouter takes some setting up; like the offline maps in Googe Maps, you have to download in sections the areas you need first, but the upside is that you can use Kurviger Pro in the field. For example, say you’re riding with some friends and you’re looking for a good route to a specific place but nobody wants to pour over a map to make those decisions. Just open Kurviger Pro on your phone (it will load a map at your current location), press and hold on your destination, and it will generate a route—again, to the degree of curviness you want. You can even share the route with your friends.

Screenshot of Kurviger Pro. All roads lead to Lachute.

Non-Navigation Apps

There are some other apps I use, not for navigation, strictly speaking, although they can be used for that. If you’ve followed Itchy Boots as she makes her way across the Americas, you will have heard of iOverlander. Noraly uses it to find her accommodations. I’m rarely sleeping with a roof over my head when I tour, but iOverlander is equally useful for finding campgrounds and even wild camping locations (i.e. places on crown land where you can camp for free). The app is user-based, and users submit descriptions and photos of the sites they’ve stayed at. This is helpful because there are a lot of people boondocking with campers and vans, and their needs are different than those who are tenting. So a safe gravel parking lot might be good if you have an RV, but not so nice if you are tenting. I wish iOverlander made this distinction, perhaps using a different symbol for each type of wild camping.

iOverlander screenshot. Tent icons are campgrounds; crescent moon icons are wild camping spots. Clicking on the icon brings up a window with user-based descriptions and photos.

Last spring, a friend and I planned to camp at a state campground in Vermont, only when we got there it was closed. In fact, we were too early and all the state campgrounds were still closed for the off-season. (Doh!) So I opened iOverlander and it showed a wild camping spot a short distance away. We ended up at lovely site next to a river with a few other campers nearby for security and even a drop toilet to boot!

I also use weather and radar apps, of course, to monitor the weather. They are pretty straightforward so I won’t spend any time on them. But for the record, my preferred apps in this department are WeatherCAN and MyRadar. I like WeatherCAN because it’s generated by Environment Canada. I reluctantly open Weather Network only when I need a 14-day forecast, steeling myself for the clickbait.

The Best Riding App on my Phone

I’ve saved the best for last. There is one app that I have come to love, to love I say, so much so that it’s become almost indispensable. It’s an app like no other since it is an overlay on the Android system and replaces the usual interface. It’s called Drive Mode Dashboard, by Thork Racing.

This is what I see when I launch DMD. (This is Version 2.0.) Instead of my usual desktop and app icons and widgets, I see this. It’s fully configurable but this is how I’ve set mine up—with a set of most-commonly-used apps on the left and a compass, digital speedometer, and odometer on the right. There’s more info along the top, as you can see. Along the bottom are icons for a map, my full list of apps, settings, even a digital rally book. Pretty cool.

Rally Book Mode. Ready for the Dakar.

But where this app really comes to life is in conjunction with Carpe Iter Controller, a bluetooth controller that mounts to my handlebar. With this controller and DMD, I can navigate throughout my phone—open any app, open and control media in Spotify, change the volume in my helmet, the brightness of my screen, and more. Where I use it most is to zoom in and out and pan around in maps. I think I could even tune my ECU while riding if I wanted to. About the only thing it can’t do is stop Microsoft Office Update from reminding me to check for updates every time I open Word! (Can Bill Gates avoid this?)

I see Thork Racing have a new unit out now with three buttons and a toggle and it can connect directly to 12V. My 1st generation controller has a rechargeable battery that lasts about a week with full-time use. There wasn’t room on the Beemer’s handlebar to mount it vertically so I made up a bracket and mounted it horizontally on the mirror stem. I have it mounted vertically on the Tiger, and yes, you configure the orientation in the driver software so the toggle switch pans your maps accordingly. Needless to say, with this set-up, if my eyes are not always on the road, at least my hands are on the handlebars. The controller is a little pricey but it’s a very nice modification.

Final Words

Despite finally getting my phone set up to be my primary means of navigation, I ended up buying a used Garmin Montana 600 for the big trip. I was nervous after having so many tours tainted by navigation issues and wanted a reliable back-up. The Montana has a WAAS-enabled GPS receiver and HotFix® satellite prediction. No, that’s not a dating service but the latest technology to ensure your connection to satellites is never dropped. The Rugged Mount is waterproof and robust enough for off-roading, and while I’m not positive, I think the Montana has a more comprehensive off-road mapping system than the phone apps. The Google Car made all the way up to Tuktoyaktuk, apparently, but it can’t go on single track or some of the ATV trails I do.

When all electronic devices fail, I rely on that thing called a paper map. No batteries needed! My Wolfman tank bag has a nice big clear plastic sleeve on top for them. It’s easy to lose sight of the big picture, so to speak, after staring into a 6″ x 3″ screen all day. I’ve recently discovered Butler maps, made for motorcyclists, and they are not only water resistant but also contain routes suggested by other motorcyclists and a ton of other information on the flip-side. I bought the one for The Maritimes and it currently hangs in my upstairs hallway outside my study, as did the one of North America I used to plan my cross-Canada trip. So a paper map serves multiple purposes: it’s great in the field, but it also serves to navigate me through the dark winter months of the off-season.

Ready for my sticky dots.

What are your preferred navigation apps and devices? Are there some I haven’t mentioned? Drop a comment below. I always like to hear from readers.