
I’ve become wary of riding without my full set of tools. I have the little BMW set that resides in the tail compartment, but I can’t do much with it. I bought a Kriega tool roll last year to house all the tools I need to do most anything on the bike, but I had nowhere to carry it. It tucked nicely into my tank bag, but I didn’t like having all that weight up high on the bike and knocking hell out of my plastics. A tank bag is like a day bag—for a few incidentals you want to keep close at hand, not your full set of tools. Then I bought a plastic Stanley tool case and used it as a tail box, securing it with Rok Straps, but it starting rubbing the powder coating off my rack and was not a permanent fixture on the bike. Looking for the perfect solution, I decided I’d have to make it myself.
Some guys use the plastic rolls that come with tractor manuals, but I had no idea where to buy such a thing, and then I still had the question of how to attach it to the bike. Some use the white PVC pipe with an orange cap, but I wanted something more discrete since Bigby is an all-black kind of bike. So I decided to use 4″ ABS pipe—that’s right, the kind of pipe that carries last night’s dinner to the sewer. If it’s good enough for that substance, it can carry my tools.
I started where all DIY projects start: at the local big box hardware store. Some fiddling and fitting together in the plumbing isle and I had figured out the basics of my tube.
All materials were under $30
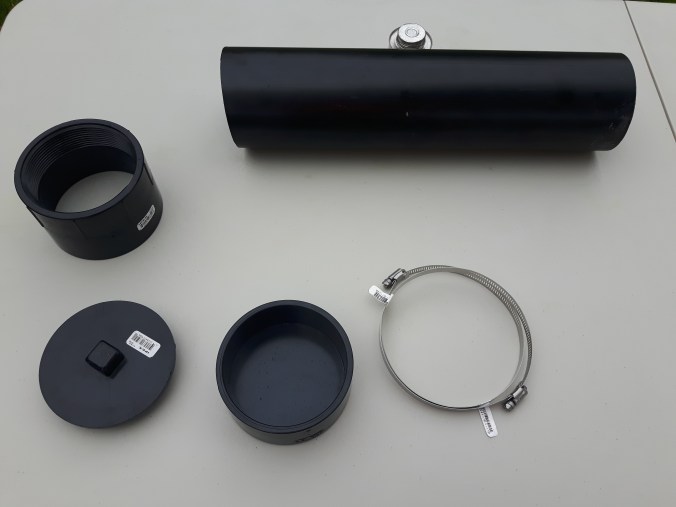
I had a piece of pipe hanging around from the last time I changed the crapper, so all I had to get was an end cap, a converter, and a screw cap. Because I was attaching it to my pannier rack, 4″ ring clamps were not enough, so I had to go with 5″—a little long, but the end can be cut off after the install. Then I needed some cement to glue it all together.

Most guys mount the roll lengthwise on the inside of their pannier rack, but because I’m an original, I decided to do it differently. (Actually, it was because my large canister muffler prevented the standard location.) I searched around and found a spot behind the licence plate, crossways. It’s more discrete there, and the bonus is that the bike stays balanced. I just had to be sure it was going to be safe; you don’t want anything locking up the rear wheel unexpectedly. And in fact, this would prove to be the wrong location. (Right idea, wrong in reality. See warning below.) It did rub and I ended up moving it. You’ll have to find the best place to mount it on your bike.
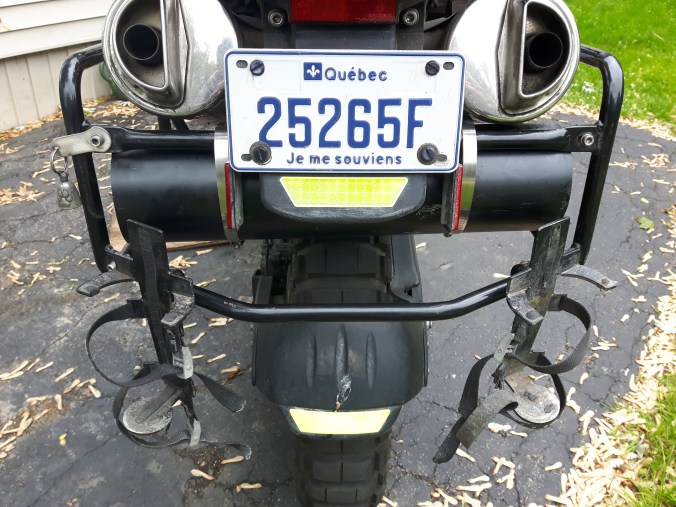
Offering it up, as my dad used to say. Je me souviens.
The pipe was a little long so I cut off a few inches with my reciprocating saw, then cleaned the burr with a file. The roll ended up being 16″ long, enough for my Kriega, some extra tire tubes, and a few spare parts. There might even be room in there for a first aid kit—all the essentials, so I’m never guessing when I’ll need something.
The nice thing about ABS is that you can assemble everything and offer it up again, just to be sure, before you start cementing pieces together. Just beware that it may not be easy to take it apart, especially if it’s been sitting in some heat. Fortunately, my MotoMaster Strap Wrench came to the rescue again. I love that tool!
The trickiest part of the job was figuring out how to lock the tool roll. I’d recently read on a user forum of someone having a sentimental tool lifted from his, and I guess they can be targets for anyone who knows what’s inside. My first thought was to drill a hole in the top of the cap and the side of the tube and to pass a long-arm lock through both. Unfortunately, I should have waited for my second thought before drilling because once I had, I realized I was never going to get a lock though both. Fortunately, the third thought was to put eyelets in the holes and pass a small length of looped cable though both and lock the cable. Okay, it’s not super secure, but you basically just want a mild deterrent, something to stop the quick grab and run. I use a 6′ length of similar gauge plasticized wire to secure my big tail bag to the rack when I’m leaving it unattended for a length of time. Anyone with wire cutters can get through this pretty quickly, but anyone seen using wire cutters on a bike parked on the street will hopefully raise some suspicion.

A small vinyl-covered lock will prevent vibration damage. Just loop the ends and crimp. Not pretty but functional.
The ring clamps secure it firmly against the rack. I’m glad there’s no movement because any vibration would quickly cause significant damage to the tube and my rack.
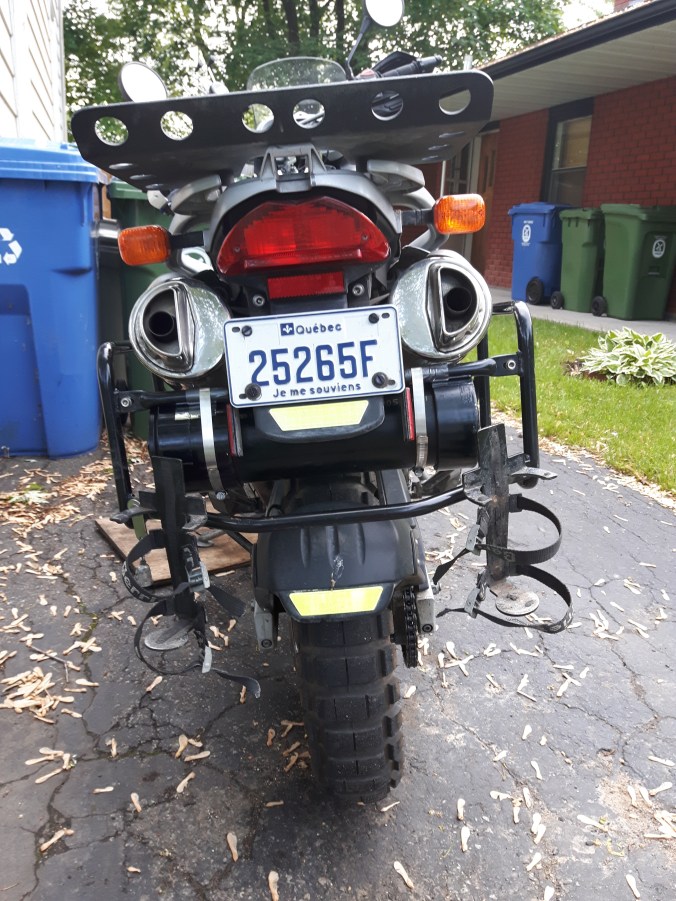
The finished product.
The Harley boys who polish their bikes at each rest stop would probably be aghast at this mod, but adventure riding puts utility ahead of aesthetics every day. And the next time they need a tool, I’ll be happy to oblige. When I stopped at the Nova Scotia tourism office en route to Cape Breton, I noticed a Harley rider on his back struggling to tighten an oil filter with a pair of pliers.
“Can I help you?” I asked.
“I don’t think so,” was his reply. “Not unless you happen to have a 14 mm socket.”
“As a matter of fact . . .” and I started rummaging to the bottom of my pannier.
As Hamlet says, “The readiness is all.”
Warning: The tube mounted in this location rubbed on my rear tire. It’s surprising how much movement there is in the suspension. It should be mounted lengthwise on the inside of one of the pannier racks or on the outside of the horizontal crossbar between the fuel racks. Any mods you do to your bike are at your own risk. I offer this merely as a suggestion.
