Let’s Talk About BPH

Breaking the seal on a taboo topic.

There’s a great line in the movie The Bucket List, the 2007 film directed by Rob Reiner and starring Jack Nicholson and Morgan Freeman: “Three things to remember when you get older: never pass up a bathroom, never waste a hard-on, and never trust a fart.” Don’t worry, it’s the first one I’m going to discuss today.

I’ve found BPH to be kind of a taboo subject for men, and I was hesitant to write about it too. I think that’s because of a misconception that having BPH is a symptom of loss of virility, but it’s not. Let’s get that out of the way early. Maybe BPH is taboo also because it’s a sign of aging, and who likes to acknowledge that? Signs of BPH usually begin to appear in the 40’s. One easy statistic to remember is that 50% of 50-year-old men and up to 80% of 80-year-old men have it. It’s very common, so let’s start to normalize talk about it.

What is BPH?

Johns Hopkins Medicine defines BPH, or benign prostatic hyperplasia, as “a noncancerous enlargement of the prostate gland,” and says “it’s the most common benign tumour found in men.” Yikes! “Tumour” and even “noncancerous” in the same sentence sounds scary, so we’ll just describe it as an enlargement of the prostate. In fact, I’ve heard the “H” interpreted also as “hardening,” which is even less scary, especially at an age when we generally want things to be hard. I’m not a doctor and I’m not going to give medical advice, but I’ll talk a little about how this relates to motorcycling as I see it and what I’ve discovered so far that might help to minimize symptoms and not prevent you from riding.

BPH and motorcycling

I know riders, both men and women, who were wary about riding during those Covid years because of the lack of available bathrooms. Well, having BPH is kind of like having a chronic shortage of bathrooms and is something you have to manage while touring. If you are a guy and an adventure rider who spends a lot of time in rural areas and wilderness, there’s thankfully no shortage of available bathrooms, so to speak. It’s here that I will gladly recognize male privilege.

But I don’t really like urinating in public. Call me conservative, or old-fashioned, or a prude, but I find it a bit vulgar, so I always prefer to find a bathroom if I can. I don’t like urinating at the side of the road, or behind buildings, or really anywhere I might be seen. But here’s the first thing I’ve learned about BPH, or at least my experience of BPH as it relates to motorcycling: I don’t usually have the need to go while riding. I used to think this had something to do with vibration, either from the engine of the big thumper or the knobbies on the road—that it numbed a nerve or something—because I’d be fine for hours and hours as long as I was riding. The easy solution, then, seemed simply to keep riding.

But alas, eventually we have to stop for gas, and then I found I could barely get one tank full before I had to empty another. It got to a point where it was very predicable, so predictable that I came up with that theory about the vibration. I no longer think that, or I think there’s more to it than physiology, strictly speaking.

You know how you often need to go to the bathroom as soon as you get home from somewhere. You don’t even have to be motorcycling but running errands in the car, for example, or commuting home from work, or whatever. You get in the door and suddenly you are busting! That’s because your body—your bladder, to be specific—knows there is a bathroom near, so essentially sets off the alarm, telling your brain, “Okay, Joe, there’s a bathroom in the vicinity.” Or maybe it’s the brain telling the bladder; that would make more sense. I don’t know what kind of communication happens between the bladder and the brain or what language they’re speaking but I’m positing that there’s a psychological or at least a neurological component to how the system works.

Like a boss

This is important because it relates to the second thing I’ve learned about BPH, and my first suggestion on how you can minimize symptoms. You can train your bladder. Yes, like a dog. Reward good behaviour and you’ll get more of it; reward bad behaviour and you’ll get more of that. Running to the bathroom is rewarding bad behaviour and training your bladder to be the boss. Soon, it’s yanking your leash, so to speak, and leading you around. (Okay, I’ll drop that metaphor now.) Instead, my doctor reiterated what I’d heard online from Dr. Rena Malik, urologist and pelvic surgeon. You don’t want to get to the situation where everywhere you go you are urgently locating the bathrooms. Before you get to that state, he said, whenever you get the urge to go, don’t go. Wait, if you can, for the urge to go away, and it will always go away. (You need to keep this in mind during your darkest moments.) When it does, wait a few minutes longer, and then walk calmly to the bathroom. Good behaviour. Be the boss of your bladder.

By the same logic, Dr. Malik also suggests not doing “just in case” bathroom visits, or what is called “convenience voiding.” (No, that’s not a phrase to describe how Prime Minister Trudeau answers media questions; that’s called “convenience avoiding.”) I know this is counter-intuitive and counter to what your mother and grandmother and every preschool teacher says, and counter to what Edward Cole, the Jack Nicholson character, says above in his advice for the aging. Convenience voiding tells your bladder that it needs to empty before it’s full. Bad behaviour. No treats. So trust that you will be able to find one when the need arises and pass up that bathroom if you don’t need to go. You’re in it for the long game.

Kegels

Okay, so by now you’re probably thinking not only that I’m a sadist but also that you are going to have an accident. That’s a lot of waiting, or rather . . . holding. To help with this, you can do some Kegel exercises. Yes, there’s another muscle that needs to be exercised to avoid atrophying with age. I’d never heard of Kegel exercises until a few years ago, so if you haven’t either, you’re perfectly normal. A YouTube search will turn up lots to try, but here’s one that presents two good exercises to start with. You can easily find more.

They can be tricky to do properly at first, so if you’re really struggling with retention, you might want to invest in a professional pelvic physiotherapist for a few sessions to make sure you’re doing them right. You don’t want to waste your time exercising your butt muscles. 😳 It’s a bit like what I tell my students about oral presentations, since they often get up in front of the class and either read or recite instead of speak: if you’re in a singing contest, it doesn’t matter how well you dance. So spend a bit of time and possibly money to ensure you are strengthening the right muscles.

Water in, water out

Another piece of advice my doctor gave me was to try to moderate my fluid intake. I know, I know . . . we’re supposed to drink the equivalent of a small pond each day, according to The Kidney Foundation. Keep in mind that includes all liquids, like those in fruits, vegetables, coffee, tea, beer, hard liquor . . . not that anyone’s eating vegetables while riding. I definitely notice a difference in the frequency of my “rest stops” when I’m wearing my hydration knapsack as compared to when I carry a water bottle. I like to carry water on me so I don’t have to stop to drink, but the trick is to sip. Same for distance running. If you run long distances in the heat and use a hydration belt, you probably sip a bit every few kilometres rather than chug infrequently. Give your body only what it can process and you will cut down on your bathroom breaks.

Yes, it’s water in, water out, like calories. You have to regulate your water intake according to conditions, so if it’s hot and dry, you will be losing a lot of water in sweat and evaporation as air rushes through your mesh jacket, and if it’s cool or humid, less so. The last time I changed my roof, I worked beside the roofer. I was stripping old shingles; he was laying new ones. At one point, he needed the washroom but it was occupied. I was apologetic and suggested he could use our half bathroom upstairs but he said, “It’s okay, I’ll just sweat it out.” He had 30 years of experience managing his fluids.

Avoid Irritants

You know that line in the famous poem Desiderata about what to avoid?

“Avoid loud and aggressive persons; they are vexatious to the spirit.”

Well there are other irritants that should be avoided. Coffee, tea, alcohol. Yeah, this is one where the cure is worse than the disease, and I’ll be damned before I give up any of those. But again, perhaps moderation is the key, or at least knowingly drink these things with the price in mind. They are vexatious to your bladder and it won’t be long before nature is calling. It reminds me of that old joke, “What’s the difference between a beer and a piss?”

“About 15 minutes.”

Final Thoughts

I recognize that I haven’t spoken at all about the other way symptoms of BPH manifest, which is restriction of flow. I’ve only discussed the opposite problem: frequency and urgency. That’s because I think the other issue is a little more complicated and one which you should discuss with your doctor. There is medication and surgery as options, and I will just add that a friend of mine had the surgery and is a big advocate of it now. It’s really helped him out, so don’t suffer unnecessarily. Of course, if you live in Quebec, you have to find a doctor first, but that’s another issue particular to La Belle Province.

I’ve just scratched the surface on this topic. There’s a ton of information available online if you are interested in exploring it further. The bottom line on this, however, as far I’m concerned, is that BPH is a completely normal aspect of aging for many men and nothing to be embarrassed about. With a little attention to it in the form of training, fluid management, and avoiding irritants, it will not stop you from enjoying your bike well into the golden years. Just think of Ted Simon riding around the world at the age of 72 and still riding at 90! (I am making no claims about Ted Simon’s health, only his accomplishments.)

Ted Simon rode around the world in 1972 and again at the age of 72. His book, Jupiter’s Travels, documenting the first trip, was the inspiration for Ewan and Charlie’s Long Way Round and, arguably, the entire adventure motorcycling industry.

And while we’re on this topic, don’t forget to get tested regularly. We aren’t talking about cancer here, but it’s never a bad time to remind ourselves and others to get checked, since early detection, as with all cancers, is crucial. I’ll be doing the Ride for Dad September 14th. Follow the link to join in your area or to help fund research.
The Major Service

Getting ready for the new season this year meant a little more than adding a few farkles.

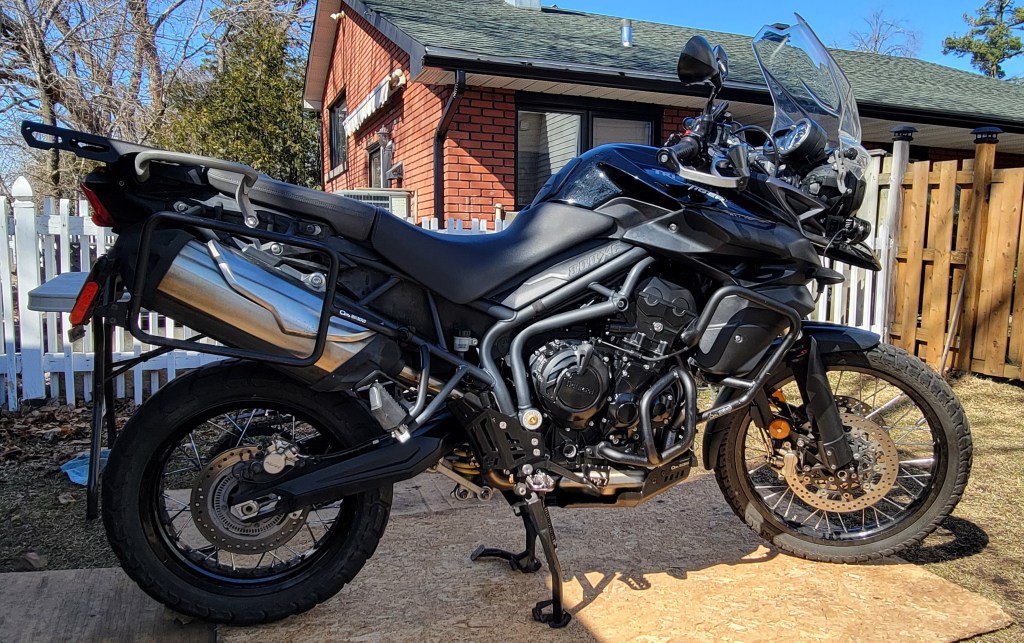
When I bought my 2013 Triumph Tiger 800XC in May 2022, it had only 14,500 kilometres on it, despite being nine years old. In the following two years, I’ve put another 34,000 on it. I’ve done basic service during that time, like changing the oil, coolant, brake fluid, and cleaning the air filter. I’ve also changed the plugs. But it was time for some major service.

Last fall I did the dreaded valves, swingarm and rear suspension bearings, and cleaned the starter motor. This spring I’ve fixed a problem with the shifting mechanism, cleaned and lubed the steering head bearings, overhauled the front forks, and made a few mods to get it ready for the BDRs. It’s been a long process, but it’s finally ready for the new season.

Valves

It’s the job everyone loves to avoid, and I did too. In fact, when I bought the bike, the dealer said they no longer recommend checking the valves at the manufacturer’s recommended 20,000K because, more often than not, when they get in there at that mileage, the valves are fine. I guess if you’re paying the dealer $1000+ to check them, it’s bittersweet when they don’t find anything out of spec. I was happy to wait. My buddy who rides a Triumph Scramber 1200 XE has never checked his and he’s got I think now over 78,000K on it. “If they’re slappy, they’re happy,” he said, although I always thought you don’t want to hear the valves. At any rate, with now over 48,000 kilometres on the Tiger, it was time to get in there and see how happy they are.

All the intakes were fine, but all the exhausts were tight, some significantly. Here are my calculations. Sorry about the grease.

Highlighted is the amount out of spec. I’m using metric.

As you can see, all the intakes were spot on at 0.15 (specs are 0.10 – 0.20). The exhaust specs are 0.325 – 0.375, so ideally you want them at 0.35. Some of mine were 0.20, so .15mm out of spec. I’m glad I didn’t wait any longer or I might have started causing damage to the valve seat. Live and learn: sometimes there’s reason behind the manufacturer’s recommendations.

An egg carton works well for keeping all the buckets and shims organized.

You want the same bucket to go back on the original valve, so keep any happy dogs with long tails out of your workspace. Nobody likes removing the cams, but just make sure you’ve got it locked at top dead centre and turn the engine over several times by hand once you get it back together to make sure you didn’t slip a tooth on the timing gear. I almost did because I didn’t put enough tension on the timing chain while torquing down the holder. (You have to remove the tensioner.) So you have to find a suitable wedge of some kind to manually tension the chain while tightening. The first two (2!) times I torqued down the holder the chain climbed a tooth.

Timing marks should line up parallel to the crankcase on the inside.

Thanks to MuddySump for his excellent videos. I was following my Haynes manual, but it’s always good to watch someone else do it first, especially when that person has the same bike as you and is a licensed Triumph mechanic! Once I got everything buttoned back up, I checked the valves again and they are now all spot on.

It’s always a little unnerving starting the bike back up again afterward, but it fired right up. I’m hoping the bike will run a little easier now with less tendency to stall.

Starter Motor

A known issue with the Tiger 800, at least the first gens, is a weak starter motor. There is a tendency when the engine is hot for the starter to fail. I’ve had it happen to me a few times. You stall the bike and the starter is reluctant. I’ve managed to fix it by keying off and on, but it was getting worse. Many guys swap out the starter with Rick’s and I considered it, but since I was already down to the throttle bodies, I figured I’d lift them to access the starter and give it a good clean.

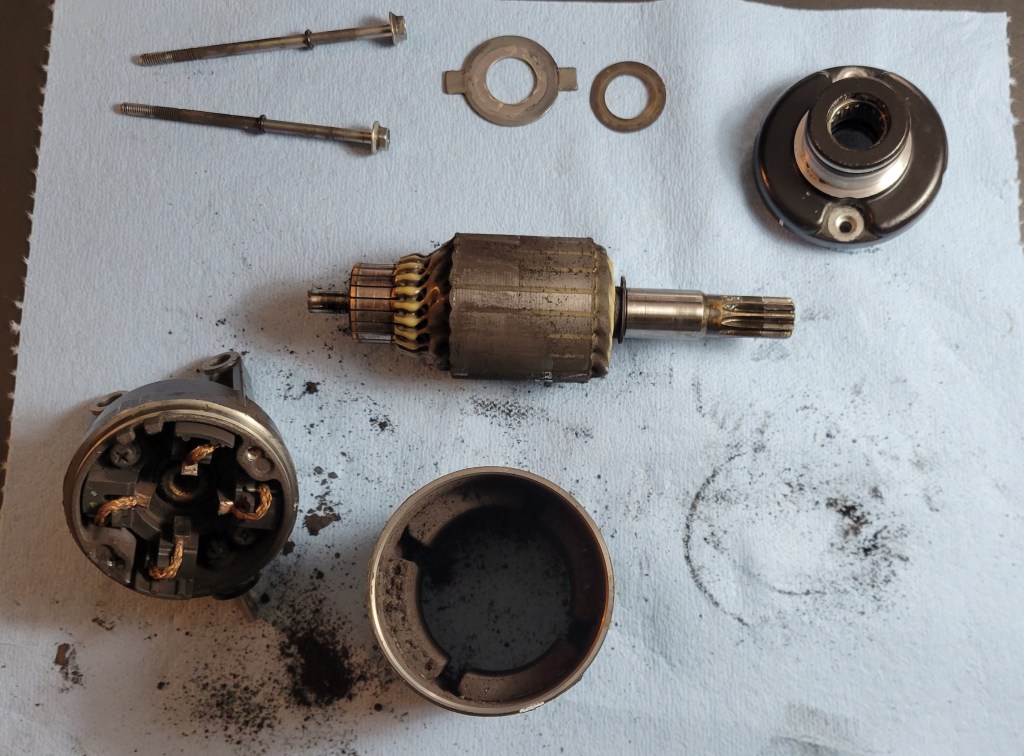
I took it apart and there was a lot of carbon dust in there, and some discolouration on the armature. Some 1000 grit emery paper cleaned everything up, including the shoes. The bearing was fine, and I’m hoping I’ve breathed another few years at least of life back into the OEM starter. We’ll see. [Update: on the test ride, the starter still acted up once the engine was hot, so I guess I’m buying a new one. Oh well, it was worth a try.]

Swingarm and Suspension Linkage

The swingarm bearings take a lot of abuse down there right in front of the rear wheel. Even if you aren’t doing water crossings, they’re going to get water and grit and grime thrown up at them. And when there’s crud or corrosion, you won’t feel it as you will with steering head bearings. I remember when I finally did this job on the 650GS, one of the bearings was in very bad shape and I had a bugger of a time getting the pivot bolt out due to the corrosion. This is one you want to do on the recommended interval, and it’s one of the easier ones so why not? You aren’t opening up the engine, just taking the rear wheel off, unclipping all the wiring from the swingarm, then removing the pivot bolt.

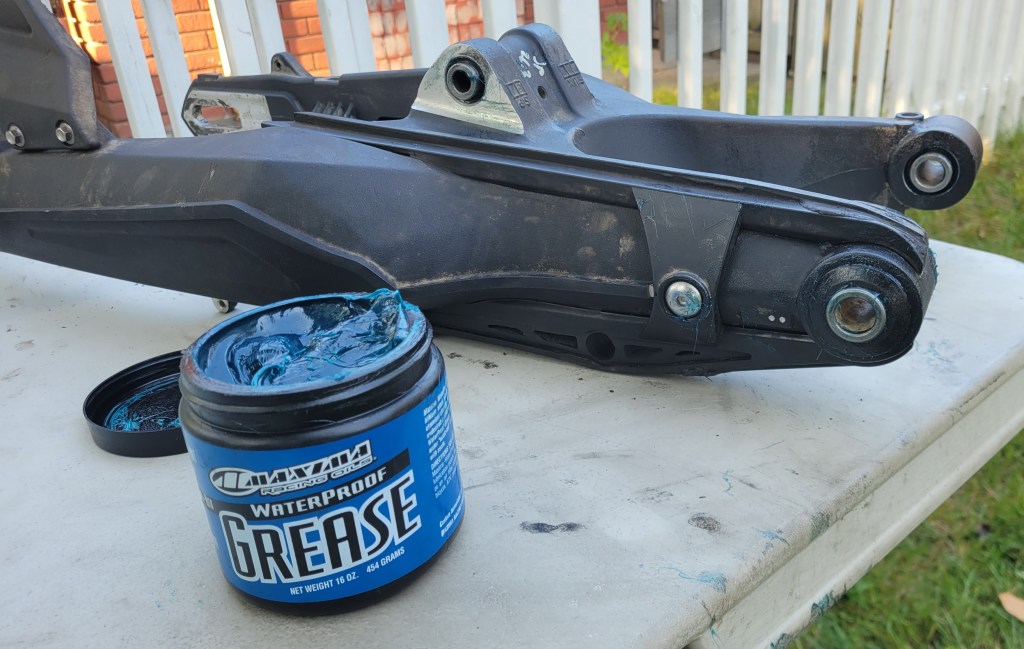
Thankfully, it wasn’t that bad this time, but I still left it a little too long. There was some discolouration on the bushings, but the bearings looked fine, albeit missing some grease. I cleaned everything up as best I could using 1000 grit emery paper and repacked the bearings with waterproof grease.

It’s always a good feeling when you restore these crucial components.

Shifting Mechanism

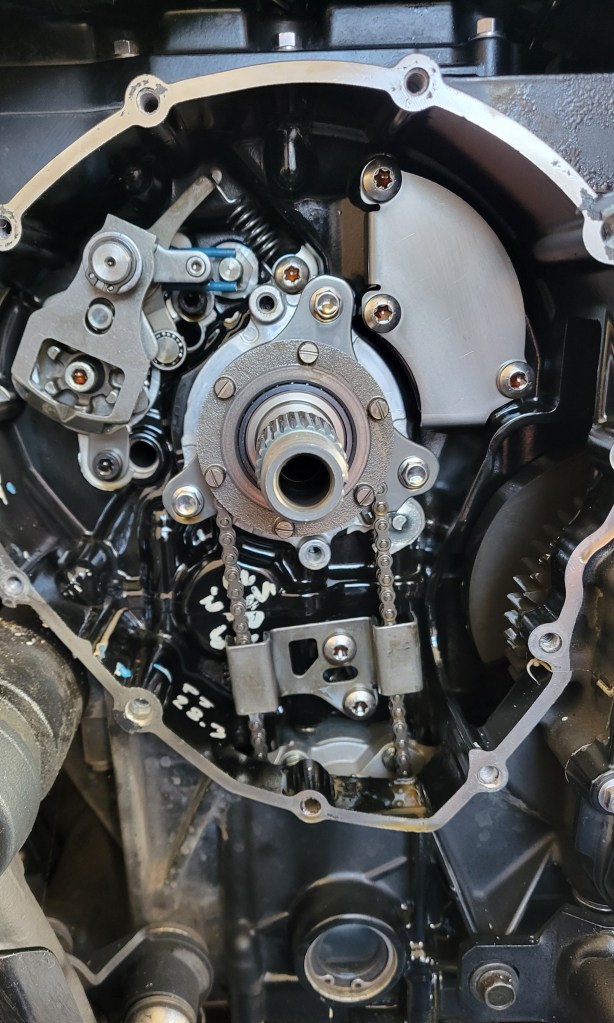
Problematic selector arm is top left. Centralizing spring is blue, indicating it’s been upgraded.

On the last ride of the season last year, the Tiger started being reluctant to downshift. I noticed it as I pulled away from the house and came to the first stop sign. I was heading to Vermont and would have turned around, except I was leading a club ride and there were people counting on me, so I continued.

My first thought was that the clutch cable needed adjustment. It’s normal for those to stretch over time and need to be tightened. But adjustment didn’t help, and as the day continued, the problem got worse. I somehow managed to finish the day, but coming up through Smuggler’s Notch wasn’t much fun and I was happy to get home. That was the final ride of the season. I decided I’d use the remaining nice weather to do maintenance but before I could get to this job the snow arrived, so it had to wait.

I store my bike in an unheated shed, so working on it over the winter wasn’t an option. As you can imagine, my curiosity nagged at me all winter. Was it the clutch, the shifting mechanism, the gearbox? Some research online revealed that there are some known issues with the shifting mechanism on this bike. There’s a pin on the shifter spindle that holds the centralizing spring and it’s known to break. When that happens, the shift lever doesn’t return to centre, ready for the next downshift, but flops down. You can still shift the bike, but you have to lift the lever first with your foot.

That didn’t appear to be my problem because, while there was a little play in the lever, it wasn’t flopping down. But I wondered if it was starting to break. Also, there was a recall to upgrade the centralizing spring, which is known to fail, and I didn’t know if my bike had the old or new spring. I also wondered if the problem was as simple as a worn clutch.

At the first warm day, I finally got in there to see what is happening. To get to the shifting mechanism, you need to remove the clutch. That was fairly straightforward, and the plates looked good. In fact, the stack measures 42.25mm and the tolerances are 41.54 to 42.54, so I’ve only burned .29mm of my clutch over 48,000 kilometres. I’m happy about that.

I had some trouble removing the bushing and bearing but with a friend’s help, we got them and the basket out. What we noticed is that on a downshift, the shifter arm slips off the pins of the detent wheel. A close inspection of the arm revealed wear on the respective pawl.

Wear in the corner of the pawl where it engages with the detent wheel pins. This arm is under tension from a spring (behind, out of view) and it’s also possible that the spring was fatigued.

There has been a redesign on this part as well as the detent wheel that engages with it. I decided to change the whole spindle because Triumph has also redesigned the problematic pin for the centralizing spring. Here are comparisons of the crucial parts, old (on top) versus new.

Dear reader, do you care? If you are a mechanical engineer or just a mechanical nerd like me, maybe you do. If you have a 1st gen Tiger 800, you should. These are the wrinkles that were ironed out sometime during production. I’m glad to have the stronger parts in my bike, and it’s shifting great again. Here in Canada, the spindle unit is under $200 and the detent wheel and selector arm come as a kit for under $100, so the hit wasn’t too bad.

Forks Overhaul

I don’t think the fork oil or seals have ever been changed on this bike. I’d never done inverted forks before. They are a little more difficult and require a seal driver. (You can’t use plumbing ABS pipe to drive the seals because the outer tube is in the way.) Figuring this would not be my last bike, I went with the adjustable kind that will work on a variety of bikes but are a little more trouble to use.

Everything came apart easily enough, once I bought a set of thin spanners. (Every job requires at least one trip to Canadian Tire.) There isn’t much room between the spacer tube and the top cap, and you have to get a wrench in there to hold the lock nut while you remove the cap. That was the only snag on the disassembly.

Laying everything out in the order it came off.

The bushings were discoloured with wear, but I didn’t want to wait for new parts so cleaned them up as best I could with fine grit emery paper. For the new seals, I decided to go with SKF because I’d read good things about them. Thanks to Triple Clamp in Toronto for stocking these. A neat trick I learnt from Tusk is, when using those tricky adjustable fork seal drivers, use safety wire to avoid driving your fingers instead of the seal. Nice!

The only weirdness of this job was that the amount of oil listed in my manual was way off. It said 619mL for the XC and 107mm from the top of the tube, but I had to pour out about 100mL to get the correct height. Yes, I drained all the old oil, and yes, I pumped the damper rod several times to dispel all the air when adding the new. I asked my dealer about this and he said they only use the height measurement. When I tipped the old oil into a measuring beaker, it was about 1L for the two forks, so with loss, 519mL sounds about right. Anyway, fresh oil, seals, and socks will help the front end this summer.

Steering Head Bearings

This one too had never been done. You can see in the image above that there isn’t much of the factory grease left in there. For this one, I didn’t use the waterproof general lithium grease but bearing grease. The only difficult aspect of this job was avoiding paying for the Triumph tool for accessing the head-stock. Instead, I used a C-spanner and Ryan F9’s tip on using a luggage scale to get the correct torque. The initial preload once you get everything back together is 40Nm, then you back it off and tighten the bearings to 10Nm, which is a little over 7ft/lbs. My C-spanner is about a foot long with a hole at the end of the handle, so all I had to do is convert Nm to ft/lbs.

After having the forks and triple-T out, I needed to align everything again. Thankfully, Delboy’s Garage just put out a video on how to do that.

Fuel Tank Breather Tube Fix

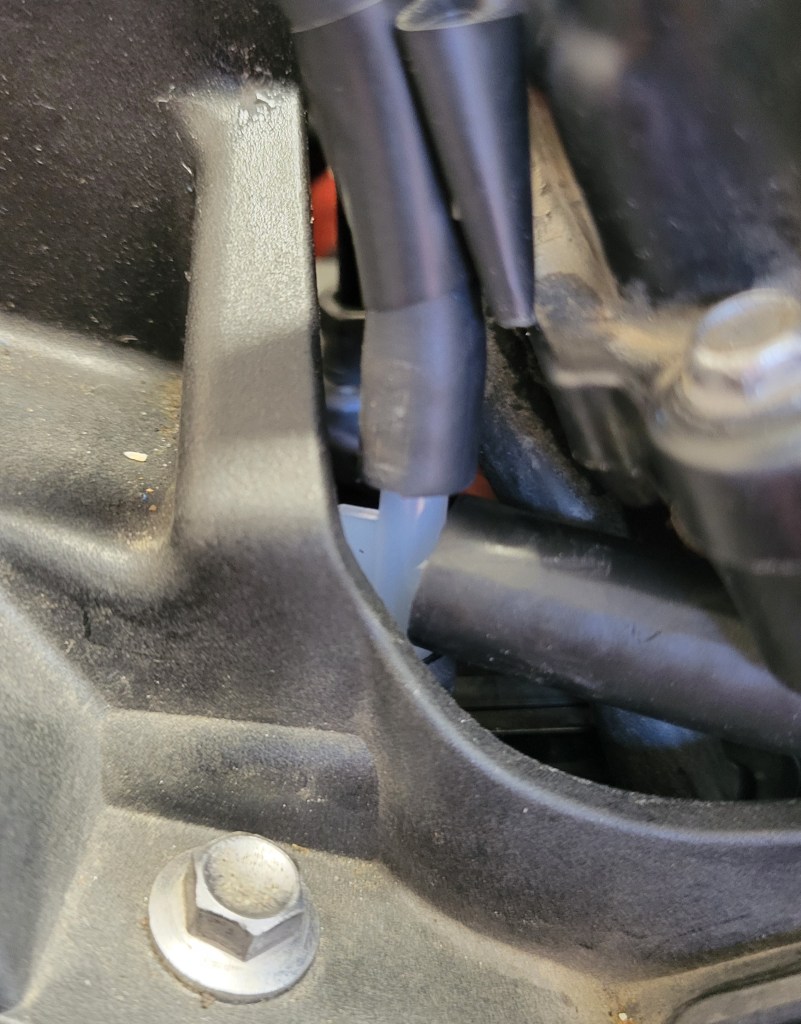
In my last post, I talked about how I ended up with about 3 litres of water in my fuel tank after a failed water crossing. In the post, I presented the theory that the water was sucked up from the tank breather hose when the tank had negative pressure. I considered rerouting the breather tube to keep it out of potential water, but my friend Mike came up with a better solution. While servicing his Africa Twin, he noticed that the tank breather on that bike has a Y-fitting with a length of hose staying high on the bike and the other draining down.

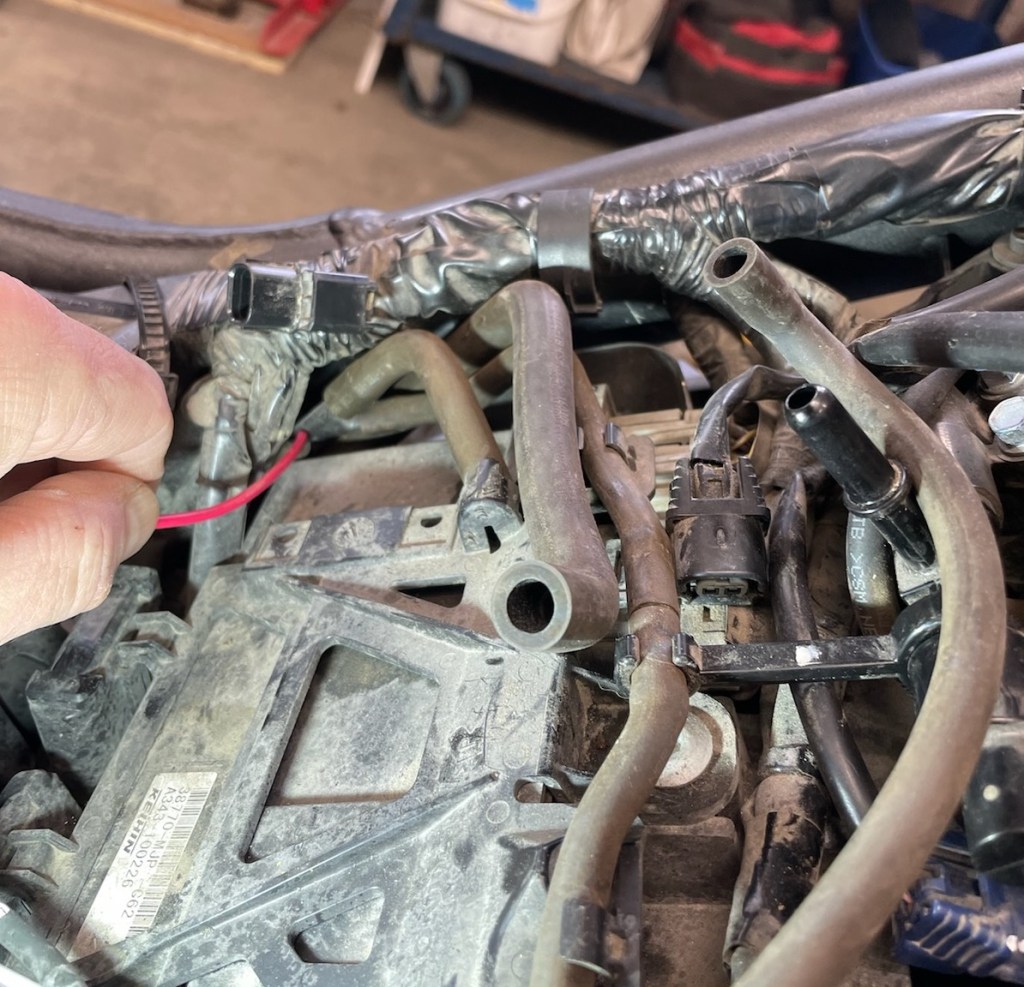
My buddy Mike’s Africa Twin. He’s pointing to the Y-joint with the piece of red wire. The short tube fits into that little cup, presumably to keep it clean. That’s the battery area.

So I picked up a set of assorted vacuum T-connectors and a length of rubber tubing at Canadian Tire and did the same on the Tiger. I cut the tank breather tube and inserted the T-connector, then added the extra tubing. I haven’t decided yet where it will terminate but for now it comes up the siderail and loops across under the fuel tank and is tucked in the other siderail. I think I will shorten it and add a loose end cap like on the AT.

If you have a Tiger and want to do this mod, just be sure to cut the right hose. There are two leading out of the tank. One is the drain tube and one is the breather. The drain tube has a check valve on it so doesn’t allow water to come up. The breather tube is the larger of the two where they attach to the tank.

A Few Mods for Dirt

Fender Extender

I saw MotoBob add a front fender extender to his Triumph Tiger and thought it would be a good modification, given the dirt I plan to ride this summer. It keeps a lot of mud off the front header pipes and radiator, not to mention rain water off your pants. He used the Pyramid Plastics version, but my dealer, Montreal Moto, actually had a Triumph one in stock so I snapped it up.

Some extenders come with sticky pads, but I was advised to use silicone. I decided to make things easy for myself and remove the fender. Sounds reasonable, right? I could have done this mod just by removing the front wheel, but I decided to give myself some extra room and removed the fender. It was three bolts on each fork, so how hard can it be, right?

Little did I know that someone had used red threadlocker on the bolts, and one snapped off in the fork. Perhaps someone at Triumph can explain to me how a front fender is a permanent install?

So I lost a day there. I drilled it out and was retapping it when I got distracted and broke the tap inside the old bolt. Ugh! What a mess, going from bad to worse. I bought some carboy drill bits (after some research on what the hardest, sharpest drill type is), but even a carboy bit wouldn’t touch the tap. Fortunately, my friend Mike, whom I’ve already mentioned a few times, came to my rescue. (He was the guy who refinished the bodywork of my old GS.) He has a proper workbench on a cement floor and drove the tap out with a punch, and then we could re-tap. The thread was a little loose from the abuse it had taken, but he showed me a trick to strengthen it with some 5 minute epoxy. Apply the epoxy like threadlocker but coat the bolt in WD40 so it doesn’t glue inside. Thread it in and after a few minutes remove the bolt and let the epoxy harden to the old threads. Neat! When I reinstalled the fender, I used blue threadlocker.

Lowering Footpegs

My Fastway Adventure footpegs give you the option to mount them standard or lowered. I mounted them standard so I wouldn’t have to adjust my foot levers, but with the dirt coming up, I thought I’d swap to the lowered position. Fortunately, Fastway provide a tool to use to press the pin out. Then you simply press it back in from the other side—from the top of the peg.

Unlike the fender extender and most other jobs, this one went smoothly and I had the pegs back in again in no time. It was easy to adjust the height of my brake lever; just undo the lock nut and screw the adjuster into the master cylinder. Because I was screwing in, I didn’t even need to bleed the brake. And when I put the shift lever back on, I rotated it slightly from its previous position. This set-up lowers my pegs 8-10mm, which may not sound like much, but I suspect will be significant for knee comfort on long days and lowering centre of gravity when off-roading. The downside is that the pegs are a little closer to the road, but I don’t think I’ll be dragging them anytime soon. Or so we’ll see.

Before I reattached the brake lever.

Sidestand Extender

Another mod for the dirt. I’ve always gotten by without one of these, although it’s sometimes a pain to find a stone or stick to use instead when you are forced to stop in mud or soft grass. I went as far as to install a Touratech one on the GS once, but it lasted all of one ride. I got hung up on some rocks and when I got home I noticed I had an extender no more . . .

Needless to say, I was skeptical about buying another from Touratech, but different bike, different design. Besides, I got this one half price. One of the benefits of riding a discontinued bike is that if you keep your eye out you can sometimes snag accessories at discontinued prices. We’ll see how long this one lasts.

Now I remember what I don’t like about sidestand extenders: they interfere with the centre stand. Oh well, I’ll just have to put the sidestand down first before using the centre stand. No big deal, and maybe it will help stop my centre stand from rattling so much. Or maybe now there will be two stands rattling together. Anyway, I’m not wedded to this accessory and we’ll see how long it lasts.

Oil Filter Guard

The Outback Motortek skidplate for the Tiger 800 does not protect the oil filter. Some would say that’s a design flaw, but I suspect OM did it that way so you can change the oil without removing the guard. (They put a cutout in the guard for the sump plug.) But it does leave the oil filter a little vulnerable at the front of your engine. Triumph make a push on metal guard. It’s a simple design with indents that engage with the filter for an interference fit. Easy to remove when it’s time to change the filter, which I will do after running the bike a bit this spring. The engine’s been open for some time as I worked on everything, but with oil being so damn expensive (it costs me now over $80 for an oil change), I will just change the filter. Anything that might have strayed in will be captured in the filter.

It’s been a long haul but I think I’m ready now for another season and another 50,000K. I took the Tiger for a test ride yesterday and it’s shifting smooth again and the clutch feels great. The engine is running well, and while I still have to change the starter, it’s not crucial. I’m happy to be back on the road.

Here in Montreal, it’s Easter Monday and I think I can safely say we’ve had our last snowfall. Crocuses are pushing up and there are buds on the trees. Geese are returning and everywhere the signs of spring are upon us, including the sound of motorcycles back on the roads. For Canadian riders, it’s the best time of year. I wish everyone, wherever you are, a safe and enjoyable 2024 season.

Please leave below any comments you have and consider following. What mods and maintenance did you do in the off season? What are your plans for the coming season? I love hearing from readers, so drop me a line.