What’s the most important contact area in biking? Some say it’s the two patches of rubber, one on the front tire, one on the back, that touch the road. Some say it’s the four contact areas of control—two hands on the handle-grips, two feet on the pegs. I say the most important contact area is your butt on the saddle. I come to this conclusion after a season of riding with an OEM BMW seat. The Bavarian Motor Works, as the name suggests, are renown for their engines, not so much for their upholstery. The guys in my club know that after around 200 kilometres I start to squirm. By 300 I can’t take it any longer and stand up, even if we’re at highway speed. After my 800 km day last year, I had a new understanding of the term “saddle sores.”
There’s nothing worse than ruining a day’s ride by being uncomfortable on your bike. For that reason, on my Wish List last Christmas was a new seat. My old seat was not only uncomfortable but the vinyl had cracked with age. It was due to be changed.  The only problem is that both BMW’s and Touratech’s comfort seats are about $700 CAN. My butt was telling me to spend with abandon, but my mind (and my wife) was reminding me of our budget. Then I heard about Seat Concepts, a company that ships you the foam and cover and you re-upholster the seat pan yourself at a fraction of the cost. For my bike, it was about $250, or close to 1/3 the price of the other comfort seat options.
Seat Concepts is an American company, so I ordered through MX1Canada in BC and let them handle all the cross-border issues. The standard foam is for people 160 lbs. and up, and since I’m 145 soaking wet, I custom ordered the foam to my weight. There are four options for the cover: gripper top/carbon sides, all carbon, embossed top/vinyl sides, and all vinyl. There’s also a swede option but that’s not practical in geographical areas that rain, which is pretty much everywhere except the desert. I was interested in the gripper top, but it’s not recommended for people who sometimes ride in jeans, including me, so I opted for the all carbon option, which is their second-most popular covering. I also decided to choose the Dakar height since I was feeling a little cramped on the bike. It all arrived in the mail this past spring and all I needed was a warm day to do the work, since they recommend placing the cover in warm sunlight to heat it up. That day finally came last Sunday, so I got to work. Here are the tools I used.


There are some excellent video tutorials offered by the folks at Seat Concepts, but here is how my install went.
I started by removing the staples in the old seat. I used a flat-head screwdriver and dug them out. 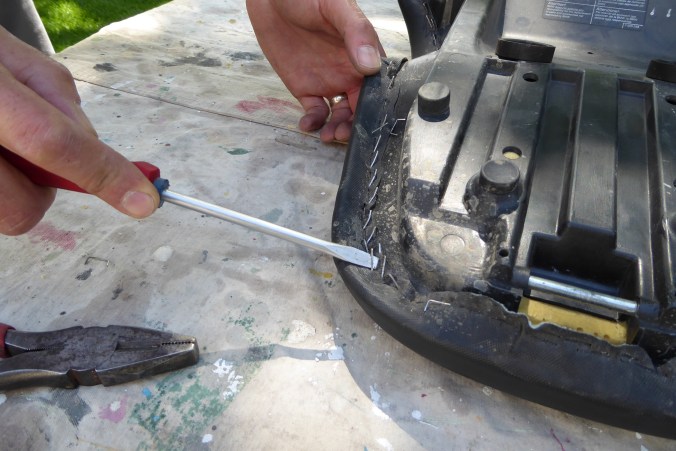
Don’t worry if only one side of the staple comes out . . .
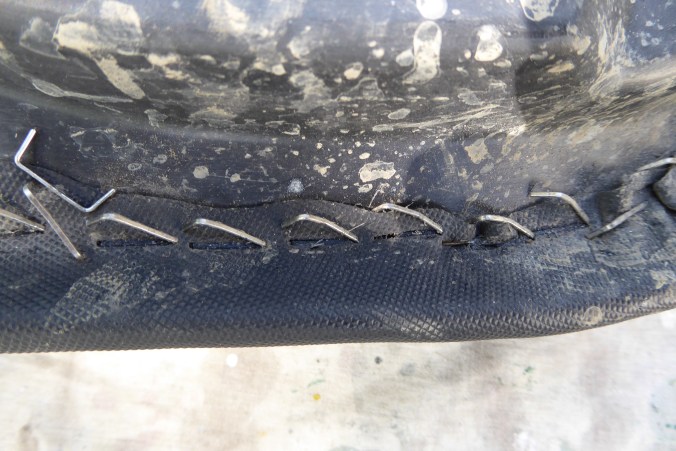
. . . because you are going to grab the staple and pull it out with blunt-nosed pliers.

Once all the staples are removed, you just peel back the old cover and separate the foam from the seat pan. On mine, it came off easily. Apparently on others, you have to coerce it a bit.

You will have a bunch of holes in your seat pan from the old staples. They have to be sanded down with a medium sandpaper or they might puncture your new seat cover.

Now you’e ready to glue your new foam to the pan. I used 3M’s Super 77 aerosol spray and it worked great—so great, I asked my wife to assist by separating the sides at the front while I positioned the back. The glue is tacky at this point, so you want to get one section straight and right before another touches. A second set of hands helps at this crucial stage. Note that I laid the foam upside-down on my workspace and placed the pan onto it; it was easier that way.
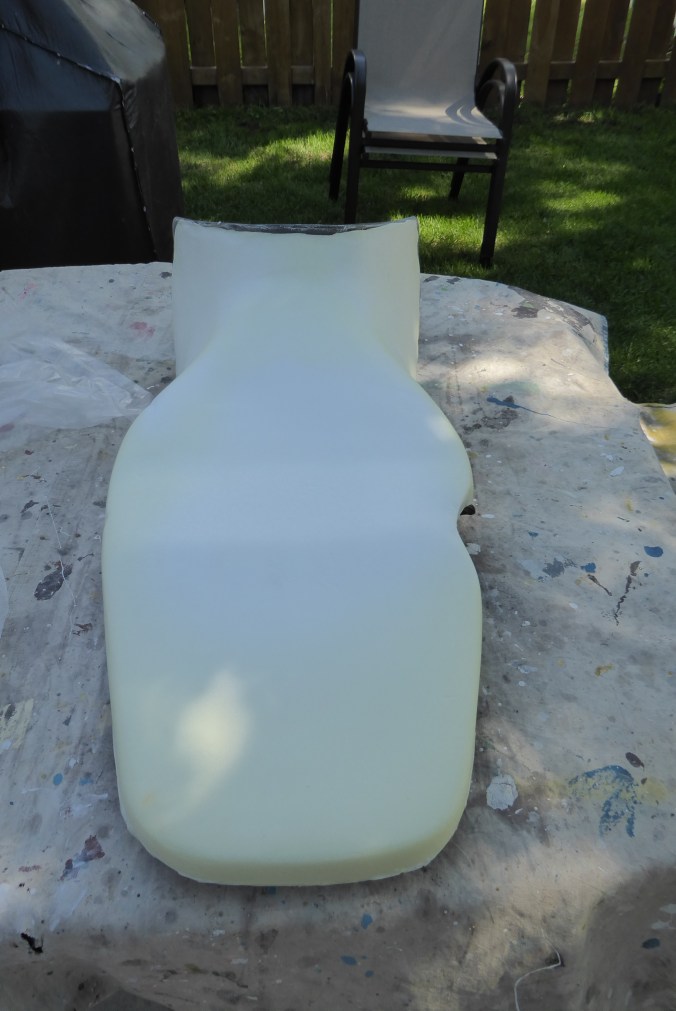
This is what the seat looks like before covering.
Meanwhile, like I said, your cover has been basking in the hot sun and is pliable. Heating it first also helps because when it cools it will shrink and tighten up. Seat Concepts provides some thin plastic to waterproof the foam. It’s recommended you use it under the cover. So I began by wrapping the seat and taping the plastic to the underside of the pan. (The tape is temporary and will be removed later after all the staples are in.) There were some small wrinkles in the plastic but it is impossible to not have any and I figured the plastic is so thin I’d never feel them under the cover.
Then I started the part that gives most people some stress. It actually was not hard at all. I started by putting two stables at the back and one or two in each corner at the front. Make sure the cover is centred by examining the seams closely. Then I just started wrapping and stapling the cover from the middle outward toward the front and back. I pulled the cover over the lip and stretched it just a little more and put in a staple. I worked both sides at the same time, ensuring the cover stayed centred and taut. 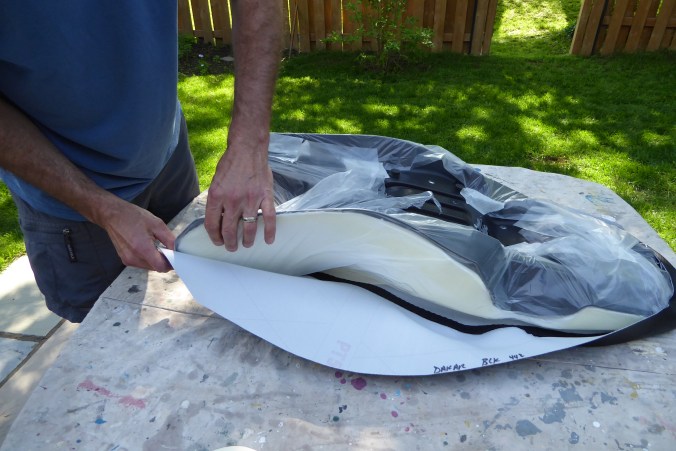
I borrowed an electric stapler from a friend, but as it turned out, my hand one was just as effective and I used it for tight spots in combination with the power stapler. I used 1/4 in. T50 staples. As with any stapling of this kind, it’s important to stabilize both the item being stapled and the stapler from recoil or the staples will not go in all the way. Any that did not, I tapped in fully later with a hammer. Yeah, a second set of hands is helpful at this stage too, but it doesn’t take long. 
Then I just used an Olfa knife to trim the excess cover and plastic. The finished product looks great!
Finally, I reinstalled the seat. It needed some coaxing because the Dakar seat is a little wider at the back than the standard, but well worth it if you can afford the extra height. I took measurements before and after and the Dakar is about 1.5 inches higher than the standard. It also has a flatter front shape with less sloping into the tank. Here are the two seats side-by-side, before and after pictures for comparison.


It’s surprising what that 1 1/2 inches does. Everything feels different. I feel more upright on the bike, seated on it rather than sliding into it. Controls feel different too. And while I can still flat-foot, I feel that extra height at each stop. Most importantly, my knees are now bent at 90 degrees, which is the best ergonomically, according to technician at my work who helped me set up my new office chair.
I haven’t done any long rides yet with the new seat, but I’ll follow up here with a comment once I do. Next weekend I’m going to a rally in NY State where I’ll be going on some day-long rides, but my early indication is that the seat is very comfortable. I’m also happy with the money I saved by doing it myself.

This is exactly what I want to do with mine. Never liked he OEM seat.
LikeLike
Hey! Thanks for this. What is the bike seat height now?
LikeLike
It’s 31 1/2″. So if I understand correctly, the Dakar seat adds about 1-1 1/2 on the stock.
LikeLiked by 1 person
Thanks for the write up!
LikeLike
Thanks for the info, I need to do this with mine as my back is starting to suffer, have you got a link to the seat conspets page please
LikeLike