A long-lasting aggressive knobby that’s surprisingly quiet and stable on the road.
The Triumph Tiger is notorious for having a steep rake and an unstable front end in the dirt. Ask me how I know.
I dropped the fork tubes flush with the triple tree to rake out the Tiger but it was still causing me some grief in loose terrain.
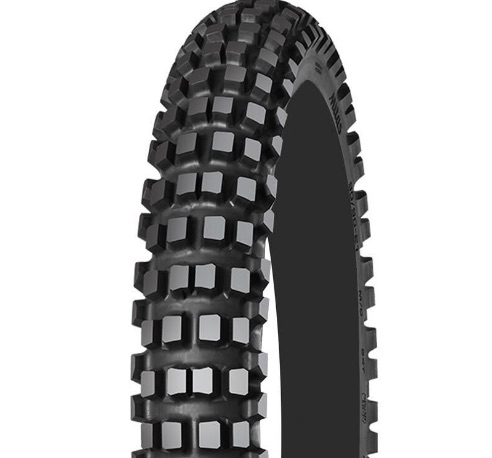
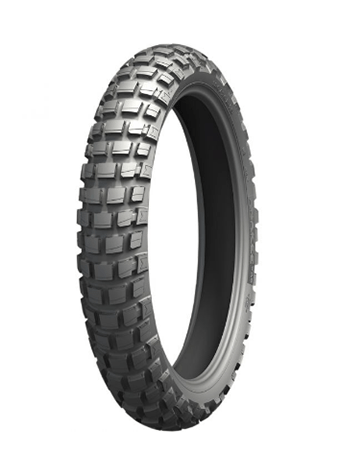
All these tucks happened with the 50/50 Michelin Anakee Wild on the front. It’s a good tire, but not aggressive enough for the Tiger when it ventures into sand or mud. Before heading out on the TQT this past summer, I decided that, enough was enough, I’d put the most aggressive tire I could find on the front. That ended up being the Mitas Enduro Trail-XT+, a 20/80 tire that replaces the discontinued the E-09 Enduro. Because I’m cheap, I paired the Enduro Trail-XT+ on the front with a Shinko 804 on the rear and it was a good combination.
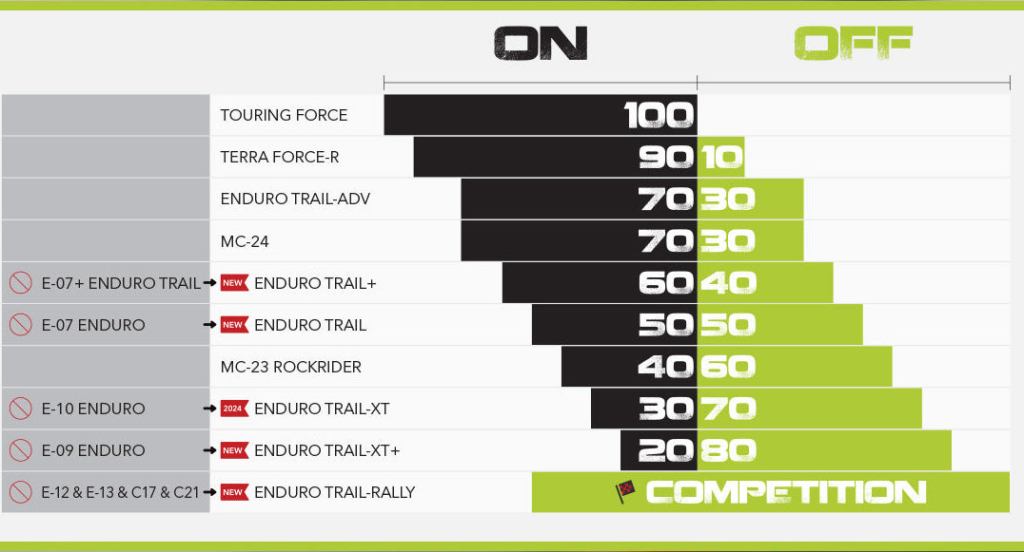
Many people find the Mitas naming confusing. Here’s a chart to study. A quiz will follow at the end of this post.
Street Performance
I’ve never had such an aggressive tire on either the Tiger or my old 650GS so it was a new experience for me. As soon as I headed out, I noticed the infamous headshake in the rain grooves on the highway, but I loosened my grip on the bars and said a Hail Mary in my helmet and all was well. I got used to this unnerving feeling and before long was happily blasting at 130+ km/hr without requiring a diaper, er, “incontinence brief.” Maybe the edges of the knobs rounded off a bit, or maybe I just got used to it, but this tire is fine at highway speed. It’s also surprisingly quiet too, with no high-speed whine.
The Trail-XT+ was also reliable in hard cornering on the street. I had it on when I did some “spirited” riding with the boys during a pavement ride at Rally Connex’s Fall Colours Ride. It’s not easy keeping up with KTM Fred and VRRA-man Marc, but I managed, and that was after the tire already had maybe 10,000K on it. Unlike the Scorpion Rally that stepped out on Kyle Bradshaw on his twisties challenge, the Trail-XT+ held without a twitch or slip.
Off-Road Performance
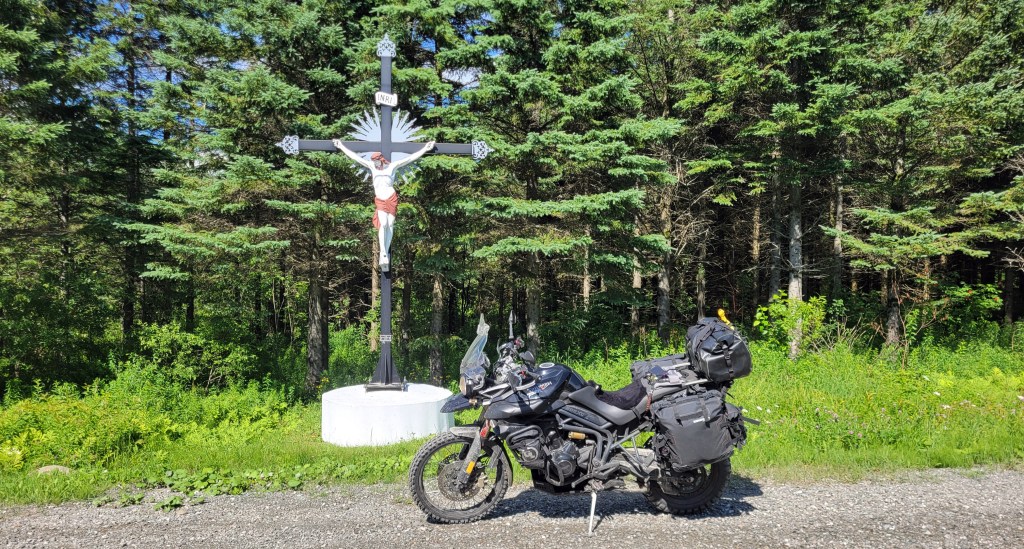
At a 20/80 rating, obviously this tire shines in the dirt. It took me a while to gain confidence in the front again but I can confidently say that the Enduro Trail-XT+ finally stabilized the front end of the Tiger. I can’t speak to how consistently the rear slides out because I wasn’t running it on the rear, but the Trail-XT+ kept the front planted. The TQT doesn’t have deep sand, but I rode through a variety of loose gravel, dirt, wet dirt, mud—even some shallow sand—and the front end never once twitched. I felt I could finally enjoy this bike off road without being nervous about the front end.
Okay, this is not gnarly terrain. The TQT is big-bike friendly so there isn’t any of that. But you can tell by the speed I’m carrying into these corners and especially in the wet dirt (not quite mud, but slippery nonetheless) that I’m confident in the front end now.
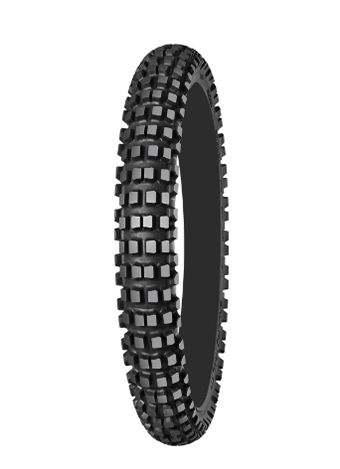
What’s the difference? Comparing the Wild and the XT+, it’s clear that the Mitas has smaller lugs that bite into the dirt. More significantly, its sidewall lugs protrude more and hold the front in place when the bike is leaned over.
Enduro Trail-XT+Anakee Wild
I know how to weight the outside peg when cornering off road, and I know to keep my weight over the contact patch, so I don’t think those tucks are simply a result of improper body positioning. Most of those them were a result of hitting a slight rut when riding straight; the Anakee Wilds just cannot climb out of even a sandy rut and start to plough sideways and away we go! I think the side-lugs of the Trail-XT+ make all the difference.
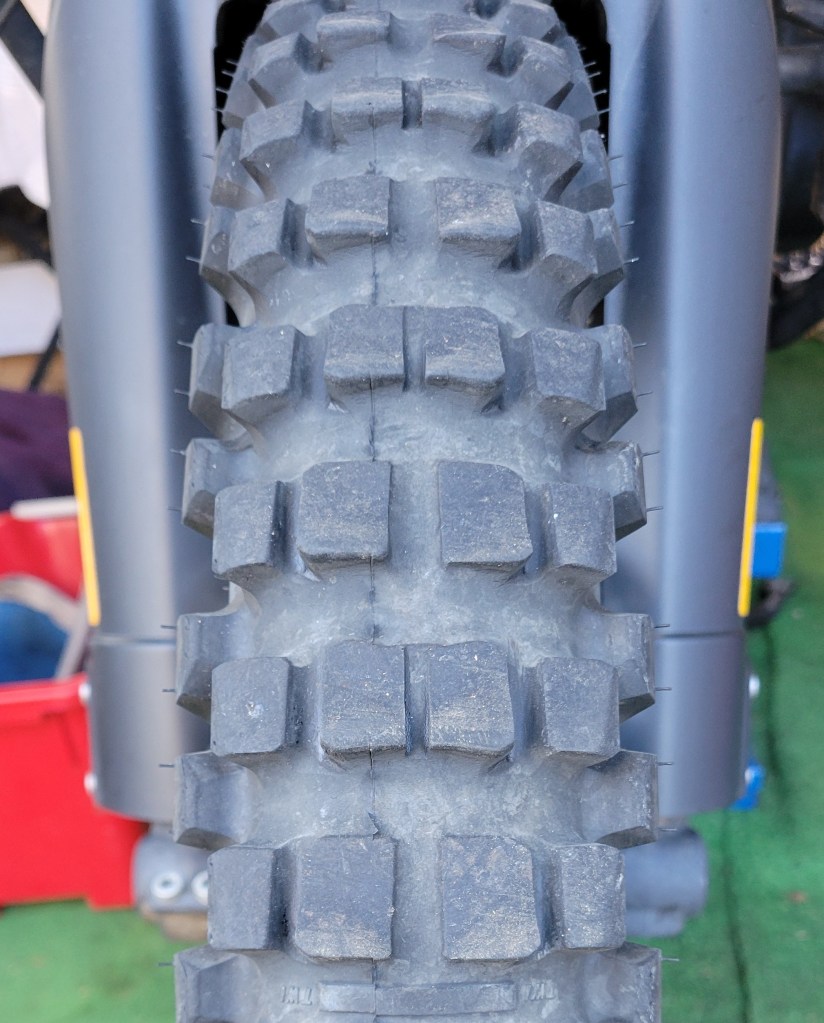
Longevity
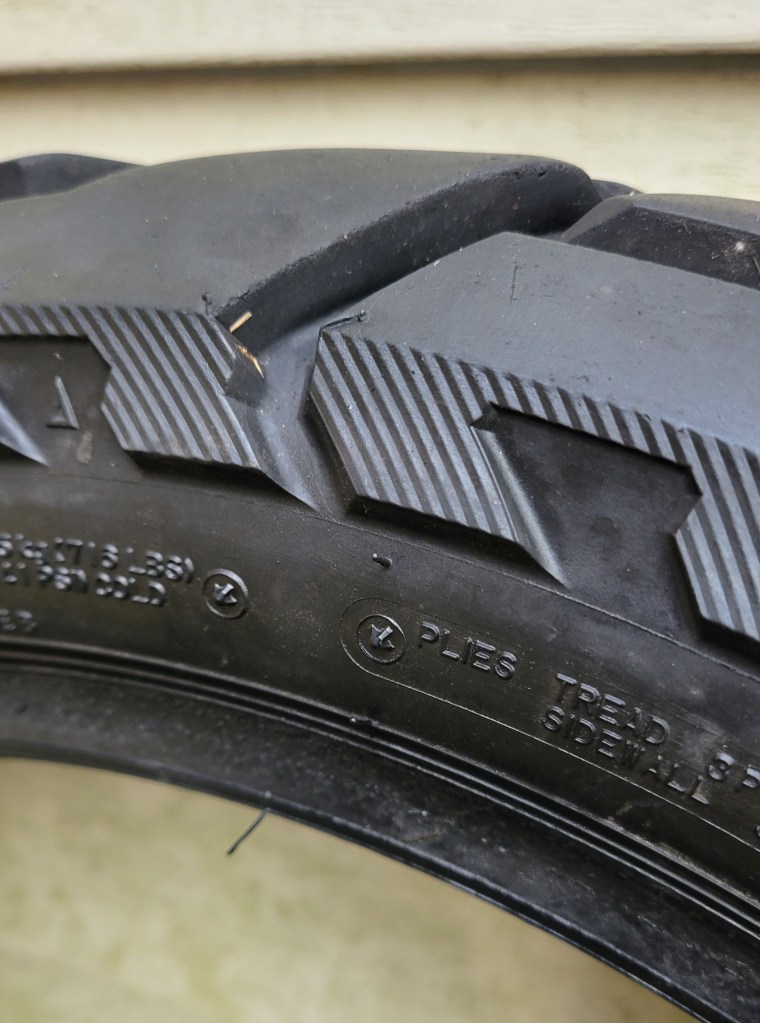
In terms of compound, I’d say the Anakee is actually softer. This gives the Mitas its longevity. I got a full season out of one, about 14,000K (8,700 miles), which is pretty damn good for a knobby, especially when about half of that was on asphalt. This is what it looked like toward the end of season with approximately 12,000K (7,500 miles) on it. Obviously, you can’t expect this kind of longevity on a rear.
The Enduro Trail-XT+ is bidirectional for added longevity. I’d say this one is ready to be flipped. 😉
Despite the longevity, the tire is not vibey on asphalt. In fact, I’ve found some street tires with a hard centre compound to be more vibey than the Trail-XT+. I really don’t know how Mitas managed to pull that off.
Conclusion
If it’s not already evident, I’m really impressed with this tire, and if I were not planning to sell the Tiger, another would definitely be going on the front next season. In fact, I’ll probably put the same on whatever bike I end up getting. Excellent grip off road, good road performance, quiet, not vibey, and long-lasting—what more are you looking for in an ADV tire? This is going to be my go-to tire for everything other than street touring, it’s that good.
The Enduro Trail-XT+ is available TT/TL in a full range of sizes and a Dakar stiffer carcass as well. For more information, technical specs, and a complete sizing chart, visit the Mitas page.
Pros:
Not vibey or noisy on road.
Good, reliable grip on road in twisties.
Headshake in rain grooves and cheese-grater bridges bearable.
Excellent off road. Planted front end.
Upwards of 12,000 – 14,000K (7,500 – 8,700 miles) longevity expected on front.
Tube type and tubeless for all sizes.
Good range of sizes available.
Dakar (yellow stripe) version available.
Cons
More expensive than a budget tire.
Have you tried this tire? Was your experience as positive as mine? What do you agree with in my review? What do you disagree with? Any other tire suggestions for off road riding? Drop a comment below. I promise, I’m not a bot seeking your personal info. I always like to hear from readers.
It wasn’t the tour I had planned, but the best adventures rarely are.
The original plan was finally to ride The Blue Ridge Parkway down into West Virginia and then take the MABDR and NEBDR back to Canada. Followers of this blog will know I’ve been trying to do this bucket list ride for the past several years, but something always gets in the way. This past season it was the ridiculous rhetoric coming out of President Trump’s mouth about Canada being the 51st state. Statements like that are disrespectful toward all Canadians at best and mildly threatening at worst. Despite how much I was looking forward to that tour, I decided to exercise what little agency I have as a Canadian by participating in the boycott.
I got to thinking that, while we don’t have BDRs here in Canada (yet), we do have the TCAT (Trans Canada Adventure Trail), and it’s the same idea. I thought I might do the section named The Forest that goes from Baie Comeau, Quebec, west to Kenora, Ontario, so essentially across the two largest provinces in Canada, mostly off road. The TCAT takes you through some very remote regions and would have been quite a challenge, especially solo.
Why solo, you ask? Well, it wasn’t for lack of trying. I put the word out to my riding buddies, but there was none who could get away from work and family commitments for the length of time I was considering, and others who could but had other stuff get in the way. I’m used to touring solo, although this would be the first time solo off road, which is never advisable. It’s always better to ride with a buddy, but if I got into trouble, I had a Garmin inReach Mini to help get me out.
Then my riding buddy Riley reminded me of the TQT, the Trans Quebec Trail. Same idea but closer to home and, more importantly, with an accompanying app. The concern I had with the TCAT is whether the tracks would be up to date. I’d come across this liability before when doing a section of it south of Calabogie, Ontario. A bridge was out but not indicated in the tracks I purchased, and this led to being stranded on a hydro line overnight. However, the TQT has an app and users can report a problem easily in real time, so you know the route is kept current. The app also includes information on gas stations, restaurants, campgrounds, accommodations, hospitals, and more, taking a lot of the burden out of this aspect of touring and providing some support and peace of mind. That decided it: I’d ride as much of the TQT as I could.
On the shakedown ride, the Tiger started having intermittent starting issues—not the usual slow-crank kind but a new no-crank kind—nadda, nothing. After a few minutes, it would crank and fire fine so the problem was clearly heat-related. Given where I was going, I decided to rig up a jumper cable from the starter terminal to up under the seat by the battery. If the bike started acting up in the middle of nowhere, I could bypass the ignition system by touching it to the Pos terminal of the battery.
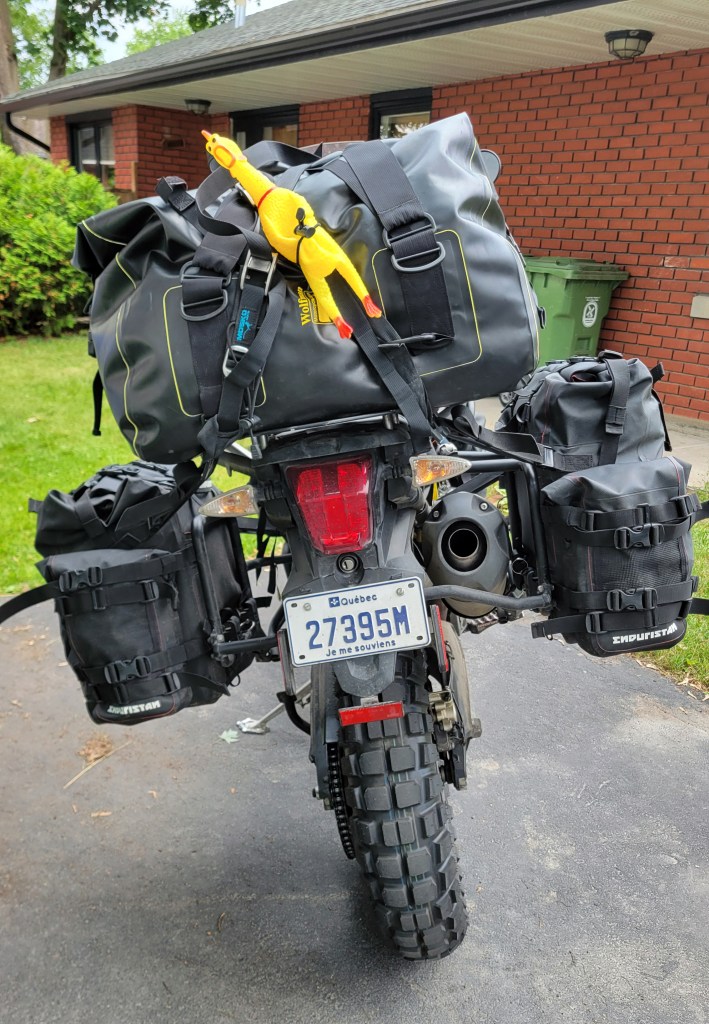
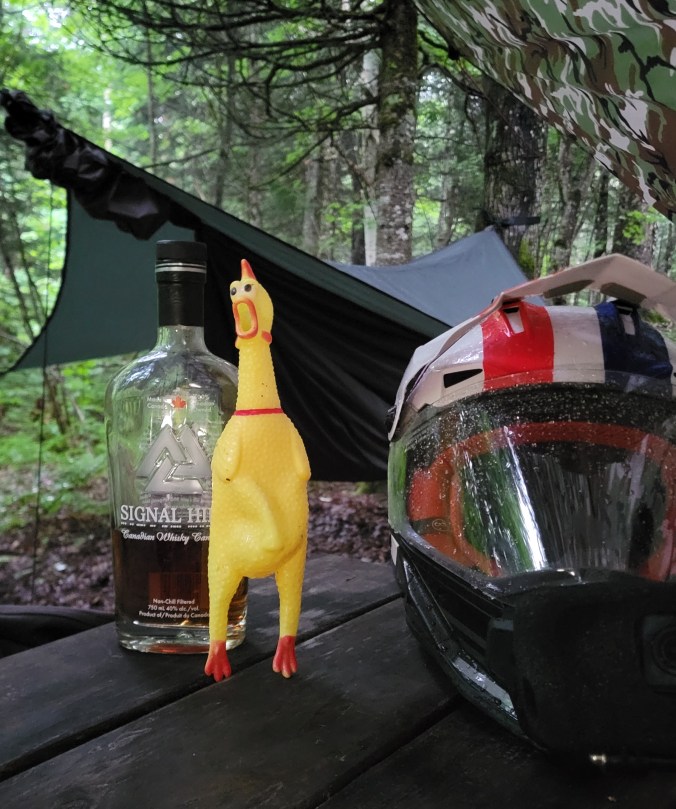
My departure date arrived and I was loaded up and ready to go. Unfortunately, despite my best efforts to avoid a duffle bag on the tail, in the end I needed it because I was trying hammock camping and needed the room for an insulation pad that goes under the hammock. The duffle, however, was very light, containing the pad, my sleeping bag, and a few other items. It looks worse than it was.
Safety chicken with his seatbelt on a little too tight.
I bombed down to Magog where I planned to pick up the TQT—2 hours of highway riding east of Montreal. It was hot, very hot, maybe not by Nevada standards but enough to make my phone battery overheat. When I reached the route, it took me some time to orient myself with the app. That involved some starting and stopping at the side of the road as I fiddled with my phone, and on one occasion, the bike wouldn’t restart, the same problem I was experiencing before. I figured it was because the lithium battery in the bike, like in my phone, was overheating, a problem I’d experienced before with another lithium battery. Using the jump wire, I found that the starter cranked just fine but the bike didn’t start. It was like it wasn’t getting any fuel. Not good. (At the time, I guessed that the ECU must need power to regulate the fueling, but I discovered much later that the issue was actually a loose wire into the fuel pump relay.) With the entire three weeks of remote riding ahead of me, I decided to err on the side of caution and return home.
The next day I started out again, this time with an old AGM battery in the bike. I rode again hard down to Magog, then stopped and started the bike several times, stressing the bike to test it as best I could before committing to the tour. It seemed to be starting fine now so on I went.
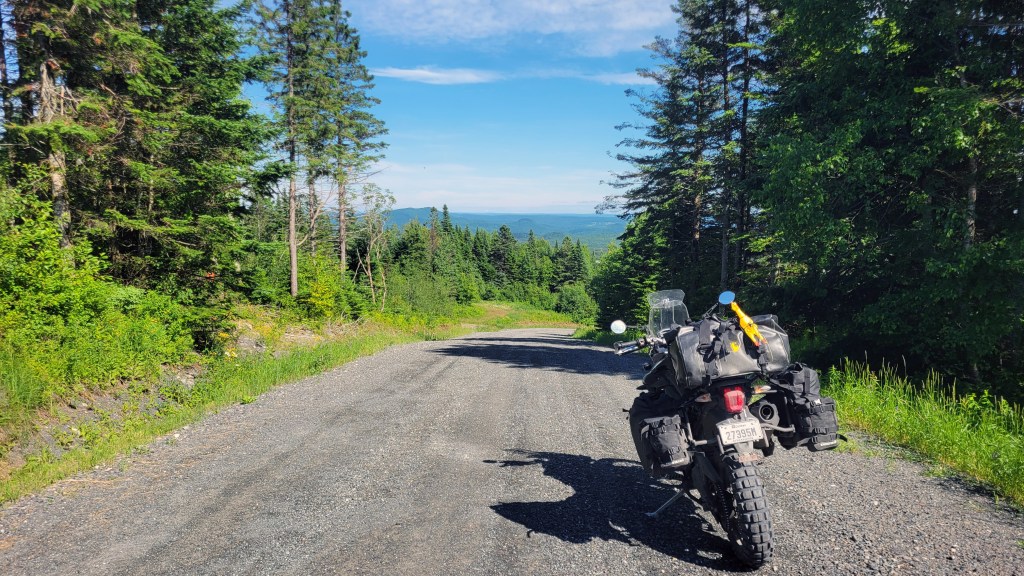
With these glitches behind me and the bike running great, I could finally enjoy the ride, and enjoy I did! I’ve never been east of the Townships up into the Mégantic Mountain Range but this region is beautiful. I passed through rolling hills and farmland in the valleys. The riding is not technical but mostly hard-packed dirt and gravel, which is good if you’re fully loaded.
Farmland near Dixville, Quebec.
The Tiger is perfect for this stuff, and since putting a Mitas Enduro XT+ on the front, the front end is planted, giving me a lot of confidence compared to when I had an Anakee Wild washing out on me.
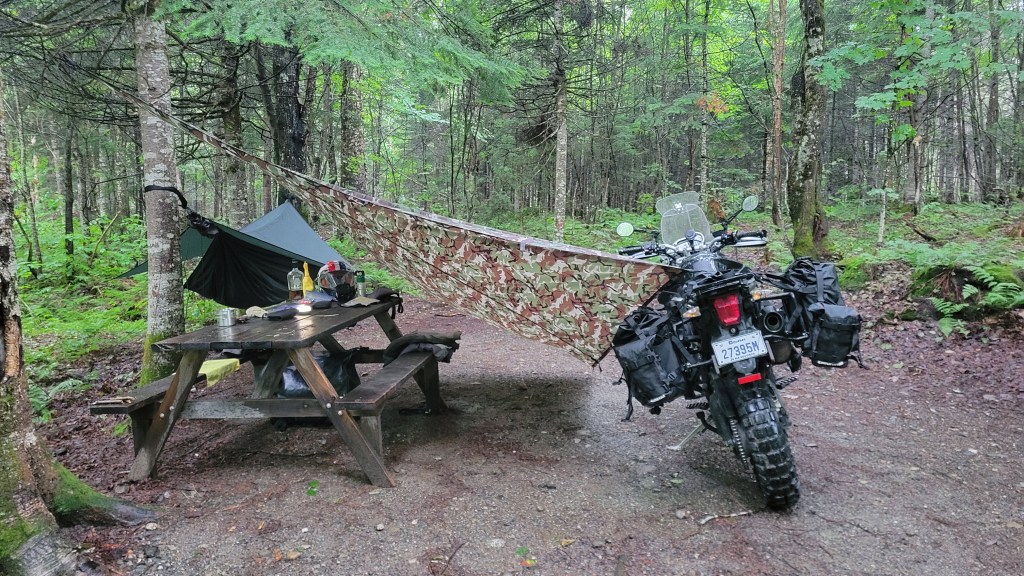
As you can see, I was climbing up into the mountains as I headed northeast. The time came to start looking for a camping spot for the night. This is where the app is really helpful. It automatically detects when you are on the route and brings up sidebar information like next gas station, nearby attractions, and other options. One option is Campgrounds, and pressing it brings up nearby campgrounds relevant to your geolocation. I saw there was one a few kilometres away and pressing on it gave me the option to navigate there in the app of my choice. Nice! I might be explaining this slightly wrong, but trust me, it’s easy, and the next thing I knew I was pulling in to Camping Mont-Mégantic.
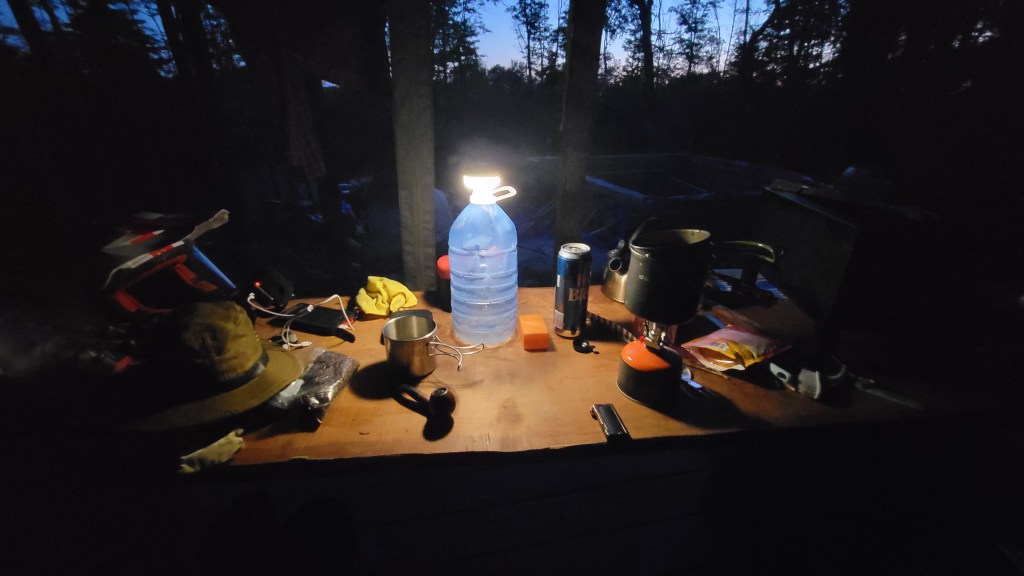
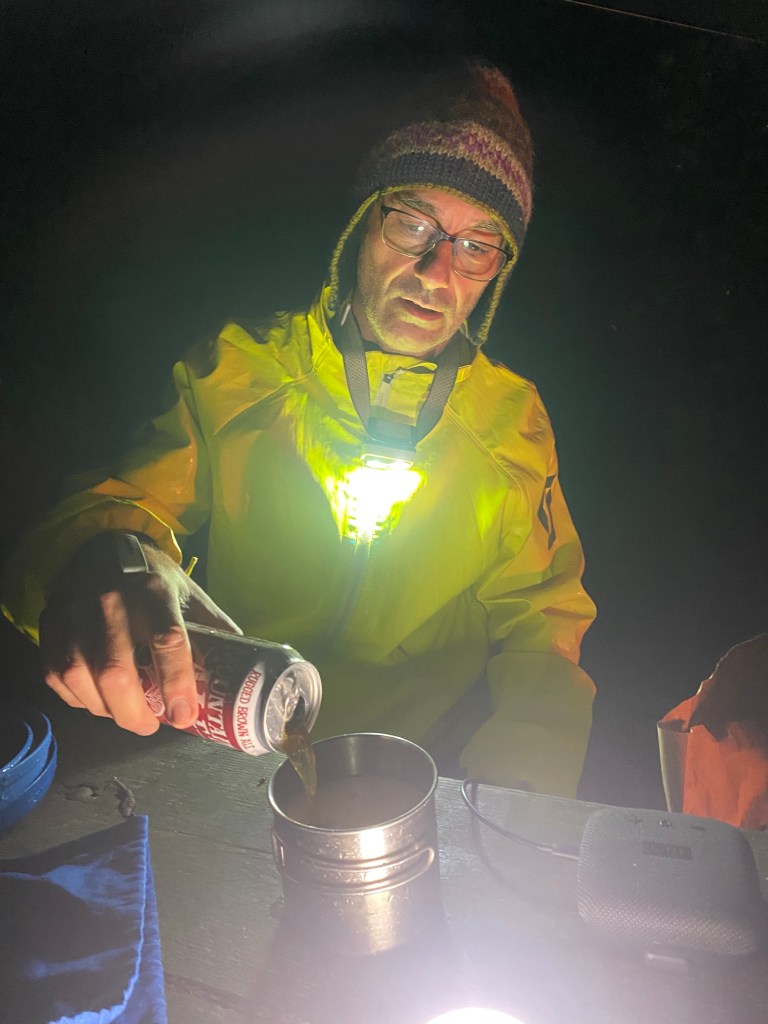
It was starting to rain so I quickly strung a tarp over the picnic table and made my dinner.My drinking buddy likes to sing but doesn’t have much of a voice.
When the sun went down, it wasn’t long before I was in my hammock, enjoying listening to the rain on the tarp.
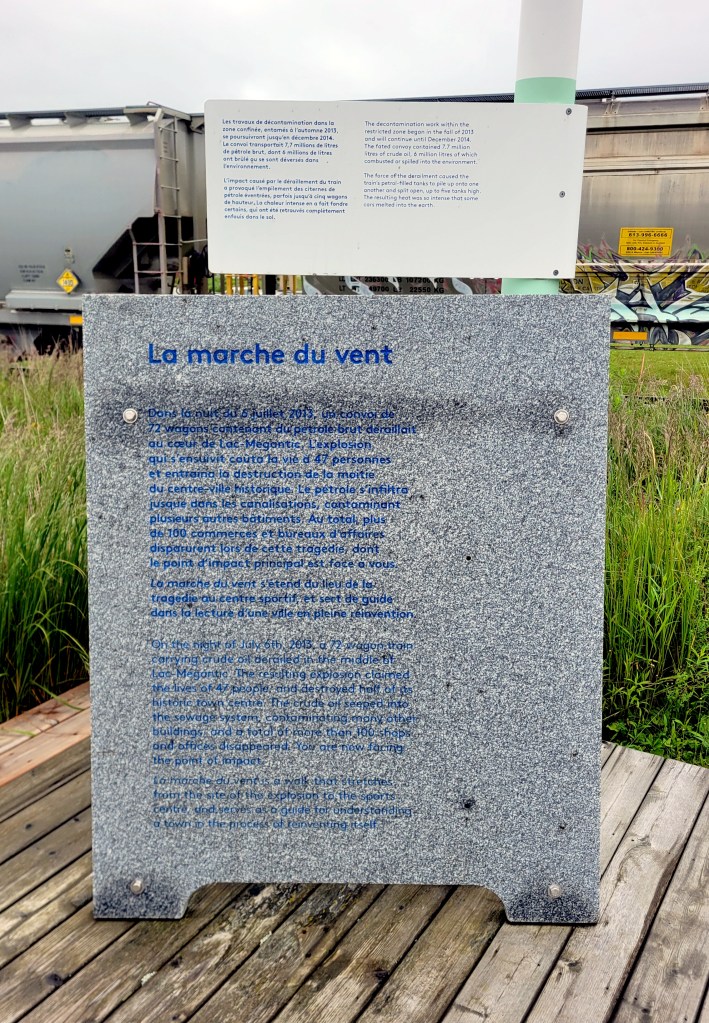
The next day started with a ride down into the lovely town of Lac-Mégantic. If that name sounds familiar, it’s because the town is the site of one of the worst industrial disasters in Canadian history. I soon found the memorial at the place where the accident occurred.
The inscription is a little difficult to read in the photo above so I’ve transcribed most of it below.
On the night of July 6th, 2013, a 72 wagon train carrying crude oil derailed in the middle of Lac Mégantic. The resulting explosion claimed the lives of 47 people and destroyed half of its historic town centre. The crude oil seeped into the sewage system, contaminating many other buildings and a total of more than 100 shops and offices disappeared. You are now facing the point of impact.
It was a moving and reflective moment, and I will admit, the feeling that came to me at the time in addition to sadness was anger, not at the oil industry or the railway workers. The accident was just that—an accident—and I’m not going to fault anyone for being human. No, my thought went to environmentalists who think they can solve our oil dependency by blocking pipelines. As I write this, about one third of global energy consumption is oil, and while it’s slowly dropping, we are still very much in need of moving oil across geography. Blocking a pipeline from being constructed, however well intentioned, does not erase the need. The oil is simply moved by freight instead, sometimes through populated areas like Lac Mégantic. Oil passes less than a few hundred meters from my house.
I don’t have the space here or the expertise to wade into the renewable versus fossil fuel debate. What I will say, however, is that blocking pipelines is short-sighted. A pipeline like the Trans Mountain Pipeline is an easy target, the proverbial line in the sand, but getting Alberta’s oil to global markets means Canada is less reliant on The United States as its sole buyer and can demand international market prices. More importantly, according to one study by the National Bank, getting China and India off of coal will reduce more CO2 emissions than what Canada produces as a whole. In fact, transitioning China alone off of coal will eliminate 8 times the amount of CO2 that Canada produces.
Of course, none of this was in my head as I stood at the site of the disaster and tried to imagine the devastation that the explosion caused, but I was thinking of the Quebec Government’s opposition to the Energy East pipeline proposal. Recently under increased demand for inter-provincial cooperation and trade, there has been a softening. The issues surrounding proposed pipelines are nuanced and complex, but my hope is that decisions are made based more on pragmatic calculations than political ideology or regional interests.
As I stood on the platform, a train carrying oil slowly passed through town, and it seemed to me that families came to witness it. The train was somehow central to this community, part of its collective memory and culture. The marche du vent is a walk that serves “as a guide for understanding a town in the process of reinventing itself,” and I was glad that a moment of reflection at this historic site was a part of my adventure.
I climbed back onto the bike and burnt some more fossil fuels. At times, the route narrowed to single-lane road so I had to keep my speed down and ride right.
I stopped in Saint George for lunch, then continued on northeast through the Beauce. This region is surprisingly still part of the Appalachian Mountains and the route seemed to zig zag back and forth across mountain ranges, providing a lot of fun riding and some spectacular views.
Somewhere around Frampton, QC, looking north toward Quebec City.
My planned destination for the day was just south of Rivière du Loup, where a friend has some property, but my progress was slow. You can’t really get out of 3rd gear on these roads, nor would you want to. In some sections, the route narrows further and becomes sandy, and there were other delays.
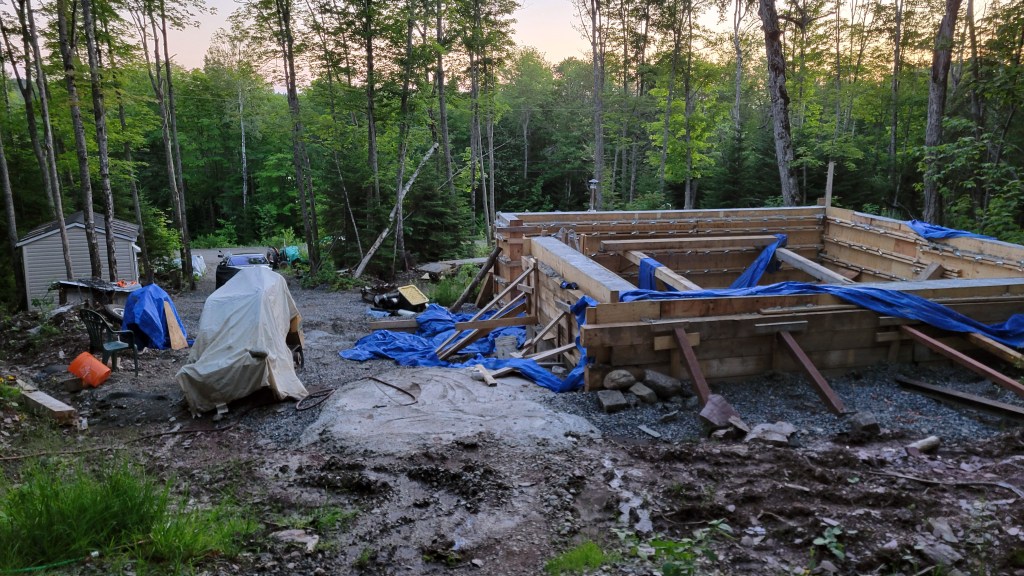
As the afternoon progressed, I had a decision to make: whether to start looking for a campsite or to bail on the TQT and get to my buddy’s property where he said I could pitch. I was curious to see his property and the log cabin he was building there, and I was ready to get out of the forest and nearer the coast, so I decided on the latter. 90 minutes of highway riding later, I was there just as the light was beginning to fade. Unfortunately, I happened to be there in one of the rare times that he was back in Montreal.
Bagged curry and beer dinner in the fading light.
In the morning, I could see that Mark had the foundation poured. He now has the walls up and the roof on, hydro in, and windows and doors installed. That’s pretty impressive for one summer’s work, given that he’s virtually working alone with only his wife to help and provide food services. The only thing he didn’t get to was the chinking, so that will have to be done in the spring. (He has the cabin insulated though.) If you want to see how he’s done most of this construction and other work, check out his YouTube channel, Fierce Tartan. There you will see the nearly-finished project and how he managed to lift those huge beams into place on his own.
The workshite. As with most construction, it’s pretty messy and all comes together at the end.
I decided to stay a second night so I could rest a bit and enjoy the area. I went up to the local public beach for a swim, then rode into town to buy a cheap polar blanket because, even with the insulating pad, I wasn’t warm enough at night.
The camper’s bathtub.
I had mixed feelings about bailing the day before. I tend to get goal fixated and not riding all the TQT to RDL felt like a fail. Honestly, what concerned me was the ZEC section I was heading toward, just south of La Pocatière and Kamouraska. ZECs are nature reserves and there really isn’t anyone in them this time of year when it’s not hunting season. The route skirts the US-Canada border east to Pehénégamook before turning north toward Rivière du Loup. That section looks really interesting as it follows the Notre Dame Mountain Range but would have to wait until I could return with some riding buddies.
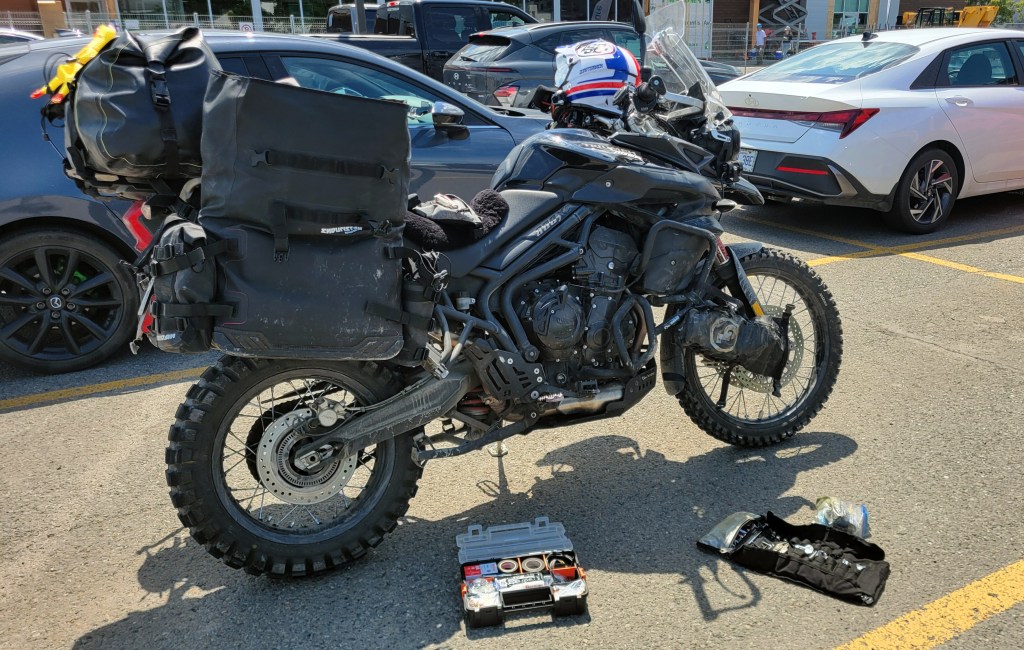
Atlas throttle lock needed adjustment. Every tour requires some parking lot maintenance.
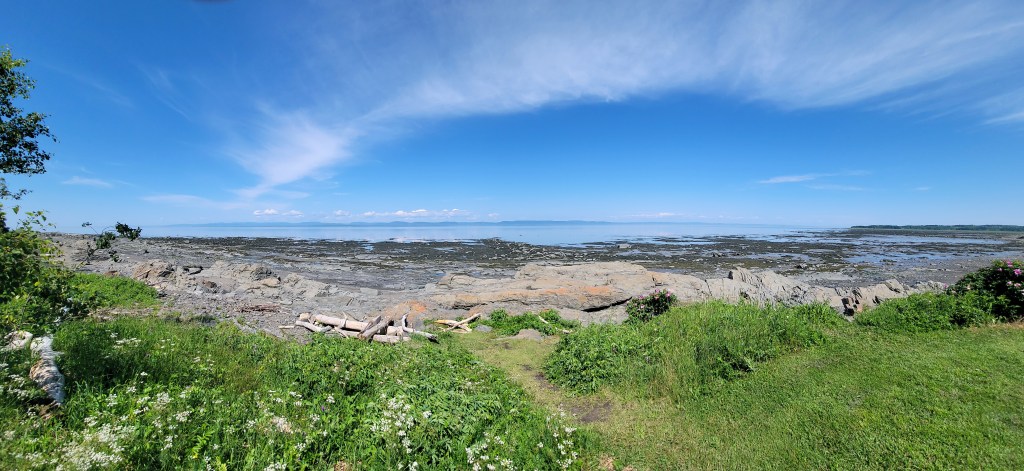
After a McD’s breakfast, I followed my nose and found what I was looking for—a sunny, grassy, spot on the shoreline where I could read and nap in the shade. This is technically still the St. Lawrence River but you can see there is a tide. The water begins to become brackish, and just east it widens into the gulf.
After two days of boreal forest, this is what I was craving and was happy that the route east follows the shoreline a short ways before turning inland again. The next day’s riding took me through more small towns, some with unusual attractions.
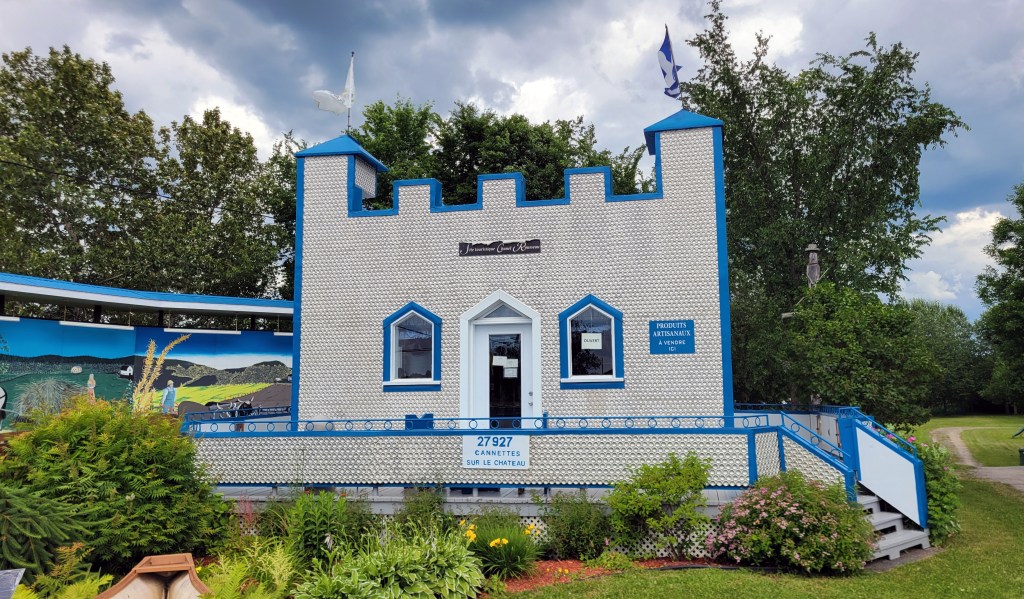
Can Castle in Saint-Jean-de-Dieu. 27,927 cans used to make this castle. Apparently somebody counted.
But mostly it was more and more forest on gravel roads, and some of it quite remote.
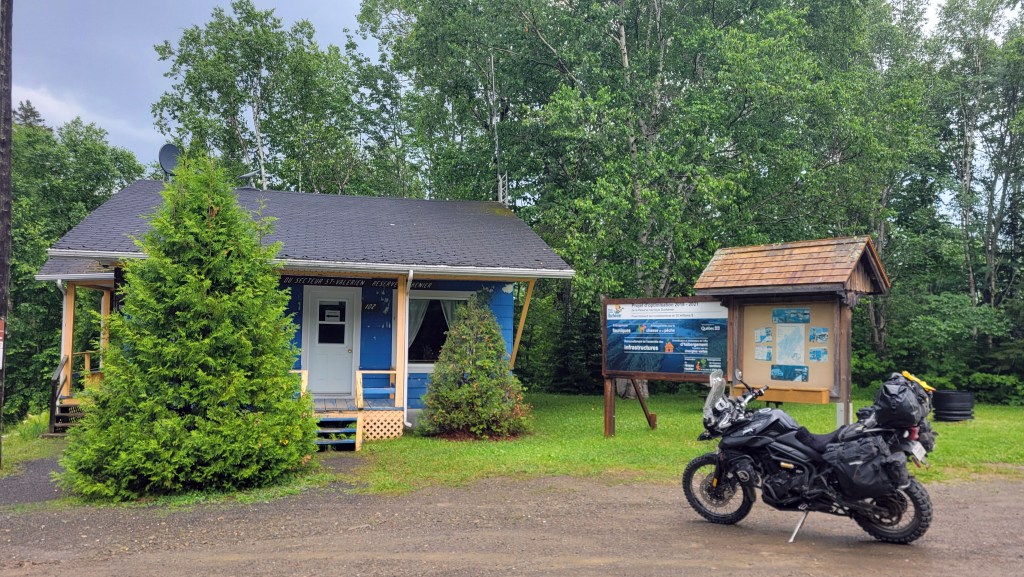
The northern gate of Reserve Duchenier.
The route now was taking me deeper into the bush and at the same time it began to rain. I decided again to detour off and go back to the coast. By the time I reached Bic, just west of Rimouski, it was pouring so I decided to splurge on a room for the night. Okay, call me a wimp, but one of the gifts of ageing is good judgment.
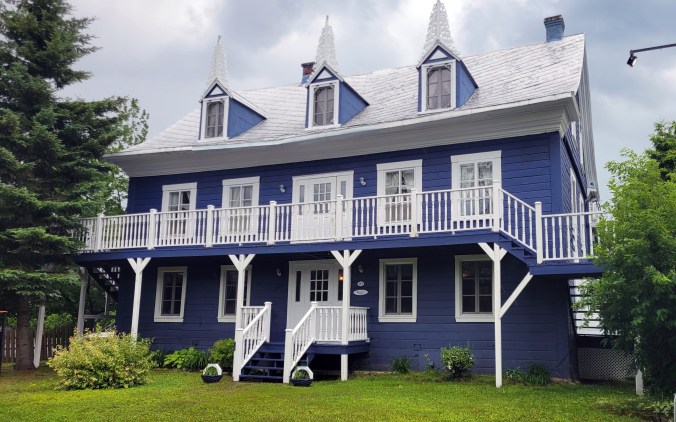
Auberge des Iles du Bic
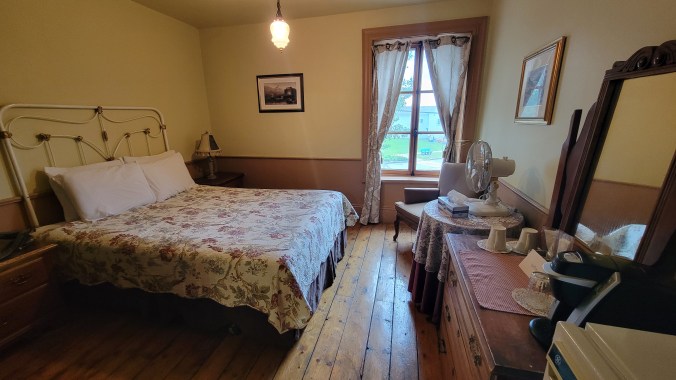
My room
Lobby
The Auberge des Îles du Bic was constructed in 1840. Rates were very reasonable and came with breakfast. The owner let me borrow the outside tap to hose down my bags before bringing them into the room.
The next morning I went exploring. I’d heard about Parc national du Bic and I was hoping to get a campsite there. Unfortunately, the campground is popular and they had no open sites. A neighbouring private campsite wasn’t very nice, and I was having trouble finding trees near the shore to string a hammock. At the same time, I was coming to some conclusions about the tour thus far.
For one, I wasn’t enjoying the solo touring as much as I had in the past. The shakedown ride with the boys on The Timber Trail in Kawartha Lakes was really fun and I was missing that camaraderie. Or perhaps I was now used to having Marilyn riding pillion. When I’d toured solo before, it was on the street where you run into people and are approached in coffee shops and gas stations. At any rate, riding solo for hours during the day through remote forest was lonely.
I also found that, while the off-road route involved potentially more interesting riding, I had to ride conservatively because I was alone. I didn’t feel comfortable venturing hundreds of miles into a nature reserve alone, and I was having some difficulty finding wild camping or campgrounds where I could string my hammock. Aside from the last few hundred kilometres into Rivière du Loup, I’d accomplished my primary goal of riding the TQT from Magog to Rimouski.
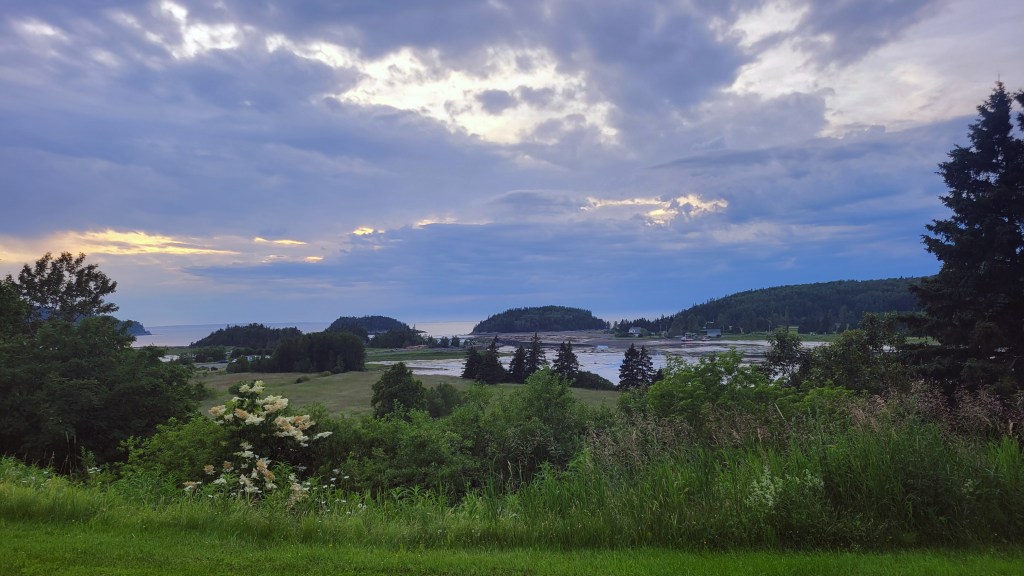
It was sometime around then that I decided to change my plans for the remainder of the tour. I would visit a good friend in central Nova Scotia instead and spend the following week touring that province’s western coastline, a region I’d never fully explored before. It would mean more asphalt and more tourists, but also more cafes, bookshops, and microbreweries. I will definitely be back on the TQT next summer and hope to go further, into Gaspesie and over the Chic-Choc Mountains. Next time I will come with friends.
Foreboding skies over Parc national du Bic.
Do you have any thoughts about my decision? Itchy Boots and Lyndon Poskitt and many other ADV riders ride solo. Am I getting old and soft or old and wise? The solo versus group tour debate is an interesting one. What is your preference? Drop a comment below and click Follow if you want to hear how the rest of the tour through NS goes.
The term “adventure” is so over-used today that it’s lost almost all meaning, but this is how I define it.
In a recent episode of Adventure Rider Radio RAW, host Jim Martin and guests tried to define the word “adventure.” It was a rather abstract discussion that quickly deteriorated into subjectivity and personal perspective, yet the poet and wordsmith in me was piqued. Since I use the term in my blog’s byline and hold the expression “life is an adventure” as a personal motto, I thought I should take a crack at defining it. Yes, the term means different things to different people, but here are the elements of adventure riding as I see it.
Exploration and Discovery
photo credit://History Channel/Shutterstock
There has to be an element of exploration and discovery. Adventure riding is going where you’ve never gone before. I suppose in this sense, all travel has an element of adventure, as it gets us out of our milieus. One of my favourite things is seeing something for the first time, and like the proverbial first step into the stream, we can only see something the first time once; it’s never quite the same again.
I’m a curious person, whether in the realm of ideas or things. Adventure riding allows me to follow that curiosity, leading me into the unknown. There’s a mystery at every geolocation in the world and all we have to do to solve it is go there and look. That’s why it’s important to go slow and stop when something catches your eye, because there’s no point on going somewhere if you aren’t looking.
Sometimes what there is to see is geography, sometimes people, sometimes architecture, art, or any number of things, and sometimes it’s an unknown aspect of ourselves.
Challenge and Risk
photo credit://@LifeofSmokey
At one point in the podcast, Jim Martin tries defining the term by finding something that it is not. (This is called Definition by Exclusion, i.e. A is not B.) He uses as his example the quintessential insult of every adventure rider—a trip to the local Starbucks. Surely a ride to Starbucks and back is not an adventure, he posits. But one of the guests argues that for someone suffering from social anxiety, maybe a trip to Starbucks is an adventure.
What this line of thinking suggests is that personal challenge or risk, even perceived risk or fear, is one element of adventure. We are moving out of our comfort zones, however large or small, where personal growth occurs. We are moving, as Jordan Peterson would say, from order into chaos.
I’ve written before about the thrill-seeking aspect of adventure riding, those people who seek danger by riding extremely remote roads like the Trans-Taiga, or dangerous parts of Mexico and South America. On this topic, I like what guest Michelle Lamphere said: the experience has to be meaningful. Risk for risk’s sake is merely being foolhardy, but risk in order to have a transformative experience is another element of adventure as I define it. That’s why I’ll probably never do the Trans-Taiga but surely will go back up The Dempster and complete my ride to Tuktoyaktuk. (I was prevented entry to NWT because of Covid restrictions.) The former is a lot of mind-numbing forest leading to a dam, but the latter is some of the most astounding geography I have ever been privileged to witness.
Risk in itself is not an adventure, but risk is often part of adventure because we need to risk in order to discover.
Off Road, En Route
Odysseus consults the soul of the prophet Tiresias in Hades. Allessandro Allori, 1580
I don’t think you have to go off road to have an adventure but it sure helps. That’s because when we go off road, we get away from the conceptual order of civilization. Canadian nature poet Don McKay refers to this geographical and epistemological space as “home,” and “wilderness,” by contrast, as “not just a set of endangered spaces, but the capacity of all things to elude the mind’s appropriations” (Vis à Vis 21). When we ride off road, we move from the realm of human to other. As the road deteriorates from asphalt to gravel, then dirt, trail, and bush, we shed the trappings of our everyday lives, where deep discovery can happen.
In Classical Literature, this journey is called Katabasis, the motif in which the hero descends into the underworld in search of valuable, hidden knowledge. Aeneas in The Aeneid does it, as does Odysseus in The Odyssey and Dante in The Inferno; they each make the dark journey through Hades in the hope of finding enlightenment. For Swiss psychologist Carl Jung, the route to personal growth involved a similar descent into what he called The Shadow, the unconscious.
I don’t think it’s coincidental that the archetypal symbol of the unconscious in literature across cultures is wilderness—the forest, the jungle, the sea—untamed geography untouched by human power. When we ride off road, we are riding figuratively into the unconscious. Guided by our GPSs and with the support of our satellite trackers, we face adversity in its most primordial form, and what we hope to find, somewhere at the nadir of this adventure, is a mental and physical toughness we never knew we had.
Sibyl leads Aeneas to the Underworld in The Aeneid
Spontaneity and the Unplanned
Do you make reservations ahead of time when you’re touring, or do you wait until mid-afternoon, then start looking for accommodations? I generally like to wait so I’m not committed to being somewhere by a certain time. It allows me flexibility so I can follow my nose and explore where it leads. Similarly, I often don’t have a set route. I have a general destination, but how I get there is a matter of choice. See an interesting dirt road—why not check it out? Once while riding along the Sunrise Trail in Nova Scotia, I noticed some 2-track leading off from the road toward Northumberland Strait. My curiosity got the better of me and so I followed it to a picnic table on the edge of the cliffs looking out over the water—a perfect lunch spot.
The old Beamer near Arisaig, NS.
For this reason, I also often tour solo, although lately my feelings around that are changing. Riding solo of course provides you with complete autonomy to determine the route, the pace, the accommodations, even what attractions to see. The downside, however, is that you have to be more conservative in what risks you take. This past summer I had the opportunity to ride through a ZEC, which is a nature reserve here in Quebec. I was at the gate paying the entry fee when the staff person mumbled something about “trois cents.” What now?! Three hundred kilometres of off-roading solo with no one around? He actually advised against it. There are a lot of moose in there, he said. So I changed my planned route. As I age, I’m less inclined to take risks. The best of both worlds is to find a riding partner or partners who are compatible in riding skills, personality, and philosophy.
If your route, your accommodations, your attractions are all determined before leaving home, if your entire trip is scheduled, you aren’t really on an adventure; you’re touring. That’s fine, if that’s what you’re into, but allowing something unexpected or unplanned to happen, again, provides greater opportunity for discovery. Perhaps what is essential in this aspect of adventure is that we relinquish control and, instead of acting upon the world, we allow something to happen to us.
An ADV Bike
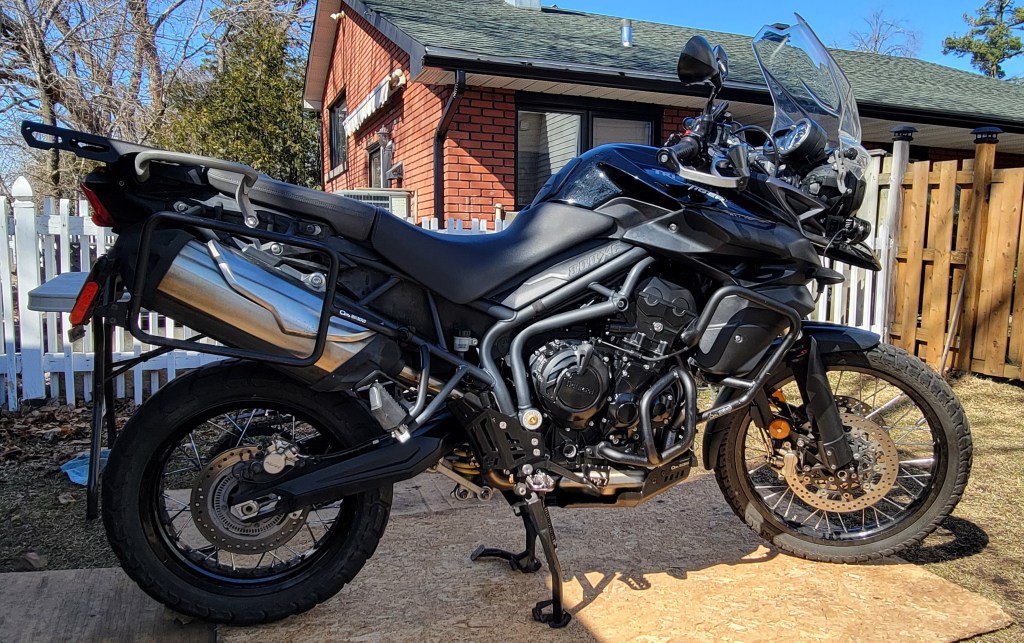
My 2013 Triumph Tiger 800XC
This one is probably going to be the most controversial. Do you need to have an ADV bike to have an adventure? No. Certainly not. There are people riding around the world on postie bikes, 50cc mopeds, and at the other end of the scale, Gold Wings and Harley cruisers. But I’m going to ask the question, why? My dad always said use the right tool for the job, and I question whether these machines are the best choice. While it’s not a requirement, having an ADV bike will allow you to have an adventure a lot easier than on another machine. Here are the key elements of an ADV bike, IMHO.
It has to be off-road capable. That means good ground clearance and knobby tires. Missing one or the other is seriously going to limit where you can go.
It has to be comfortable, with a large seat (not a dirt bike seat), a windscreen and faring, and good ergonomics. ADV riding is not about crunching the miles, but having a bike that can do it gives you the option if needed. You’re going to be spending the entire day on the bike, so it must be comfortable.
It has to be light enough to pick up on your own. It’s ironic that the big GS, at 600 lbs., has become the iconic ADV bike. Can you lift this bike and gear on your own should you drop it in the middle of nowhere? Okay, it carries its weight low and can be lifted with the right technique, but do you need all that power? I think the ideal ADV bike is a middle-weight at 650-900cc, maybe even smaller—big enough to crunch the miles comfortably, but small enough to lift on your own.
It has to be reliable or fixable. One of the reasons the Ténéré 700 is so popular is that it has minimal tech and one of the most reliable engines in the industry. You also have to be able to source parts from remote places when there is a problem.
It should be able to carry some luggage. The adventure rider is going into remote areas so has to be self-sufficient. That means carrying tools and tubes, some spare parts, clothing, maybe a tent and cooking equipment. Itchy Boots has travelled extensively without driving a single tent stake, but carrying camping and cooking gear frees you from the burden of having to find shelter when the sun goes down.
What’s in a word?
No doubt I’ve pissed off a lot of readers with this post, but I’m open to alternate viewpoints. Yes, words and the phenomena they refer to are somewhat subjective, but if we’re trying to define a term, we have to be somewhat exclusive or the word loses precise meaning. When words get over-used, they tend to lose that quality, so this is my attempt to rescue the term “adventure” from marketing and corporate interests.
What would you add or subtract from my definition? Leave a comment below. I’m not an ADV snob, but I am rather careful with words. I agree with Flaubert that one must strive to find le mot juste (the right word), but that begins with having the word right.
In the end, even this poet will acknowledge the limits to language. Words are crude signs we use to point to phenomena but never perfectly convey their meaning, and definitions of words are yet another semantic step away from the actual thing. However, if you get yourself an adventure bike and head out with no definite route but guided by curiosity, pushing through fear into the unknown, you will discover that the word “adventure” means much more than the sum of its parts. It’s the closest thing I’ve found to complete freedom, something even resembling joy, but then these too are only words.
Port Joli Beach at Thomas Raddall Provincial Park, Nova Scotia
The annual wistful synopsis of the summer.
Here we are, at the beginning of autumn. There’s still plenty of good riding left in the season, but the days of summer vacation and touring are already behind us. As usual, I haven’t posted much over the summer since I’ve been busy riding, reading, travelling, troubleshooting, and generally staying away from sitting at a computer, the occupational hazard of my job.
This summer I tried to balance travelling and resting, my two favourite activities. Okay, resting isn’t really an activity, but napping is. In the past, I did a little too much of the former and not enough of the latter and ended up going back to work in the fall not feeling rested. This year, I did a smattering of shorter trips, one longer trip, and a whole lot of resting. I’m a year away from retirement so consider this good practice for the future.
My eldest sister, Susan, and my dad, 96 years young!
The summer began, as it usually does, with La Classique Moto Fest, the big ADV rally here in Quebec held each year over the May long weekend. If you missed my write-up about that event, you can find it here. Then when I was free and clear of all work duties, I made a trip back to Ontario to visit family, and in particular my dad for his birthday. He’s now 96 years old, so I like to get back to see him at least a few times a year. That was followed by my annual literary pilgrimage with my writer friend, Harold. We usually visit the gravesite or home of a famous writer, and this year we planned to get to Orillia and Stephen Leacock’s house. We stopped in Kawartha Lakes, Ontario, in Lanark County at Silent Lake Provincial Park and never made it much further. The historic residence of the author of the enduring Canadian classic Sunshine Sketches of a Little Town will have to wait another year.
While I was there, I scouted the campground for a return trip with some riding buddies the following week. We stayed two nights and rode most of The Timber Trail. I did that Highlands loop solo last fall and, although a few of the boys were on street bikes this time, I knew most of the dirt and gravel roads would not pose them any problems. Yes, even an R1200RT and a Honda ST can do much of this loop, albeit slowly and when dry. It’s not only big bike but also street bike friendly.
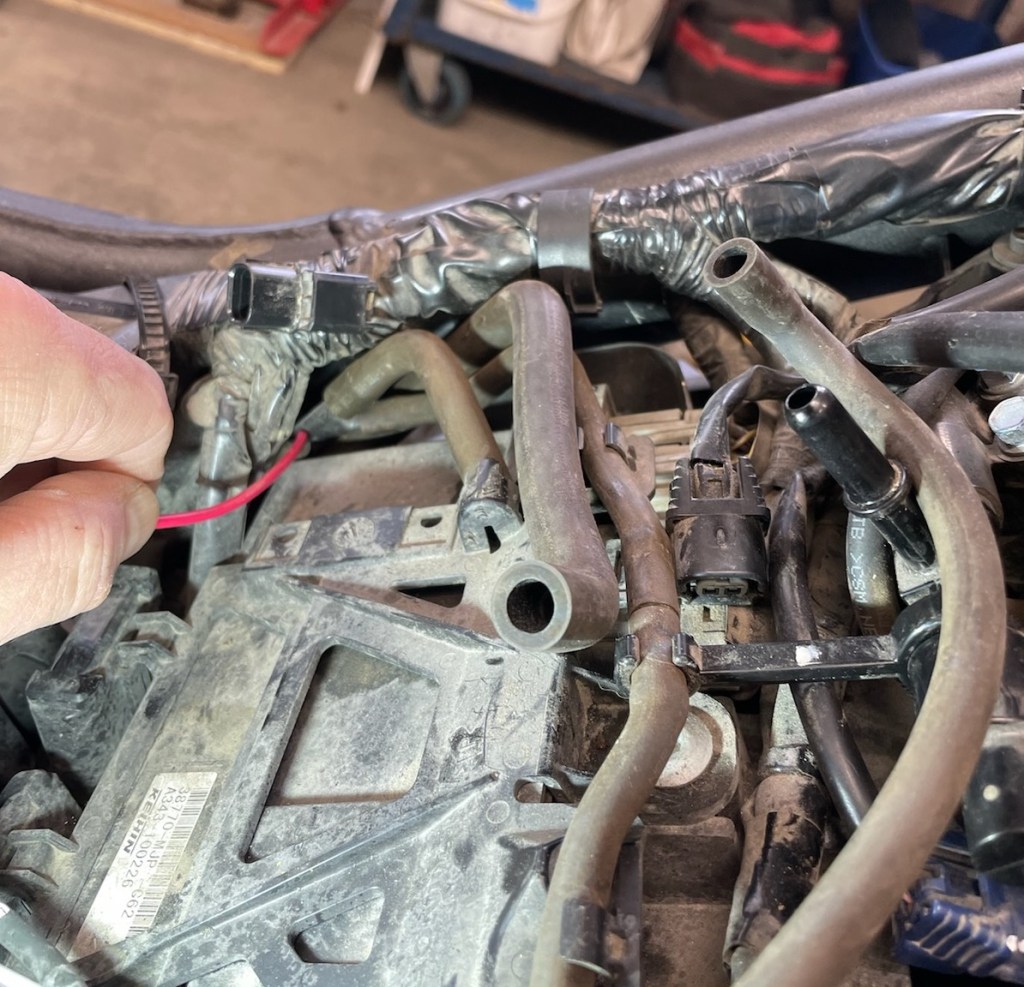
That was the shakedown ride for my summer tour and a good time to find out that I had some intermittent starting issues. After stopping for a short break, my bike wouldn’t crank. At first I thought it was a switch (sidestand, clutch, starter?), then a relay. Once home, I changed the starter relay under the battery, then the battery. I ended up doing my tour without incident but had more starting issues once back home. After more troubleshooting, I think I’ve traced the problem to a loose wire into the fuel pump relay. Perhaps it was the relay itself, and I’m still not 100% sure I’ve solved it, but for now the bike is starting fine. You gotta love intermittent electrical issues.
Looking for a short in the wiring harness.
I’ll be writing about my tour over the winter months when I’m off the road, but suffice to say it was one week of the Trans Quebec Trail from Magog to Rimouski, and one week doing The Lighthouse Route that follows the southern and western shores of Nova Scotia. Watch for those posts soon and click Follow if you want notification when they’re posted.
Crossing the Laurentian Mountains on the TQT south of Quebec City.
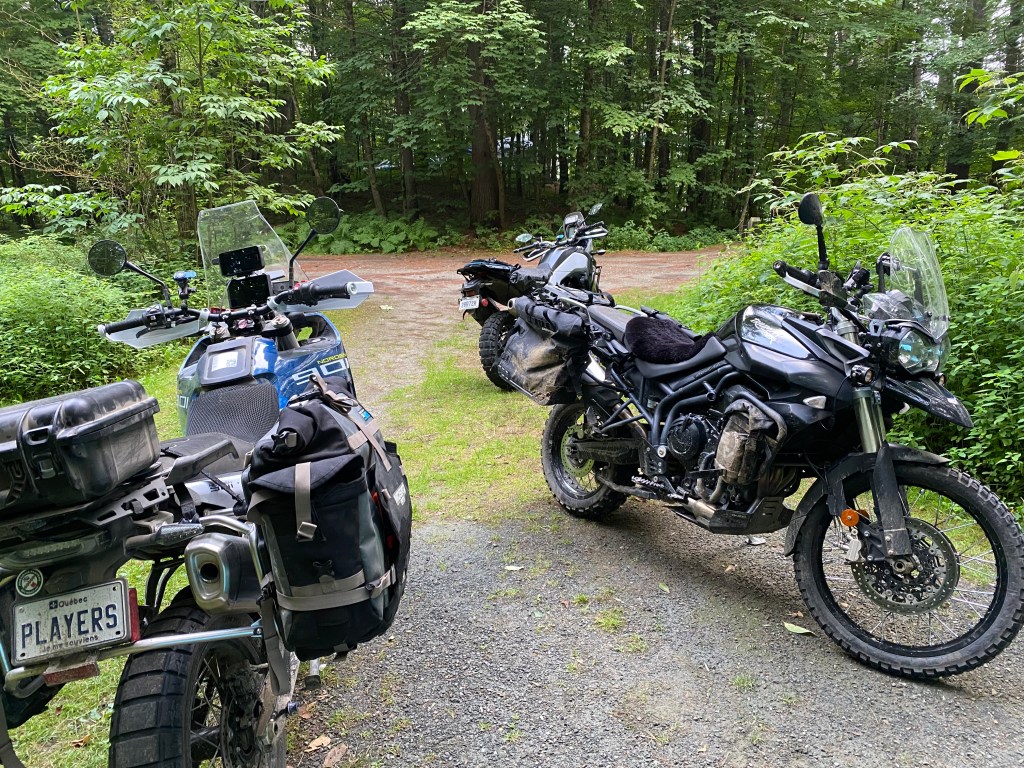
The summer was capped by another short trip with the boys to the Calabogie, Ontario, area to ride The Pickaxe Loop. I don’t take many photos on these group trips because who wants to ask four guys to stop while you snap a few photos, but here’s one from our final night at Black Donald Tent and Trailer Park, cooking under a tarp in the rain.
L to R: Danny (Triumph Scrambler 1200XE), Steve (Honda ST), Mike (BMW 1250GS), and Riley (Norden 901).
Amid it all, I’ve been dealing with an oil consumption issue with the Tiger. If you read my post on the piston soak, you will know that I had a lot of carbon in the cylinders and I think the oil retention ring was stuck. I used Seafoam and a water treatment to clear a lot of it out in June and the bike seemed fixed. But as the summer progressed, it started to burn oil again—not as much as before, but still about 400 mL over 1,200K (745 miles) on the Pickaxe trip.
The moral of the story is don’t mess with OEM set-up on the engine!
Just the other day I was doing some research on what causes carbon build-up and something caught my attention: “When it comes to the mechanical operation of the engine, air to fuel ratio inconsistencies also plays [sic] a key part in the development of carbon buildup.” Just the mention of air to fuel ratios got me thinking about my Unifilter prefilter that was an early mod I did on the bike. The OEM air filter is under the fuel tank and so kind of a PITA to access. The prefilter replaces the snorkel under the seat and not only reportedly catches 95% of the dirt but is easy to remove and service.
I remember having a nagging concern when I installed this. Don’t I now have two air filters, and what might that do to the air-fuel ratio? But it’s a popular mod and so I dismissed the concern, reassuring myself that the ECU would adjust, as it does for temperature and altitude. Now I was returning to that mod and suspicious it was the cause of my carbon build-up. Isn’t running the prefilter essentially like running a dirty main filter? A quick Google search indicated that, indeed, running a dirty air filter can lead to carbon build-up!
So last weekend I removed the prefilter and reinstalled the original snorkel. The bike seems to start faster, idle smoother, run better, and have more power. I now think the bike was choked all this time! The moral of the story is don’t mess with OEM set-up on the engine! I’m now completely stock with a Triumph air filter and a Triumph oil filter. I’ll be doing another piston soak and engine clean toward the end of the season, and in the meantime I’m adding Seafoam as a fuel additive to start the cleansing. I want to start next season with a clean engine in the hope that it will stay clean.
With the bike running great, I’m looking forward all the more to the fall riding. If there’s a silver lining to the end of summer, it’s the cool, beautiful riding of the autumn, especially here in Canada when the leaves begin to turn colour. I’ll be leading a club ride down through the Eastern Townships at the end of September during the height of the fall colours, and the following week I’ll be participating in the appropriately-named Fall Colours Ride in Barry’s Bay, hosted by Rally Connex. 10 guys in the same cabin is surely going to be an adventure in itself.
How did you spend your summer? Drop a comment below, or at least tell us your favourite destination. What was your best moto moment? Unfortunately, I don’t think WordPress permits photos, but you can always try, or post a link to your own online photo host.
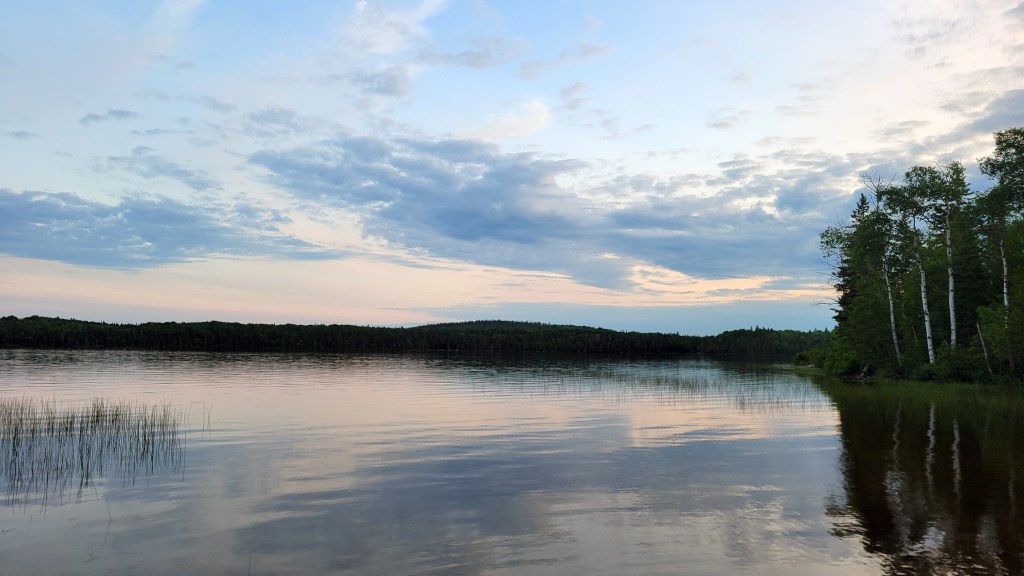
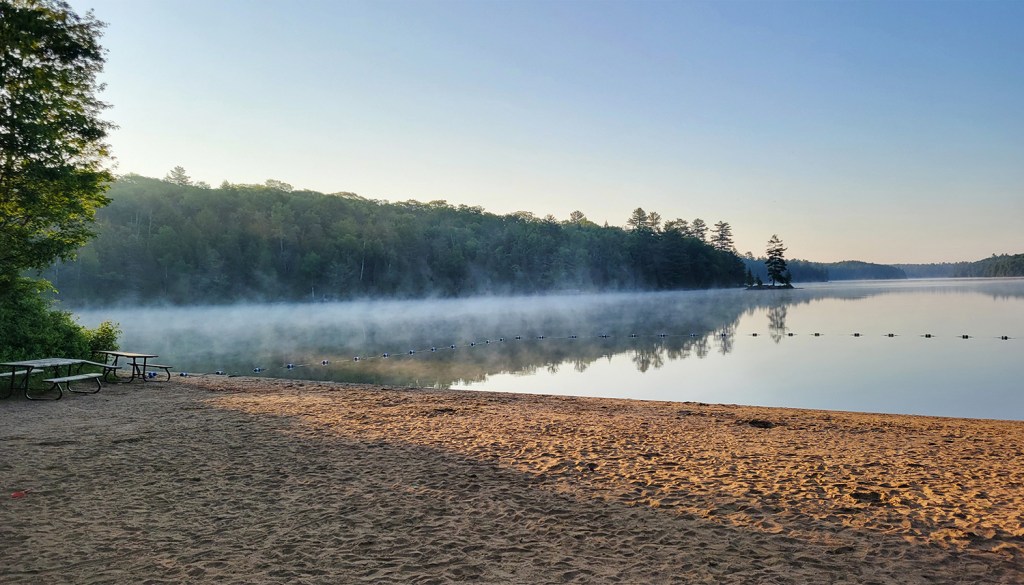
Silent Lake at dawn
Lots more to come in the months ahead, but for now, let’s get out there and enjoy the autumn riding while we still can.
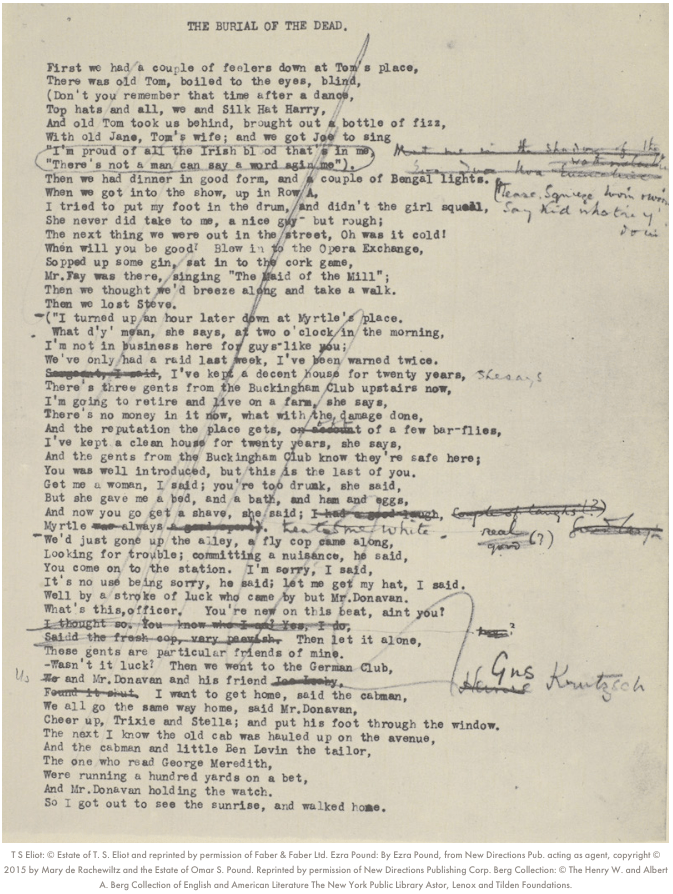
“April is the cruelest month,” T. S. Eliot wrote as the opening line of his iconic poem “The Wasteland” (1922). Clearly, he had never experienced a Canadian March. As I write this on March 25th, we are 10 days into the new riding season, yet no one is riding. It’s 2C (36F) and the sky is a slab of grey slate pissing cold rain that turns to ice in patches on the treacherous sidewalks. Brown, dirty snow still sits at the sides of the roads and in patches on lawns, slowly melting over weeks to expose winter garbage and dog shit lying underneath, and the grass, when it finally pokes through, isn’t really grass but mud and last year’s soggy, decaying leaves. Eliot’s poem captures postwar disillusionment and his nervous disorder, but it might equally describe the mood of Canadian bikers in late March.
Nevertheless, we continue to plan and prepare for the season to come in a kind of blind faith. Yesterday I did a practice pack of my gear. I’m trying a new gear set-up and have the ambitious plan of eliminating my tank bag, tail duffle bag, and hydration knapsack. I want to ride this year without the extra weight either on the bike or my back. To do that, I had to be as ruthless as Ezra Pound was to Eliot’s manuscript.
Gear
I replaced my tent and mattress with a hammock and bug net. I’ll be touring midsummer so I’m going without a hammock underquilt. I also swapped my MSR Dragonfly stove and 2L Billy pot for an Odoland isobutane stove and pot, but I’ve added to my kit a Bushbox twig stove. I’m not sure which will become my primary stove, but the idea is to use the twig stove when dry wood is readily available and the isobutane when it’s not. And as a back-up to the back-up, just for its simplicity and ease, I’ve also picked up a Trangia alcohol burner. This fits nicely inside the Bushbox and can burn isopropyl alcohol, available at any pharmacy. Can you tell I’m nervous about giving up my Dragonfly?
My camping mates will be happy to know that I finally retired my toy hardware store hatchet and bought a Gränsfors Bruk Wildlife Hatchet. I don’t know why I suffered as long as I did. I’ll be using this around camp to prepare firewood and split firewood into twigs for the Bushbox. I’ll be travelling solo so edited out of my kit the second plate, cup, and cutlery, resulting in my cookware now being considerably smaller and lighter.
When I did The Timber Trail at the very end of last season, I found my Wolfman Expedition tank bag too big and heavy, making the Tiger more top-heavy at slow speed than it already is. It also worked better on the 650GS with the fuel cap on the side of the bike and not under the bag. It would have been possible to move the essentials to my hydration knapsack, but I want to eliminate it too. Water is heavy and the knapsack restricts airflow through a jacket. Mine also interferes with my neck brace. (If it goes under the brace, the brace sits too high; if it goes over the brace, the brace digs into my shoulders from the extra weight.) Instead, I’m going to try a fanny bag with only a few essentials from the tank bag: aux port to USB adapter, some electrical cords, a Leatherman Wave, tire pressure gauge, 8mm socket and micro-ratchet for my pre-load adjuster, and my monocular. I think fanny bags are nerdy, especially if worn in the front (i.e. the scrotum bag), and I wouldn’t be caught dead in one anywhere but on the trail, but one might be the answer to staying cool and unencumbered on the bike. If they find me dead somewhere on a trail this summer, at least my reasons for wearing one are now known.
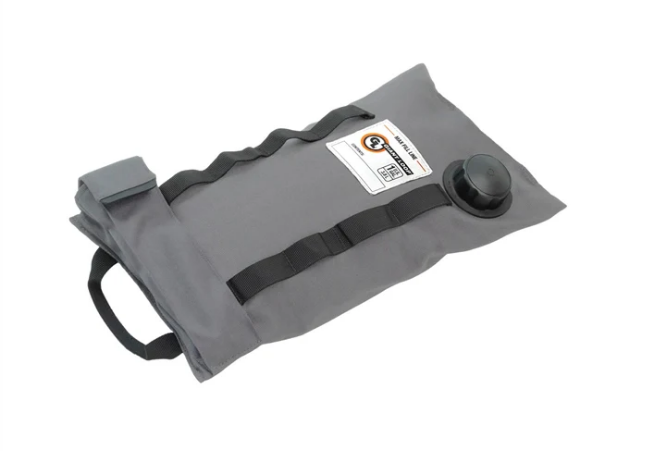
As for water, since I won’t be needing to bring a fuel bottle for the Dragonfly stove, my bottle holster is free. I’ve moved it from the back of a pannier to the front left side and will try the Simple Modern Insulated Tumbler with Straw and Lid for sips when I can. It’s only 28 mL so I’ll also be carrying an MSR 4L Dromedary to refill it as needed. Marilyn and I took the latter through Newfoundland but never used it much, so I was ready to retire it from my kit, but I’ll be doing some pretty remote riding midsummer so will strap the Dromedary onto the bike along with a 1G Giant Loop Armdillo bag to extend my range to around 400 km (~250 miles).
Giant Loop Armadillo Bag
After the practice pack last night, I can confidently say that almost everything fits into my Enduristan Monsoon Evo bags. I’ve added two Enduristan Fender Bags onto my panniers, into each fits perfectly a 10×10 Aquafest Safari Tarp. (I’ll be taking two—one for over the hammock, one for shelter.) My tools and tubes, as always, will go in two Giant Loop Possible Pouches that I strap to the crash bars at the front of the bike. I say “almost” because I will still have to have a small Enduristan tail bag on the rack at the back for my rain jacket, windbreaker, and down vest—my layering system to deal with temperature changes. I can live with that.
Finally, I’ve added to my gear to prepare for the risks of off-roading. I have a Knox compression suit and recently purchased the chest protector upgrade that doesn’t come standard with the shirt.
Knox Venture ShirtChest protector upgrade
I swapped out Level 1 armour for Level 2. I also recently replaced my ageing Arai Signet-Q helmet with a Contour-X. I know, I know: why didn’t I get an XD-5 or similar adventure helmet? Well, I already have an adventure helmet, the LS2 Pioneer, and this will be my touring helmet. The peak causes wind noise and I was looking for the most comfortable, quietest, safest helmet on the market, and the Contour-X fits me like a glove.
Route
I’m sorry, my American friends, but I’ve decided that I can’t do this summer my planned ride of The Blue Ridge Parkway south and the BDR’s coming back. This will be the 3rd time I’ve postponed this ride, and I don’t do it lightly. I was looking forward to exploring the Appalachian Mountains and challenging myself on the MABDR and especially NEBDR, but after much deliberation, I’ve decided to join my fellow Canadians and stay north of the border this summer, that is, the “artificially drawn border.”
What makes this decision especially difficult is that I have always found Americans extremely friendly and helpful, and I recognize the difference between Americans and their government. But lately we Canadians have been hearing of visitors having their phones confiscated at the border and searched, and some Canadians detained, and even some anti-Canadian sentiment from certain states that shall remain unnamed, so I don’t feel entirely safe to visit while tensions are this high. I’ll be travelling solo in remote regions so am especially vulnerable. It’s really unfortunate that it’s come to this and I hope our good relationship can be restored quickly so I can complete that bucket list ride.
Instead, I’ve decided to do some of the Trans Quebec Trail. This is a system of trails throughout Quebec. Initially I was going to do a section of the TCAT (Trans Canada Adventure Trail) called The Forest that runs from Baie Comeau, Quebec, to Kenora, Ontario, but that gps track isn’t always kept up to date. My Calabogie Misadventure ride a few years ago was largely a result of the track not being kept current; my riding buddy and I didn’t know that a bridge was out and were forced back out onto a gnarly hydro line. The big benefit of the TQT is that there is an accompanying app that is user-submitted; if there’s a problem on the track, one can immediately report it with the press of a button. The app also shows campgrounds, gas, groceries, attractions and more, so I feel I can ride with a lot less stress and simply explore, as I like to do, finding the essentials when needed. Thanks to Marc Chartrand and his team for putting this route and app together.
I plan to pick up the track south of Montreal and follow it east to Rimouski and beyond, perhaps into the Gaspé interior. Then I’ll cross the St. Lawrence River (uh, by ferry) from Matane to Baie Comeau and come back by the north shore, up through northern Quebec with some of the most remote riding I’ve ever done. It loops over Lac Saint Jean, where Marilyn and I visited last fall, but on dirt roads this time. Apparently about 90% of the route is dirt and gravel. You can see the entire trail and photos at the STQT Facebook page. I don’t know how long this will take me and I don’t have a definite schedule, but that’s the kind of adventure riding I like. With the app and riding solo, I can play it by ear and simply explore at my own pace. Teachers’ benefits.
Training
To prepare for the off-road element of this tour, I’ve decided to do some more instruction this summer. When I got my licence in 2016, I did some classes to get a Level 1 foundation, but it’s been several years since and I’m ready to improve on those skills. I’m going to look into the Level 2 class with Académie Ridaventure. Their Level 2 class covers such things as water crossings, clearing obstacles (logs, large rocks), and brake slides. I think it’s always good to develop your skills, and I feel I’ve plateaued recently.
I hope to do a semi-private Level 2 class.
“Ah spring!”
There’s another poem I know about spring. Unlike Eliot’s 434-line masterpiece, this one contains two words: “Ah spring!” I know it by heart. It’s been a brutal winter with record snowfall in Montreal and frigid temperatures for months. No January thaw this year. But we’ve finally arrived at the cusp of spring and the riding season.
If there’s one positive of the off-season, it’s the opportunity to “reculer pour mieux sauter,” as D.H. Lawrence said, step back to jump forward. It’s a time to dream and plan for adventures to come. I’m ready; the bike is ready. It may not be the cross-country tour I did in 2021, but in many ways it feels like this tour will be my most ambitious and the one I’ve been working towards since I began riding in 2015. It’s the kind of ADV remote touring I wanted to do on the cross-Canada tour but didn’t have the time. I discovered then that this country is so large that you have to explore it one province at a time, and I guess I’ll start with the one I’ve called home now for 35 years.
What are your plans for the season? What changes have you made to your bike and kit to prepare? Drop a comment below. Whether you are an armchair adventurer or a seasoned traveller, despite what Nature presents us today, it really is a special time of year. Keep the faith, my motorcycle friends: we’re almost there.
Let me start by addressing the elephant in the room and deal with the controversy surrounding knee braces. A few years ago, a reader commented on a Wish List post of mine that included some knee braces. I’m always happy to receive comments from readers and wasn’t even aware of any controversy. He pointed me toward Ryan Hughes, the leading spokesperson against braces, who argues that they restrict movement on the bike and lead to incorrect body position. There have also been anecdotal claims that braces have led some people to breaking their tibia or fibula.
On the other side of the argument is Adam Reimann. He admits that he’s tried and abandoned some pretty bad braces that were painful and obstructive, but he suggests to keep looking around to find some that fit you well, then you will not want to ride without them. It will be, he says, like “riding without your helmet.” He refers to a brace as like a second knee, a knee over your knee, that adds strength when you need it, whether in a twist, hyperextension, or hard knock.
I think this is one each rider has to decide for him or herself. For me, I’ve seen guys blow out their knees playing soccer, and I’ve seen (on video) a now friend severely damage his knee in a little tip-over. (Reimann comments that’s it’s often not the high speed accidents but the silly little slow-speed ones that cause the most damage.) These are very heavy bikes we’re taking off-road, and it doesn’t take much to tear a meniscus or AC ligament or worse. Since I’d like to keep my mobility well into my retirement, I decided to get some braces.
The problem was I never could find the $1000 or so to buy a pair. Then one day I had an idea, such a brilliant idea (if I may say so) I don’t know why I hadn’t thought of it before. (I get my best ideas upon waking, as if my mind has been mulling over a problem in sleep and decides to present me with the answer upon waking.) Maybe I could get a portion of the braces covered under my group insurance at work? I’d heard of people getting covered for a brace after an accident, but shouldn’t doctors and insurance companies logically cover preventative braces too? I looked into it and discovered they do! You need a doctor’s prescription, so off to the clinic I went.
The young doctor I got (this is Quebec healthcare—no one actually has a doctor) was not familiar with knee braces and I had to show her a photo of one on my phone and explain what I’d be using it for. After dutifully checking that my knees were indeed still fine, she thankfully wrote me the prescription but added, just to cover herself, “for preventative use” on it.
I mention all this because if you’ve been considering getting braces but the cost has been a deciding deterrent, check your insurance policy. Ideally, medicine should be preventative, just like bike maintenance. Just make sure the braces you get are medically certified because some are not.
With 80% covered, I decided to go “top of the line,” as my parents used to say. That’s the Pod K8 2.0 braces with the forged carbon frame. Pod also make the K4, which is also medically certified but slightly heavier with an “impact modified composite frame.”
The design genius of the Pod braces is the synthetic ligament that simulates the AC ligament that is so vulnerable. Unlike traditional knee pads, the brace’s frame prevents torsional movement and hyperextension, but the synthetic ligament does not hinder bending. I’m no orthopedic surgeon or industrial designer so won’t go into the weeds of how the brace is designed or works, but I can speak to the fitment and comfort of the Pods.
As with all motorcycle gear, fitment is crucial. That starts with getting the right size brace, with the width or circumference of your knee the crucial element. (The sizing chart has both measurements. Just be sure to measure while standing, i.e. load-bearing.) Like a helmet, the brace should be snug but not tight, and the Pods come with various pads and spacers that fit inside the knee cup to get the perfect fit. If you are between sizes, they suggest going up a size.
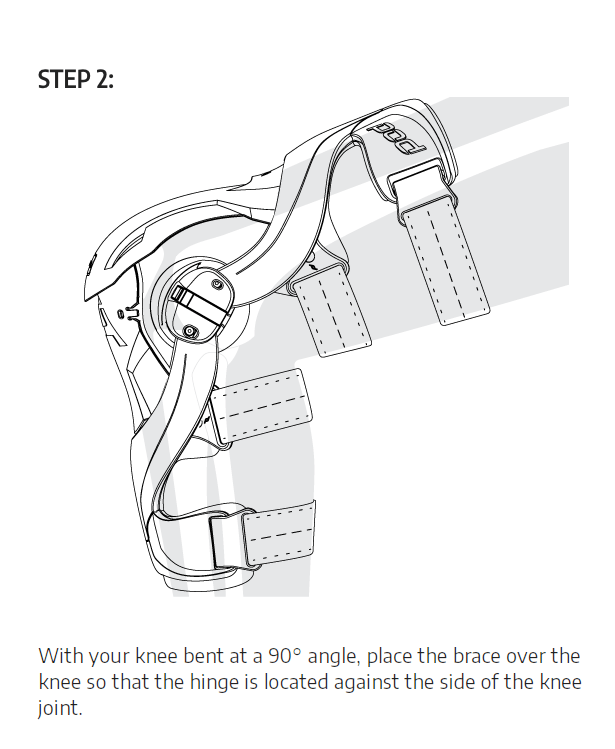
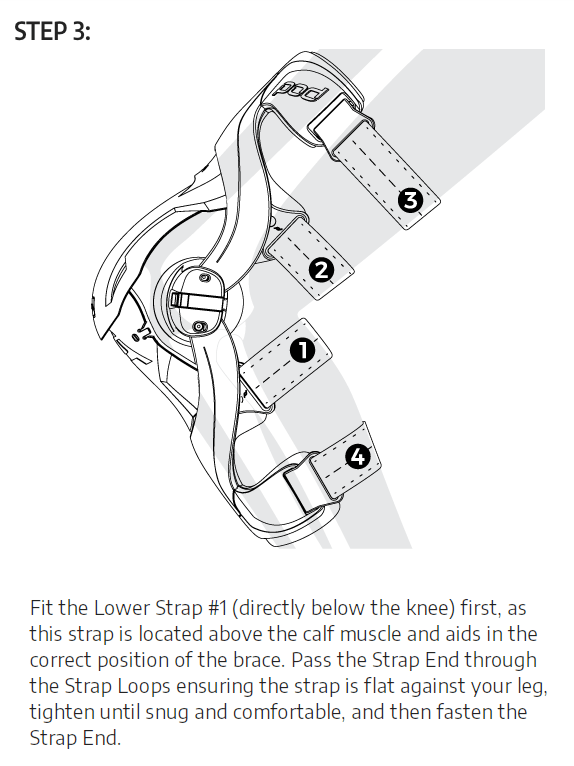
There are two crucial elements of putting on the brace. First, make sure the hinge of the brace is next to the hinge of your knee. Doh! That seems obvious, but many people fit them too low. To ensure correct placement, put them on with a bent knee. Then they should naturally fall to the right place on your leg. The straps are numbered and the other crucial element is to fit the first strap above your calf muscle and ensure it’s tight. Doing so will prevent the brace from sliding down during the day.
The rest of the straps are straightforward, working outward from the knee. Initially I made the outermost straps too tight and they dug into my flesh, leaving a mark by the end of the day. I backed off on those and the brace is now more comfortable.
Yeah, when I first put them on I felt like Robocop, but I soon got used to them. I did a couple of rides at the end of last season—four days in Vermont and The Timber Trail in Ontario—and wore them all day every day without discomfort. Okay, they are like your adventure boots: you’re happy to get them off at the end of the day but don’t mind them during. I bought a pair of the Pod KX knee sleeves to go under the braces and would recommend something similar. They provide just a little more protection to your skin, and folding the ends over the brace top and bottom ensures nothing gets snagged on the inside lining of your pants.
On the bike, I did not find the Pods obstructed my movement. However, I’m not racing and doing berms or pulling any Pol Tarrés moves. What I am doing is squeezing the bike with my knees, and especially pressing the inside of my knee into the bike to stabilize it around corners, and the Pods didn’t dig into the inside of my knee; they have rubber pads that fix into the knee cup with velcro to prevent that. There isn’t much flesh on these knees and the Pods with the knee sleeves didn’t irritate any bones or skin.
The knee is such an important yet complicated and vulnerable body part. Why not invest in doing everything you can to protect them? Overall, I’m very satisfied with the Pod K8 knee braces. I haven’t had the bike come down on one yet, but I now ride off-road with the peace of mind of knowing that if it does, my knees are protected, certainly better than in a knee pad or with traditional knee armour.
Disagree? Go ahead: the comments section is open below, and like in my classrooms, I encourage diversity of ideas.
Spirited on road, capable off road, the Tiger 800XC is a great all-round middle-weight bike.
My review of the 650GS has been the most viewed page on this blog for years, so I thought I’d write one on the Tiger, which I’ve had now for three full seasons and over 45,000K. These are both old bikes, so I know most people reading the reviews already own the bike and want to see if they’ve made a mistake. You have not. Well, as always, it depends on the type of riding you do. But if you’re looking for a long-distance ADV touring bike, the Triumph Tiger 800XC is a good choice.
But I’m getting ahead of myself. As I did before, I’ll break down the review into components.
Engine
The heart of any bike is the engine and the Tiger’s is a gem. When I pulled into my driveway on the GS at the end of my 2021 cross-country trip, I knew I wanted a smoother bike. The big thumper got me to the Pacific Ocean and the Arctic Circle and back, but it wasn’t very comfortable, especially on those highway miles. When I test rode the Tiger, I knew I would buy it even before I was around the block; I couldn’t believe what I was feeling. This engine is SMOOOTH! I’d go as far as to say it’s the bike’s defining characteristic. This is the 800, so before Triumph moved to the T-plane crank and off-set firing order, so it’s about as smooth as a triple can be. If you’re coming from the nuts-numbing world of a big thumper, the inline triple with a 120 degree crank is a world apart and exactly what I was looking for.
Aside from being smooth, this engine has a ton of character. It has comparable torque to its rival, the BMW F800 GS (58 ft.lb @ 7850 rpm vs. 59 ft.lb @ 5750 respectively), but gets that torque much higher in the rev range. And it likes to rev! It spins up fast, so even pulling away from a stop light you find yourself pulled involuntarily into The Giggle Zone. Yet despite that high peak rpm, the torque on the Tiger is incredibly linear.
photo credit:// ADVMoto. 1st Gen Tiger 800 dyno results. Note the linear (flat) torque “curve” above 3000 rpm.
The gearbox is also smooth, both upshifting and downshifting. It’s so smooth, someone I swapped bikes with once asked if it has a slipper clutch. The high-revs, the smoothness of both engine and gearbox, combined with a wonderfully guttural exhaust note make the Tiger 800 a really fun bike to ride. It feels like Triumph has shoe-horned a sport bike engine into an adventure chassis, which I guess they have since the engine comes from the 660 Sport. I’m not afraid of the dirt but, to be honest, most of my adventure touring is on asphalt, and the Tiger makes crunching those miles enjoyable.
Where the engine does come up short is in slow-speed technical riding, a downside the T-plane crank of its successor, the Tiger 900, attempts to address. The 800 is happy when revved, but is prone to stalling at slow speed, especially in sticky mud or over obstacles—anything that requires careful clutch work in 1st gear. It has no tractor-factor, so if you like ATV and snowmobile trails, single-track and getting out into the woods, the Tiger is probably not for you. It can do it, but you have to keep the revs up and feather the clutch a lot, which can be tiring on your hand and the clutch.
Handling
The XC model I have has a 21″ front and a 17″ rear wheel—an unusual combination in the ADV world where an 18″ rear is the norm. Perhaps Triumph did that to compensate for the nose-heavy geometry of the big triple compared to a parallel twin. (It still has a stink bug stance.) They’ve also increased the rake on the front forks beyond the competitors’ to 23.9˚ (compare with 26˚ for the BMW 800). What this weird-ass geometry does is make the 21″ front wheel surprisingly easy to turn in yet planted through corners. For an ADV bike, the Tiger is surprisingly agile and confidence-inspiring through the twisties. That’s when it’s in its element, whether on asphalt, gravel, or dirt.
Lanark County Trail System on 70/30 tires.
The cost is a tendency for the front end to tuck in mud or sand, especially if you forget to steer with the pegs. My crash this past August was a direct result of that happening on a muddy downhill corner, although I think balance of the bike front to back was also a factor. (I was under sag.)
Front-end tuck on the Bailey-Hazen hero section.
The Tiger is also a little top heavy, despite its flat horseshoe-shaped gas tank. That’s probably a result of the tall and wide engine. (To get the 660cc Sport engine to 800, Triumph lengthened rather than widened the bore.) You don’t feel it once the bike is rolling, but again, it’s another characteristic that makes the Tiger a challenge off-roading at slow speed. What all this means is that if you want to ride hero sections on the Tiger, you’d better have skills.
Triumph says that the Tiger is for “light off-roading” and they don’t lie. The engine and balance of this bike are designed for 2nd gear and up. But the biggest indicator that this bike is not for serious off-roading is the placement of the spark plugs and air filter, both of which are under the tank. If you’re doing water crossings—and what serious off-roader isn’t—you’d better not swamp the bike or you’re going to be removing bodywork and lifting the tank trailside. Been there, done that. It’s not much fun. To lift the tank, you need first to remove the beak, radiator side panels, indicator panels, and trim. I’ve done this perhaps a dozen times now and have the whole process down to about 20 minutes. Needless to say, for an ADV bike, this is a major design flaw, or at least a serious limitation.
Suspension
The Showa suspension on the XC is a step up from the XR version. Rear travel is 215mm and front is 240mm. That’s more than what I’ll need because I’m not blasting down rocky trails as much as trying to thread my way through them. (The 650GS, for comparison, has 165mm rear and 170 front.) With the Outback Motortek skidplate, ground clearance on mine is about 9 1/4″ or 235mm. The shock has hydraulic preload and rebound adjustment. The forks are a beefy 45mm but with no adjustment. That’s a fairly basic system, but again, sufficient for ADV touring.
Like most ADV bikes off the production line, the Tiger 800 is set up for road use. The suspension is soft and cushy, making a plush ride around town (and during test rides, I should add). But if you want to use this bike for how it’s intended—ADV touring (the XC stands for cross country)—you’re going to have to stiffen the suspension.
The OEM shock has a spring rate of 9.7 kg/mm which, surprisingly, gives me a static sag of 18% (40mm). This means that under its own weight on the OEM spring, the bike is under sag. Rider sag for me is 35%, even with preload fully wound. (Note to newbies: static sag is unloaded with no rider and should be 10%; rider sag is loaded with rider and should be 30%.) At 150 lbs (177 in all my gear), I’m not a big guy, and with about 66 lbs of luggage (56 on the back, 10 on the front), I don’t think I’m overloaded, although I’ll be working over the off season to reduce that weight. Nevertheless, it’s clear to me that the OEM spring on the shock is too soft for anything but solo street riding.
I recently upgraded the suspension and will publish a separate post on that topic, so click Follow if you’re interested in what I’ve done.
Ergonomics and Comfort
The ergonomics on the Tiger are generally comfortable whether you are seated or standing. The wide handlebars are what you’d expect and want on a bike designed for the dirt, yet they don’t feel like ape-hangers when seated either. I haven’t added any bar risers because the bar mounts are already high, and when I stand the bars fall to the right place when I’m in the correct body position with hips slightly bent. (Most people who add risers are seeking comfort while standing erect.)
One unusual feature of the bike’s ergos is the distinct sensation of the fuel tank between your, uh, thighs. It was something I immediately noticed on that brief test ride and something others have commented on when we’ve swapped bikes. The tank is wide, and it forces your knees apart. (No bad jokes here). I find it actually reminds me to squeeze the bike, which is good practice whether riding on and especially off road.
The seat is generally comfortable for long days, although when touring I add a sheepskin pad to improve comfort and airflow. Triumph sell a comfort seat for this bike but I haven’t needed it. Similarly, Marilyn hasn’t complained about the seat on the back. The 1st generation Tigers do not have a heated seat option but subsequent ones do.
My knees sometimes complain over long days but I’m pretty long-legged, so they are bent slightly more than 90˚. I put my Fastway pegs in the low position and the adjustable seat in the high position and this set-up has been pretty good. With the bike now sitting even higher, I’m anticipating improved comfort for my ageing knees. In the raised position, seat height is 34.5″ or 885mm, which is comparable to its BMW competitor.
My biggest complaint about comfort is in the area of wind management. I’ll be doing a separate post on my search for a solution, but let me say here that the OEM windscreens for the Tiger suck! The stock screen is notorious, and the touring screen is little better. Maybe it’s too much to ask of a screen to allow airflow at slow speed when off-roading and a quiet ride at speed on the highway. The best solution I’ve found is the touring screen with a cheap clip-on wind deflector, which helps with the wind but ruins both the lines of the bike and video footage from my chin-mounted camera. Oh well.
Aesthetics
Canadian poet Robert Bringhurst has a collection titled The Beauty of the Weapons and I think the Tiger is a beautiful weapon, especially the all black model. I get a lot of compliments on the bike, even from other riders. You can see in the neoclassic bikes like the new Bonnevilles that Triumph pays a lot of attention to how a bike looks, and they’ve done a great job with the Tiger. Okay, you may say they’ve copied their competitor with the beak, but I think a bike without one looks weird. There are a lot of complimentary parallel angular lines on the bike that thankfully Outback Motortek has followed. Aesthetics is something not everyone is into, but I want a bike that makes me turn around and look at it as I walk away in the parking lot, and the Tiger does that.
Reliability
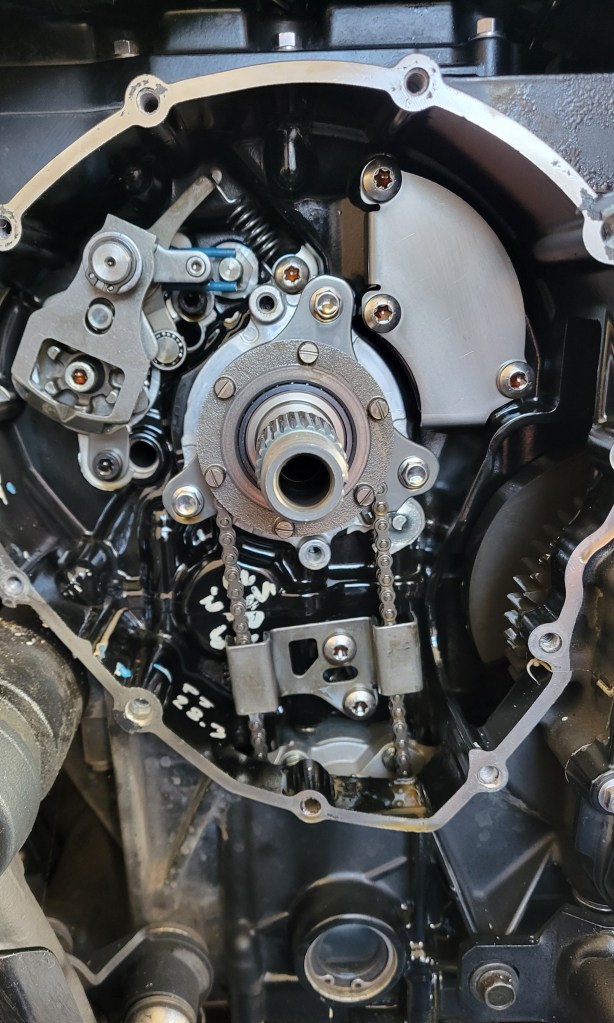
There are a few known issues with this bike, not surprising given that it’s a first generation model. The shifting mechanism is known to fail, and mine did, but not in the expected way of the return spring or the pin for the return spring breaking. No, it was the selector arm that failed at about 45,000K, so while I was in there behind the clutch, I decided to replace not only the selector arm but also the problematic spindle, the return spring, and the detent wheel, all of which have been redesigned. You can read about that work here. The bike also let me down once in the bush during a water crossing when somehow about 3-4L of water got in the tank. I still think the only viable theory is that water got sucked up through the tank breather tube and I’ve since redesigned the tube to avoid this happening again.
I cut the breather tube behind the airboxand added a T-joint and short length of hose
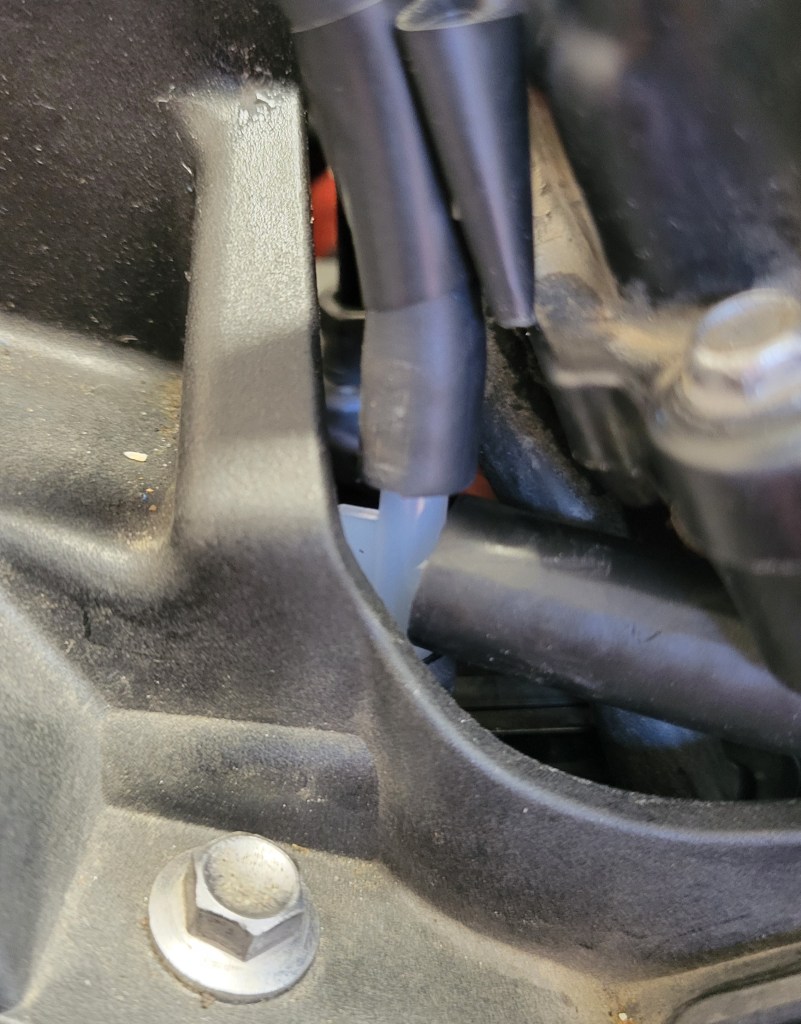
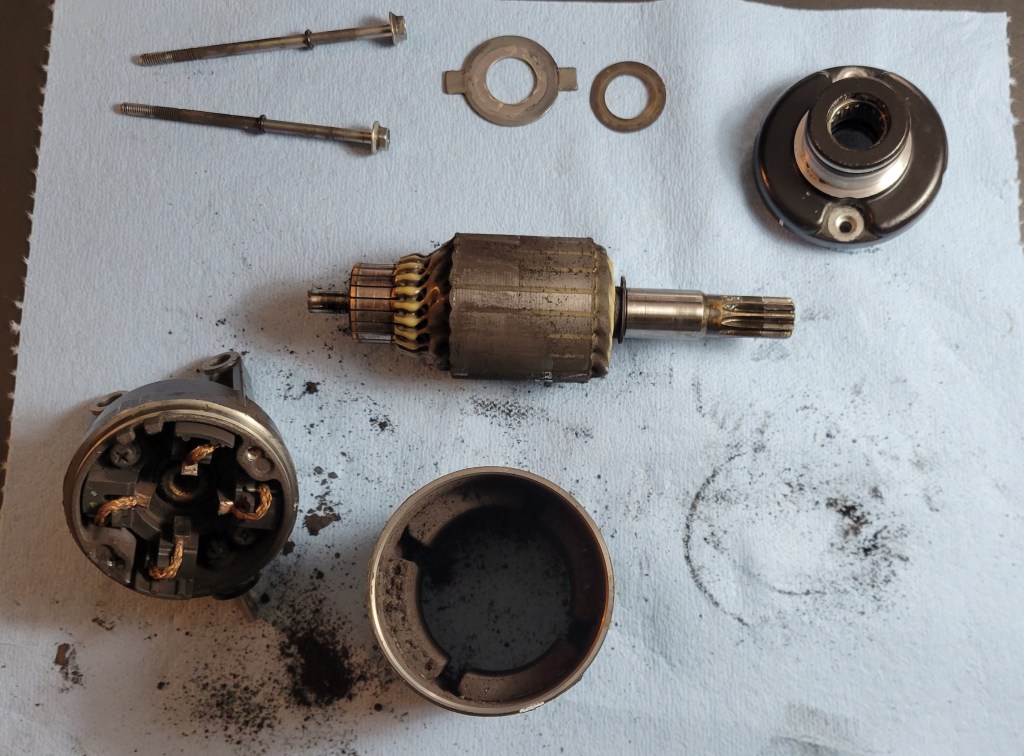
The other known issue with this bike is the starter motor. There are many accounts of it failing to restart the bike when the engine is hot. It was fine for me the first two years but then started to act up and got progressively worse. I’ll be doing a separate blog post on that too, but I’ll let the cat out of the bag here and say the problem was, at least in part, a dirty main ground on top of the engine block that was causing a voltage drop. If you have the dreaded starter motor issue on your Tiger, clean the main ground and contacts on the starter relay before changing the starter or battery.
That’s it. Clutch, stator, voltage rectifier, water pump, oil pump—all good—and no issues with any of the electronics. That’s not bad, in my opinion, for a bike with over 60,000K on it.
I adjusted the exhaust valves at 45,000K; the intakes were perfect but all the exhausts were tight. There are some reports of the engines, particularly on the 2nd gen Tigers, to start burning significant oil at about that mileage, but thankfully that has not been the case with mine. It burns a little oil now, particularly at high-revs on the highway, but nothing significant. I’ll come back from a tour of a few thousand kilometers and top up maybe 200mL. I’ve been using Castrol Power 1 4T and, more recently, Motul 7100, but when I mentioned my oil consumption to my dealer, he said they put Motul 300V in all the “high-revving bikes.” I thought it was only for racing bikes, but henceforth that’s what will be going in this bike.
I like that the 2011-14 Tigers are still relatively simple and easy to service on my own. There’s no ride-by-wire and rider modes or complicated electronics that require a computer to diagnose and repair, although I wish turning off ABS were easier than navigating menus. The 1st Gen Tigers that ran 2011-14 are at the tail end of an era before things got pretty complicated electronically. Build quality and fit-and-finish are excellent, and the bike is looking as good as new with no rust or corrosion on it anywhere, despite its age.
Summary
Pros
Fun, spirited engine
Smooth gearbox
Agile and planted through corners
Comfortable seat and ergonomics
Good looks
Aside from a few early-model issues, generally reliable
Relatively easy to service
Cons
No tractor-factor; stalls easily in 1st gear
A little top heavy
A tendency for the front end to tuck in low-traction terrain
Poor wind management
Shifting mechanism weak
Some reports of starter issues with OEM starter
Plugs and airbox under the tank
Vulnerability in water if the tank is rapidly cooled
Looking at the length of those two lists, you’d think I’m not happy with the bike, but I am. That’s because the main elements of the bike are good—the engine, the handling, the reliability. The bike has a few issues, like any bike, but they are overshadowed but just how much fun it is to ride, and isn’t that the main thing we want in a bike?
Conclusion
When I participated in La Classique Moto Fest here in Quebec a few years ago, I saw my bike in a long line of other bikes there for the rally. Maybe it was my subjective perspective, but it seemed slightly out of place. It occurred to me that most of the bikes there were set up for off-road riding whereas the Tiger, at least my Tiger, is more an adventure bike, and I was reminded of a comment made years ago on the ARR Raw podcast about this distinction. (I’ll link to the podcast but can’t remember the specific episode.) They were talking about tire choice, if I remember correctly, and one of the guests made the distinction between what they do as RTW riders and what weekend warriors do. He said he’d never attempt half the stuff some guys do off road because, when you’re touring halfway around the world, you can’t afford to break something on your bike and wait weeks, perhaps longer, for parts to arrive. In other words, they ride more conservatively, and that was reflected in his tire choice. I’ll add that it’s also reflected in your bike choice.
Off-road versus adventure bikes. An arbitrary distinction?
As we all know, the adventure bike is the ultimate compromise. It has to be good on road and off road, capable of crunching out miles on the highway as well as getting you down a logging road. It has to be quiet and comfortable for long days in the saddle, powerful enough to climb mountains and carry camping gear, maybe a pillion, yet small and light enough to pick up on your own in the middle of so-called nowhere. It has to be reliable, and simple enough to fix yourself, trailside if necessary, if something does break. With these considerations in mind, the middleweight Triumph Tiger 800XC is a great all-rounder and an excellent choice as a long-distance ADV touring bike. It has its drawbacks, for sure, and may be master of none, but it’s the best Jack of all trades I’ve been able to find.
It wasn’t the tour I planned for the summer, but it was eventful.
photo credit: Riley Harlton
The initial plan for my big tour of 2024 was to ride The Blueridge Parkway down to West Virginia and then come back on the MABDR and NEBDR. It would have taken me probably close to a month. But then those plans got kiboshed by unforeseen circumstances and for a while there it seemed I wouldn’t get away at all. In the end, I managed to spend four days in August touring Vermont with Riley and Marc from The Awesome Players Off-Road MC doing Sections 4 & 5 of the NEBDR.
We decided to do a spoke-and-hub type trip, using Silver Lake State Park in Barnard, VT, as our home base. This meant not only that we didn’t have to move camp each day but also that we could ride for a few days without luggage. I’ve stayed at that campground several times and it never disappoints. The general store in Barnard has gas and makes a great breakfast sandwich.
We decided to ride Bailey-Hazen down. B-H is an old military road dating back to the war of independence (1776). It’s primarily dirt and gravel and runs from Montgomery Centre down through Lowell, Albany, Craftsbury, Greensboro, Walden, Peacham, and into East Ryegate. I’ve ridden it a few times but never the hero section. In fact, the last time I rode B-H, I attempted the hero section and had to turn around. It’s basically an ATV trail filled with babyheads, and I was alone and on street tires. It’s definitely a challenge.
So I was thinking of that section as we rode down toward the border and thinking of it some more as we approached Montgomery Centre. (The hero section is early in the track.) This time I had Michelin Anakee Wild tires on and there were three of us, but I was fully loaded with all the camping gear. Riley and Marc have a lot more off-road experience than me and the last time I rode with them it didn’t go well. You never want to be the guy holding everybody up.
We headed up the nasty little hill climb and I got loose a few times but kept it upright. Riley said later that he was thinking I must be happy not to be on the Beemer and I was. The Tiger is definitely more capable with the 21″ front wheel. There was a crew working on the trail and soon we hit some deep gravel they were spreading and that was interesting. But somehow I made it to the top without dropping the bike and felt pretty good about that. Unfortunately, things were about to take a turn for the worse.
For those unfamiliar with Awesome Players lingo, a douche rope is a fabricated rope with a steel karabiner on one end and loops along its length for handles. It’s used to pull out the douche who is stuck in mud or, in my case, whose bike is down a ravine. I don’t know why I was going so fast, except I guess because adrenaline was pumping through me and maybe I was over-confident, having just done the tough part. I think I also relaxed my concentration. You can see my front tire slip out on the muddy downhill corner which threw my balance, and then I was struggling to keep the bike on the trail. Riley thinks I hit a false neutral because you can hear the bike rev a few times but I think I just panicked. Fortunately, what I lack in riding skills I make up for in tree avoidance technique. When I saw it coming up fast, the bike went one way and I the other.
I’m breathing hard into my helmet because I was in some pain and thought at first I might have pulled an Itchy Boots and broken my collar bone. But in the end, it was just a separated shoulder and, a month later, I’m almost fully recovered. The tendons have healed and I’m just working on strengthening and stretching the scar tissue. It could have been much worse. If the bike had hit the tree, I imagine there would have been structural damage and it would have been a write off. In the end, it just made for a few uncomfortable days around camp and especially trying to sleep in my tiny tent.
I was pretty mad at myself, as you can hear. It was an auspicious start to the tour and I was living up to my reputation. But here’s the thing I’ve come to realize after reflecting on the crash over the past month: crashing is not only an inevitable part of off-roading but part of learning. In fact, Brett Tkacs lists dropping your bike as an indicator that you’re improving your riding skills, which at first seems counter-intuitive, but when you think about it, if you aren’t dropping your bike once in a while, you aren’t pushing beyond your limits where both sh*t and learning happens. I’m pretty familiar with riding on dirt and gravel roads but haven’t done much trail riding. By contrast, Riley and Marc have been doing trails for years, so I knew that riding with them would be a learning experience.
Their experience was essential to getting my bike back on the trail. They had the gear and know-how. Here’s Marc explaining the procedure.
video credit: Riley Harlton
Once the bike was taken care of, we had lunch and I took a bunch of meds for the pain. I wasn’t sure how it would go on the bike but it was surprisingly okay; the shoulder is relatively immobile while riding, and it was actually off the bike around camp that I felt the injury most.
When we headed off again, I decided to let Marc go first and went slower on the downhill.
That’s my windscreen rattling; I lost some hardware in the crash that I replaced at the next rest stop. Later, Riley lead and I followed his line.
Bailey-Hazen actually isn’t a technical road, aside from a few bits. This clip is more indicative of what most of it is like—hard-packed dirt lined by trees and periodically opening up to nice views of the surrounding hills. It’s a fun ride and appropriate for big bikes.
The next day we headed south on Section 4 of the NEBDR but not before the amazing breakfast sandwiches of the Barnard General Store. There we met Bethel, who was visiting from California and had rented a Ténéré 700 from MotoVermont. She was enamoured by the general stores and bucolic countryside of Vermont, and who wouldn’t be, especially if you live in Superslab City. (I might have this wrong, but I think she said she lives in Los Angeles.) We shared stories over breakfast of falling in mud puddles and down ravines. It’s always nice to meet fellow bikers; there’s definitely a bond between like-minded people enjoying the freedom and thrill of motorcycling. Unfortunately, she was heading north to return the bike in Burlington and we were heading south.
If you know anything about the NEBDR, you know that it’s one of the harder BDRs and that Sections 4 and 5 are the toughest sections, so we were expecting some challenging terrain. I was trying to figure out where the by-passes were because I’d already decided I would take them with my gimpy shoulder; I just couldn’t risk another fall. But to our surprise, the section was relatively tame, more of the same winding dirt and gravel roads. When we finally stopped for coffee and a pastry at Sweet Birch Coffee Roasters and Bakery in Wallingford and Marc got out his map—yes, his paperButler NEBDR map—we realized we had done all the bypasses. It seems that the most recent gpx tracks (March 2024) had the bypasses as the default and you had to load the harder sections separately if you wanted them. When I downloaded the tracks, there was much description of flood damage, so I suspect the organizers decided to steer riders away from those Class 4 roads for now. It worked out for me, but I think Marc was disappointed.
Despite that, Section 4 has some very nice riding. One of my favourite roads was the Forest Service Rd. 30.
Lower Podunk Road is also sweet, as is Hale Hollow.
Sorry about the bad angle of the action cam. If it’s not the wind deflector that obstructs the view, as was the case with my Newfoundland footage, it’s the bad angle unbeknownst to me. I’ll eventually get it right.
We ended up in Readsboro before high-tailing it back up to Barnard on asphalt, stopping en route for groceries and beer.
The next day we headed north on Section 5 and decided to split up so Riley and Marc could get their Class 4 fix. Unfortunately, while doing the harder section north of Stockbridge that follows the White River, Marc suffered the same fate as me. He said it was an easy section but he got target fixated on a rut and was thrown violently off the bike, separating his shoulder too! Now there were two of us gimpy. Even before his accident, he had decided that he was going to head home a day early because camping was not agreeing with him. That’s a polite way of saying he’s a wimp. No, seriously, some people are campers and some are not, and to his credit, he at least gave it a try. He said he enjoyed the campfire and time around camp, but I think he wasn’t sleeping well.
Even experienced riders periodically take a tumble. We’ll blame this one on sleep deprivation. photo credit: Riley Harlton
So after riding the exhilarating Lincoln Gap Road, we said our good-byes and Marc headed north on the 100 back to the border. It was already mid-afternoon and rain was in the forecast, so Riley and I decided to call it a day too. We picked up steaks and potatoes and, being the final night, some port. As we rode back to Barnard the rain started and never really stopped the entire evening, but we strung a tarp over the picnic table so all was well.
A tarp, woollen hat, Rugged Brown Ale, and bluetooth speaker. What more do you need? photo credit: Riley Harlton
For the ride home, we figured we’d ride the Puppy Dog Route, which passes through Barnard and goes right up to the border. I’ve ridden it a few times and it’s an easy dirt route, but I’d only ever done it when dry. After the heavy rain of the night before, it was greeasy! We were crawling along in 1st gear when I stopped and asked, “Do we really want to do this?” Riley agreed that it would take us forever, so after a few miles of that we hit asphalt and stayed on it, but the drama was not over yet.
As we rode toward the border, the rain got heavier and heavier. When we crossed the border, it became torrential, and as we came over the Mercier Bridge it was apparent that there was major flooding, including on the main highway. Traffic had come to a standstill, so we had to find another way home and that included some deep water.
154 mm of rain fell on Montreal on Aug. 9, shattering all records.
When I got in, Marilyn was none too pleased. She’d texted early in the day that we should just come straight home, but I didn’t know why since the rain wasn’t that bad in Vermont. Little did we know that Montreal was in the midst of more extreme weather and that many people were either stranded or had basement flooding. Apparently 80% of the basements in Dorval, the city next to where I live, were flooded.
A pretty hard crash, two, in fact, some challenging riding, extreme weather—this ride had it all and was the true adventure I needed before heading back to the doldrums of work. It also gave me a taste of the NEBDR and how difficult, maybe foolish, my original plan would have been to ride the entire thing alone, fully loaded, including the Class 4 roads “as a challenge.” The riding on the NEBDR is enjoyable and as challenging as you want it to be. We’ll see how I feel next summer but at the moment I’m feeling like I can skip the Class 4s if I’m alone.
The best part of this ride actually wasn’t part of the route at all but reconnecting with The Awesome Players. When I tried riding with them before, I just couldn’t keep up on the big GS when they were on smaller bikes. Now that I have the Tiger, I’m willing to try again. It’s the kind of riding I’ve wanted to do for some time but most of the riders I know don’t do dirt. I know I’ll be a little out of my comfort zone but in a good way, and there isn’t a better bunch of supportive, fun guys to ride with than them. You only have to watch a few of their videos to see what I mean.
But that will be probably next season, to be honest. Next week is the Ride for Dad to raise funds for prostate cancer research. It’s a great cause, and you can contribute to my team’s campaign here. Anything helps and is greatly appreciated.
After that, Marilyn and I are riding the Saguenay Fjord, which neither of us has seen, and I’ll be changing tires and windscreen for that tour so I don’t know if I’ll be back on the dirt until spring. Look for an upcoming post on Saguenay/Lac Saint-Jean, and a few more rides through the glorious fall season here in Canada when the leaves turn colour. Who knows: maybe I’ll even make it down to Vermont again before the snow flies.
At Silver Lake State Park. Norden 901 Expedition, Tiger 800XC, and Yamaha T7.
A great long distance adventure touring tire with one major flaw.
When Dunlop decided to design a new ADV tire, they smartly asked adventure riders what they wanted. Of course, we all want a tire that does everything well—excellent street performance with no compromises off-road. That’s not physically possible, but Dunlop claims to have come pretty close with the Trailmax Mission, saying it offers “knobby-like performance” off-road and “great ride quality” and “impressive grip” on the road. I ran the tire for 20,000 kilometres and it was a very good tire on the road but had limitations off-road. Aside from these limitations, I would hesitate to buy it again because of one major drawback.
On Road
Dunlop claims that the Trailmax Mission is a 60/40 tire. I’m glad they revised those numbers, because when the tire was launched they were calling it a 50/50. I think it’s more like a 70/30. You can see at a glance that it’s designed primarily for the street, with a rounded profile and not blocks but deep grooves. That results in a very comfortable street ride with easy turn in and relatively little vibration coming up into the handlebars.
One specific request many ADV riders had was longevity; we’re simply tired of having to change our tires every 5-6K. The Trailmax Mission tires have a very hard compound and you can expect to get 20,000K out of a set. I put a set of these on at the beginning of last season and rode them out to Newfoundland and back 2-up fully loaded. After 20,000K, there was plenty of tread left in the front and some left in the rear.
Front: yes, that’s a US penny.Rear: Canadian Mint gave up the penny several years ago.
So apparently if you can see all of Lincoln’s head the tire is finished. The rear is pretty close to done, although I’m not quite down to the wear marks. The front has some life but wear is uneven (probably my fault with under-inflation). Despite that hardness, I never had any problems with the tire skidding in the rain, an issue some riders have reported with the Heidenau K60 Scout that has similar longevity.
So if you are going on a long tour that will be primarily asphalt, the Trailmax Mission would be a good choice.
Off Road
I used this tire in the Classique Plus ride on Class 2 roads. It handles well in hard-packed dirt, gravel, and even shallow sand. I also had it on my 650GS before I sold it for a final tour through the New England states that involved some fairly deep gravel, and I have to say, I was having an easier time than my riding buddies on Shinko 705s, a similar 70/30 tire. Yes, it slides out from time to time, but predictably, which actually makes it a fun tire to run on dirt and gravel if you’re into powersliding.
There are a couple of features of the Trailmax Mission that make it especially good in dirt, despite its round profile. One is the sidewall lugs, a technology borrowed from ATV tires that allows the tire to bite when sunk into deep sand or mud. Yes, it does surprisingly well. Dunlop also claim the lugs help prevent sidewall punctures from sharp rocks.
You wouldn’t think these little ridges do much to pull a 500 pound bike through deep mud, but they do.
Another feature is the Staggered Step design. I can’t really say if these did anything but Dunlop claims they add rigidity in the contact patch for improved stability. The idea is that as one step wears down, there’s another ready to take over.
Staggered Step System
Obviously we are talking about stability on the sidewalls as you are leaning through a corner. I guess this is Dunlop’s attempt to reduce the “wandering” sensation some tires have when on the side blocks. Perhaps a Physicist reader will explain it to us because I’m a bit at a loss as to how these cut-outs are going to improve stability. That said, I never noticed the tire wandering, which is something I now feel on the Anakee Wilds I just put on.
“Knobby-like performance”?
Not really, although good enough for even deep sand if you are suicidal or mud if you are masochistic. It’s here where the tire has its limits. I found myself going through mud on the Rideau Trail north of Merrickville, and while the tires got me through the first few puddles, they soon caked up.
Impressive initial performance for a 70/30.
The problem is that, unlike a knobby, the mud does not evacuate from the grooves of the Trailmax Mission. You can spin the rear to clear it, but it’s the front that you need planted, and once it’s caked, you might as well be riding on ball bearings.
Yes, you can blame me for taking a tire like this into mud. It’s not meant for that. I’ve seen GS instructors take their 1200GS’s through a mud bath on Anakee 3s!, but I’m no GS instructor. So for the average rider, either stay out of the mud on these or put on a more aggressive tire.
Riders in the Quebec area will be familiar with Marc Chartrand. He is the founder of RidAventure.ca forum, La Classique Rally, and lead planner of the Trans Quebec Trail. Basically he’s The Man in Quebec and probably has more off-road experience exploring Quebec trails than anyone around here, so when he gives advice, I listen. I once read a reply of his to the ubiquitous question of “What tire should I put on my motorcycle?” His answer (I’m paraphrasing and translating) was basically that if you get, say, 6,000K out of a tire and “only” do about 10% off-road, that’s still 600K in the dirt. And that’s a lot of kilometres to be crapping your pants if you have on a street-biased tire. That’s why, he said, experienced ADV riders always put on aggressive tires.
I’m thinking of this advice in relation to the Trailmax Mission tire. If you are riding hard packed dirt, gravel, even some loose rock and shallow sand, these tires are great. But if you are going anywhere near deep sand or mud, you’re on the wrong tire.
The Major Flaw
Regardless of the tire’s off-road limitations, I’m not sure I’ll be putting these on my bike again. That’s because I do remote and long-distance riding and need to be able to change tires by hand. These tires are so tough it’s nearly impossible, and that’s not an option when you’re running tubes. Maybe some people can, but I couldn’t, and that’s what counts. Those 20,000K are the product of very tough rubber used in the manufacturing.
Now before you start saying “It’s all a matter of technique,” let me say that I’ve been spooning tires on and off my bikes for years. I’ve made it a matter of principle, thinking the more I struggle through the process the easier it will become when I have a puncture in the field. I’ve changed many different types of tires, including Metzler Tourance, Shinko 705 and 805, Pirelli Scorpion Trail II, Anakee Adventure, Kenda Big Blocks, and even the dreaded Heidenau K60 Scouts. But I could not change the Trailmax Mission tire.
Getting the tire on was not the problem; it was getting it off. I could get both beads off the rim, but couldn’t get the wheel out of the tire. Usually I put the big 15″ lever through and lever it off the same side, using my knee to press it the rest of the way off. You can watch Ari Henning do that here. But the tire he is changing has a minuscule sidewall, making it easy. The Trailmax Mission has a deep and very tough sidewall. There was no way it was coming off.
I eventually called in the support . . . but my wife was no help. I then texted my buddy Riley from Awesome Players Off-Road MC. He suggested another method of getting the tire off. Instead of same side, remove the other bead on the other side and drop the wheel down into the tire. For example, you can see this method done here. I tried this and got the wheel down into the tire just fine, but no matter how much I struggled with the tire fully lubed up and in the heat, I could not then get the wheel out of the tire. After much cursing, and sweat, and some blood, I got it half off, which is to say, I threw in the towel with the wheel stuck 45˚ relative to the tire. I took it to a shop which charged me $15 to get it off.
I’m not sure the Trailmax Missions are designed to be changed by hand, and I don’t blame Dunlop for abandoning those of us who still do this work. The vast majority of riders take their bikes to a shop for a tire change, and the vast majority of adventure riders aren’t going off-road and aren’t running tubes. Even the latest bikes with off-set spoked wheels don’t run tubes, so you can fix a flat using a plug. To compete in the longevity game, manufacturers are using tougher and tougher rubber. The industry is slowly abandoning those of us who still ride with tubes and need to remove our tires by hand.
I’ll admit, you can get a tube out to patch it without removing the tire, although even that will be difficult with a sidewall this tough. So I’ll step down from my soapbox now by just saying that the difficulty of changing the Trailmax Mission by hand is a consideration.
The Beast. That bruised thumb is the product of a tire lever in trying to get it off. I would suggest also wearing eye or maybe face protection because I had a lever fly out with force.
Conclusion
Dunlop has swung for the fence with the Trailmax Mission tire. It’s a premium tire at a premium price, with a 150/70 18″ (a common rear size) running for about $320 CAN and $250 USF. They listened to riders and studied the market, then came up with a tire capable of going long distances on the large adventure bikes of today. Apparently something like 80% of BMW 1200 (now 1250 and 1300) GS’s never see dirt, and that’s clearly the market Dunlop were aiming for with this tire. If that’s the type of riding you do, the Trailmax Mission is definitely worth a try. Like I said, I used it to ride out to Newfoundland, a tour which was primarily asphalt, but it was nice to know if the asphalt ran out (and it did a few times), we would not be in trouble. Overall, I was very happy with how the tire rode and how long it lasted, even fully loaded with a passenger through the heat of midsummer.
If you are looking for something beefier, capable of mud and sand, consider the Trailmax Raid, a 40/60 tire in the Dunlop line.
Getting ready for the new season this year meant a little more than adding a few farkles.
When I bought my 2013 Triumph Tiger 800XC in May 2022, it had only 14,500 kilometres on it, despite being nine years old. In the following two years, I’ve put another 34,000 on it. I’ve done basic service during that time, like changing the oil, coolant, brake fluid, and cleaning the air filter. I’ve also changed the plugs. But it was time for some major service.
Last fall I did the dreaded valves, swingarm and rear suspension bearings, and cleaned the starter motor. This spring I’ve fixed a problem with the shifting mechanism, cleaned and lubed the steering head bearings, overhauled the front forks, and made a few mods to get it ready for the BDRs. It’s been a long process, but it’s finally ready for the new season.
Valves
It’s the job everyone loves to avoid, and I did too. In fact, when I bought the bike, the dealer said they no longer recommend checking the valves at the manufacturer’s recommended 20,000K because, more often than not, when they get in there at that mileage, the valves are fine. I guess if you’re paying the dealer $1000+ to check them, it’s bittersweet when they don’t find anything out of spec. I was happy to wait. My buddy who rides a Triumph Scramber 1200 XE has never checked his and he’s got I think now over 78,000K on it. “If they’re slappy, they’re happy,” he said, although I always thought you don’t want to hear the valves. At any rate, with now over 48,000 kilometres on the Tiger, it was time to get in there and see how happy they are.
All the intakes were fine, but all the exhausts were tight, some significantly. Here are my calculations. Sorry about the grease.
Highlighted is the amount out of spec. I’m using metric.
As you can see, all the intakes were spot on at 0.15 (specs are 0.10 – 0.20). The exhaust specs are 0.325 – 0.375, so ideally you want them at 0.35. Some of mine were 0.20, so .15mm out of spec. I’m glad I didn’t wait any longer or I might have started causing damage to the valve seat. Live and learn: sometimes there’s reason behind the manufacturer’s recommendations.
An egg carton works well for keeping all the buckets and shims organized.
You want the same bucket to go back on the original valve, so keep any happy dogs with long tails out of your workspace. Nobody likes removing the cams, but just make sure you’ve got it locked at top dead centre and turn the engine over several times by hand once you get it back together to make sure you didn’t slip a tooth on the timing gear. I almost did because I didn’t put enough tension on the timing chain while torquing down the holder. (You have to remove the tensioner.) So you have to find a suitable wedge of some kind to manually tension the chain while tightening. The first two (2!) times I torqued down the holder the chain climbed a tooth.
Timing marks should line up parallel to the crankcase on the inside.
Thanks to MuddySump for his excellent videos. I was following my Haynes manual, but it’s always good to watch someone else do it first, especially when that person has the same bike as you and is a licensed Triumph mechanic! Once I got everything buttoned back up, I checked the valves again and they are now all spot on.
It’s always a little unnerving starting the bike back up again afterward, but it fired right up. I’m hoping the bike will run a little easier now with less tendency to stall.
Starter Motor
A known issue with the Tiger 800, at least the first gens, is a weak starter motor. There is a tendency when the engine is hot for the starter to fail. I’ve had it happen to me a few times. You stall the bike and the starter is reluctant. I’ve managed to fix it by keying off and on, but it was getting worse. Many guys swap out the starter with Rick’s and I considered it, but since I was already down to the throttle bodies, I figured I’d lift them to access the starter and give it a good clean.
I took it apart and there was a lot of carbon dust in there, and some discolouration on the armature. Some 1000 grit emery paper cleaned everything up, including the shoes. The bearing was fine, and I’m hoping I’ve breathed another few years at least of life back into the OEM starter.
Swingarm and Suspension Linkage
The swingarm bearings take a lot of abuse down there right in front of the rear wheel. Even if you aren’t doing water crossings, they’re going to get water and grit and grime thrown up at them. And when there’s crud or corrosion, you won’t feel it as you will with steering head bearings. I remember when I finally did this job on the 650GS, one of the bearings was in very bad shape and I had a bugger of a time getting the pivot bolt out due to the corrosion. This is one you want to do on the recommended interval, and it’s one of the easier ones so why not? You aren’t opening up the engine, just taking the rear wheel off, unclipping all the wiring from the swingarm, then removing the pivot bolt.
Thankfully, it wasn’t that bad this time, but I still left it a little too long. There was some discolouration on the bushings, but the bearings looked fine, albeit missing some grease. I cleaned everything up as best I could using 1000 grit emery paper and repacked the bearings with waterproof grease.
It’s always a good feeling when you restore these crucial components.
Shifting Mechanism
Problematic selector arm is top left. Centralizing spring is blue, indicating it’s been upgraded.
On the last ride of the season last year, the Tiger started being reluctant to downshift. I noticed it as I pulled away from the house and came to the first stop sign. I was heading to Vermont and would have turned around, except I was leading a club ride and there were people counting on me, so I continued.
My first thought was that the clutch cable needed adjustment. It’s normal for those to stretch over time and need to be tightened. But adjustment didn’t help, and as the day continued, the problem got worse. I somehow managed to finish the day, but coming up through Smuggler’s Notch wasn’t much fun and I was happy to get home. That was the final ride of the season. I decided I’d use the remaining nice weather to do maintenance but before I could get to this job the snow arrived, so it had to wait.
I store my bike in an unheated shed, so working on it over the winter wasn’t an option. As you can imagine, my curiosity nagged at me all winter. Was it the clutch, the shifting mechanism, the gearbox? Some research online revealed that there are some known issues with the shifting mechanism on this bike. There’s a pin on the shifter spindle that holds the centralizing spring and it’s known to break. When that happens, the shift lever doesn’t return to centre, ready for the next downshift, but flops down. You can still shift the bike, but you have to lift the lever first with your foot.
That didn’t appear to be my problem because, while there was a little play in the lever, it wasn’t flopping down. But I wondered if it was starting to break. Also, there was a recall to upgrade the centralizing spring, which is known to fail, and I didn’t know if my bike had the old or new spring. I also wondered if the problem was as simple as a worn clutch.
At the first warm day, I finally got in there to see what is happening. To get to the shifting mechanism, you need to remove the clutch. That was fairly straightforward, and the plates looked good. In fact, the stack measures 42.25mm and the tolerances are 41.54 to 42.54, so I’ve only burned .29mm of my clutch over 48,000 kilometres. I’m happy about that.
I had some trouble removing the bushing and bearing but with a friend’s help, we got them and the basket out. What we noticed is that on a downshift, the shifter arm slips off the pins of the detent wheel. A close inspection of the arm revealed wear on the respective pawl.
Wear in the corner of the pawl where it engages with the detent wheel pins. This arm is under tension from a spring (behind, out of view) and it’s also possible that the spring was fatigued.
There has been a redesign on this part as well as the detent wheel that engages with it. I decided to change the whole spindle because Triumph has also redesigned the problematic pin for the centralizing spring. Here are comparisons of the crucial parts, old (on top) versus new.
Old and new selector arms. Triumph has squared the pawls.Old and new detent wheels. Strengthening webs have been added. Original pin was riveted. New pin is machined.
Dear reader, do you care? If you are a mechanical engineer or just a mechanical nerd like me, maybe you do. If you have a 1st gen Tiger 800, you should. These are the wrinkles that were ironed out sometime during production. I’m glad to have the stronger parts in my bike, and it’s shifting great again. Here in Canada, the spindle unit is under $200 and the detent wheel and selector arm come as a kit for under $100, so the hit wasn’t too bad.
Forks Overhaul
I don’t think the fork oil or seals have ever been changed on this bike. I’d never done inverted forks before. They are a little more difficult and require a seal driver. (You can’t use plumbing ABS pipe to drive the seals because the outer tube is in the way.) Figuring this would not be my last bike, I went with the adjustable kind that will work on a variety of bikes but are a little more trouble to use.
Everything came apart easily enough, once I bought a set of thin spanners. (Every job requires at least one trip to Canadian Tire.) There isn’t much room between the spacer tube and the top cap, and you have to get a wrench in there to hold the lock nut while you remove the cap. That was the only snag on the disassembly.
Laying everything out in the order it came off.
The bushings were discoloured with wear, but I didn’t want to wait for new parts so cleaned them up as best I could with fine grit emery paper. For the new seals, I decided to go with SKF because I’d read good things about them. Thanks to Triple Clamp in Toronto for stocking these. A neat trick I learnt from Tusk is, when using those tricky adjustable fork seal drivers, use safety wire to avoid driving your fingers instead of the seal. Nice!
Driving the new sealsRefilling the fork in The World’s Smallest Workshop
The only weirdness of this job was that the amount of oil listed in my manual was way off. It said 619mL for the XC and 107mm from the top of the tube, but I had to pour out about 100mL to get the correct height. Yes, I drained all the old oil, and yes, I pumped the damper rod several times to dispel all the air when adding the new. I asked my dealer about this and he said they only use the height measurement. When I tipped the old oil into a measuring beaker, it was about 1L for the two forks, so with loss, 519mL sounds about right. Anyway, fresh oil, seals, and socks will help the front end this summer.
Steering Head Bearings
This one too had never been done. You can see in the image above that there isn’t much of the factory grease left in there. For this one, I didn’t use the waterproof general lithium grease but bearing grease. The only difficult aspect of this job was avoiding paying for the Triumph tool for accessing the head-stock. Instead, I used a C-spanner and Ryan F9’s tip on using a luggage scale to get the correct torque. The initial preload once you get everything back together is 40Nm, then you back it off and tighten the bearings to 10Nm, which is a little over 7ft/lbs. My C-spanner is about a foot long with a hole at the end of the handle, so all I had to do is convert Nm to ft/lbs.
After having the forks and triple-T out, I needed to align everything again. Thankfully, Delboy’s Garage just put out a video on how to do that.
Fuel Tank Breather Tube Fix
In my last post, I talked about how I ended up with about 3 litres of water in my fuel tank after a failed water crossing. In the post, I presented the theory that the water was sucked up from the tank breather hose when the tank had negative pressure. I considered rerouting the breather tube to keep it out of potential water, but my friend Mike came up with a better solution. While servicing his Africa Twin, he noticed that the tank breather on that bike has a Y-fitting with a length of hose staying high on the bike and the other draining down.
My buddy Mike’s Africa Twin. He’s pointing to the Y-joint with the piece of red wire. The short tube fits into that little cup, presumably to keep it clean. That’s the battery area.
So I picked up a set of assorted vacuum T-connectors and a length of rubber tubing at Canadian Tire and did the same on the Tiger. I cut the tank breather tube and inserted the T-connector, then added the extra tubing. I haven’t decided yet where it will terminate but for now it comes up the siderail and loops across under the fuel tank and is tucked in the other siderail. I think I will shorten it and add a loose end cap like on the AT.
Back right corner of the airbox
If you have a Tiger and want to do this mod, just be sure to cut the right hose. There are two leading out of the tank. One is the drain tube and one is the breather. The drain tube has a check valve on it so doesn’t allow water to come up. The breather tube is the larger of the two where they attach to the tank.
A Few Mods for Dirt
Fender Extender
I saw MotoBob add a front fender extender to his Triumph Tiger and thought it would be a good modification, given the dirt I plan to ride this summer. It keeps a lot of mud off the front header pipes and radiator, not to mention rain water off your pants. He used the Pyramid Plastics version, but my dealer, Montreal Moto, actually had a Triumph one in stock so I snapped it up.
Some extenders come with sticky pads, but I was advised to use silicone. I decided to make things easy for myself and remove the fender. Sounds reasonable, right? I could have done this mod just by removing the front wheel, but I decided to give myself some extra room and removed the fender. It was three bolts on each fork, so how hard can it be, right?
Little did I know that someone had used red threadlocker on the bolts, and one snapped off in the fork. Perhaps someone at Triumph can explain to me how a front fender is a permanent install?
Bolt broken in the fork foot.Yes, that’s definitely red threadlocker.
So I lost a day there. I drilled it out and was retapping it when I got distracted and broke the tap inside the old bolt. Ugh! What a mess, going from bad to worse. I bought some carboy drill bits (after some research on what the hardest, sharpest drill type is), but even a carboy bit wouldn’t touch the tap. Fortunately, my friend Mike, whom I’ve already mentioned a few times, came to my rescue. (He was the guy who refinished the bodywork of my old GS.) He has a proper workbench on a cement floor and drove the tap out with a punch, and then we could re-tap. The thread was a little loose from the abuse it had taken, but he showed me a trick to strengthen it with some 5 minute epoxy. Apply the epoxy like threadlocker but coat the bolt in WD40 so it doesn’t glue inside. Thread it in and after a few minutes remove the bolt and let the epoxy harden to the old threads. Neat! When I reinstalled the fender, I used blue threadlocker.
Lowering Footpegs
My Fastway Adventure footpegs give you the option to mount them standard or lowered. I mounted them standard so I wouldn’t have to adjust my foot levers, but with the dirt coming up, I thought I’d swap to the lowered position. Fortunately, Fastway provide a tool to use to press the pin out. Then you simply press it back in from the other side—from the top of the peg.
Out with the oldand in with the new.
Unlike the fender extender and most other jobs, this one went smoothly and I had the pegs back in again in no time. It was easy to adjust the height of my brake lever; just undo the lock nut and screw the adjuster into the master cylinder. Because I was screwing in, I didn’t even need to bleed the brake. And when I put the shift lever back on, I rotated it slightly from its previous position. This set-up lowers my pegs 8-10mm, which may not sound like much, but I suspect will be significant for knee comfort on long days and lowering centre of gravity when off-roading. The downside is that the pegs are a little closer to the road, but I don’t think I’ll be dragging them anytime soon. Or so we’ll see.
Before I reattached the brake lever.
Sidestand Extender
Another mod for the dirt. I’ve always gotten by without one of these, although it’s sometimes a pain to find a stone or stick to use instead when you are forced to stop in mud or soft grass. I went as far as to install a Touratech one on the GS once, but it lasted all of one ride. I got hung up on some rocks and when I got home I noticed I had an extender no more . . .
Needless to say, I was skeptical about buying another from Touratech, but different bike, different design. Besides, I got this one half price. One of the benefits of riding a discontinued bike is that if you keep your eye out you can sometimes snag accessories at discontinued prices. We’ll see how long this one lasts.
Now I remember what I don’t like about sidestand extenders: they interfere with the centre stand. Oh well, I’ll just have to put the sidestand down first before using the centre stand. No big deal, and maybe it will help stop my centre stand from rattling so much. Or maybe now there will be two stands rattling together. Anyway, I’m not wedded to this accessory and we’ll see how long it lasts.
Oil Filter Guard
The Outback Motortek skidplate for the Tiger 800 does not protect the oil filter. Some would say that’s a design flaw, but I suspect OM did it that way so you can change the oil without removing the guard. (They put a cutout in the guard for the sump plug.) But it does leave the oil filter a little vulnerable at the front of your engine. Triumph make a push on metal guard. It’s a simple design with indents that engage with the filter for an interference fit. Easy to remove when it’s time to change the filter, which I will do after running the bike a bit this spring. The engine’s been open for some time as I worked on everything, but with oil being so damn expensive (it costs me now over $80 for an oil change), I will just change the filter. Anything that might have strayed in will be captured in the filter.
It’s been a long haul but I think I’m ready now for another season and another 50,000K. I took the Tiger for a test ride yesterday and it’s shifting smooth again and the clutch feels great. The engine is running well, and I’m happy to be back on the road.
Here in Montreal, it’s Easter Monday and I think I can safely say we’ve had our last snowfall. Crocuses are pushing up and there are buds on the trees. Geese are returning and everywhere the signs of spring are upon us, including the sound of motorcycles back on the roads. For Canadian riders, it’s the best time of year. I wish everyone, wherever you are, a safe and enjoyable 2024 season.
Please leave below any comments you have and consider following. What mods and maintenance did you do in the off season? What are your plans for the coming season? I love hearing from readers, so drop me a line.