I did a Seafoam piston soak and water treatment in an attempt to clear carbon deposits and stop oil consumption.1
This season my 2013 Tiger 800XC started burning oil. The bike now has 65,000K on it, and from what I’ve read on forums, it’s not uncommon for Tigers to start burning oil at this mileage. I met someone at the Overland Gathering in Calabogie who switched to a 900GS when his Tiger started losing oil, yet “none on the engine and none on the garage floor,” in his words. 2nd gen Tigers apparently are especially susceptible to this fault, and many owners unload them at about this time.
I spoke to the head mechanic at my dealership and he suggested I switch to Motul from the OEM-recommended Castrol. At first I switched to 7100, but in a follow-up conversation, he said they put the V300 Racing formula in all their “high revving bikes.” I hadn’t really considered my triple as high-revving, but I guess it is, or is supposed to be.
In a recent video on one of my favourite channels, Adam Reimann has decided to buy and ride a KLR across Australia. After four hard days in the upper quarter of the rev-range, the bike hasn’t lost a drop of oil. He posits that “anyone who’s been having an oil-burning issue, they’re not flogging it hard enough.” He’s talking about the KLR, a notorious oil-burner, but it got me wondering about my issue. Is it possible that I haven’t been riding in the correct rev-range? Ryan F9 has also done a video on this topic, and in it he mentions that the Italian tune-up helps clear carbon deposits from the cylinders.
I decided to give the bike a good run and headed off to Vermont a few Sundays ago with a couple of buddies. What I discovered is that at over about 6,000 rpm the bike transforms. It smoothens out and comes alive. The slight vibration coming up into the right hand-grip disappears, and all I can hear of the engine in my helmet is a whistle from the intake. According to specs, the bike hits peak torque (78 ft/lbs) at 7850 rpm, and that’s probably closer to wear I should have been riding it for the past three years! I’d been riding it like a single or a parallel twin.
I also discovered on that ride that the oil consumption was getting worse. After 450K (280 miles), the bike had burned about 250mL of oil—basically from the top of the sight glass to the bottom in one day. This was concerning, especially since I am preparing for a multi-week tour.
Compression Test and Inspection
When I got home, I decided to run a compression test and have a look in the cylinders. To do that on the Tiger, the first thing you need to do is remove the tank.

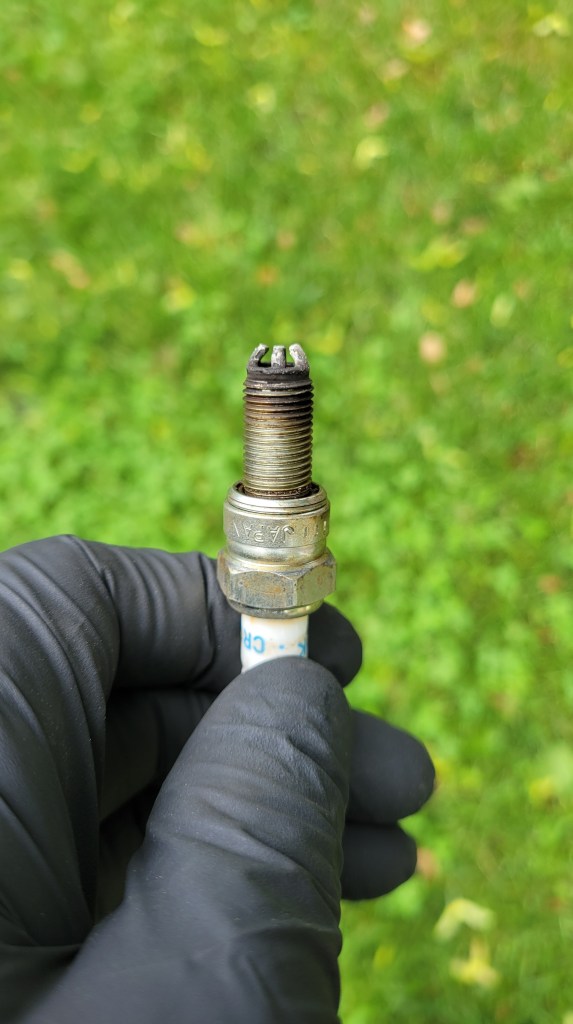
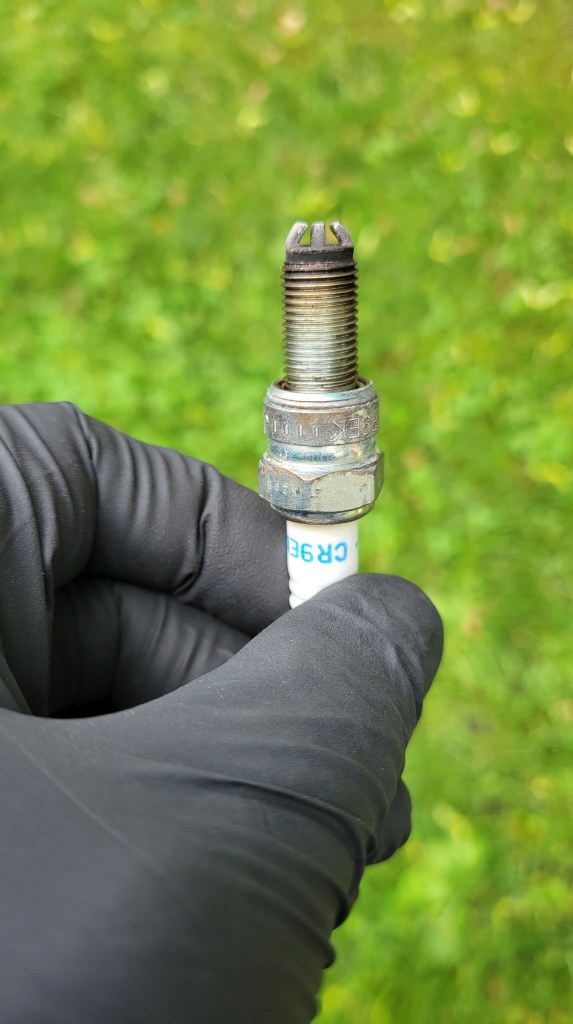
Next I removed the spark plugs and examined them. They showed some white deposits that indicated oil burnt in the chamber. There was no wet oil in the threads. That brownish colour is the copper grease I use to prevent them seizing in the block.

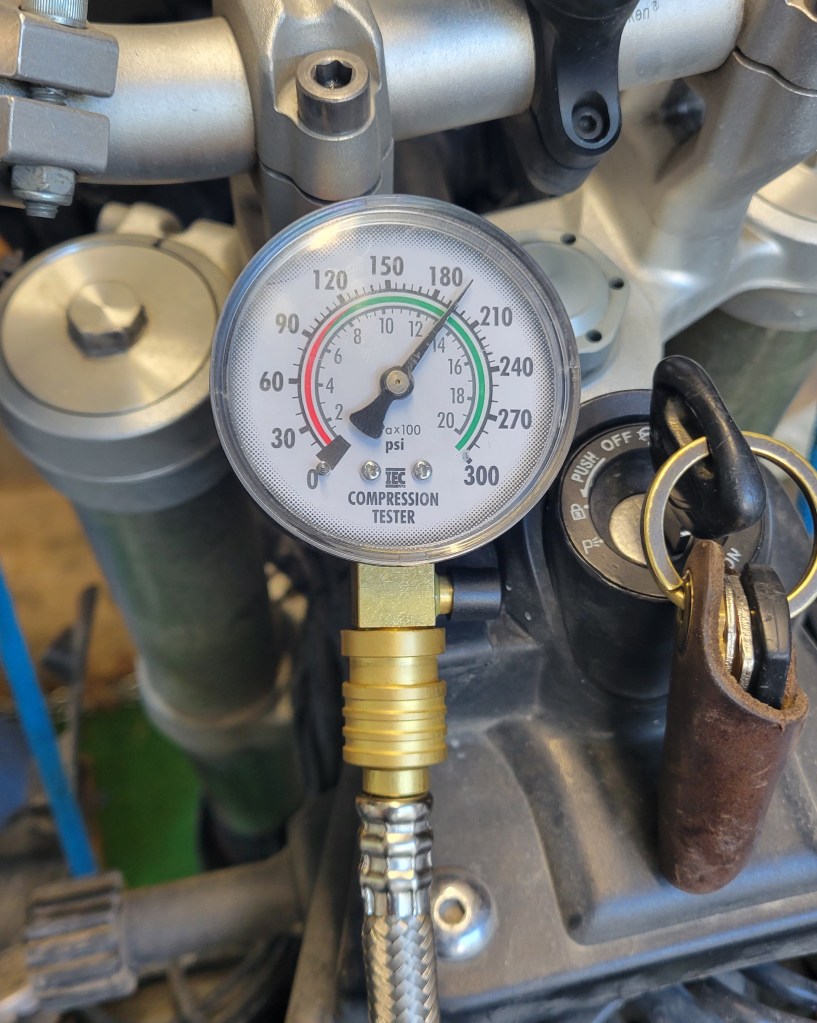
Next I ran the compression tests. Much to my relief, compression was good with all cylinders over 180 psi, so I know there’s nothing physically wrong with the cylinders (i.e. scoring, major wear).


However, a compression test does not tell you much about the state of the oil retention ring. There are two compression rings on top and they can be working fine, but the oil retention ring can be “stuck” with carbon and not doing its job. I knew my bike had carbon deposits on the top of the intake valves and had tried to clear that last fall with a Seafoam treatment. My working theory now was that running the bike at low rpm had left unburnt fuel in the system that resulted in carbon deposits gumming everything up. Perhaps I wasn’t the only one who wasn’t flogging their bike hard enough.
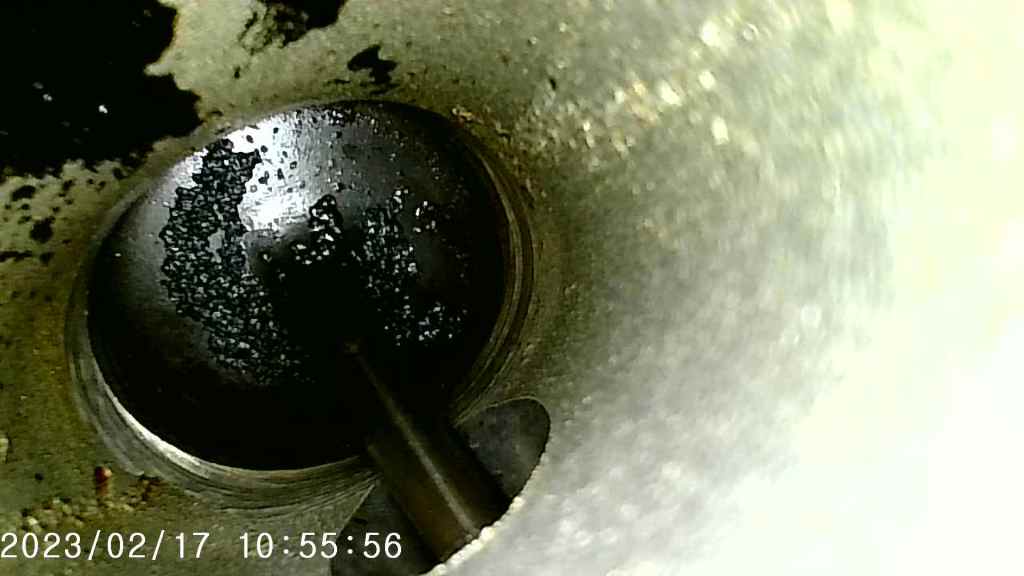
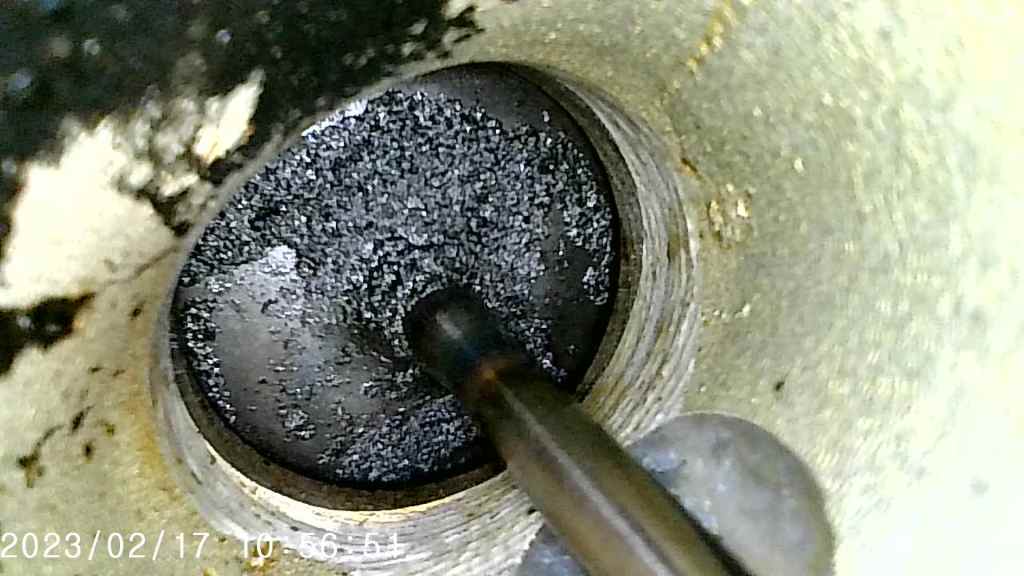
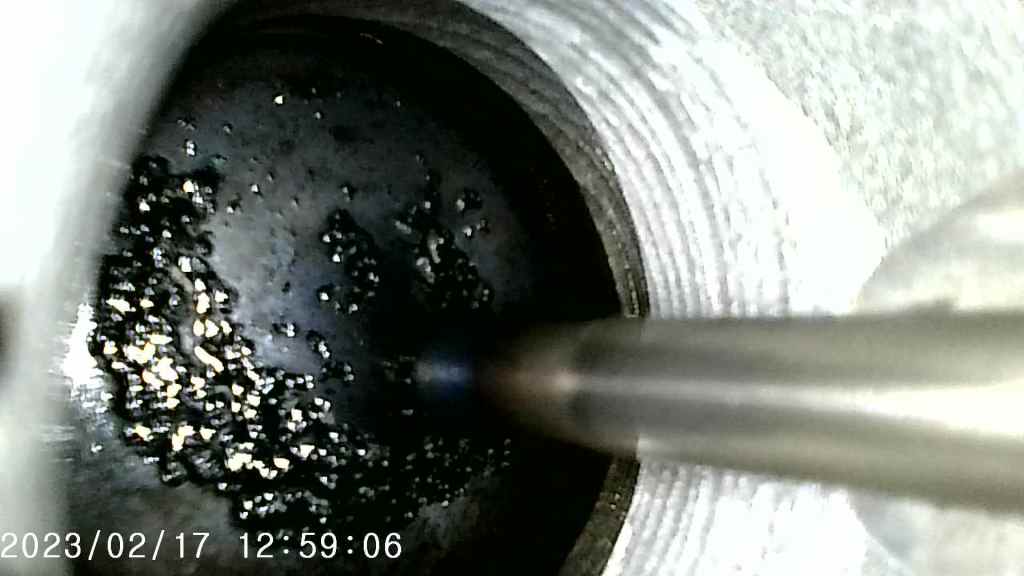
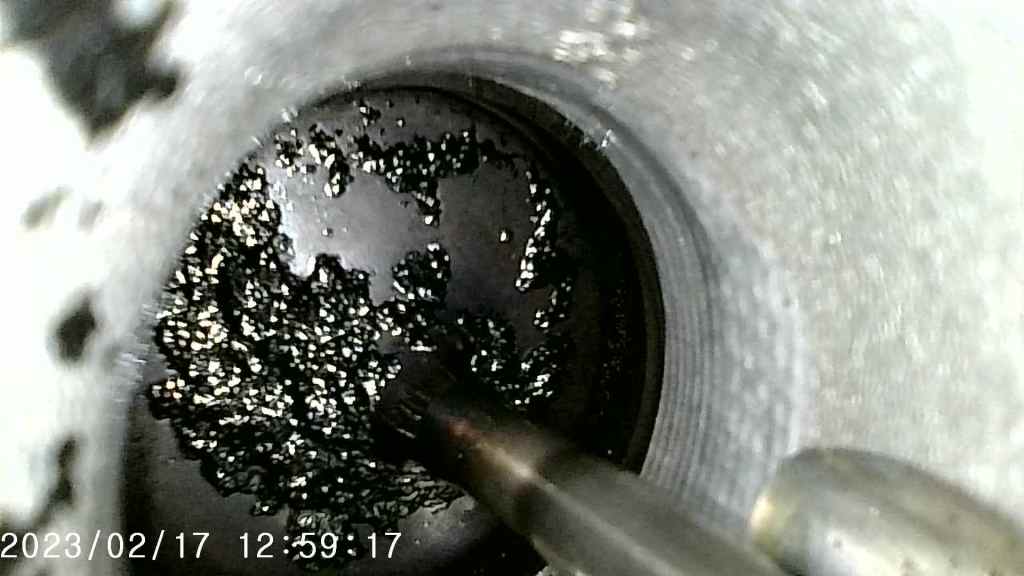
Next I got out my scope and had a look, and what I saw on top of each piston went far in confirming my theory.


Yikes! Is this normal? It certainly wasn’t on the Beemer.
L to R: Pistons 1 to 3. Click on any for a better view. Of the three, piston 1 is the best, and the compression test shows it. Piston 2 is clearly the worst. I wonder how close to my valves the carbon was getting?
The Piston Soak Treatment
This led me to watching YouTube videos on how to remove carbon with a piston soak. Basically that involves pouring a carbon cleaner into the spark plug hole and letting it sit for a while. Some people let it sit for 24 hours; others top it up after 24 hours and let it sit more. One guy soaked his pistons for about a week. You can replace the plugs finger tight to prevent evaporation, but just remember to remove them and turn the engine over several times to clear the cylinders before trying to start the engine again or you will hydrolock it and cause catastrophic damage, which would not be good.
The popular product is Berryman’s B-12 Chemtool, but it can’t be found easily in Canada and, more importantly, it’s not recommended for motorcycles with a wet clutch. (The additive will seep down past the rings into the crankcase.) I decided to go with the milder, less corrosive, tried-and-true Seafoam to help loosen the deposits. I watched another video comparing Berryman’s and Seafoam in which a guy soaks his valves for 10 days using each and the Seafoam did very well, so off to Canadian Tire I went.
Before putting the Seafoam into the cylinders, I wanted to know roughly where each was in its cycle, so I inserted a long pipe cleaner (fringe benefits of smoking a pipe) into each spark plug hole, then reconnected the battery and turned the engine over in very small increments until the cylinders were all a little ways down from TDC. (I know this will produce an error code but I can clear that later using TuneECU.) I didn’t want the Seafoam simply to leak out through one of the valves.

It’s pretty much impossible to get them all down when they are 120 degrees apart, so I started with cylinder 2 high and decided I would rotate the engine the following day. In the videos I’d seen, the guy would jiggle the crank to work the Seafoam (or Berryman’s) below the compression rings to where the oil ring is. Each day I added another ounce, but I really didn’t need to; by the third day, any additional Seafoam leaked out of the exhaust valve and down the front of the engine via the header.
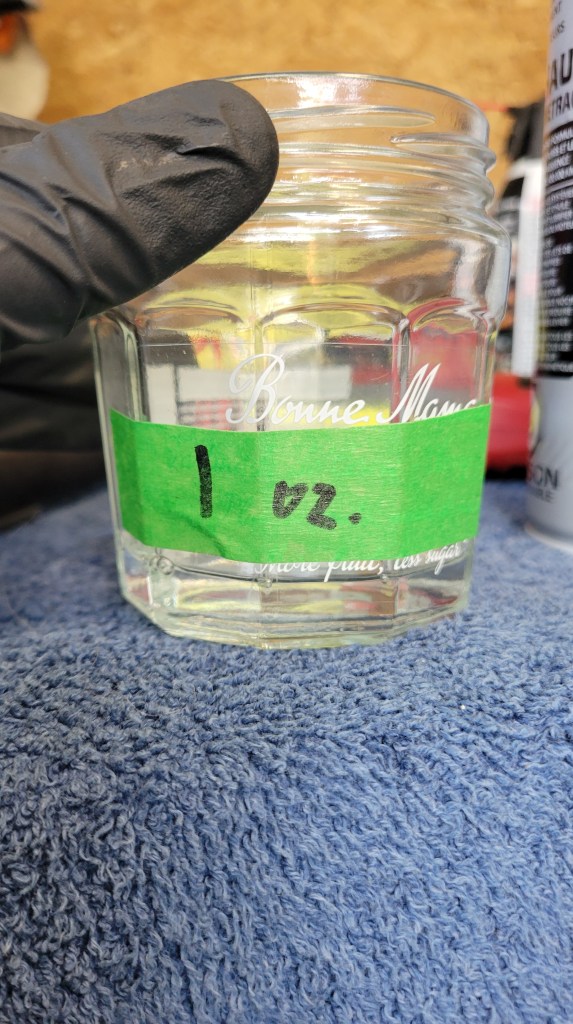

Measuring and pouring 1 oz of Seafoam into each cylinder.
Meanwhile, I was waiting on a part for the windscreen which prevented me from riding so it was a good time to do this work. I screwed the plugs finger tight back into the block and headed off to visit family for the weekend. This is where the story gets interesting.
The Water Treatment
While passing through Whitby, I stopped at GP Bikes to pick up that bracket for the windscreen. I got to talking with the guy in the parts department about what I was doing and he said when they were young they would spray water into the engine to clean the carbon. He said he once brought a gutless oil-burner back to life using this method. And sure enough, here is Eric The Car Guy decarbonizing an engine with water. Apparently, the water instantly vapourizes and steam-cleans the carbon from the engine.
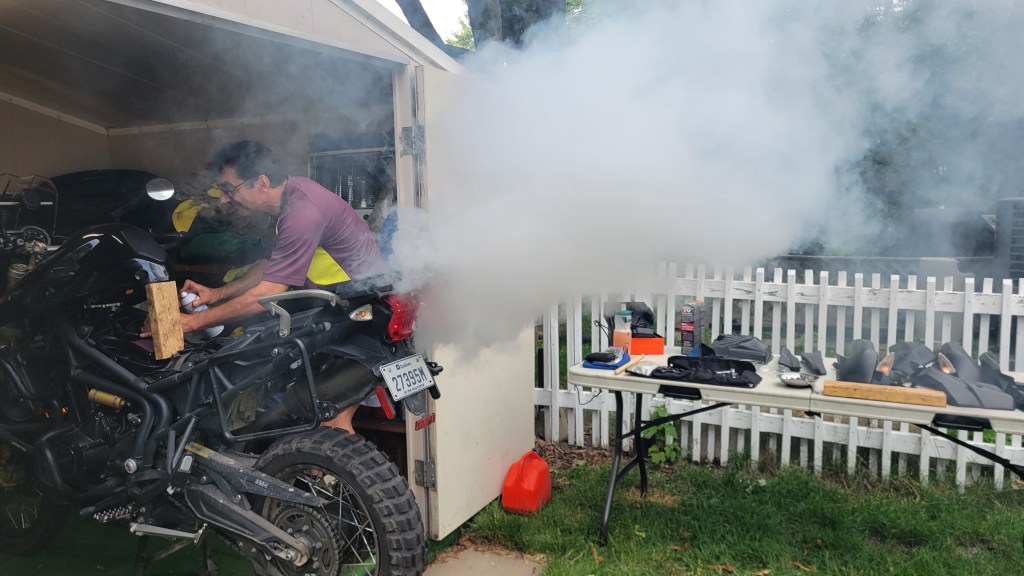
Here’s how you do it. You start the engine and let it warm up at idle to operating temperature. Then you hold the engine at around 3,000 rpm (I used my throttle lock) while injecting the water. You will hear it bog a little so adjust accordingly so it doesn’t stall. Using a spray bottle rather than a cup will prevent accidental hydrolock and, again, catastrophic damage.
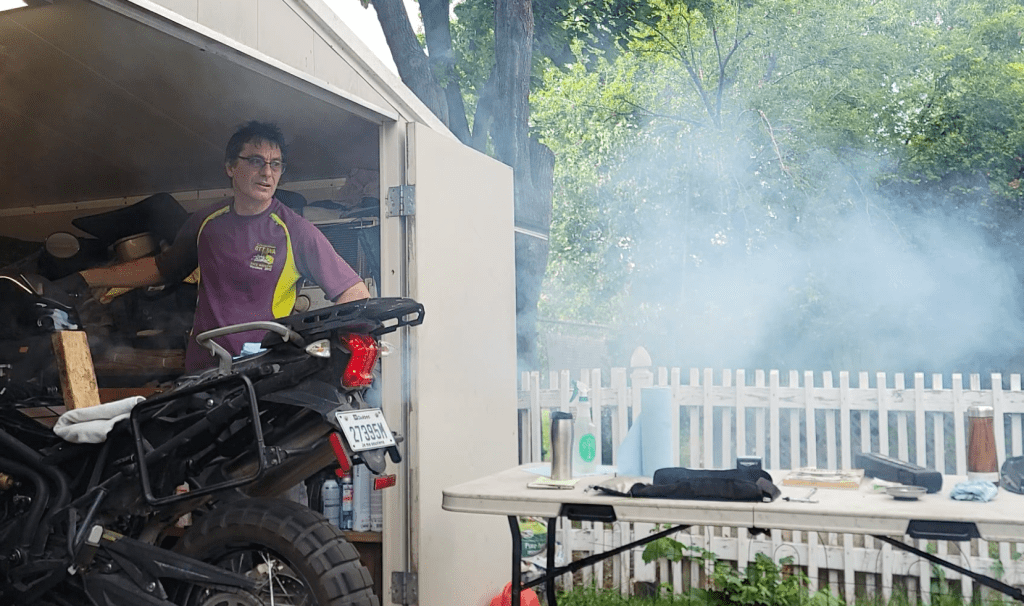
By the time I got back into town, the pistons had been soaking for over a week. It was time to clear the chambers and start the engine.
Once the smoke had dissipated, I did the water treatment. I still had the airbox open so sprayed RO water directly into each throttle body.
After about 15 minutes and 150mL of water, I cut the engine and drained the oil and put in a new filter. The oil might be contaminated with water, and the filter might be full of carbon deposits.
The Results
I was very curious to take the plugs out and look at the pistons again, but my curiosity would have to wait. I was heading off on a 3-day motocamp in the Kawartha Lakes region the next day and didn’t have any more time.
I had decided to put Rotella T6 in after all this because, being a diesel oil, it has extra detergents that help clean deposits that tend to build up in diesel engines. Part of my research for this project led me to The Motor Oil Geek, a tribologist, and you can find out what a tribologist is as well as the specific properties of Rotella diesel oil here.
You really should do a double flush, just to be sure you get any water and crud out of the engine, so I decided to run the Rotella just for the trip and then swap it for a regular gasoline engine oil. I also added the remainder of the Seafoam to my fuel tank and used top-tier fuel for the next two fills to help with the cleansing.
At the end of the first day of riding (450K), I checked the oil. As I tipped the bike toward me off the sidestand, I saw the oil rise up in the sight glass all the way to the top! To my great relief, the bike hadn’t burned any oil. After 1,200K when I pulled back into my driveway, the bike still hadn’t burned any oil.
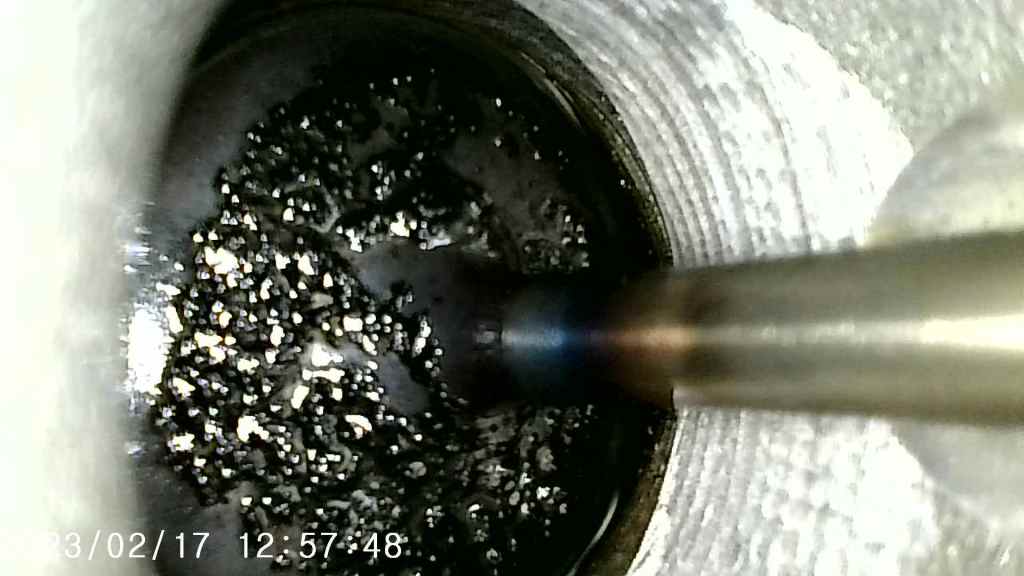
The next day, I removed the tank and spark plugs again and had a look at the pistons. They were considerably cleaner. Before images on left; after on right. Top to bottom are pistons 1 to 3.


Again, click on any image above for a larger view.
Okay, they’re not spotless, but there is considerably more metal and less carbon showing. More importantly, the bike isn’t burning any oil, so I guess carbon was preventing the oil retention ring from doing its job. I’m going to run a fuel additive for one more fill to help clean the last of those deposits out.
Just out of curiosity, I ran compression tests again. I’m now getting 10-15 psi more compression per cylinder.


Conclusion
Needless to say, I’m more than pleased with these results—I’m relieved. I love the Tiger and want to get many more years of fun out of it. As I write this, I’m prepping the bike for my summer tour. I’m going to drain the Rotella, but this time I’m not replacing it with Motul V300. One of the things I learned through researching this project is that race oils have a shorter change interval. Yes, they are the highest spec, but they are also designed to be changed after a race weekend or track day. Motul 7100 and a set of new plugs are going in this bike.
Another thing I learned is to never put any oil additive in your engine. Oils are carefully designed with a balance of friction modifiers, cleansers, and other additives in a balance engineered by tribologists. Adding something to the oil only upsets that balance. If you want to cleanse your engine, a much better approach is to use a fuel additive. They are safe and will clean injectors, intake valves, and the combustion chamber. I’ll be adding some Chevron Techton fuel additive to a tank of gas after each oil change to help prevent those deposits from building up again. If you want to know why, watch this video by The Motor Oil Geek.
I’ll also be riding the bike higher in the rev range. My fuel economy will suffer a hit, but the Tiger really is happier over 6,000 rpm.
Take-Aways
- Ride your bike in the correct rev-range.
- Don’t use diesel oil in your gasoline engine.
- Don’t use oil additives.
- Use fuel additives to help clean deposits.
- Top-tier fuel has extra cleansers as well as higher octane.
- Seafoam and water can clear carbon deposits from the combustion chamber and improve compression.
Questions, comments? Okay guys, there’s nothing quite like a good mid-season oil thread. What oil do you put in your engine and why?
- The ideas in this post are presented for information purposes only and are not given as advice. Any work you do on your engine is at your own risk. ↩︎