The Wish List, 2023

It’s time to modify the Tiger for dirt.

There’s a balance between customizing a bike and over-modifying it. I remember an episode of Adventure Rider Radio in which Jim Martin talks with Warren Milner, who worked at Honda for 30 years in product planning and R & D. Warren warns against rashly modifying your bike, especially based on advice given on internet forums. For example, at one point in the interview, he talks about the exhaust system, describing how manufacturers spend hundreds of hours developing and testing it before the bike goes into production. That’s because today’s bikes use back-pressure from the exhaust as an integral part of the combustion process to optimize fuel efficiency and emissions, yet one of the first mods owners often do is to slap on an aftermarket exhaust. One can almost hear the collective groan of the engineers as they do.

At the same time, every bike that rolls off the assembly line is built for the average rider—average build, average riding (whatever that is), average skills, average goals. That’s why it’s important to customize it for your specific needs. Tall rider? You might want a taller windscreen to avoid buffeting, or add a wind-deflector. Long legged? You might want to lower your pegs or raise your seat. Or the opposite: you might want a lowering kit so you can flat-foot. Going off-road? You’ll need different tires, etc.. There are a lot of considerations, and fortunately, a lot of options available. The industry is healthy with aftermarket products.

I decided to ride the Tiger for a season pretty much as I bought it. I wanted to get a feel for it stock before making changes. I still have the stock front tire on that came with the bike. The only changes I made were in the realm of protection: crash guards and a beefier skid plate. I’d learned my lesson with the BMW, waiting to buy some upper protection and ending up buying a new radiator along with the guards when I eventually did. After studying the market, I went with Outback Motortek. The guards and plate set me back a cool Grand, but I think they’re the best on the market. The only other mods I’ve done to the Tiger so far were to add an AltRider rear brake extender and a wind deflector.

But with two big tours planned for 2023, it’s time to ask Santa for some items to get the bike ready. Here’s what’s on my wish list for 2023.

Panniers

The Tiger came with Triumph racks and cases. The system is fine for commuting and light touring, but those side-opening cases aren’t practical for moto-camping.

I deliberated (read, “agonized”) over this decision for a long time. I love my Touratech hard cases, but the Tiger has a high exhaust on the right side so I really should go with an asymmetrical system. When I had the 650GS on the market, I had offers just for the racks and cases, but I was reluctant to separate them from the sale of the bike. The new owner wanted to buy them too, but in the end, I decided I couldn’t separate from them either.

They are great cases and contain a ton of memories with all the stickers from where I’ve been. They are the original puck system, which you can’t get anymore, and I like that you can lock them. I’ll probably use these when I tour the East Coast with Marilyn because they are big and we need the space and I won’t be doing much dirt on that tour anyway. We’ll just have to pack them so the bike stays reasonably balanced.

However, I also plan to ride the NEBDR and MABDR next summer, and from what I’ve seen on YouTube, there are some challenging dirt sections of the NEBDR in particular for which I’ll need a smaller, soft-pannier system. (Soft panniers are generally considered safer for off-roading; there is less chance of breaking a leg.) I know everyone is getting the Mosko bags these days, and they are beautiful bags, but I decided to go with the Enduristan Monsoon Evo 34L/24L system.

I’m using the past tense because Santa took advantage of a Black Friday sale and got these 20% off. I picked up at the same time the matching bottle holster (for my stove fuel) and a can holster (for water, chain lube, or bear spray). One of the nice things about this system is that it’s modular, and I’ll probably be adding more to it as I figure out my needs.

Marilyn and I used the Enduristan pannier topper through the West Coast and loved it. Enduristan products are completely waterproof and designed by ADV riders to withstand the abuse of adventure touring. But the main reason I went with this system is the weight; they are the lightest panniers on the market, with no backing or mounting plates to worry about. This also means that the bags and cases will be easily interchangeable.

Racks

It’s Outback Motortek all the way. They put a lot of R & D into their products and back them up with some brave testing, dragging expensive bikes along the ground.

Okay, you might say this is a marketing gimmick, but it does show how the bars, even though they do not come up very high, are sufficient to keep the plastics and vital parts off the ground and protected. The bars look like crap afterward but have done their job and can be re-powder coated.

The rear racks offer protection for the silencer and rear of the bike, in addition to carrying the panniers, so again, I went with the strongest. These are a full 18mm + with the powder coating. In fact, they are industry leading in their size, so big that Dual Sport Plus, where I bought the Enduristan bags, includes a workaround kit of washers so the bags fit these bars.

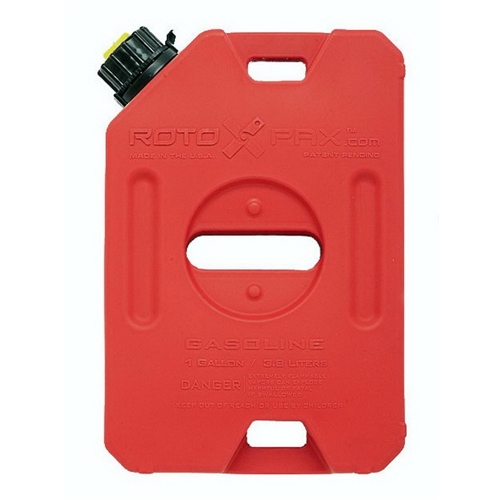
To these bars, I’m going to add on the left side an X-frame plate so I can mount a RotoPax 1G fuel container inside the bars. This will increase my range when remote riding and help balance the bike, especially when using the symmetrical TT cases. Clint at Dual Sport Plus has my exact planned set-up—racks, panniers, and RotoPax—seen here.

Hand and Lever Protection

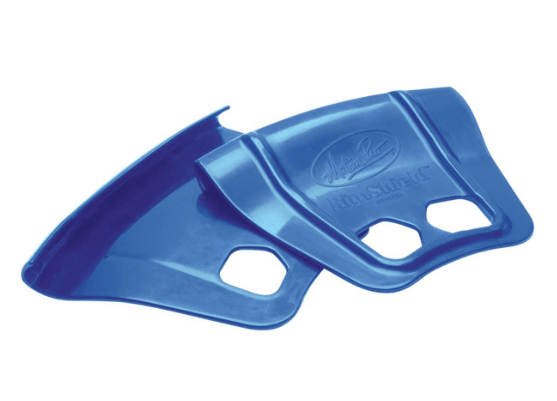
The final bit of protection I’ll need before attempting those gnarly sections of the NEBDR is some protection for the levers. I considered going again with foldable levers but that would still leave the front brake reservoir and my hands unprotected. After looking at all my options, I decided to go with Barkbusters. They have a model that is made for my specific bike so the install is straightforward. And if I had any lingering doubts, they were quashed when I saw that BB make a plastic with my bike’s name on it. I know the Jet plastics don’t provide as much wind protection as the Storm and other plastics, but I think they suit the styling of the Tiger, and sometimes you just have to sacrifice a little practicality for vanity . . . I mean, aesthetics.

I’m not going to change my mirrors for now. I’m really not fond of the look of the double-take mirrors and am hoping the crash guards will sufficiently protect the OEM ones. And if they don’t, well, the decision will have been made for me.

Foot Pegs

What’s the most important part of the bike when off-roading? Given that I’ve posed this question in the subsection titled Foot Pegs, you’ve probably guessed correctly. If your body position while off-roading is correct, you really shouldn’t have much weight on the bars; you should be pretty much balanced on the pegs and steering the bike with your feet (i.e. peg-weighting). Of the four contact points with the bike (hands and feet), the pegs are the most important, so a good set of foot pegs is a must if you are going to do any technical riding.

The Triumph pegs aren’t small but they aren’t large either. I’ve heard that a large foot peg can make a big difference (sorry, bad pun), changing the entire feel of the bike and inspiring confidence. They will also save you resoling your boots quite as often. I looked at IMS, but they don’t make pegs for the Tiger. When I found that Fastway did and that there was a Canadian distributer, I jumped, Black Friday sale or not.

As you can see, at 2.25″ x 4.75,” these pegs are huge. They have adjustment for height and camber, and come with two lengths of cleats: 10mm and 12mm. I’ll probably start with the 10mm since my adventure boots already have a tread. They are expensive, but you only have to buy them once; Fastway sell bike-specific fit kits for mounting, so I will hold onto these babies when the time comes to sell the Tiger.

Honestly, I never thought I’d pay $300 for foot pegs, but I’ve been watching YouTube videos of guys doing, or trying to do, the Class 4 roads on the NEBDR and thought, “I’m going to need all the help I can get.”
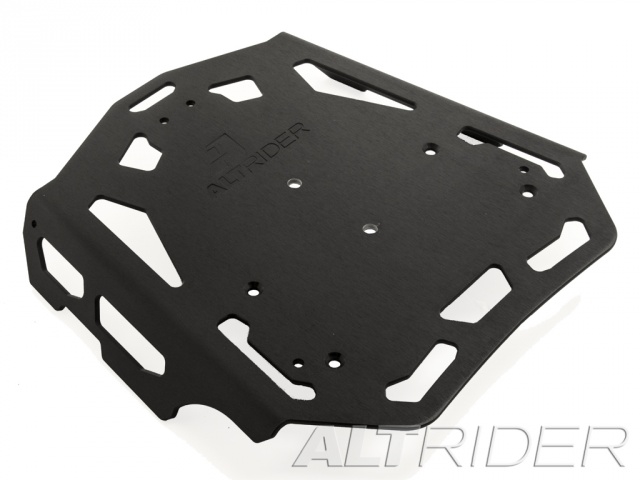
Tail Plate

The OEM tail plate is too small for a duffle and has no good strapping points. It also shifts side to side as part of that Triumph system that shifts as you corner. I really like the AltRider tail plate, but at $260 for a piece of metal, I’m considering other options. You can get an eBay Special from China for 1/3 of that price, but will it be the same? Will the cut-outs be bevelled so they don’t cut into your straps? Will the powder coating begin to wear off after a season or two, as happened on my Kildala rack? AltRider make good stuff, and I like how this one projects out the back of the bike so there’s still plenty of room for Marilyn behind me. I might just watch and wait for this item to go on clearance somewhere, but I’ll definitely need a new tail rack before I tour.

Tires

I’ve had the Dunlop Trailmax Mission tire on the rear of the Tiger, and I had them on the GS when I took it to Vermont last summer. This 70/30 tire is a good choice if you are doing a lot of street with some dirt or gravel roads. That’s what I expect when Marilyn and I go through Gaspé, PEI, New Brunswick, Nova Scotia, and Newfoundland. So I’m going to put the matching tire on the front first thing in the spring before we head off.

For the tour in the US, that’s a little different and more complicated. I plan to start out on some BDRs (Backcountry Discovery Routes) that will take me from the Quebec border down to Pennsylvania, then I’ll be riding principally asphalt as I make my way over to the Outer Banks, including The Blue Ridge Parkway—a bucket list ride for me—and, why not, Tail of the Dragon while I’m in the area.

What do you do when faced with such diverse riding, everything from Class 4 (i.e. unmaintained) roads to the most renown section of twisties in The U.S.? Well, based on my experience, you have to go with the most aggressive tire required for your off-roading needs. You can ride a knobby on asphalt but if you try to take a street tire into mud and gnarly stuff, you can get yourself in trouble. Of course I could by-pass the gnarly stuff, but where’s the fun in that, and besides, I like a challenge!

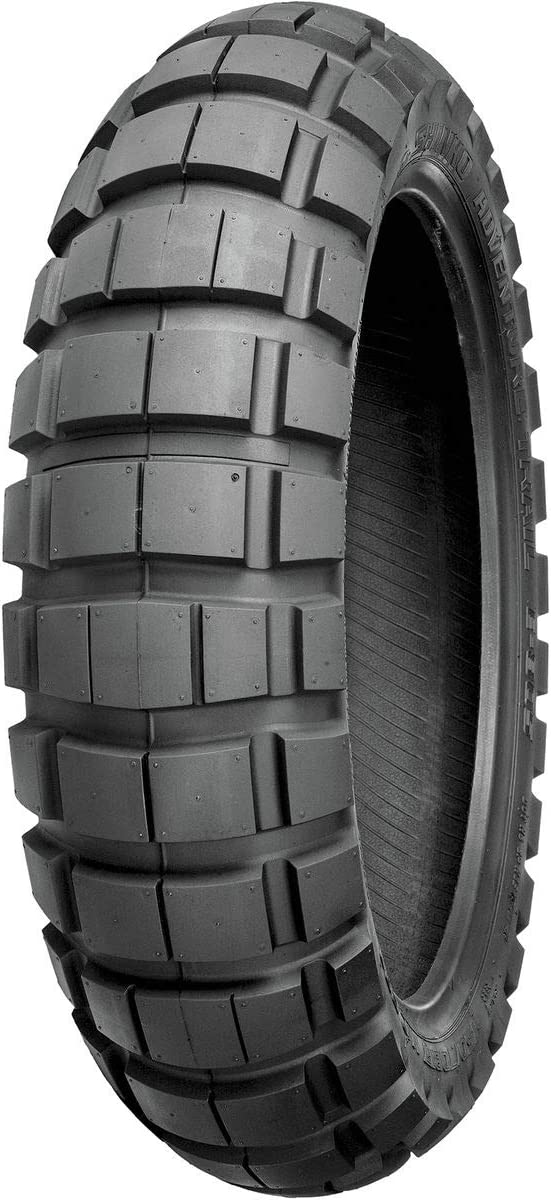
I’m currently deliberating between Shinko 804/805s and Michelin Anakee Wilds. I know the Shinkos are surprisingly quiet and smooth on the road, despite being a 40/60 road/off-road tire. However, they aren’t great with lateral stability. The Wilds are listed as a 50/50, but I have a sense they might be better in the dirt but louder on asphalt. (I’ve never ridden a set of these before.) I also like that the Anakees are a radial tire, so they will run cooler in the heat at speed. And for what it’s worth, Lyndon Poskitt just put a set of these on his Norden 901 for his tour of Iceland where he’ll be doing similar riding.

The Shinkos are about half the price of the Anakees, but for a tour like this, having the right tire is more important to me than a few hundred dollars. I have run the Shinkos before and they were great . . . until they weren’t. From one day to the next, they started skidding and sliding out on me.

What do you think? Anyone tried either of these tires?

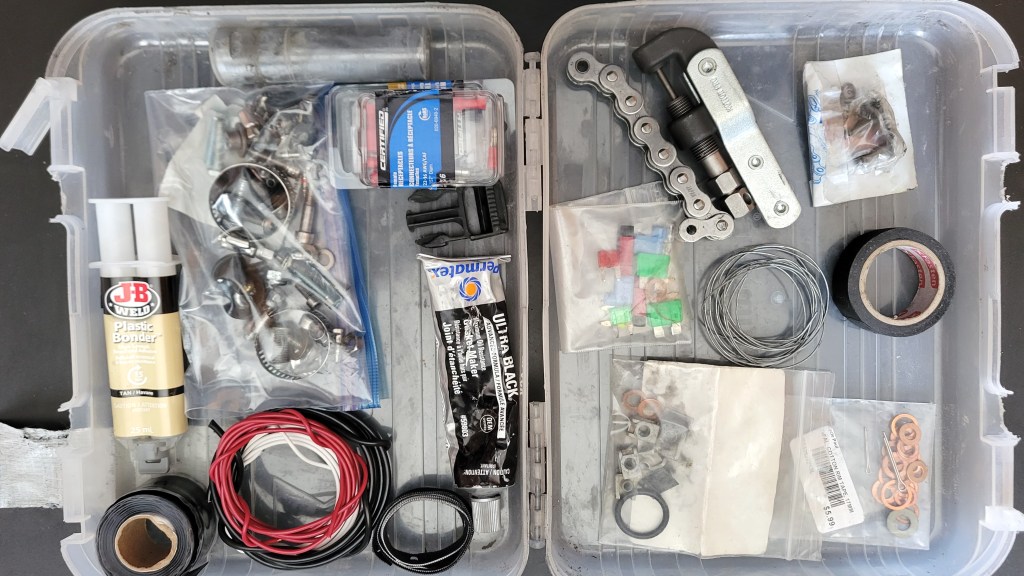
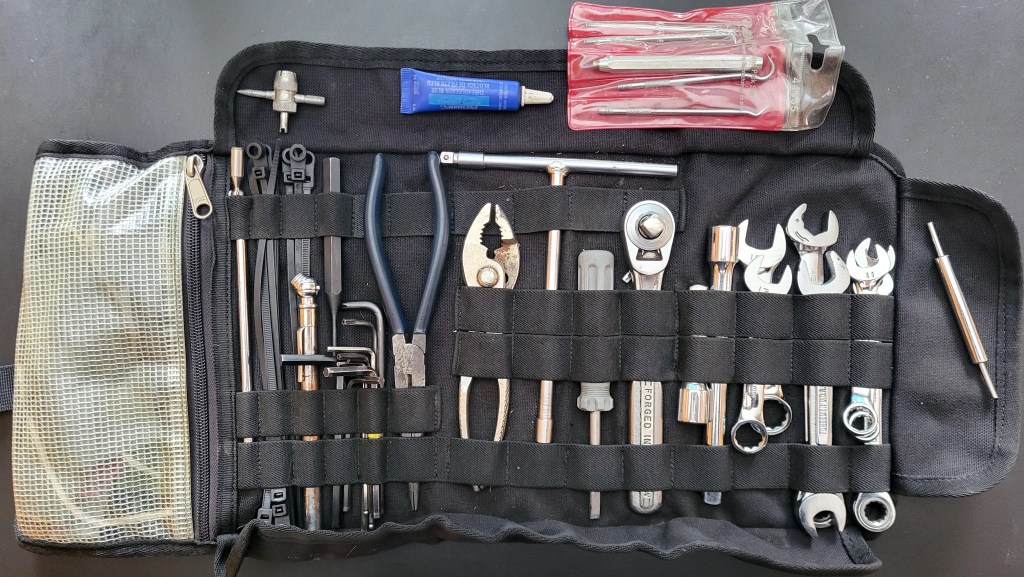
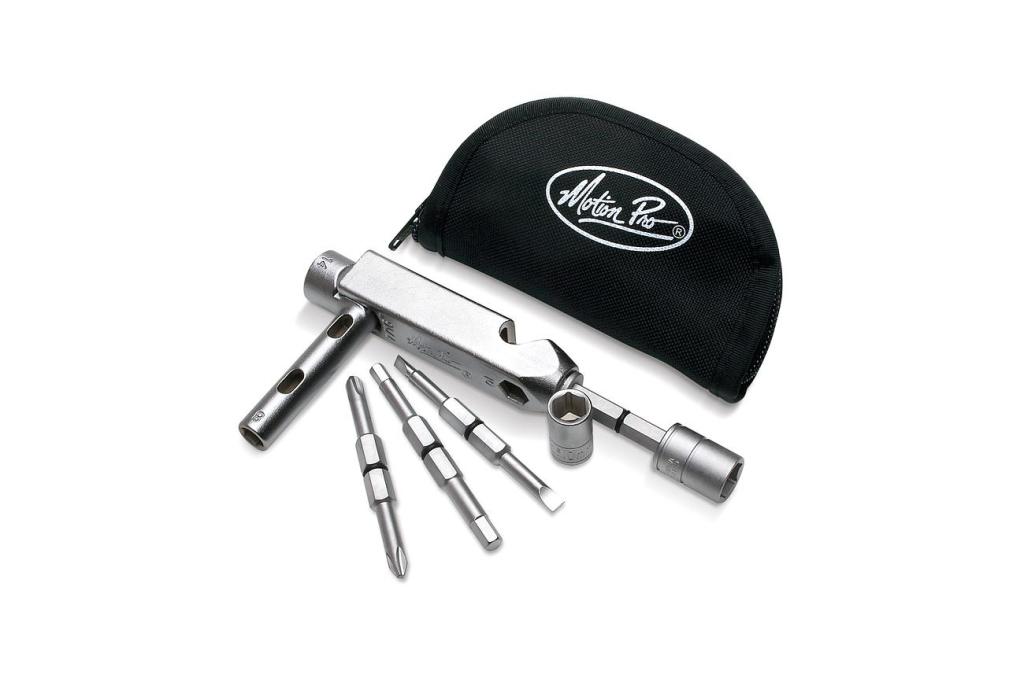
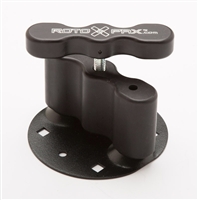
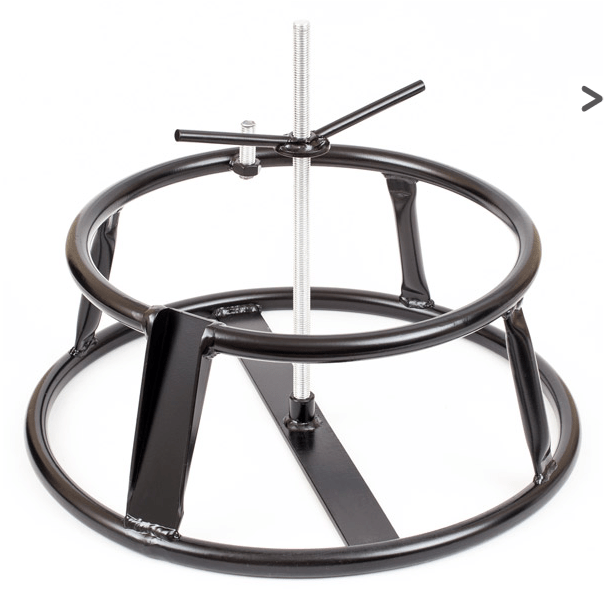
Tools, More Tools . . .

Finally on my wish list are some tools for helping me with these tire changes. I’ve always worked off the grass, but it’s not ideal; you’re grinding dirt into your bearings as you wrestle with the tire, and it’s hard to stabilize the wheel while levering. I think I’m going to ask Santa to get me a tire changing stand and some Motion Pro tools to facilitate this work and protect my rims.

The Tiger is basically a sport bike in adventure clothing; it rips, and I love how it handles through twisties. But I’ve yet to really test it off-road in technical terrain. Fully protected, with an aggressive knobby and soft panniers, Jet will be ready to hit the dirt and I’ll be eager to get back to exploring. Gros Morne National Park is a bucket list item for Marilyn and me, and I’m hoping we’ll be able to get deep into the park on the bike.

In the meantime, we’ve just received here in Montreal the first big snowfall of the winter. I’ve been shovelling the driveway for the past 24 hours, but I really don’t mind. It will be nice to have a white Christmas. I’ve just finished all my grading in my teaching work, and we are sufficiently stocked with holiday sweets and treats.

I was just remarking to Marilyn that, in many ways, I prefer the midwinter holiday to the summer one. While I can’t ride, being a bit house-bound provides an opportunity to step back from everyday life and reflect—a sort of retreat. And what comes to me this year as I do that is how incredibly blessed I am in so many ways. I and my loved ones are healthy, we have enough money, I have a fulfilling job . . . I could go on, but I’m thinking mostly of the people in Ukraine and other parts of the world who are less fortunate. In the immortal words of Ron MacLean, “count your blessings, not your presents.” It’s nice to dream and plan to buy stuff for what we are passionate about, but the most precious gifts cannot be bought.

I wish you and yours a healthy, happy holiday, and safe riding and travelling in 2023.

Ready for Anything

In the penultimate post in a series on gear, I discuss what I carry when touring.

The Container of Last Resorts

The first major tour I did was to Cape Breton to ride the Cabot Trail. As you cross the border from New Brunswick to Nova Scotia, heading east, you see at the side of the highway a mini-lighthouse advertising Tourist Information. I naturally pulled off for maps and a rest. In the parking lot, I noticed a burley, bearded, rider on his back beneath his Harley, trying to tighten an oil filter with a pair of pliers.

“Hey, can I help in some way?,” I offered. None of his fellow riders seemed either able or willing.

“Not unless you have a 14mm socket,” was the reply that emanated from beneath the bike.

I rummaged to the bottom of a pannier and emerged with the requested item.

“Here you go,” I said, and handed it down to him.


Every touring group should include at least one ADV rider. Because we venture into remote areas, we have to be self-sufficient, and that means being prepared for anything. Anything. Mechanical problems, medical emergencies, security issues—we need to carry on the bike into the bush the tools, spare parts, first-aid materials, and safety items required to get us back out of the bush.

The basis of my touring kit is my tool roll. I use the Kriega roll because I like the little pouch at the side for all the odds and ends that don’t fit anywhere else.

Kriega Tool Roll

That includes an assortment of hardware and fuses, pipe cleaners, emery paper, safety wire, thread lock, a valve stem tool, picks, and a tool for removing pins from electrical connectors (viewed far right above). The latter contains two tubes of different diameters, one on each end; hopefully one is the perfect diameter to slide over the pin but inside the hole in the connector. The tool pushes the barbs of the pin in so the wire can be extracted out the back of the connector.

I once had a flasher that had a break in the wire inside the connector plug, so I couldn’t simply splice the wire. Every time I put on the flasher, I’d blow the fuse to the circuit that included my dash, so no speedometer, tachometer, and other instrumentation. The only way to fix it, other than getting a new connector and splicing wires, was to remove the pin from the connector using a tool like this. Since then, it’s become part of my toolkit.

Left to right above in my roll is a telescopic magnet, zip ties, various Allen keys particular to my bike, needle-nose pliers, slip-joint pliers, a 1/4″ T-handle, reversible screwdriver (standard/Phillips), 3/8″ ratchet, socket extensions, various wrenches. I like the stubby wrenches from Home Depot because they are lighter—not as light as titanium wrenches, but my wallet is heavier for it. I indulge myself with a ratcheting 10mm wrench.

Why the 1/4″ T-handle? Some of those sockets are 1/4″, but with the Motion Pro T6 adapter, I can use all my 3/8″ sockets on the T-handle.

Where are the vice-grips, you ask? They are in my other tool kit since they don’t fit in this one. As I’ve said elsewhere, I don’t use vice-grips very often when working, but they are handy in a pinch, so to speak (sorry).

Sockets, etc.

In a Dollar Store pencil case, I have my sockets, some hex bit sockets (3/8″ and 1/4″ stubbies), an elbow socket, spark plug socket, a couple of crowfoot sockets (again, particular to my bike), a spoke wrench, and said vice grips (aka locking pliers). I used to carry torx bits with the BMW, but since switching to Triumph, I now carry hex bits.

There’s some redundancy here, for sure. I probably don’t need both Allen keys and Allen sockets, but the keys don’t take up much space, and sometimes one tool is better than the other for a particular purpose.

I also carry:

  • Tubes. I know you can get by with one, the front, and cram it into the rear if needed, but I carry both a front and rear tube.
  • A chain breaker, spare links, and a master clip. I like the Motion Pro Chain breaker for on the road. It doesn’t do rivets like the DID one does, so I have both. I use the DID at home when changing my chain, but take the smaller Motion Pro one on the road with a clip master link.
  • A digital multimeter for troubleshooting electrical problems. Don’t ask me how to use it beyond the basics because I’m still learning The Dark Arts, but I take one nonetheless. I have the Neoteck NT8233D Pro, which is cheap enough to get wrecked while ADV riding but still decent enough quality and reasonable in size. I’ve considered getting a smart meter, but wondered if it would be reliable enough. Anyone have any experience with these?
  • An Arteck battery jumper.
Arteck battery jumper

Tools, sockets, tubes, multimeter, and chain tool all go in Giant Loop Possibles Pouches that attach to my crash bars at the front, helping to keep the bike balanced front to back.

In one of my panniers, I carry a plastic box that contains other items and spare parts (see image at top). The spare parts have gone with the sold BMW so need to be replenished, but they were a spare clutch cable, spare levers, and a spare water pump. If I were doing a RTW tour, I’d carry more spare parts than this, but so far my tours have been in North America, where parts are readily available.

Also in that container:

  • JB Weld Steel Stick, for fixing engine casing.
  • JB Weld Plastic bonder. I’ve use this to fix body panels and broken mirrors.
  • Self-sealing tape. This stuff is amazing and can seal a high-pressure hose.
  • High-temperature electrical tape for wrapping electrical wires.
  • An assortment of electrical connectors, including Posi-Lock, and heat shrink.
  • More hardware, more fuses, assorted copper crush washers, cotter pins, O-rings, velcro.
  • Various gauge wire
  • Gasket maker
  • An extra buckle for my Wolfman tank bag.

Finally, to round out my emergency preparedness, I carry a first-aid kit and bear spray. The kit I put together myself. I took a look at what you get in those prepared kits and it didn’t look like much for the cost, so I bought another trusty Dollar Store pencil case and filled it myself. I won’t go through all that I have in there, but will say the few things you won’t get in those commercial kits:

  • Carbon capsules. Eaten something that doesn’t agree with you? Take two, wait half an hour, take a dump, job done.
  • Arnica Montana. Homeopathy for any trauma to the body.
  • Robax. I have a vulnerable back, which tends to go at the most unexpected times.
  • Antihistamines. These are great for any inflammation from bee stings or allergic reactions.
  • Triple Action Polysporin

These items, along with the essentials I always carry on the bike, round out my touring kit. They say an ounce of prevention is worth a pound of cure, and all this stuff adds up to a quite a few pounds, so I think I’m covered. The challenge is always to find the right balance between taking what you need while keeping the weight down. I’d rather sacrifice some creature comforts like a camp chair, but I rarely sacrifice when it comes to tools and other items needed to keep the bike running (although the camp chair would come in handy if stranded in the middle of nowhere).

I’ll add one more item this winter to my tools: a satellite communicator. I’ve been meaning to get one for a while, and it really is silly to travel into remote areas without one. I’ve considered them all and almost bought a Garmin inReach Mini, but I’m leaning toward getting a Zoleo at half the price. Any thoughts, anyone? I don’t see what the Garmin does that the Zoleo cannot. Am I missing something?

Have I missed anything in my touring kit? As always, your kit is personal to you, so let me know in a comment if there’s something you carry that I do not. Like I said, I’m a self-confessed gear weanie, so I’m always interested in learning about a tool I have to buy. Buying gear is one of the ways we riders in the North get through the off-season, and yesterday I put the Tiger into storage, so I’m all ears.

I’ll wrap up this series in my next post on the navigation apps I use. If that interests you, click Follow and you’ll be notified of it and future posts when they are published.

The Essentials

In this fourth post on gear, I talk about the essential tools I carry on the bike.

Clockwise from top left: manufacturer’s toolkit with 17mm stubby hex drive and Motion Pro 3/8″ driver adapter, patch kit, Motion Pro Trail Tool, zip ties, Leatherman Wave+, rags, pump, siphon, jumper cables, latex gloves, Motion Pro Bead Breaker and spoon lever. Centre: OBD Link LX Bluetooth adapter, spare fuses and electrical joiners, MSR tow strap, Mastercrap allen key set.

It’s a constant balancing act: having enough tools to fix most problems but keeping it light. You don’t want to be burdened carrying around stuff you never use, but neither do you want to be stuck somewhere, knowing you’ve left the essential tool or part at home. And then there’s the question of what type of ride you are doing. If I’m riding with the club, I tend to take less, knowing there will be others with some tools and why double-up? If I’m riding solo into remote territory, I take the full works: my tool roll, bag of sockets and drivers, even a container of spare parts. But let’s begin with what is always on the bike, even if I’m just commuting to work 30 minutes along the highway. That’s what is shown in the above photo.

The most common problem you’re going to have is a flat tire, and with tubed tires, you have to be able to get both wheels off. So you’re going to need a big wrench of some kind. For the Beemer, I have the Motion Pro combo tire lever and 24mm socket. It’s a little small, but if you place it right on the nut so you can stand on it, you can remove even the rear lug nut at 73 ft/lbs torque. Into that I place the Motion Pro 3/8″ drive adapter, which enables the lever to drive 3/8″ sockets. For the Tiger, it’s the same set-up but Triumph have a 27mm rear lug nut. Fortunately, the manufacturer’s toolkit includes a wrench with integrated handle so I only needed to buy the corresponding drive adapter and a 19mm hex bit socket (to remove the Tiger’s front wheel).

The Tiger has a captive nut on the left side rear, but for the Beemer, you need a 19mm wrench, which is big and heavy, so I carry a crowfoot wrench for that which I can snap into a 3/8″ drive.

Apparently, the founder of Motion Pro was once asked what tool he would carry if he could only carry one, and he replied without hesitation the Trail Tool.

I carry the Motion Pro Bead Breaker and lever set. They’ve never let me down yet in breaking a bead, and double as levers. I know you can remove a tire with only two levers, but I indulge myself on this one and carry an extra, one of my favourite spoons from . . . you guessed it, Motion Pro.

As you can tell, I love Motion Pro tools. Apparently the founder of that company was once asked what tool he would carry if he could only carry one, and he replied without hesitation the Trail Tool. This thing is amazing. Best of all, it packs up so small, I tuck it under my seat. If you add a few bike specific sockets to it and eat your Wheaties, you can pretty much remove any fastener other than the wheel lug nuts.

I also carry a patch kit, of course, so I can repair the puncture once I get the tube out (Duh!).

Included in my essential toolkit is a Leatherman Wave+, just because THAT IS THE LAW if you are an ADV rider. I don’t use the saw tool to clear any trails, but it’s nice to have a good pair of pliers at all times, and the knives and screwdrivers are also handy in a pinch. I added the ratchet drive that came out a few years ago and a set of torx bits, since BMW are so crazy about torx bolts. Now that I’ve switched to the Tiger, I carry a cheap allen key set because Triumph are so crazy about hex bolts.

If a hand pump is good enough for Lyndon Poskitt to ride around the world for five years, it’s good enough for me.

Yes, that is a bicycle hand pump you see above. I owned the Stop & Go Mini Air Compressor that connects to your SAE battery lead, but it has a design flaw and broke. See RyanF9’s video about that; the nipple pulls out of the hose. Then I looked into the Cycle Pump by Best Rest Products, but at $145 US it would have been over 200 bawks with conversion and shipping! What now? For a pump?! I know it has a lifetime warranty, but at 59, I don’t have that long to live, so I go with the manual pump and muscles. If it’s good enough for Lyndon Poskitt to ride around the world for five years, it’s good enough for me. And beside the pump, you see some cut up socks that I use to protect my rims when I lever off a tire.

I carry a siphon hose, should I or someone else run out of gas, and little jumper cables. I did use these last week, as a matter of fact, on a club ride when someone had electrical problems, but honestly, the easiest way to start a bike with a dead battery is to push start it, assuming it doesn’t have a slipper clutch.

Something I’ve recently purchased is a Bluetooth ODB reader. If you are venturing into remote territory, you really should carry an ODB reader. This was never an option on the Beemer. The proprietary connector on it is round so doesn’t accept third-party readers, and the GS911 tool is something stupid like $900. But with the Tiger, I’ve bought ODB Link LX and use it with TuneECU, an app available for Windows (via USB cable) and Android. The entire kit came to about $150 and provides a lot of diagnostics, including error codes and info from all sensors. You can even use it to remap the ECU! I’ll be using it to balance my throttle body because it tells me that cylinder 3 is a little off. That might be why I was getting vibration in my throttle grip, although that has improved since replacing the air filter. Of course, I carry spare fuses and electrical connectors, and if all else fails, a tow strap.

You see everything above on a changing mat I also carry at all times. You may recognize the Cordura material from my previous post on camping gear in which I write about the bags I made. This is the leftover material and it provides a clean surface to work on while removing tires. You don’t really want to be grinding dirt into your bearings while you wrestle with the tire trailside.

With what is happening in Europe at the moment, those of us who enjoy the safety of civil society have all the more reason to be thankful.

On the Beemer, I use velcro straps to attach the levers and pump to the subframe, and the tow strap tucks in behind the ECU under the seat, with the jumpers and siphon tube on top in a Ziploc. The rest goes in the tail compartment. On the Tiger, there’s no compartment, but everything except the levers, changing mat, and rags goes under the seat. Unfortunately, try as I might, I haven’t found a way to make it all fit, so I have a small bag containing those remaining items in a side case. (Dollar Store pencil cases work well as cheap tool bags.) If I were doing any serious off-roading, which I’m not yet because I still have a road tire on the front, I’d carry those items in a knapsack and ride unencumbered without cases.

This is my set-up for day-to-day and club riding. In the next post, I’ll talk about what I carry when I tour, and then I’ll finish the series by talking about navigation apps. I know I had planned to do all in one, but this is getting long, so I’ll split the planned post up into three.

Am I missing something? How does your essential toolkit compare? Drop a comment below, and if you haven’t already, click Follow to receive word of new posts.

Here in Canada, it is Thanksgiving Monday, so I’ll wish my Canadian readers a happy Thanksgiving and everyone else happy riding and safe travels. With what is happening in Europe at the moment, those of us who enjoy the safety of civil society have all the more reason to be thankful.