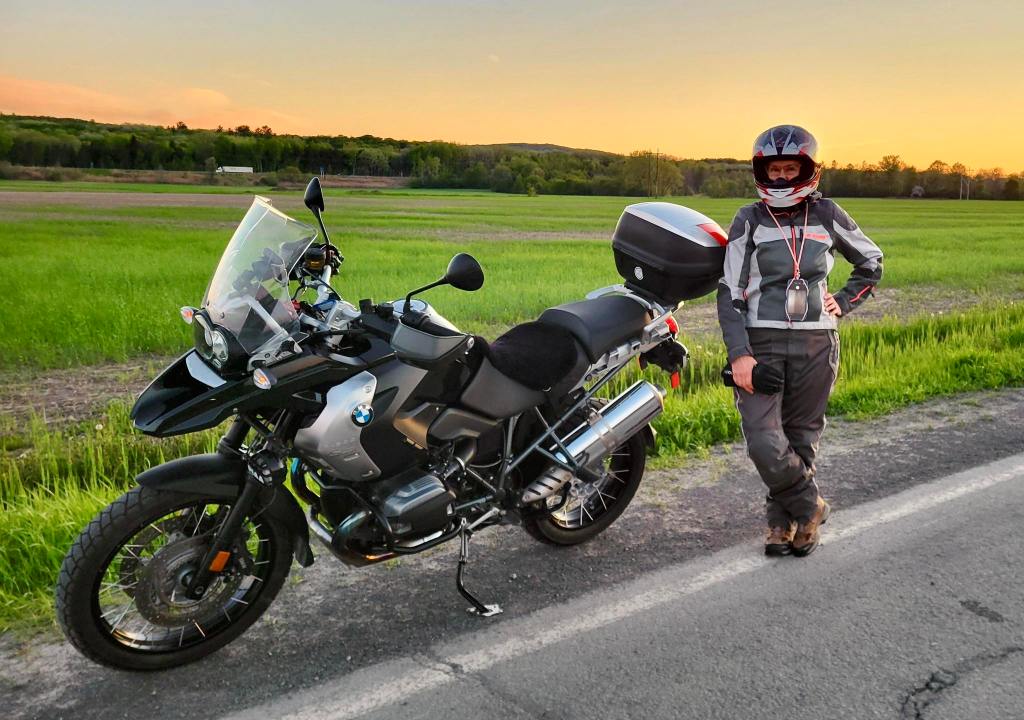
First ride. Sunset on the 342 just west of Hudson, QC.
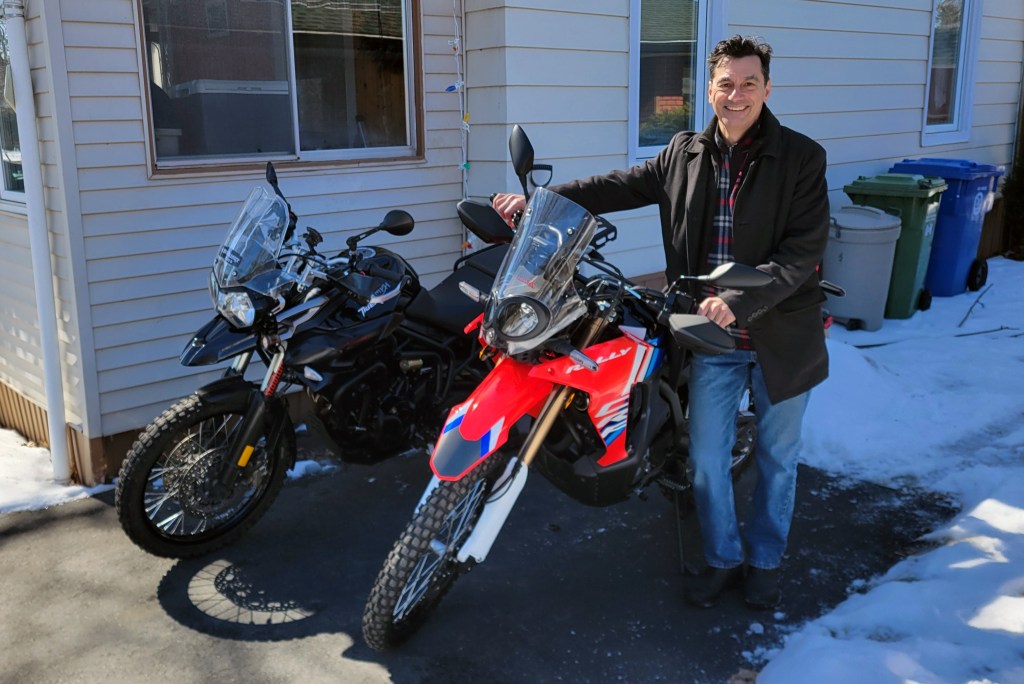
In one week, I bought a bike, sold a bike, and retired from teaching. Yes, there’s a relationship between those events.
At 59, I crunched the numbers and came up with three scenarios: retirement at 61, at 63, and at 65. Because I’m Canadian, I went for the compromise. Here it is, 4 years on, and I’ve taught my last class, graded my last essay, attended my last department meeting. The occasion called for something special: a new bike. No wait, two new bikes.
The original prize was going to be a Honda CRF300 Rally for playing on the trails. But as I was researching that purchase over the long winter months of the off season, I found myself more often drawn to Facebook Marketplace listings for a big GS. I watched buyer’s guides on YouTube, read about the different generations, models, years. I listened to the BMW Motorrad podcast Ride and Talk, and spent a lot of time at the BMW section of the Motoshow. It was clear that in many ways I was more excited about upgrading my touring bike than getting the little dirt bike.
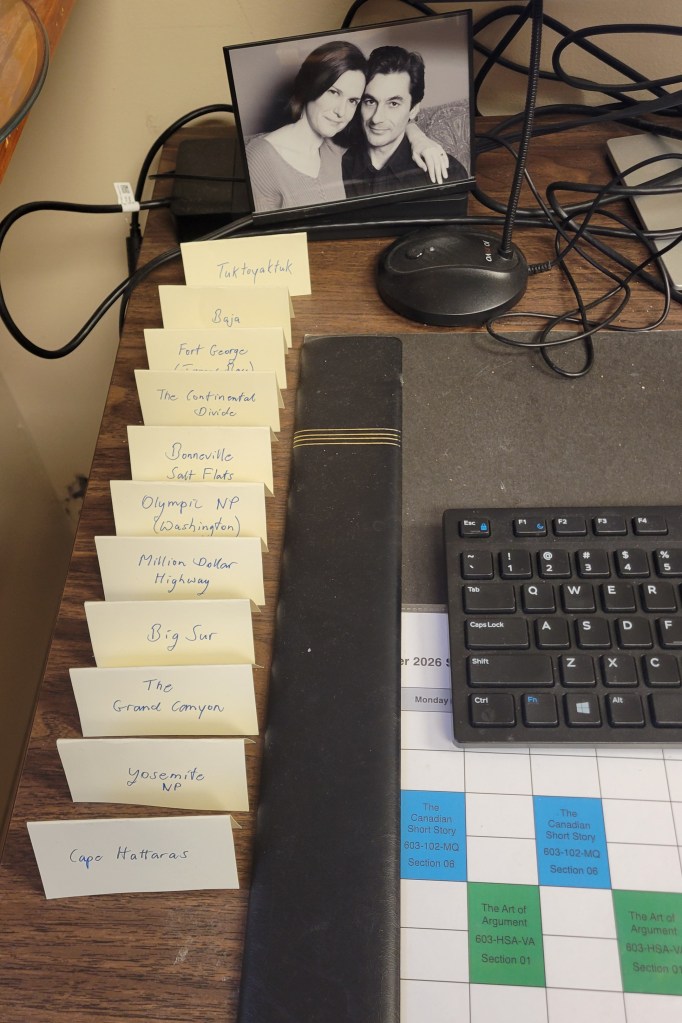
I guess that is to be expected. My retirement plans focus on places I want to tour. In my final semester, I had 15 little labels on my office desk, each with a destination, and took one home at the end of each week as I counted down to retirement. I would need a big Kilometre Cruncher to get all across North America, something bigger and more comfortable than the Tiger, and I knew the BMW 1200 GS was the best bike within my budget for that.
Retirement destinations
I was leaning toward the 2013-17 water-cooled models. They had a little more power than the earlier oil/air-cooled models, a wet clutch that is easily accessible, rider modes, cruise control, and a smooth gearbox. Then my buddy Riley started singing the praises of the old oil-cooled models. He had an 1150 years ago so was familiar with those engines. No radiator, no water pump, no gaskets, no thermostat, he said, and lighter and generally more reliable. AI suggested that the water-cooled models were sportier but the oil-cooled ones were more reliable. And without all the electronics, the oil-cooled engine was easier to work on for the home mechanic like me and for trailside repairs.
There are pros and cons to both, and all GS’s are good, but in the end I followed my gut, which was telling me I’m an old tech type of guy. The original 650 Thumper had no rider aids, not even ABS, and while the Tiger at least had ABS and a fuel gauge, it also didn’t have modes or cruise control. I think the only essential rider aid is good ABS for those panic situations. Some form of traction control is also useful in rainy conditions. The 2010-12 GS was now my target, when the old R25 engine was at the very end of its run and all the kinks had been worked out.
In the end I followed my gut, which was telling me I’m an old tech type of guy.
By now, Riley had become my unofficial (or at least unpaid) consultant. He said he likes spending other people’s money. He was sending me listings and accompanying me to look at bikes. He found a white 2012 with low mileage and under $10G. I got excited and we went to look at it but that bike had too much history. It had developed a rattle and the dealer said the engine was finished so the first owner (or was it the second?) bought an engine off eBay and installed it himself. I don’t think anyone knew what the actual mileage on the bike was. So I backed out of that. (It turned out that the original engine had only something minor wrong!)
As we sat on my porch drinking beer, Riley mentioned a late friend’s bike. The first owner sadly had passed away about two years ago and he didn’t know what had happened to his bike, which was a shame because it was apparently a really nice low-mileage bike. After he left, I naturally opened Marketplace and looked at the GSs. There was a low mileage triple black at a good price so I left a message. A few days later, Riley and I were on our way to see it.
As we turned onto the street of the address, Riley said he knew someone who lives here, and as we pulled in front of the house, he recognized it and the bike sitting in the garage. It was his late friend’s bike! It was one of those coincidences that seem like it was meant to be. And from a practical point of view, it meant I knew the history of the bike. It had always been serviced by the dealer, never ridden off road, and ridden conservatively. Buying it was a no-brainer.
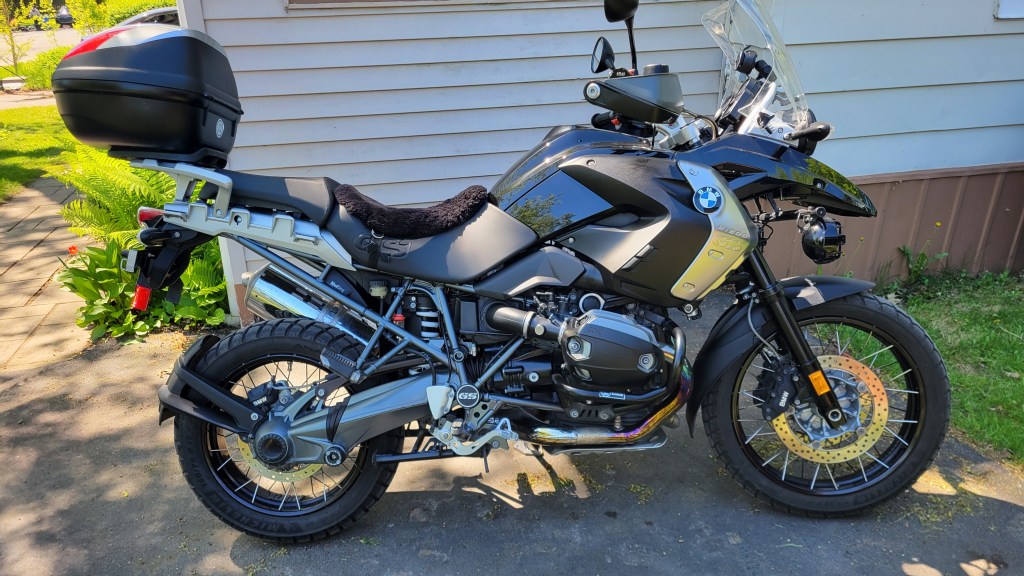
So let me introduce to you the bike that will take Marilyn and me across North America over the next 10-15 years, God willing, and maybe some of Europe too.
She’s a beauty. The Triple Black came with optional cross-spoke wheels.
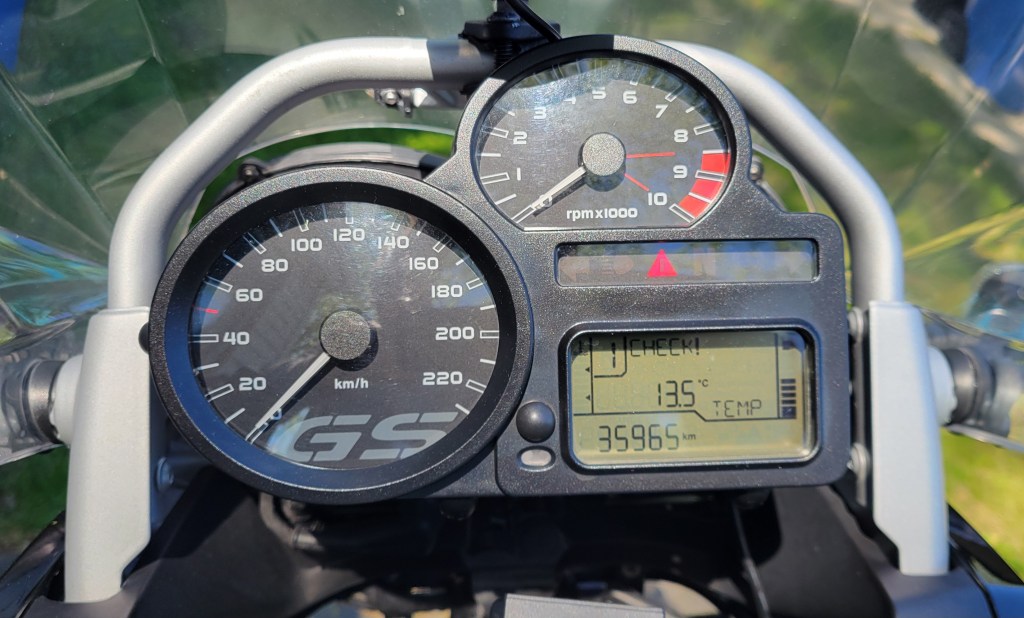
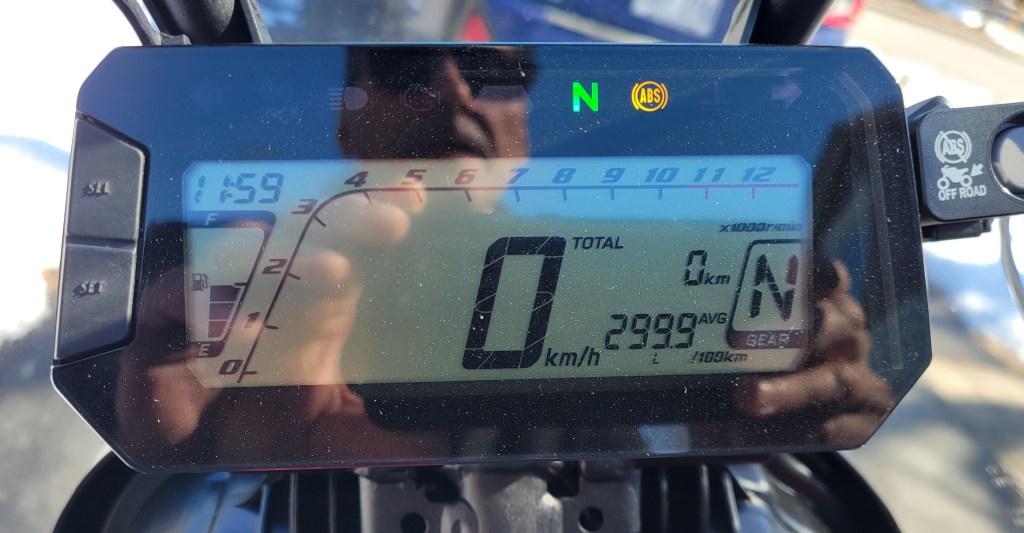
The bike has 35K on it, exactly the same mileage as the 650 when I bought it. These bikes apparently aren’t broken in until that mileage, so there’s plenty of life left in it. In fact, many of these engines last well over 200,000 kilometres if taken care of with regular oil changes.
I don’t know what the options were for this particular model, but the bike has ESA (Electronic Suspension Adjustment) and ASC (Automatic Stability Control, or BMW’s early version of traction control). It has heated handgrips, a must in my opinion for touring in Canada and at elevations. I think those things are standard.
It was one of those coincidences that seem like it was meant to be.
I like most of the modifications the first owner has made to the bike. Since it doesn’t have cruise control, he has added an Atlas Throttle Lock and a Throttle Rocker. That might seem like overkill but I like both. There are times when I just use the rocker, and on the open highway, times when I use the throttle lock. I had an Atlas on the Tiger and they are great. He’s also added Grip Puppies to reduce vibrations in the hands.
In lieu of cruise control, for crunching the miles.
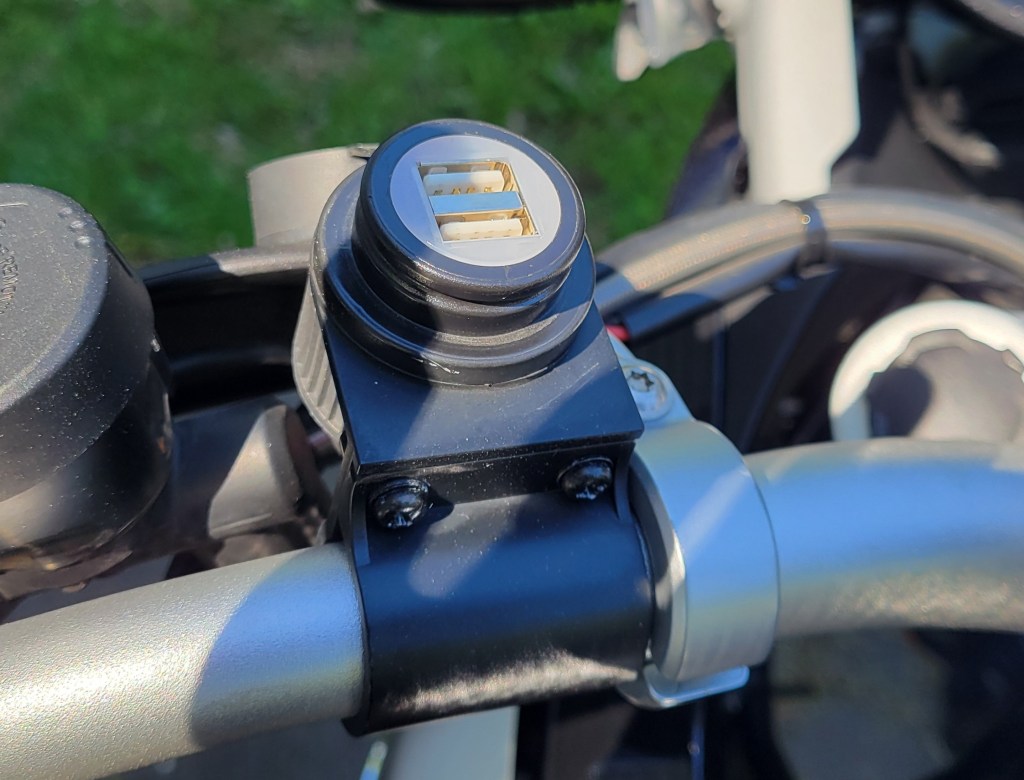
You can see in this photo a mount for a GPS. The bike came with a Tom Tom unit, and while I’ve gotten used to touring with my phone, I’m going to try the GPS for now. I like that it’s waterproof and heat and vibration resistant. It also works of course by satellite and not cellular service, which will be handy when touring out of country. On the other handlebar, he’s added a double USB port instead of the standard aux port. There is an aux port, however, under the seat near the back, so with an adapter Marilyn will be able to plug in to charge her phone or use heated gear.
He’s added a Mudsling rear suspension guard to protect the rear shock, and at the front, PIAA auxiliary lighting with a separate switch on the left handguard. I’m pretty partial to my Cyclops Aurora lights, so will probably swap them in as my aux lighting. I like how visible the amber halo makes me when riding around town, and I like the 4000 lumens they provide when I hit my high beams.
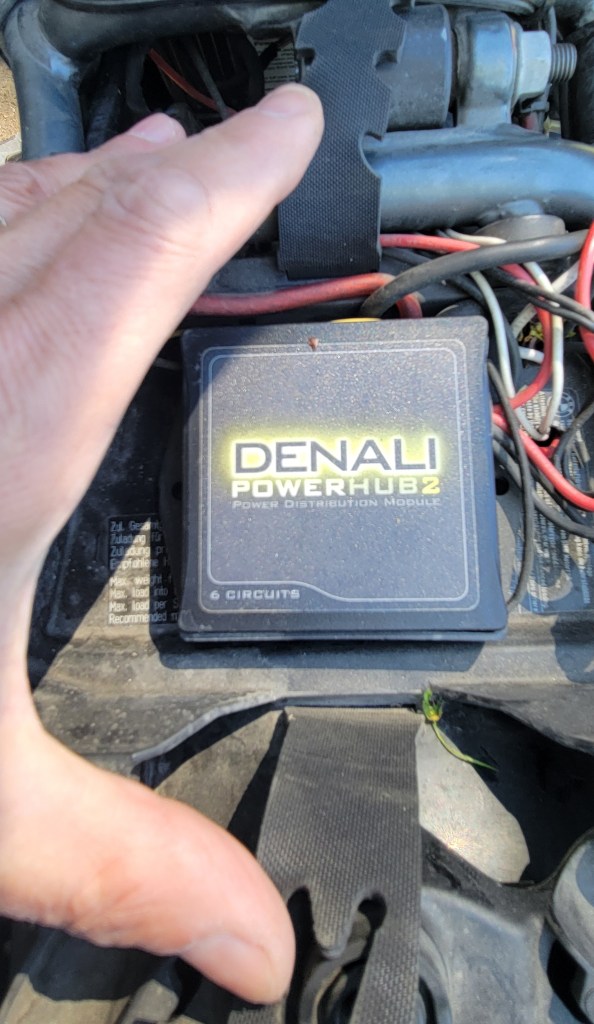
The bike has a Canbus electrical system, so I was preparing to install a CANsmart Controller to do that, but then I lifted the seat to find this.
Nice! The Denali Powerhub 2 Distribution Module works with a CANbus system, making the install of the Auroras a lot easier. There are six circuits and only three are currently used (presumably one for the PIAA lights) and all six circuits can be either switched or non-switched power. I had the Centech AP-2 Aux Fuse Panel briefly on the Tiger but this is clearly a superior system.
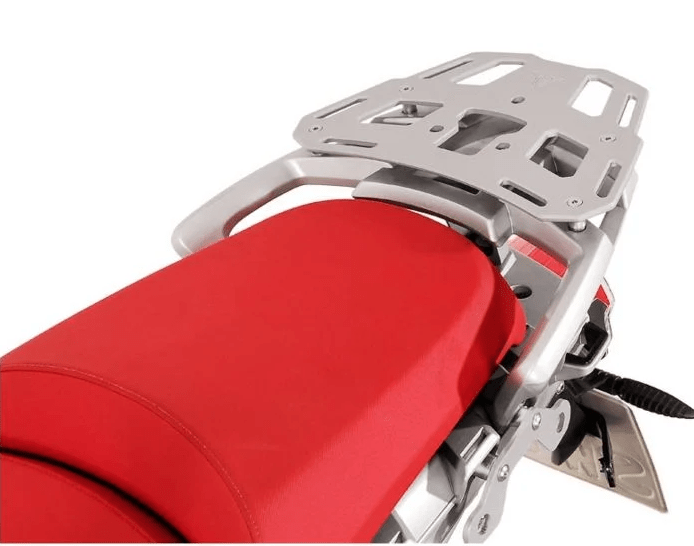
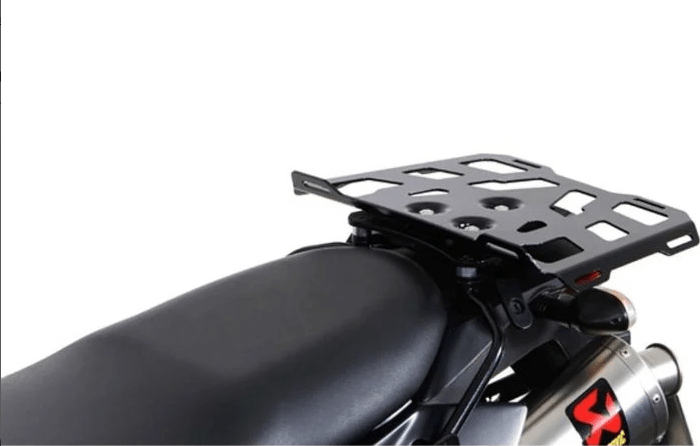
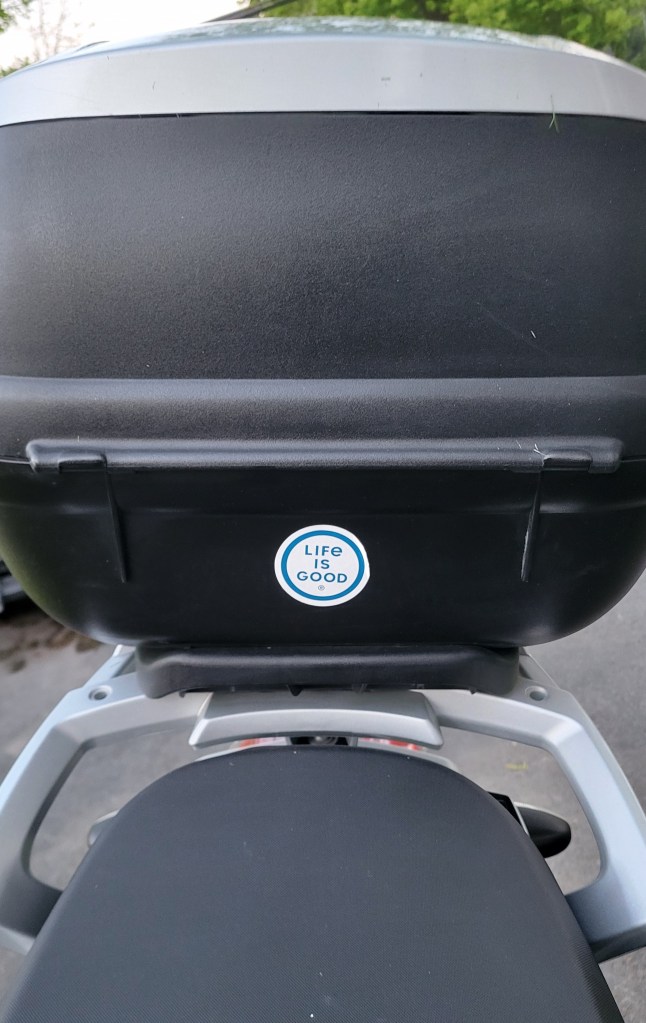
I’m not really a top box guy so will probably eventually take off the GIVI box, but I have to admit, it sure is handy around town. I’m enjoying it for now but have bought an SW-Motech Alu-Rack and Quick-Lock Luggage Rack for touring. The Alu-Rack is a durable, secure base for a small tail bag when I’m not touring, and the Quick-Lock Luggage Rack can quickly be added over and will provide a larger platform for a duffle bag.
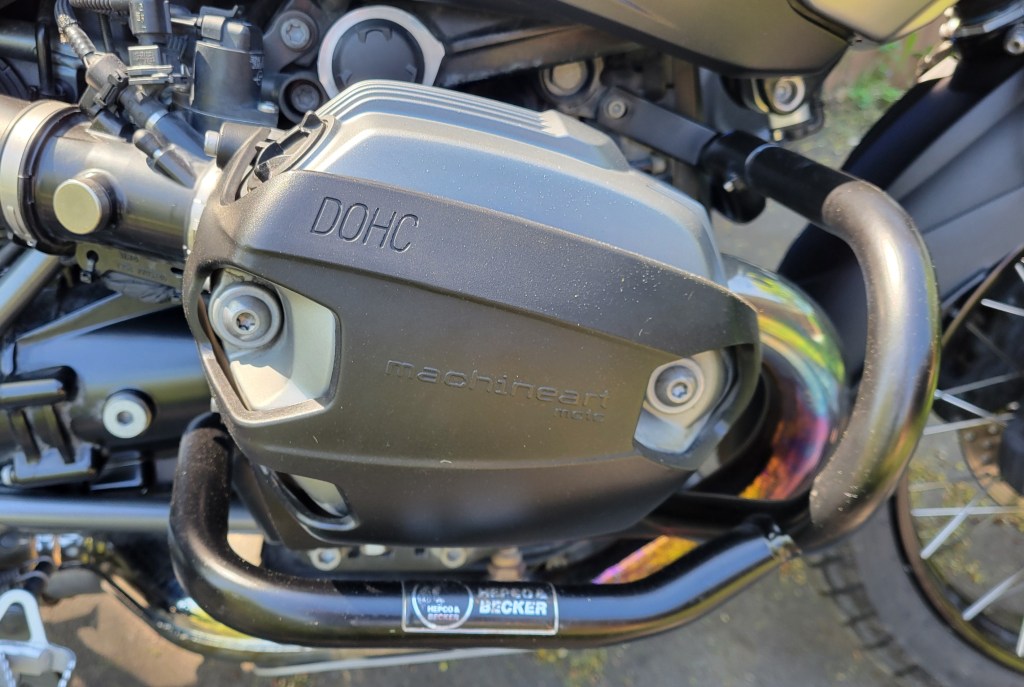
Last but certainly not least, he’s added excellent protection for the engine with Hepco-Becker bars and head covers from Machineart Moto. No need for big bars going halfway up the faring; these are all you need with the boxer engines.
I love everything about this bike. I love that it’s black—triple black, to be specific. All my bikes have been black, even my bicycles growing up. I used to buy bicycles at the police auctions, strip them down, paint them black, then reassemble them with new grease. When I bought a new bicycle from Canadian Tire in my early 20s, it was burgundy, so naturally I had to do the same. I don’t know why because blue is my favourite colour, but my bikes are always black. It just wouldn’t have felt right having a white bike.
I love everything about this bike.
I love that it starts on half a crank and twitches when you twist the throttle. I love that it shakes a little at idle and at low revs. And I love the baffle that BMW added on the 2010-12 years, giving it a real throaty exhaust note. It’s a far cry from the silky smooth Triumph triple and reminds me of the original thumper but without the buzziness at highway speeds.
BMW added an electronically controlled exhaust flap (flapper valve) on the 2010 model to control noise while keeping a throaty exhaust note.
Given the context, I can’t help think of the original owner when I swing my leg over the bike. In some way, it feels like I’ll be riding the adventures he should have had in his retirement but for some rotten luck. I don’t know what he would think, and I obviously can’t speak for him, but I like to think that part of him would be happy that his bike will be used for its original intent.
We must count our blessings and appreciate what each new day brings. That may sound like a platitude, but as I age, I recognize the wisdom of it more and more.
The first and only time I’ve ridden a little dirt bike was at SMART Riding Adventures back in 2017. I did a day class there and they start you in the morning on a Yamaha 230. It was so much fun that I later wrote to a riding friend that it was better than sex. She said I must be doing something wrong, but I stand by my initial impression. On a little bike with knobby tires, you can do stuff that you’d never attempt on a bigger bike, like muddy ruts, deep water crossings, and hopping logs. You can just enjoy the ride without all the performance anxiety. Like I said, better than sex.
It’s taken me almost a decade, but I finally have a trail bike in my stable. It’s my retirement gift to myself. A budget bike isn’t much of a reward for 30 years of teaching in public education, but I’m not complaining one bit. It’s going to be a really fun season. My purchase last week was the culmination of about a year of research and rumination, including a lot of YouTube reviews, discussions with fellow riders, and some demo rides. The light ADV market is the hottest segment at the moment and there are several excellent bikes to choose from. Below is my rationale for how I landed on the Honda Rally. If you are in the market for a light ADV bike, some of this research might be helpful to you.
Assessing my Needs
Of course, the first thing you have to decide in the purchase of a new bike is what you will be using it for. In fact, maybe that’s the most important part. I wanted a light trail bike to ride on the network of dirt roads and ATV trails here in Quebec and neighbouring Ontario and New Brunswick. I’d been trying to do this with a midsize bike since I began riding and it wasn’t going great. As Chris Birch says to people who show up at his clinics on a heavy bike, “You didn’t buy the wrong bike. You bought the wrong first bike.” There’s a reason Clinton Smout and his instructors at SMART put you on a little dirt bike to start: it’s a lot easier to learn off-road skills on a 300-lb bike than a 500-lb bike, and I would add, a lot safer too.
But I was also looking for a light ADV bike too, one that I could take on my solo adventures and not have to worry about getting stuck somewhere or being unable to lift on my own. A lighter bike is going to gain you access to more remote and technical riding than a big bike, and some of my retirement plans included that type of adventure. In sum, I was looking for a trail bike that could also cover long distances and do long days comfortably. I was essentially looking for a rally bike.
With that in mind, here were the contenders.
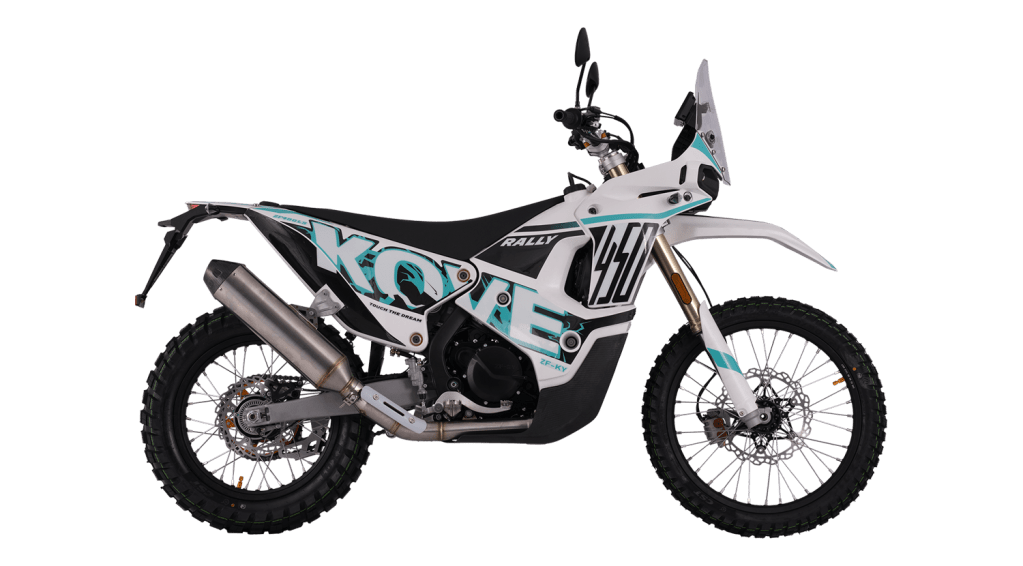
Kove 450 Rally
I got really excited when I heard you can get a competition rally bike for around $10G ($13G if you live in Canada). In the specs, it looked like the perfect bike. 449cc DOHC single with dual radiators, oil cooler, fuel injected, with a Bosch ECU controlling everything. The engine puts out 51 hp at 9500 rpm and 29.5 ft-lb at 7000 rpm.. It’s got a whopping 12″ suspension travel (high-seat model) and a whopping 8 Gallon fuel capacity over no less than 3 tanks (two up front, one in the rear) for a range of over 300 miles (500 kilometres), more than enough for even the most remote riding, all with a dry weight of just 320 lbs.! It seemed too good to be true and had many in the industry scratching their heads. I didn’t have any qualms about it being manufactured in China; Kove is not alone in that respect, and their performance in the Dakar Rally indicated good reliability. I sat on a Kove 450 at the Montreal Moto Show and it felt really good, exactly what I was looking for.
But this is one where the specs don’t tell the full story. I test rode one at La Classique Moto Fest last year. My first impression: it was loud! And for someone with only one good ear, the thought of riding this all day with the stock muffler was a deal-breaker. I could have perhaps got a baffle, but the other impression I had is that the experience of riding this bike is very raw. It’s vibey, and had head-shake at speed. Air management wasn’t great (more noise). In short, it felt like a race bike, which it is. I could have a ton of fun on this bike for day rides, but I think it would be very fatiguing on a long-distance tour, especially with the stock seat. As I write this, Craig Luke of I Think We Missed a Turn is preparing to ride the entire TCAT this summer on his Kove 450, and it will be interesting to hear how he gets on. No doubt he’s got the bike to get through whatever the TCAT throws at him, but I decided it was too much bike for me.
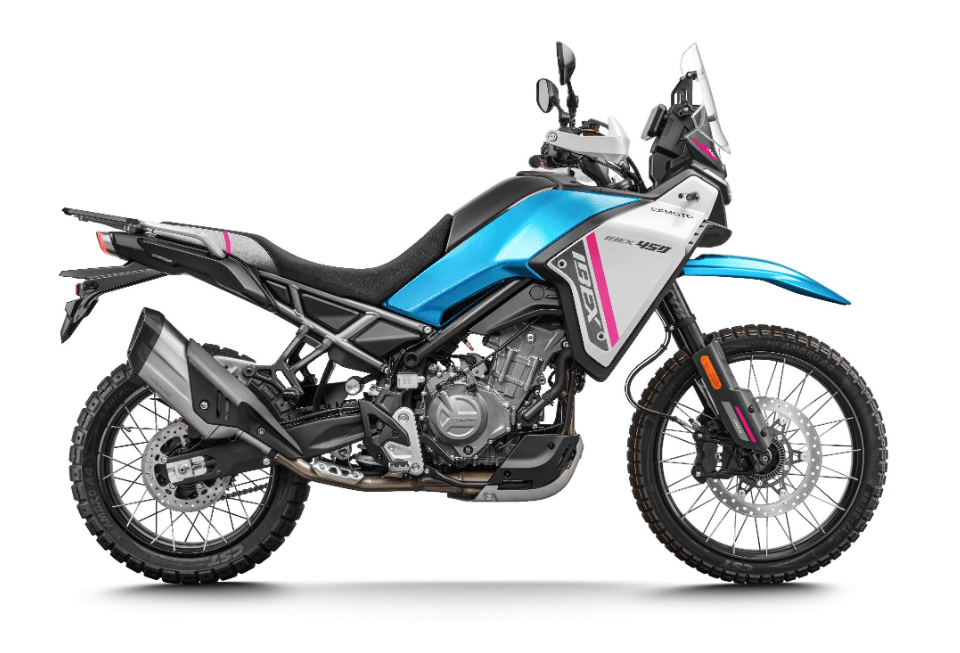
CF Moto Ibex 450
The bike everyone was talking about at La Classique was the CF Moto Ibex 450. It has everything hard core ADV riders have been asking for but no manufacturer was willing to make at the risk of cutting into the market share of one of their other bikes. It took a renegade manufacturer like CF Moto without a horse yet in the race to make the proverbial “unicorn bike.” It’s got a sweet sounding and smooth 449 parallel twin engine with a 270 degree offset crank for low-end grunt and a throaty exhaust note, fully adjustable suspension front and back, 18/21 tubeless spoked wheels, a slipper clutch, both ABS and CBS (combined braking system), a TFT display, rider modes, app connectivity . . . like I said, everything we’ve been asking for and for under $8000. Canadian!
The fly in the ointment? There really isn’t one, except maybe no cruise control, which is odd because it has ride-by-wire. That can easily be remedied by a throttle lock. It’s Chinese made, but I’m not calling that a fly. CF Moto has been making engines for KTM for a while now and we all know how reliable they are. [Pause for comic effect.] Okay, maybe that’s a bit of fly. Honestly, Honda’s reliability was a factor in my decision, but the real reason I didn’t go with the Ibex was that, at 420 lbs, it’s getting pretty close to the middle-weight bike I already have. (The Tiger stock 474 lb.) Like the Kove, the Ibex was a close second. I test rode one at La Classique and it’s a very impressive package. If I didn’t already have a bike and was aiming for another one-bike set-up, it would be hard to beat the Ibex 450.
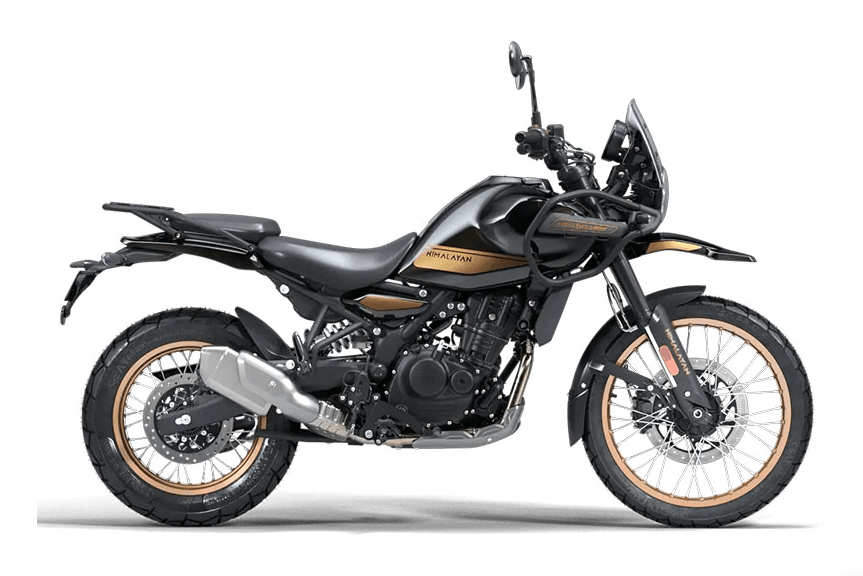
Royal Enfield Himalayan 450
Gone are the days of RE’s reliability issues. When Fort Nine did a comparison of the top motorcycle manufacturers’ plants for cleanliness by analyzing oil samples taken from new models, he surprisingly found that Royal Enfield came out on top, even beating out BMW, who came up with the standards. So they seem to have turned their manufacturing around. And under maverick CEO Siddhartha Lal, the company’s fortunes seem to have also turned around. The third corner of this triangle is design and engineering, and I can’t speak to that directly but can say that everyone who rides the 450 Himalayan is surprised by just how capable it is, despite its spec sheet. Itchy Boots was one of its first converts when she rode a pre-production model into the Himalayan Mountains, and Adam Reimann took it through the Nepal and could often be heard praising “Sir Enfield” for “getting it done.” In other light ADV “shootouts,” the Himalayan holds its own. In particular, reviews seems to praise the characteristics of the engine, and while the suspension is not adjustable, the stock set-up seems to work surprisingly well.
I haven’t test ridden a Himalayan, but it was never on my short list because of the 432-lb curb weight. That’s about 100 lbs more than what I was looking for as a fun trail bike. The Himalayan is listed as a light ADV, but like George Orwell, who self-identified as “lower upper-middle-class,” the Himalayan is an upper light-middle-weight bike. It also doesn’t have a lot of ground clearance, which is important when you’re riding trails. My sense is that trying to take the Himalayan 450 on trails would be like when I tried taking my 650 GS on them, and that didn’t go well.
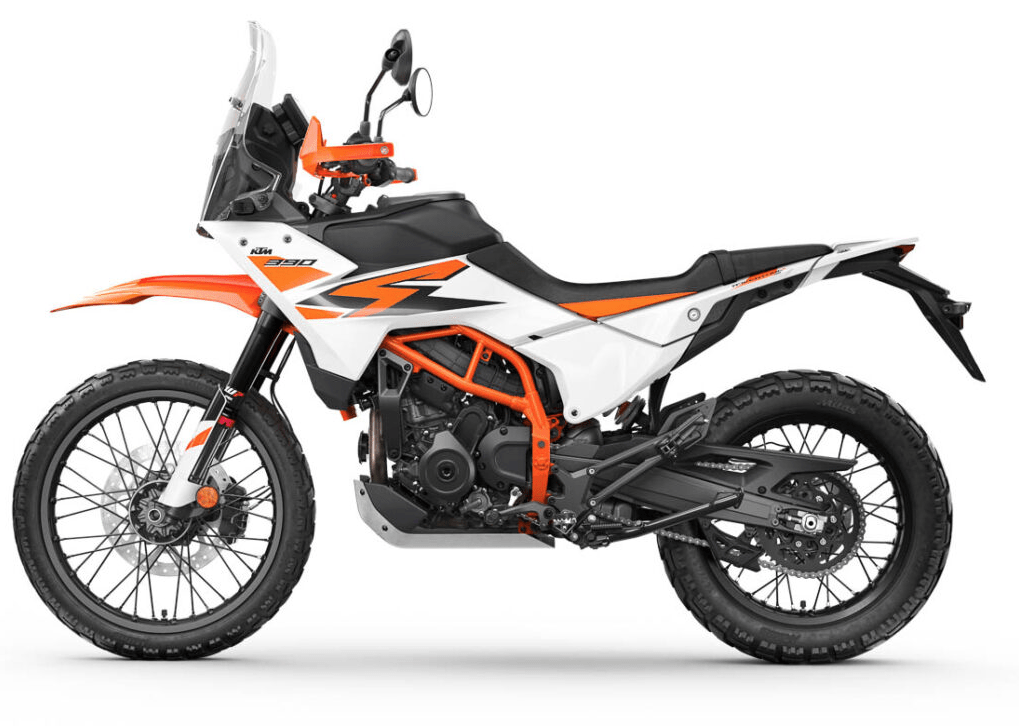
KTM 390 Adventure R
Honestly, probably the best off-road bike for the money in this segment is the KTM 390 Adventure R. It’s got 45 hp, WP suspension, floating axial brakes, cornering ABS and traction control, rider modes, 10.7″ ground clearance, and a 5″ TFT display with connectivity to your phone, all for a very competitive price. At 388 lbs, it’s not as light at the Kove, but significantly lighter than the Ibex and Himalayan. Certainly, when you look at all that, it seems a no-brainer to go for the KTM.
But here’s the thing, and I’m not even going to mention the chocolate camshafts. Even before KTM had its meltdown, I was never a KTM guy. Why? Partly because I swim against the crowd, but mostly because I’m more of an explorer than a racer. These engines have their specific characteristics, and the KTM is a high-strung, high-octane, high-compression, high-revving engine that likes to go fast and be aggressive. At 62, my fast days are over and I was never aggressive. Or maybe I was never fast and my aggressive days are over. Either way, that bike just doesn’t suit my personality, and I think that’s an important but indefinable quality in a bike. Do you see yourself in a bike, or put another way, does the bike reflect something of you? Maybe this is what others call brand loyalty, but I call it Narcissism. And while this all feels very new and unfamiliar, I think I’m a Honda guy.
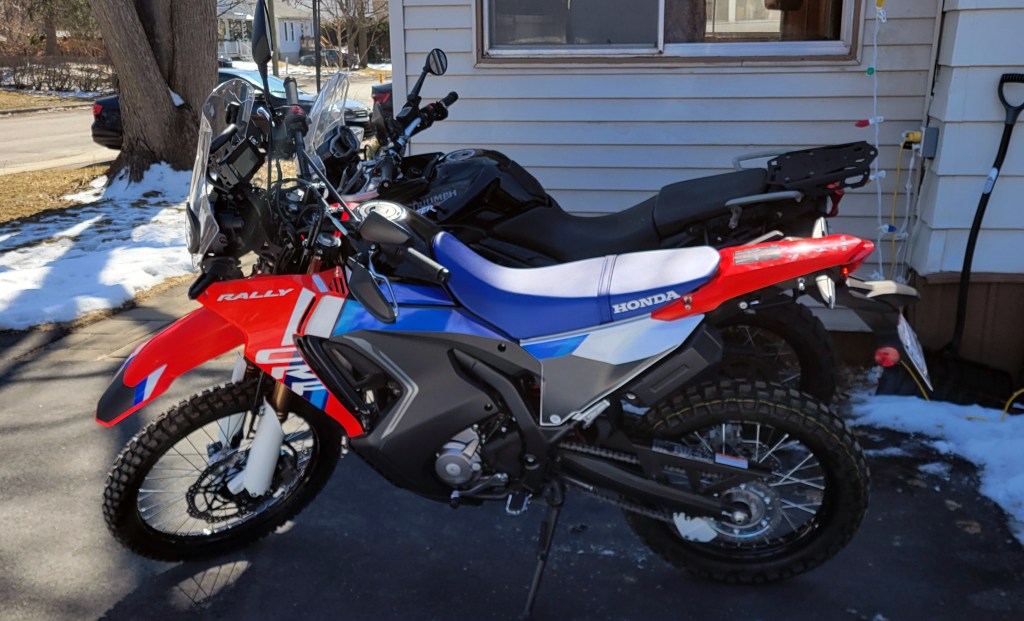
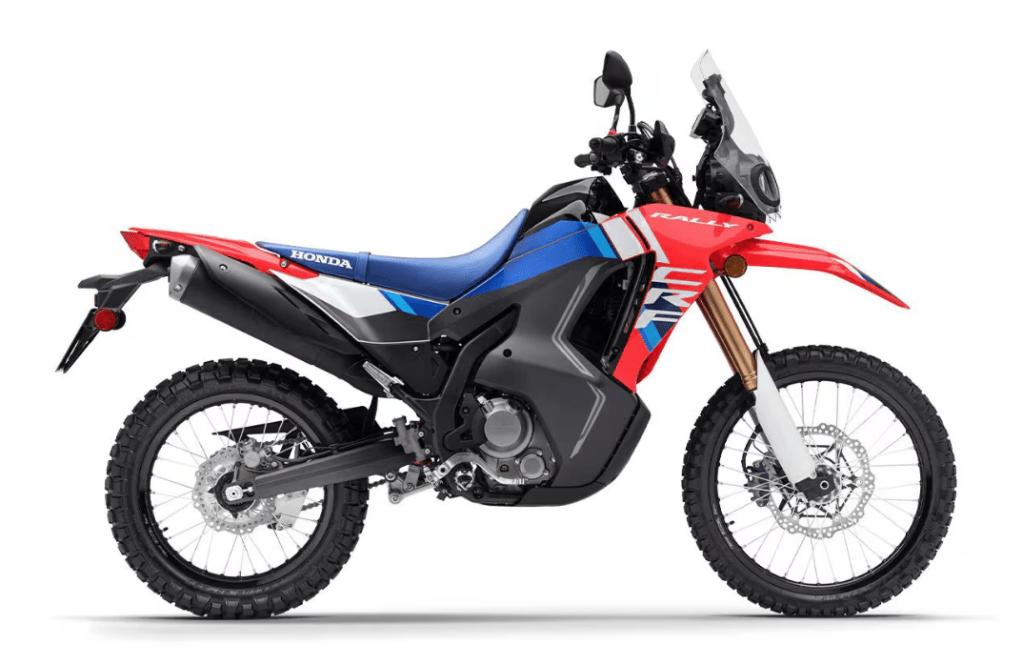
Honda CRF 300L Rally
I was initially tipped off about the Honda 300L by my buddy Riley from The Awesome Players. I think it was St. Patrick’s Day 2025, so about a year ago, and we were sitting on my porch having a Guinness and talking—what else—bikes. He’d just participated in Traction eRag’s 5-day training course out in BC. They run a fleet of Honda 250s and report no burnt clutches and very few mechanical issues. When I started watching the reviews, I kept hearing about “Honda reliability.” I’ve always fixed my own bikes, more out of necessity than good sense, and the idea of owning one that doesn’t require constant maintenance sounded appealing.
Aside from its reliability, there are a couple of characteristics of the Honda that I kept hearing in reviews. One is that, unlike the KTM, the Honda gets its power low in the rev range. This is really helpful if you don’t want to go fast but need torque down low to get up hills and over obstacles. The other is that the bike is very confidence-inspiring. That has something to do with the power delivery but also how the bike seems to carry its weight low. And at only 335 lbs, it’s one of the lightest bikes in the segment.
It’s only got 27 hp, so many owners immediately start trying to boost that with modifications to the airbox, ECU remapping, aftermarket exhaust, etc. even a complete new big bore kit if you want to have KTM-like power out of Honda. But I think those people are missing the point. Doing those mods will change the reliability and characteristics of the engine. Remember kids: it’s the tortoise who wins the race, not the hare. The only mods I might do to the engine would be to remove some of the Euro restrictions that are choking it.
Reviews also point out that the suspension is soft. Yeah, Itchy Boots rode one through South America, America, and most of Canada before finding out in Prince George, I think it was, that her static sag fully loaded was about 50%. When I decided to get the Honda, my initial plan was to buy used and put the difference in money into a suspension upgrade. Maybe an upgrade is somewhere in the new bike’s future, but there was only about $1000 difference between used 2021-24 models with 8,000K on them and a new 2025 model with improved suspension. At all of 150 lbs, I’m hoping the stock suspension on the 2025 model will be sufficient, at least for a while.
Other pros? The engine is supposedly surprisingly smooth for a single, and Honda have put a 6th gear in that serves as an overdrive. It will do 70 mph (120 kph), depending on wind direction, which is enough to get you to the dirt. The windscreen works quite well, and the headlight, although goofy-looking (some might say ugly), reportedly works very well, which is important on an ADV bike. Last but not least, I think the bike looks great. I like that Honda have gone back to the blue saddle on the 2025 model. You can see the rally heritage in its design.
Reviewers consistently call the Honda CRF 300 Rally either a “beginner bike” or an “old man bike.” As an older man who still considers himself a beginner off road, I think it will be a good fit.
Which bike would you choose and why? Is there another I should have considered? Do you have a new bike this season? Drop a comment below. I always like to hear from my readers.
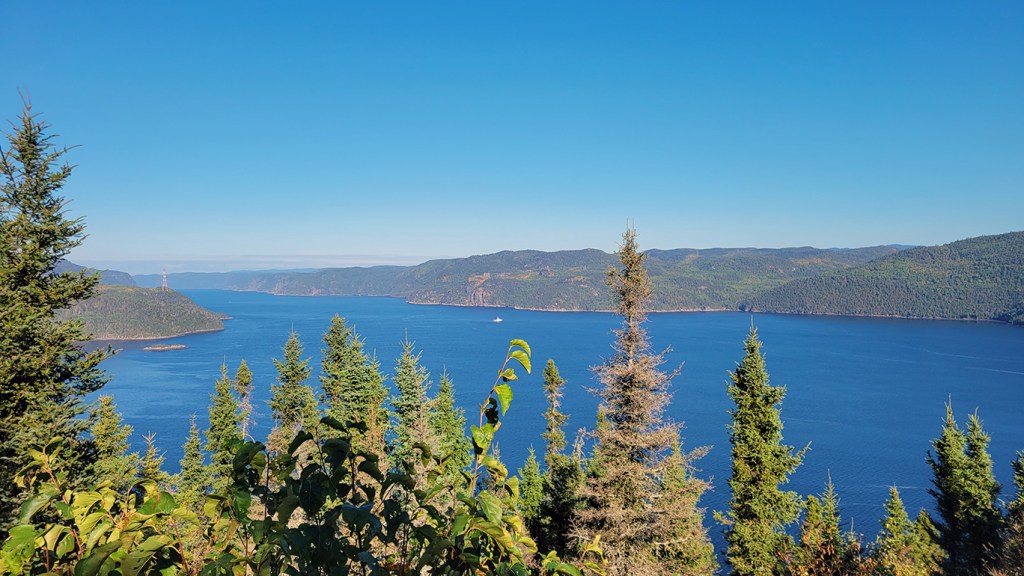
Everyone tours The Cabot Trail on the east coast, but the west coast has its own charm.
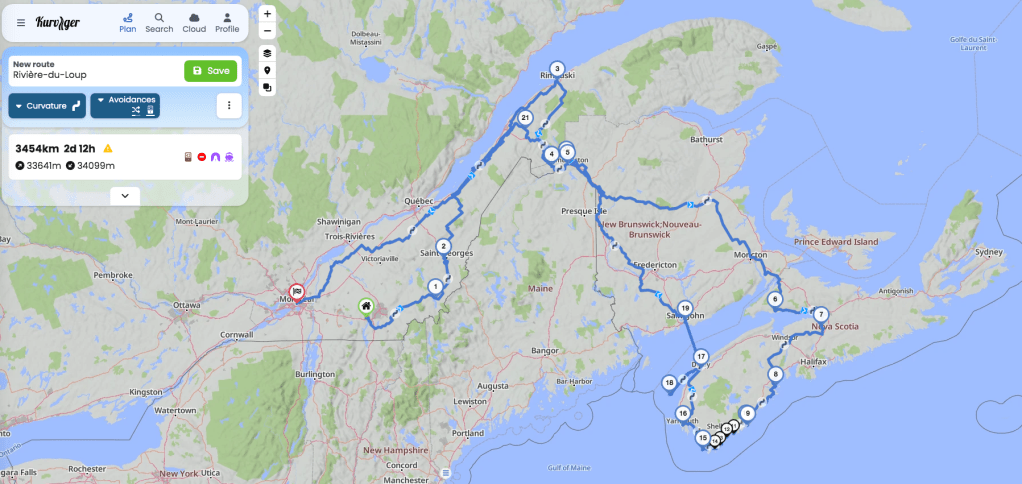
After riding the TQT (Trans Quebec Trail) from Magog to Rimouski, I’d had enough of dirt roads and boreal forest and decided on a change of pace. I contacted my good friend in Nova Scotia to see if she was up for a visit. Sharon and I met as undergrads at Western University, so long ago the university was then called The University of Western Ontario, and we’d kept in touch through the years. She’s one of my oldest and dearest friends and I don’t see her enough, so I spontaneously reached out. Thankfully, my timing was good; she’d just finished her teaching duties for the summer and her schedule was clear. I decided I’d nip down to central Nova Scotia for a short visit, then ride The Lighthouse Route that follows the NS western coastline from Halifax through Lunenburg, Liverpool, Kejimkujik National Park Seaside, Yarmouth, and around to Digby. Then I figured I’d cross The Bay of Fundy on the ferry and start making my way back to Montreal. Where the first week was remote solitary dirt and gravel riding through forest, the second would be asphalt, ocean, lighthouses, cafes, bookstores, and microbreweries.
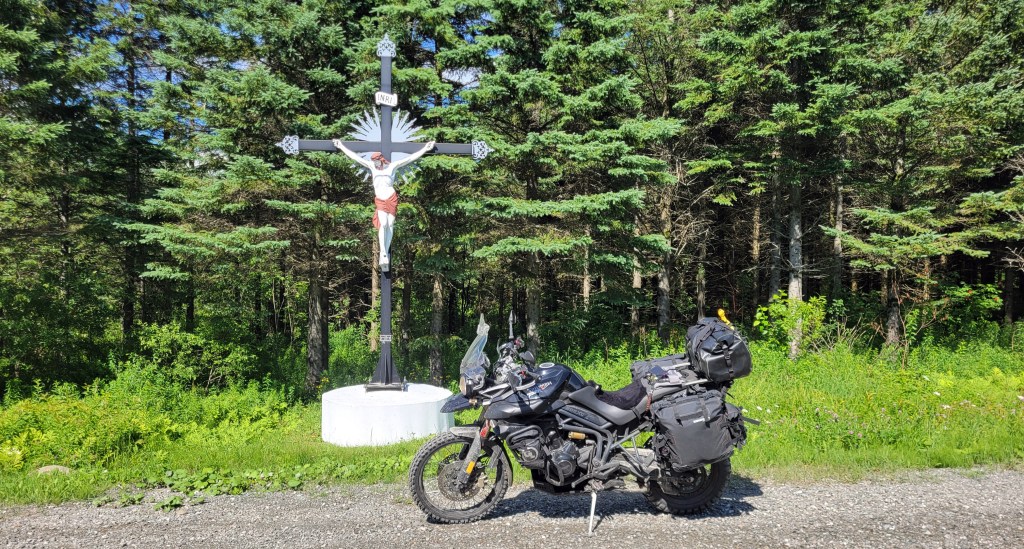
Google said Sharon was only 7 hours from Rimouski by highway, but I wasn’t in a hurry so thought I’d ride mostly dirt roads down. In fact, I could still follow the TQT south out of Rimouski and then follow my nose. It brought me to the northern gate of a large nature reserve (ZEC) standing between me and New Brunswick. I write “gate” but there was no actual barrier, just a small building that you stop at to buy your permit. There is a small fee to enter these reserves. I’m not sure why, but this is Quebec and there’s usually a fee attached to most things. No doubt the money goes toward maintenance of the building that houses the staff member whose job it is to collect the fee.
The man inside started to fill out the paperwork for my fee. I noticed that he was a two-finger typist so I guess a certain typing speed was not a requirement for his job. We got to the point where he collects the fee and I caught something about “trois cent kilomètres,” which caused me some concern. (He didn’t speak any English so obviously that was not a requirement either for the job.) A few questions of inquiry and I discovered that, yes, it was over 300 hundred kilometres through the reserve. (This man was now earning his wages.) I wasn’t expecting that and hadn’t filled my extra fuel bladder and didn’t know if I had enough gas to get through. He also said it wasn’t advisable to ride through alone because there are a lot of moose and not many people in the reserve. With that, I wished the man adieu and decided to find another way down to Nova Scotia.
I rode back out to the main road and plugged Sharon’s address into Google but with the option to “Avoid Highways.” I figured if I couldn’t ride dirt, I at least didn’t have to ride highways. Google did pretty well and in fact found me some interesting dirt to ride.
However, once I got into New Brunswick, Google did less well. I think some of the NB backroads aren’t mapped in Google using anything but satellite imagery because I soon found myself on an ATV trail that looked pretty gnarly. Yes, it wasn’t highway, but it also wasn’t a road. Fortunately there was a sign indicating I needed a permit (yes, another fee) to ride it, and given that I was fully loaded and alone, I decided to back out of that one too. It wasn’t easy getting to Nova Scotia. Clearly I couldn’t ride through the drive-through province without using highways.
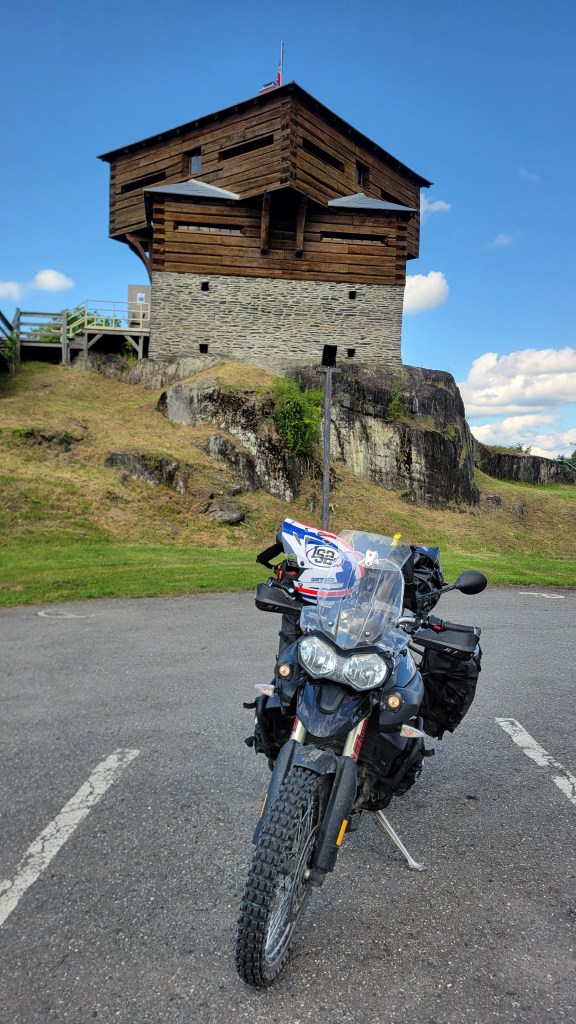
Now I was somewhere in New Brunswick and getting low on fuel. I didn’t have cell service so couldn’t look up the nearest gas station so I went old-school and asked a man who was cutting his grass. (Thankfully, there was a house.) He said to continue until I reached the St. John’s River and then turn left and that would take me into Edmundston. Phew! Every tour requires at least one fuel scare.
Soon I was not only fueled up but also at a tourist information centre, which in Edmundston is housed in an old military block house on the St. John’s River.
Prepared to defend against the attacking tourists.
And before long, I was set up for the night at Parc Provincial de la République, which is nowhere near as revolutionary as its name suggests.
The next day there was no avoiding it: 5+ hours on the Trans Canada Highway south and then east, cutting through bush with moose fence on either side, a 120 km/h asphalt corridor that numbs the mind and body but gets you into Nova Scotia, where you can drop down a gear and start to smell the ocean. I had in mind to camp at 5 Islands Provincial Park, which I missed the last time through by accidentally staying at 5 Islands RV Park (very different), only once I got there after a long, exhausting, boring day in the saddle, I was told they didn’t have a site. The Not Since Moses race was that weekend in which participants run along the muddy beach at low tide. Sounds like fun but unfortunately it meant the campground was full. With some advice from park staff and a phone call, I found a site just 30 minutes west along the shore in Glooscap Campground in Parrsboro. I was now right on the shore of Minas Basin with Sharon just a short ride away on the other side of Cobequid Bay.
Minas Basin, an inlet of The Bay of Fundy.
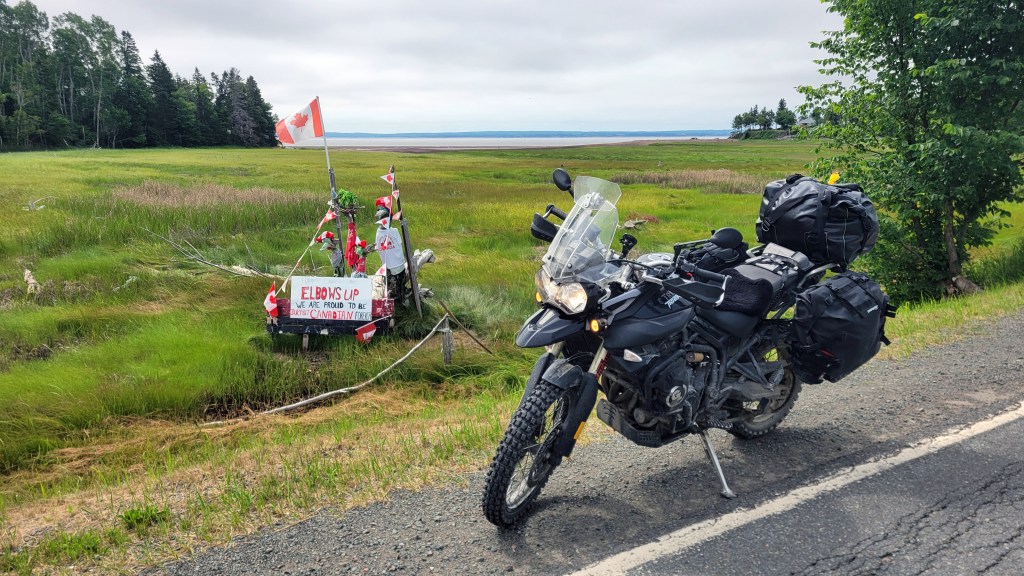
The next day, while circumnavigating the bay, I came across this roadside sign, which seemed apropos since I wouldn’t have been in Nova Scotia if it weren’t for what was happening in The United States.
Reads, “Elbows Up. We are proud to be Canadian forever. July 1867”
“Elbows Up” is a reference to hockey, Canada’s official national winter sport. It refers to a style of play by Mr. Hockey, Gordie Howe, who used his elbows to defend himself against larger attacking players. It has become a rallying cry for Canadians against Trump’s punishing tariffs and threats of annexation. The date indicated on the sign is when Canada officially became a nation, comparable to 1776 for Americans.
As a Canadian, I’ve watched with a kind of dispassionate curiosity the political events and discourse happening south of the border, but lately the conflict and tensions have crossed the border and become more personal and threatening. I normally don’t like to get political in this blog because it’s one of those topics one is supposed to avoid at the dinner table so perhaps should be avoided in this public conversation as well. Let me preface the following comments by saying that I’m in agreement with some of Trump’s policies and recognize that the Democratic Party seems to have abandoned the working class and adopted a politic based more on race and identity than pragmatic economics. I’m not a fan of open borders, despite understanding why many people might want to flee difficult situations in their home countries. I don’t think mass unregulated immigration is viable long-term. And while I’m not an anti-vaxxer, I’m curious to see what Robert Kennedy Jr. is going to do with health care reform and food and drug safety in The States.
However, Make America Great Again cannot involve violating international law and annexing sovereign countries and continents. It should not involve turning a friend and ally into an enemy and opponent by breaking trade agreements with unreasonable tariffs designed to crush industries that have served both countries very well since 1989, when the US-Canada Free Trade Agreement (FTA) was first signed by President Reagan and Prime Minister Mulrooney (superseded by NAFTA). If President Trump wants to change the nature of the US-Can trade agreement, there are mechanisms built into the agreement for that. But Trump wields tariffs like a club, threatening to use them according to his whims when he even hears something he doesn’t like. That is not a viable economic strategy for developing stable trade and investment relations.
In 1969, then Canadian Prime Minister Pierre Elliot Trudeau said that living next to America is like “sleeping with an elephant. No matter how friendly or even tempered is the beast . . . one is affected by every twitch and grunt.” And currently the beast is far from friendly. How does a relatively small country like Canada deal with a unfriendly United States? I think the answer can be found in one of our oldest stories, Jack and the Beanstalk, a story that is perhaps 30,000 years old. Jack knows he cannot survive on his own against the giant, so he enlists the help of the giant’s wife, who feeds him and hides him when the giant returns. Perhaps she too is afraid of the giant. This is exactly what Prime Minister Carney has suggested in his recent speech at the World Economic Forum in Davos—for middle-sized countries to cooperate and form alliances to protect themselves against hostile superpowers. That speech has clearly angered Trump because, as I write this, he’s threatening a 100% tariff on all Canadian goods, although his motives for this latest threat are unclear.
But back to Elbows Up for a moment, while we are still stopped at the side of the road. I miss riding in The United States and hope these political tensions are resolved soon. I plan to tour in my upcoming retirement not only the eastern seaboard but also The Continental Divide, including Utah, and the Pacific Coast Highway, among other destinations. I haven’t yet seen The Grand Canyon, or the Bonneville Salt Flats, or ridden The Great Smokey Mountains or The Outer Banks. So please, my American readers, don’t take it personally that I’ve decided to participate in the tourism boycott for now. It is a price that we are both paying for President Trump’s decisions. I feel it’s just something I ought to do while President Trump is being disrespectful. In every single course outline I present to my students, there is a sentence at the end of the section on class rules: “Mutual respect is the basis of all relationships.” Referring to Canada as the 51st state and our Prime Minister as its governor is not being respectful.
Feel free to comment below on what I’ve said above, but if I may extend the analogy of the classroom a little further, another of my class rules is that any and all comments are valid as long as they remain respectful in both tone and content.
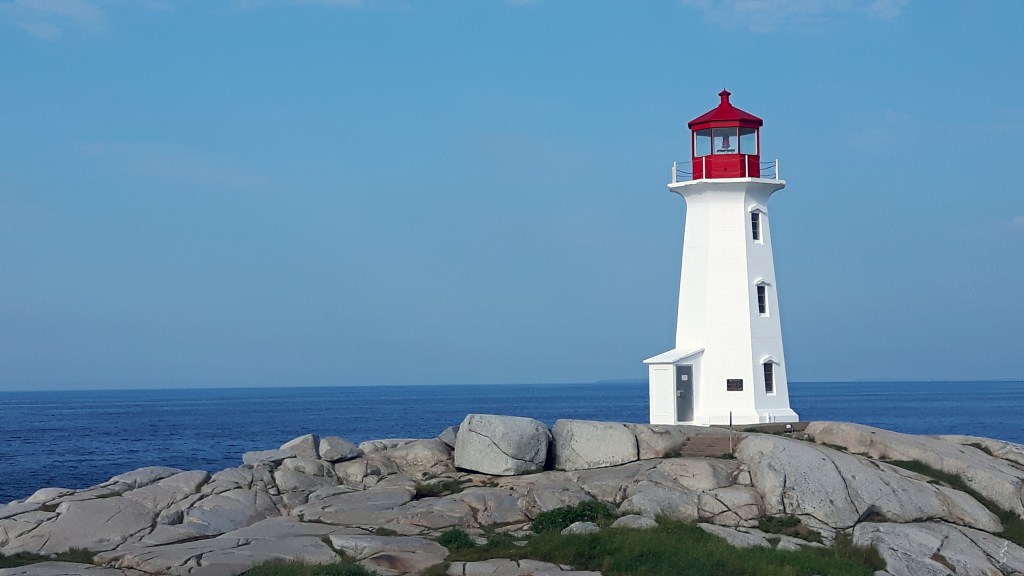
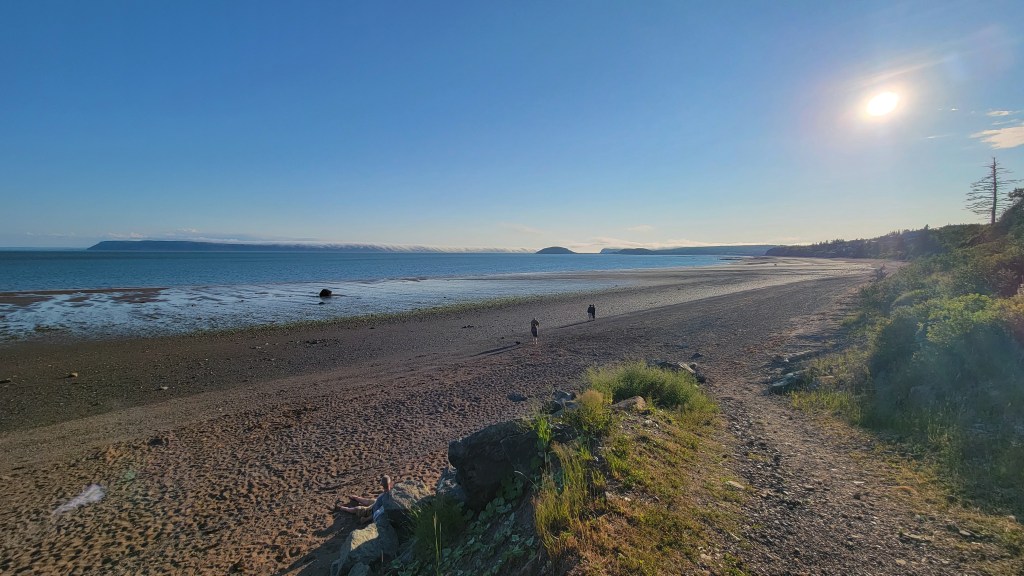
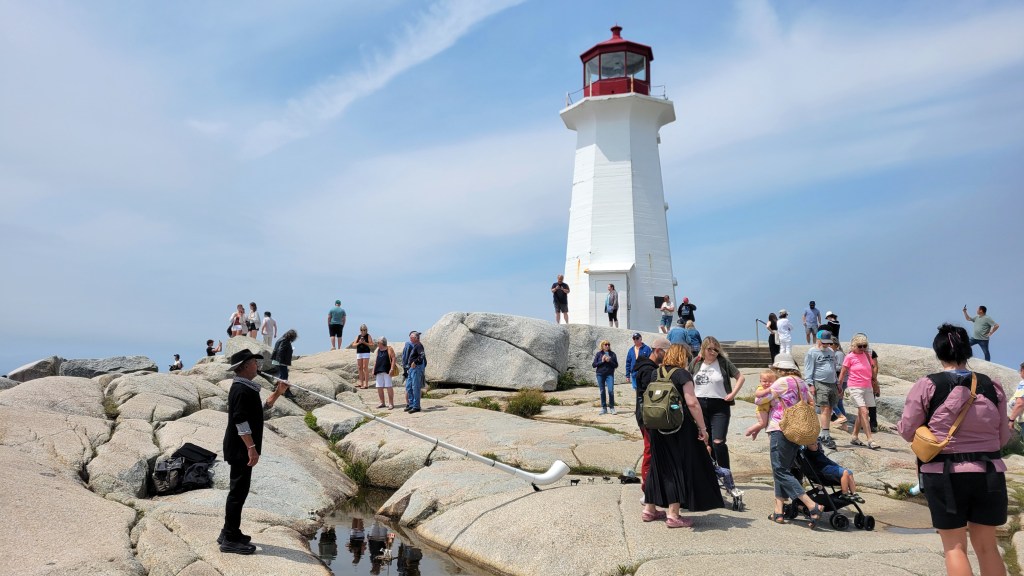
After a few days of rest, conversation, campfires, and catching up with Sharon, I loaded up the bike again and headed south, skirting Halifax and picking up the 333 that took me to my first lighthouse, Peggy’s Cove. The first time I visited Peggy’s Cove, I camped about 15 minutes away at Wayside Campground and was able to get down to the lighthouse at dawn to take the photo above (banner image). This time it was later in the morning and it looked very different.
Pro tip: get there early if you can.
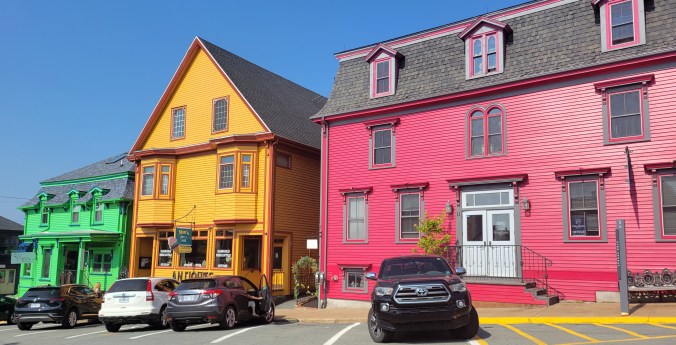
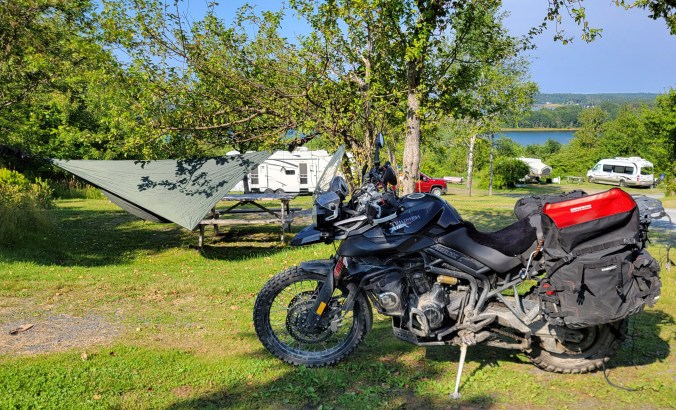
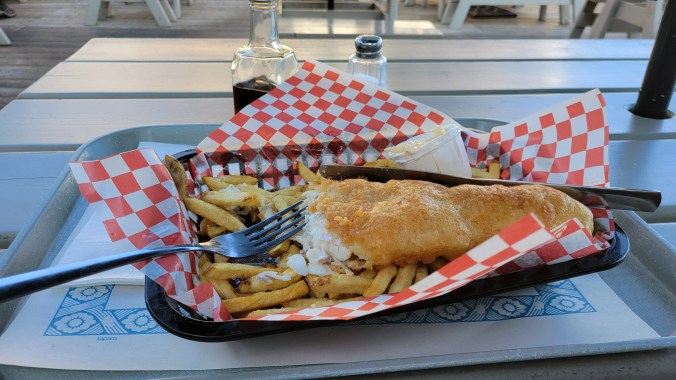
My tour now was not solitary, and unfortunately, I got more of the same once I reached my destination for the day, Lunenburg. I set up my hammock at the campground, then walked down into town for a pint and some fish & chips.
Click on arrows left and right for slideshow.
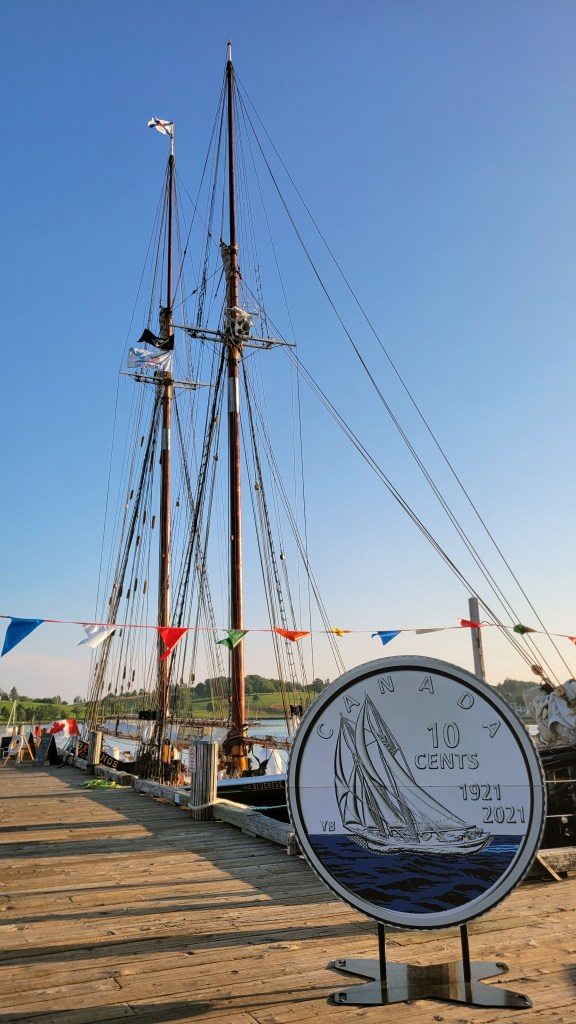
After dinner, I got an ice cream and walked down to the dock to see Bluenose II.
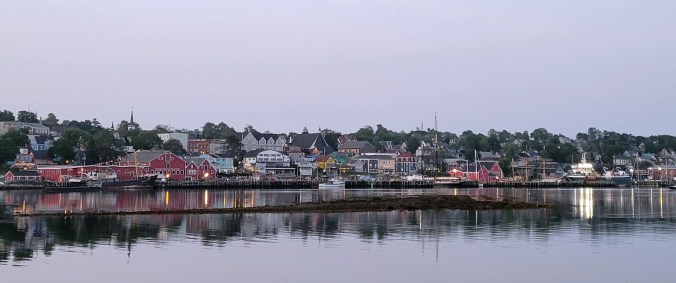
The last time I was here was with Marilyn. In fact, we’ve visited Lunenburg a couple of times and now, alone, I experienced another kind of loneliness from the previous week as everywhere I went her absence was all the more poignant, exacerbated ironically by the streets and restaurants teeming with tourists.
Lovely Lunenburg
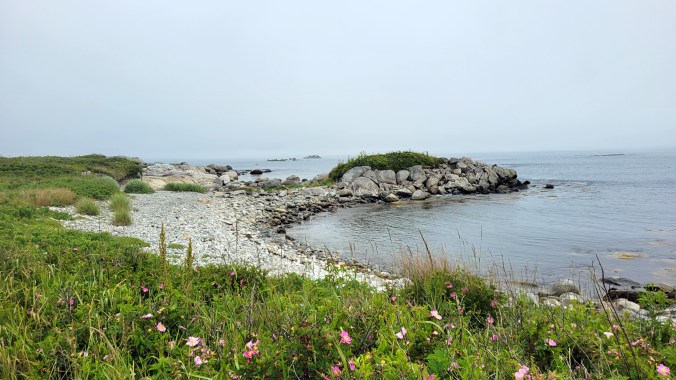
I decided to wander over to the other side of the bay where it was quieter and provided a peaceful view of the harbour at dusk. The next day I was strangely happy to pack up and continue west along the coastline, out from the crowds and into the more remote side of the province.
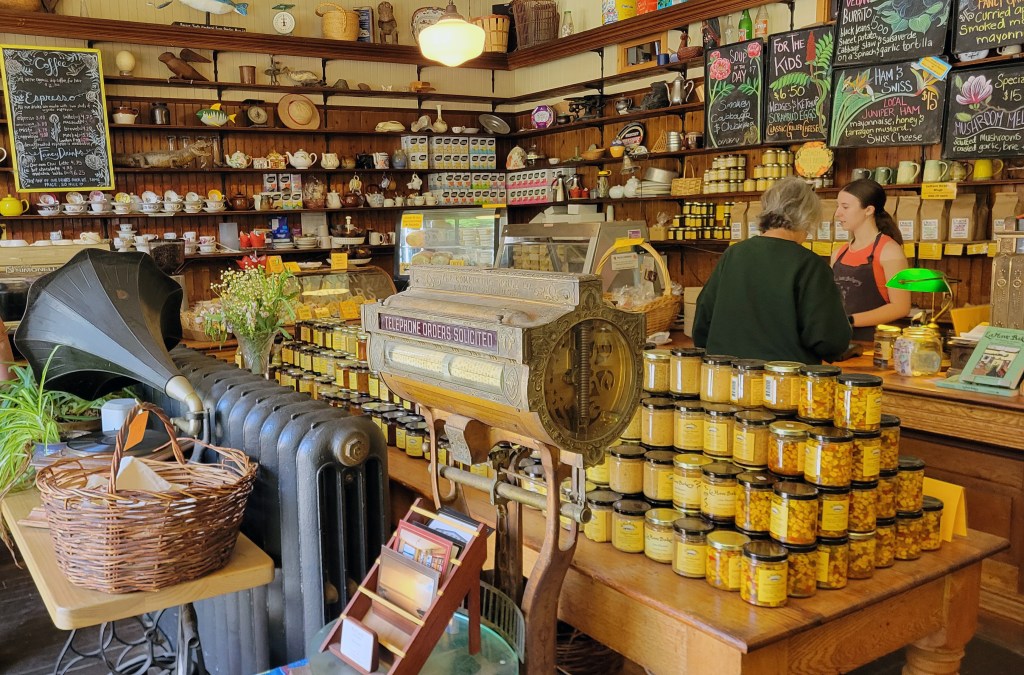
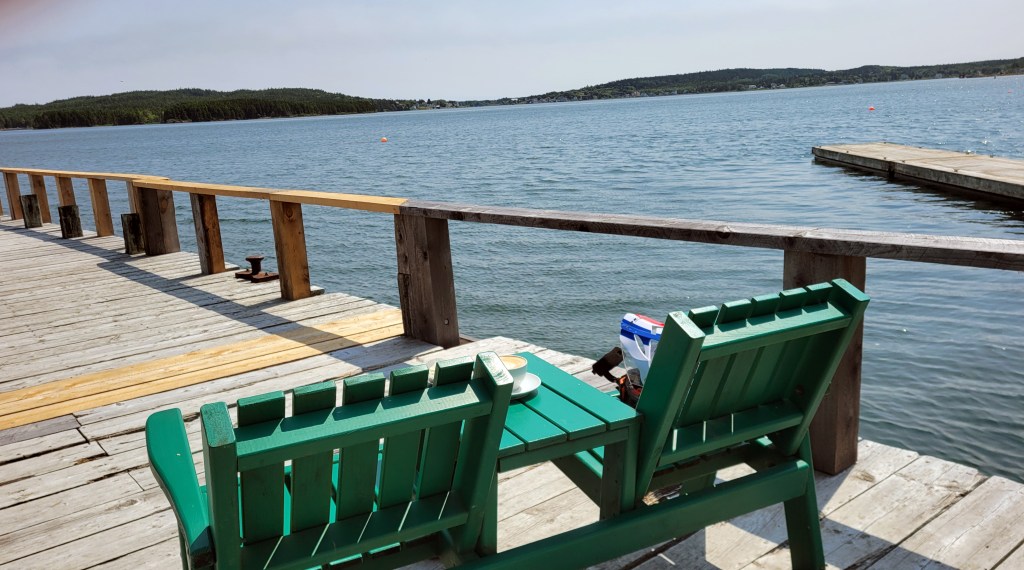
My first stop was LaHave Bakery, just off the ferry that takes you across the LaHave River. One of my favourite things while touring is stopping at a bakery for a midday snack and coffee, and it doesn’t get any better than the LaHave Bakery. They have not only delicious baked goods and coffee but also an adjoining bookstore and a dock out back where you can sit while you enjoy your treats.
A good coffee, some baking, and a book. Simple pleasures.
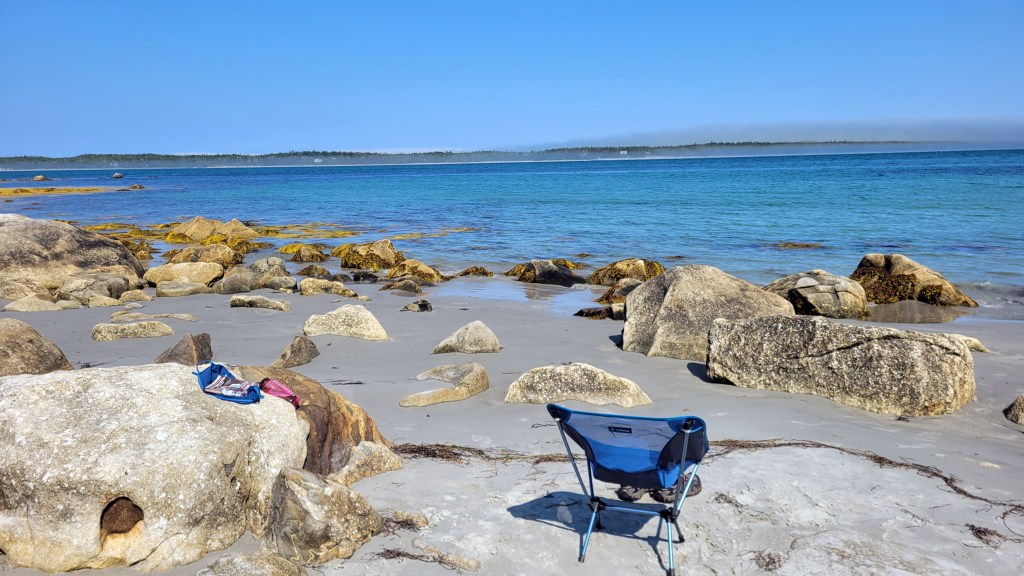
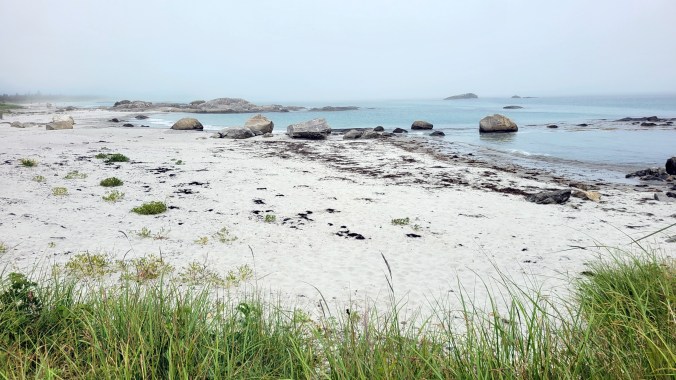
After, I continued along the 331, dropping down onto secondary roads that hug the shoreline of the peninsulas as I headed west to Kejimkujik National Park Seaside. Don’t ask me how to say it (or spell it, for that matter), but it’s on the southern shore about halfway between Lunenburg and Yarmouth. You can’t camp there so I went to Thomas Raddall Provincial Park just on the other side of the bay and set up there. As soon as I’d strung the hammock and made my way down to the beach, I knew I would stay here for a few days.
Port Joli Beach at Thomas Raddall Provincial park, looking across to Kejimkujik.
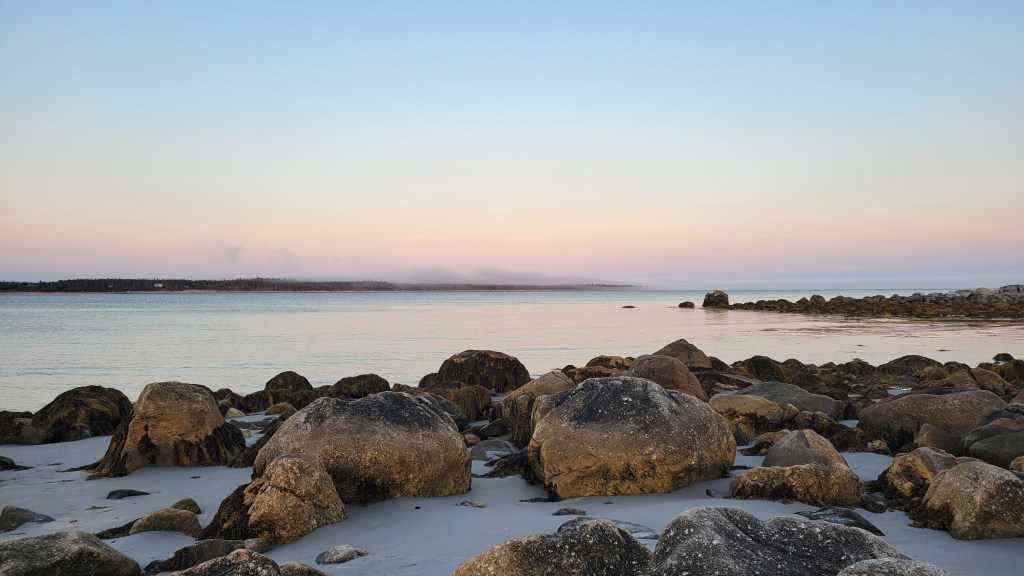
I went for a swim and read for a bit, then hopped on the bike and rode over to the park, only by the time I got there it was getting late, the parking lot was completely empty, and I knew I was all alone in this large, remote park. You have to walk a narrow trail to get to the beach from the parking lot and signs at the trailhead indicated the presence of bears. I’d left my bear spray back at camp, and when I saw signs of bear activity on the trail, I decided not to risk it but return the following day better prepared. Sometimes you just have to listen to your gut.
Back at Port Joli Beach for another peaceful dusk.
I’ve written in an earlier post about how, at my age (62), I’m trying to take some days off the bike while touring. Rest days, recovery days, sightseeing days—call them what you will, they are helpful and needed and ensure I slow down a bit and don’t ride past attractions in the quest to cover miles. Kejimkujik was the perfect place to spend a day and in many ways felt like the highlight of the tour.
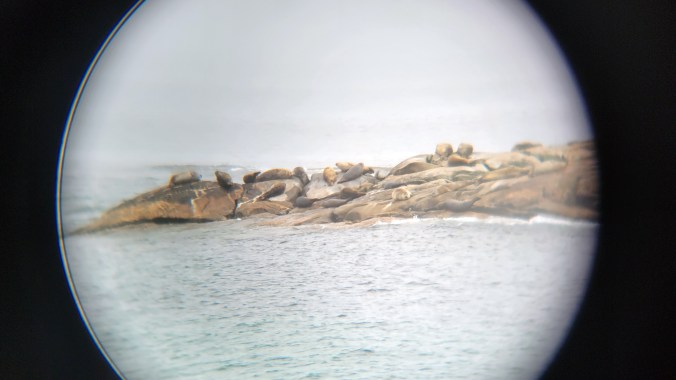
And speaking of rest, the last time I was here with Marilyn, I was so exhausted that I fell asleep sitting up on a rock at the shoreline, much to Marilyn’s chagrin, who found it a photographer’s paradise. At least that’s her memory of our visit, but in truth I was just “resting my eyes.” This time I was well rested and hiked the trail, then found a viewpoint to sit and take in the sights and sounds of the ocean. Seals were in the bay in front and a bunch were bathing on a nearby island, which I was able to see through my monocular and photograph by putting it to the lens on my phone.
Kejimkujuk beach
Kejimkujik shore
Seals sunbathing
While hiking the shoreline trail, I rounded a corner and saw a bear up ahead, but it skedaddled into the bush when it saw me. Kejimkujuk Seaside really is a special place. If you are a nature lover, make sure it’s on your destination list.
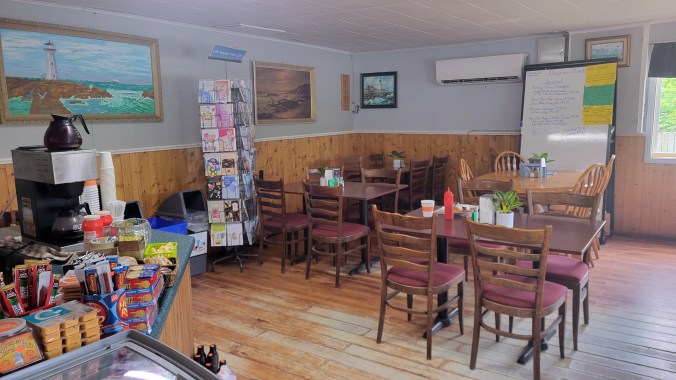
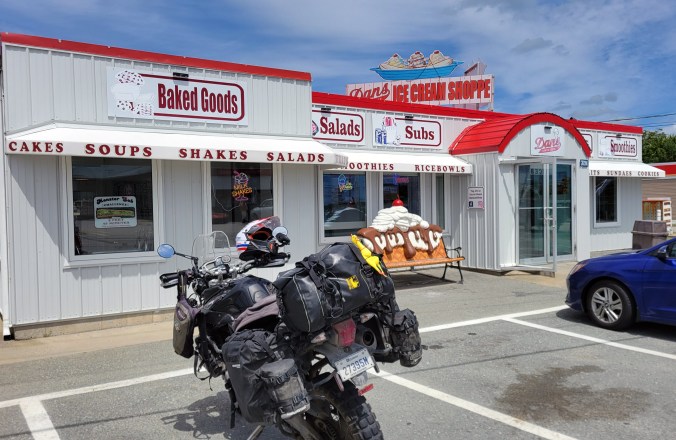
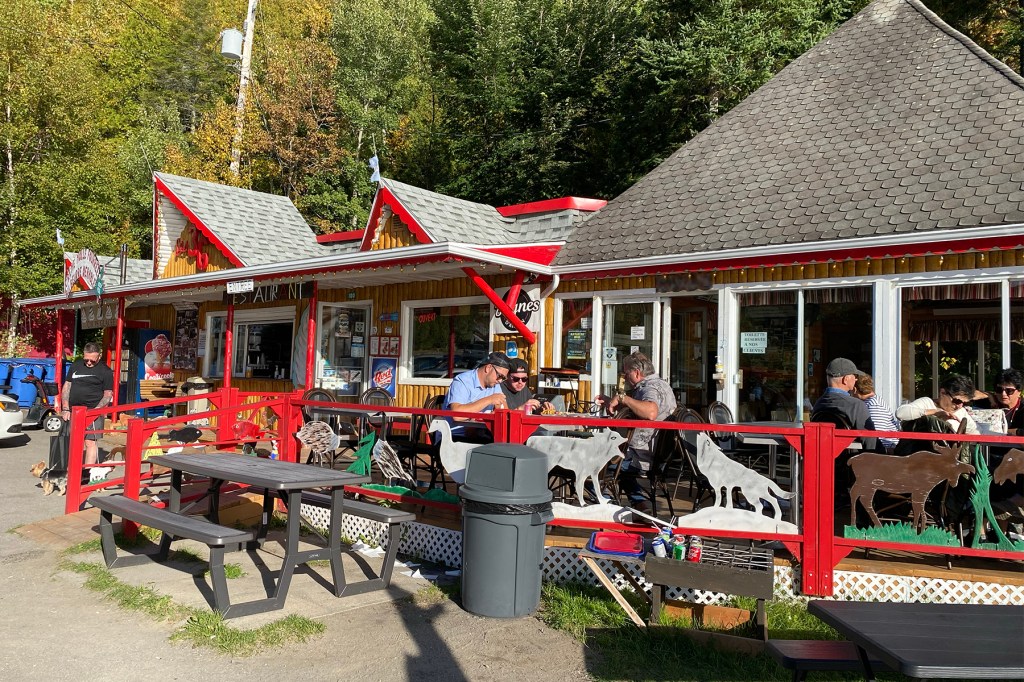
The next day I continued along the shore toward Yarmouth. I found this quaint mom and pop diner for breakfast in Bayman (Highway 3), and later in the heat of the afternoon, a classic ice cream parlour in Barrington Passage. It was a different kind of tour from first week but I was enjoying the comforts.
Classic NS breakfast diner.
Yes, there are still places in NS that spell it “shoppe.”
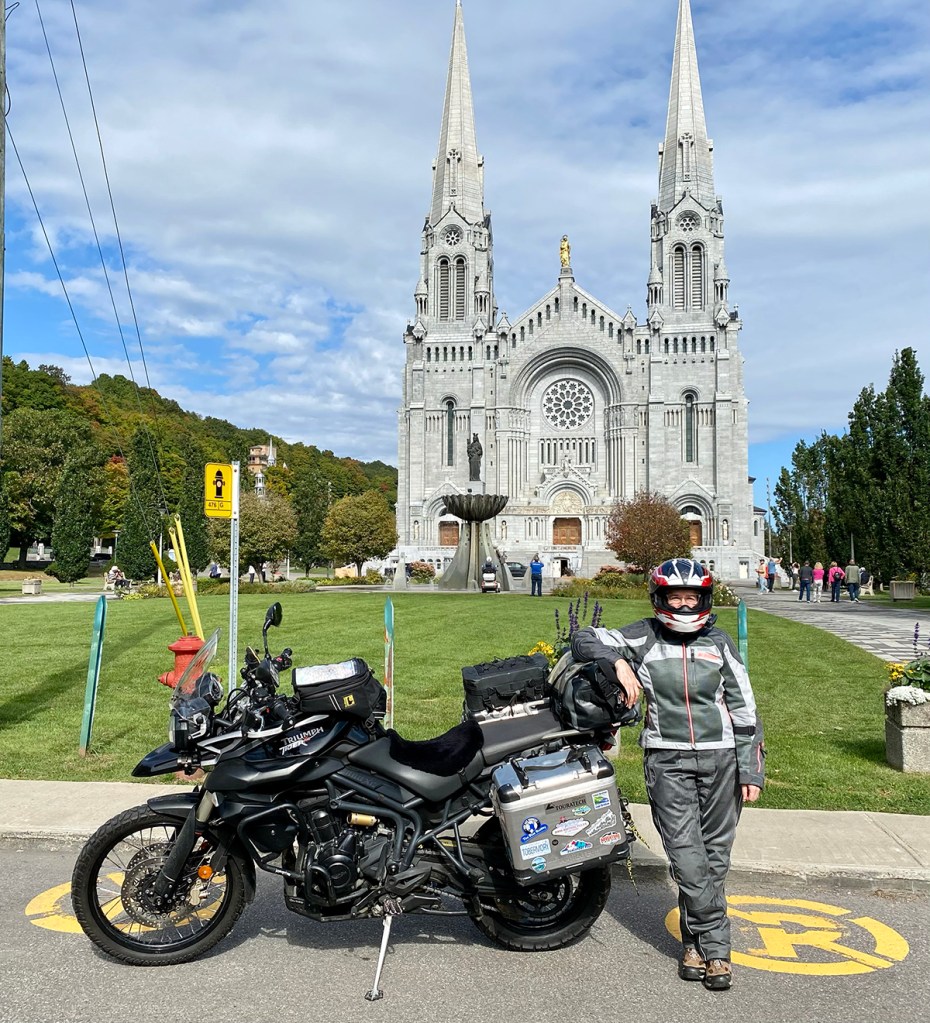
Sainte Anne Church, the oldest parish in the region (1799)
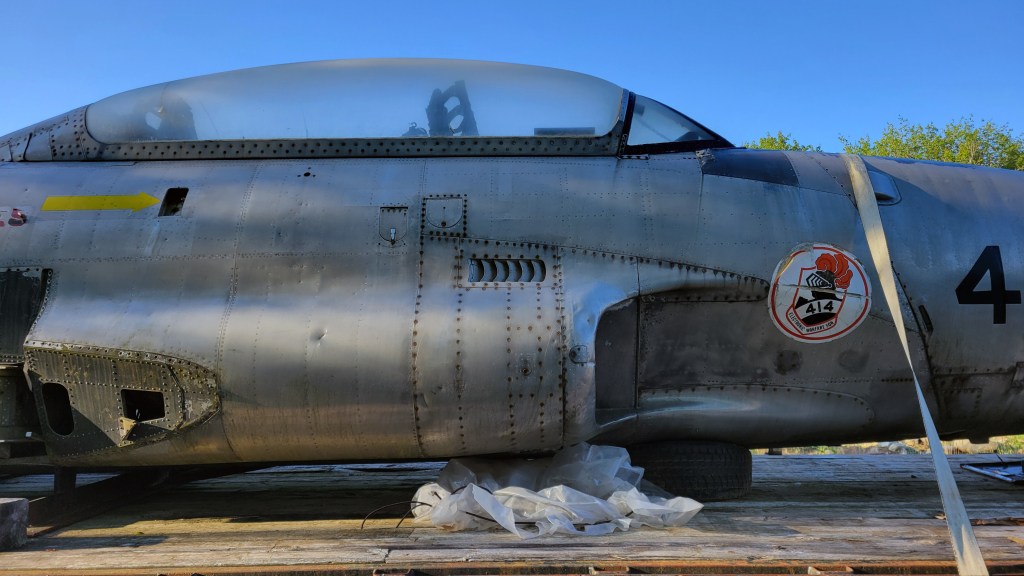
I stopped at the Canadian Tire in Yarmouth to get some oil for the bike, then rode inland to Castle Lake Campground. It was a campground unlike any other I’ve stayed at—the biggest, for sure, with lots of heavy equipment and construction going on, and some unusual artifacts, like a dismantled McDonnell CF-101B Voodoo sitting on a flatbed. I’m not sure what they plan to do with it. At any rate, I was happy for the site because everything else was full.
The next morning I was treated to one of those peaceful moments that make camping for me preferable to a cheap room.
I was now getting near the end of my loop. I rode into Digby and bought my ferry ticket for passage the following day. Then I had the day to spend so I decided to ride the Digby spit. It’s very different from The Cabot Trail, but special too in its own way. Where The Cabot Trail is spectacular and exciting, the Digby spit is quiet and peaceful, but not without some interesting attractions.
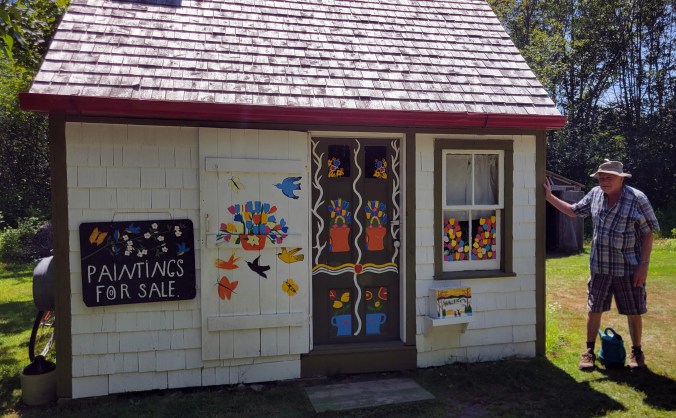
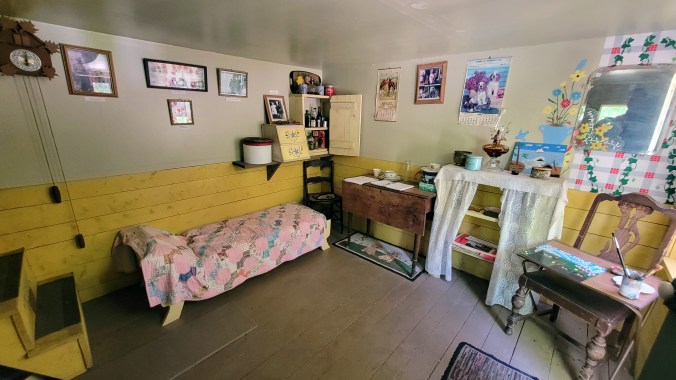
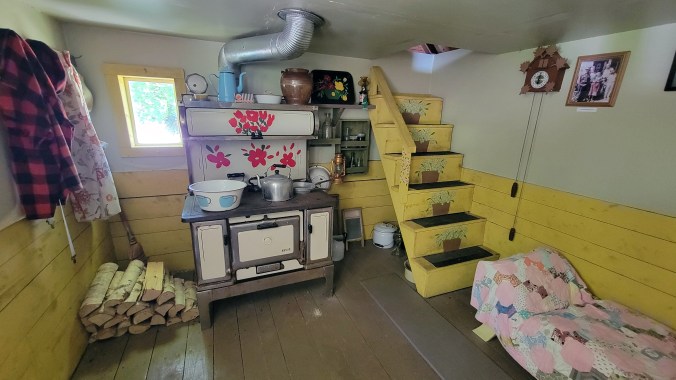
I stopped at the reconstruction of folk artist Maud Lewis‘s home. If you haven’t seen the movie Maudie (2016) starring Sally Hawkins and Ethan Hawke, it’s worth a look. Someone who as a boy knew Maud has built a pretty good reconstruction of her tiny home (the original is in the Art Gallery of Nova Scotia). I have to admit that I don’t understand the artistic merit of folk art, but I can appreciate a good story, and the story of a young destitute woman with numerous physical challenges finding love and artistic success in rural Nova Scotia is a good one and exemplifies much that is right about Canada.
Murray Ross beside his replica house on the site of the original.
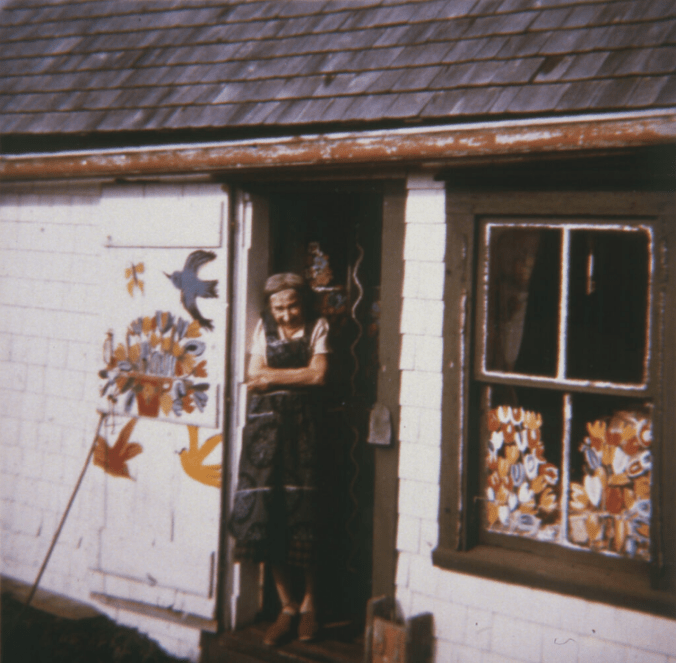
Maud Lewis in the doorway of her home, 1961 Photograph by Cora Greenaway
Murray Ross told a few stories from memory about Maud, including that she soaked her paintbrushes in turpentine and the terrible fumes in the little house likely contributed to her lung ailments later in life.
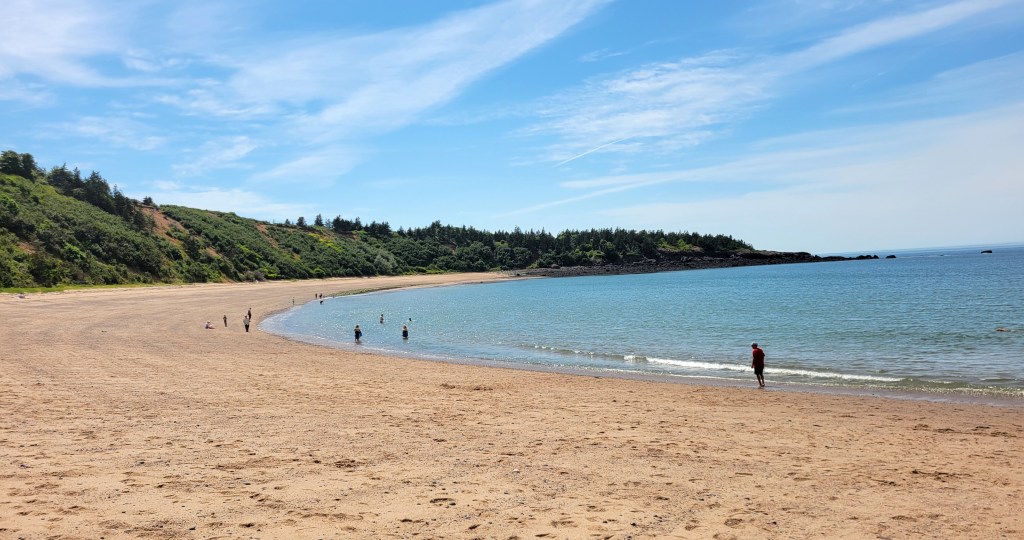
A little further along the spit, I pulled off at the appropriately-named Sandy Cove.
Sandy Cove, NS. No crashing waves here but a very pleasant rest stop along the spit.
The Digby spit is comprised of several islands. There are free short ferries rides that take you to the outer islands. If you have the time, keep going because there are some interesting attractions further along.
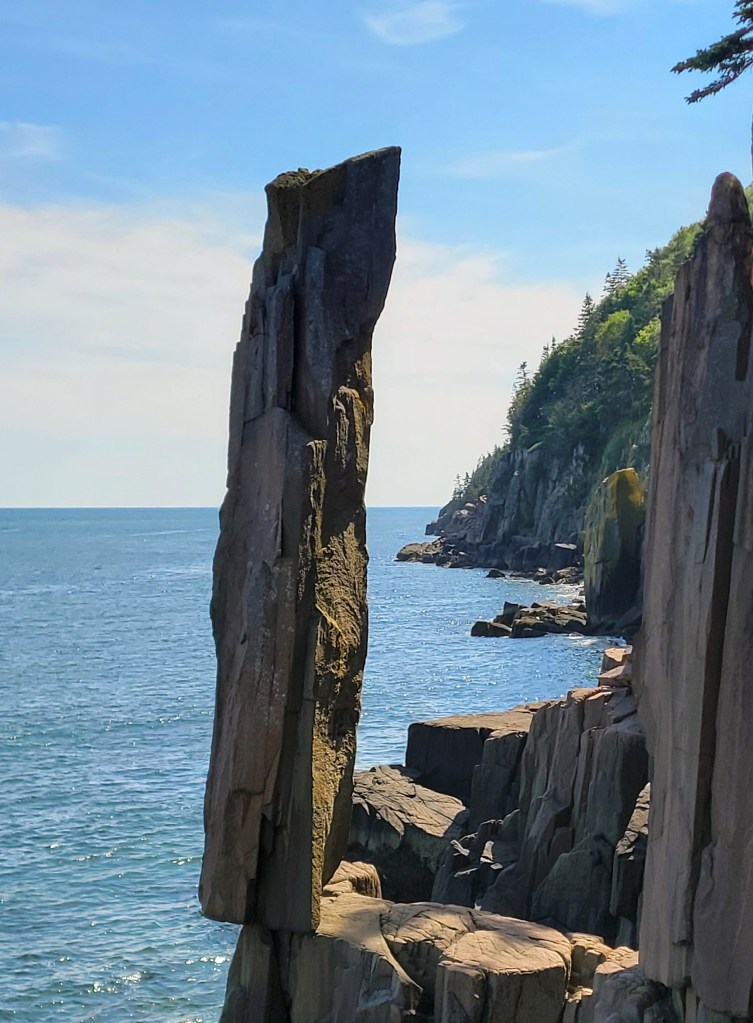
Shortly after getting off the first ferry, look for the sign for Balancing Rock. You have to survive a very buggy hike along a trail to the shore to see it, but it’s pretty neat. (Pro tip: wear your helmet with visor down on the hike.)
Balancing Rock
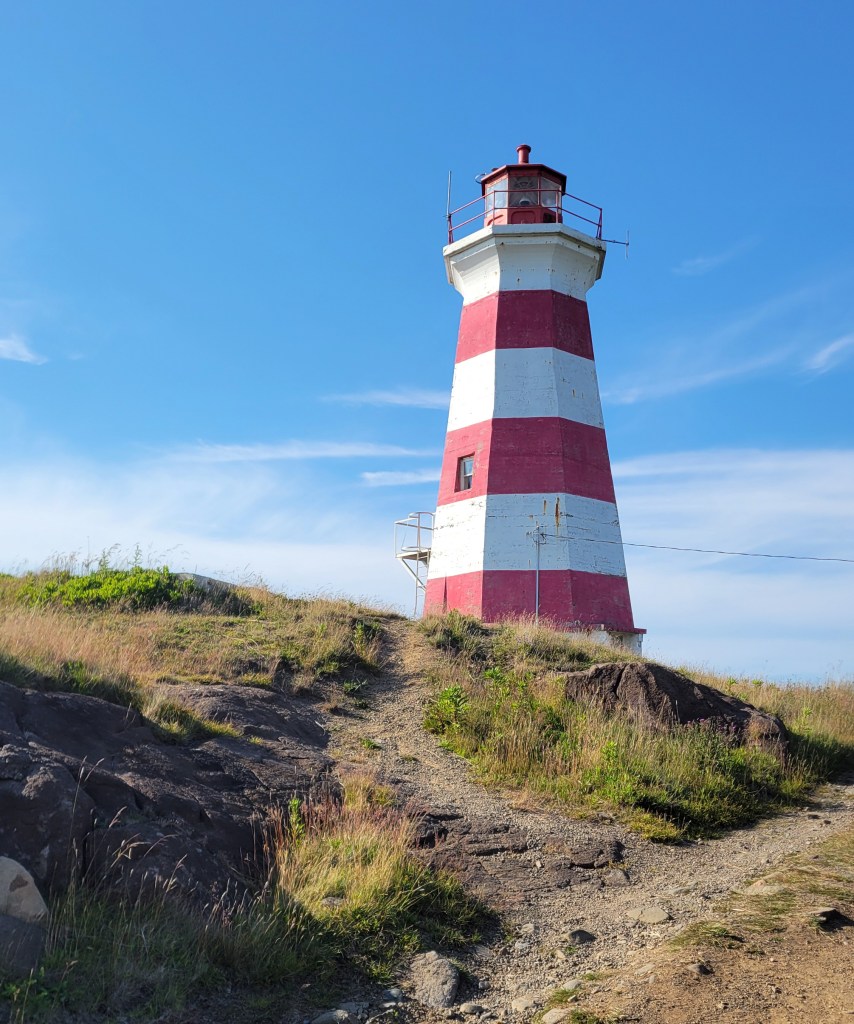
Keep your eye out for whales. Finally, if you make it that far, Brier Island not only has ice cream but also a lighthouse out on the point.
Brier Island Lighthouse, my final lighthouse.
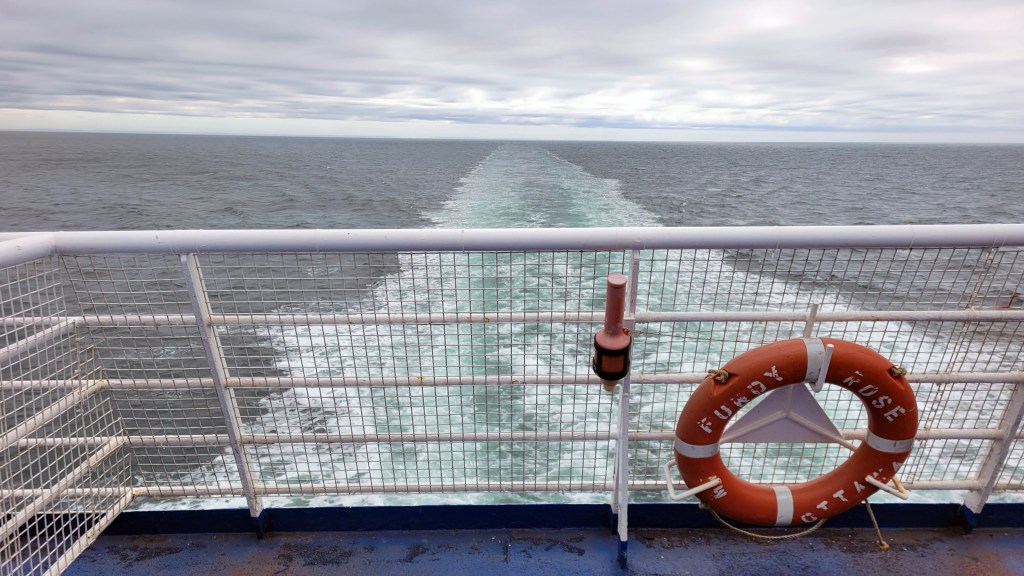
I’d never made it out to the furthest island before, and doing so this time felt like the end of the road for this tour. The next day I caught the ferry across The Bay of Fundy and started heading home, stopping at my buddy Mark’s place again in Rivière du Loup for the night before pushing on to Montreal.
Reflecting on the tour now, midwinter, I have to admit that the planned tour changed pretty dramatically, from an ambitious solo off-road ride across two major provinces, to three weeks on the TQT, to one week on the TQT and one in rural Nova Scotia. Some of that downgrading was from a lack of confidence in my bike, some from a lack of confidence in myself. When I had a stupid tip-over turning around on Mark’s driveway, I discovered that I could barely get the Tiger back up again on my own. My back is not what it used to be, and my confidence took a hit.
I’m working on getting my mojo back. I’ve been working really hard this winter on my strength and fitness to prepare my body for the kind of retirement I want to have, and moving to a bike 150 lb. lighter with Honda reliability will give me confidence again to explore on my own. That includes plans for some epic tours, but I’ll leave that for a future post. For now, I’m looking forward to buying the Honda 300 Rally in the spring and having some fun with the boys on the trails next summer.
It wasn’t the tour I had planned, but the best adventures rarely are.
The original plan was finally to ride The Blue Ridge Parkway down into West Virginia and then take the MABDR and NEBDR back to Canada. Followers of this blog will know I’ve been trying to do this bucket list ride for the past several years, but something always gets in the way. This past season it was the ridiculous rhetoric coming out of President Trump’s mouth about Canada being the 51st state. Statements like that are disrespectful toward all Canadians at best and mildly threatening at worst. Despite how much I was looking forward to that tour, I decided to exercise what little agency I have as a Canadian by participating in the boycott.
I got to thinking that, while we don’t have BDRs here in Canada (yet), we do have the TCAT (Trans Canada Adventure Trail), and it’s the same idea. I thought I might do the section named The Forest that goes from Baie Comeau, Quebec, west to Kenora, Ontario, so essentially across the two largest provinces in Canada, mostly off road. The TCAT takes you through some very remote regions and would have been quite a challenge, especially solo.
Why solo, you ask? Well, it wasn’t for lack of trying. I put the word out to my riding buddies, but there was none who could get away from work and family commitments for the length of time I was considering, and others who could but had other stuff get in the way. I’m used to touring solo, although this would be the first time solo off road, which is never advisable. It’s always better to ride with a buddy, but if I got into trouble, I had a Garmin inReach Mini to help get me out.
Then my riding buddy Riley reminded me of the TQT, the Trans Quebec Trail. Same idea but closer to home and, more importantly, with an accompanying app. The concern I had with the TCAT is whether the tracks would be up to date. I’d come across this liability before when doing a section of it south of Calabogie, Ontario. A bridge was out but not indicated in the tracks I purchased, and this led to being stranded on a hydro line overnight. However, the TQT has an app and users can report a problem easily in real time, so you know the route is kept current. The app also includes information on gas stations, restaurants, campgrounds, accommodations, hospitals, and more, taking a lot of the burden out of this aspect of touring and providing some support and peace of mind. That decided it: I’d ride as much of the TQT as I could.
On the shakedown ride, the Tiger started having intermittent starting issues—not the usual slow-crank kind but a new no-crank kind—nadda, nothing. After a few minutes, it would crank and fire fine so the problem was clearly heat-related. Given where I was going, I decided to rig up a jumper cable from the starter terminal to up under the seat by the battery. If the bike started acting up in the middle of nowhere, I could bypass the ignition system by touching it to the Pos terminal of the battery.
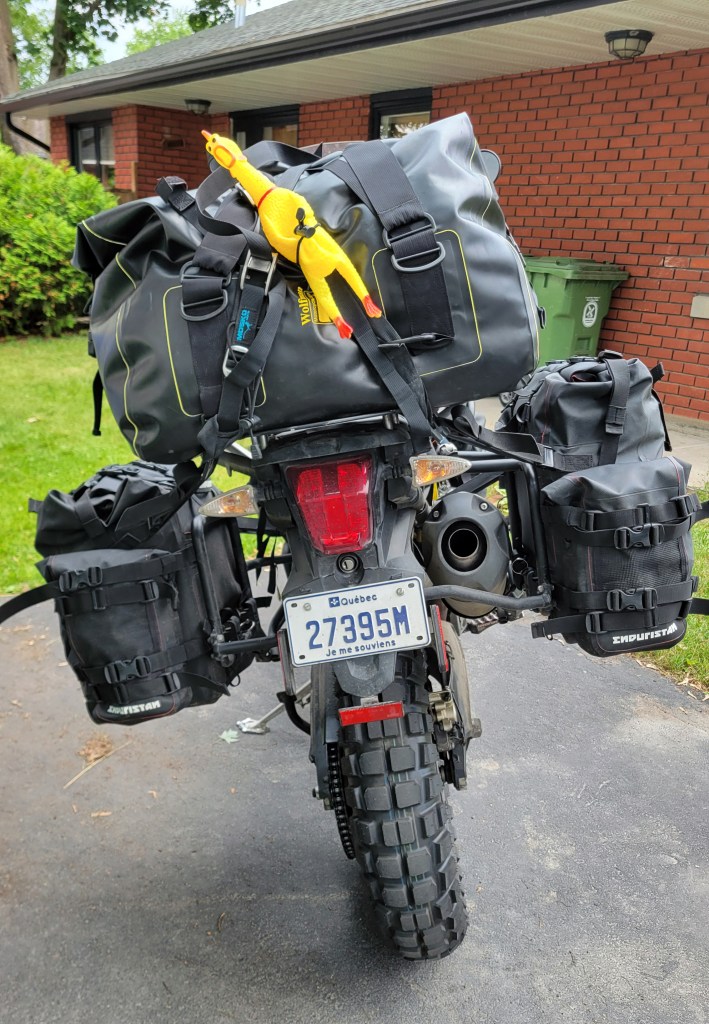
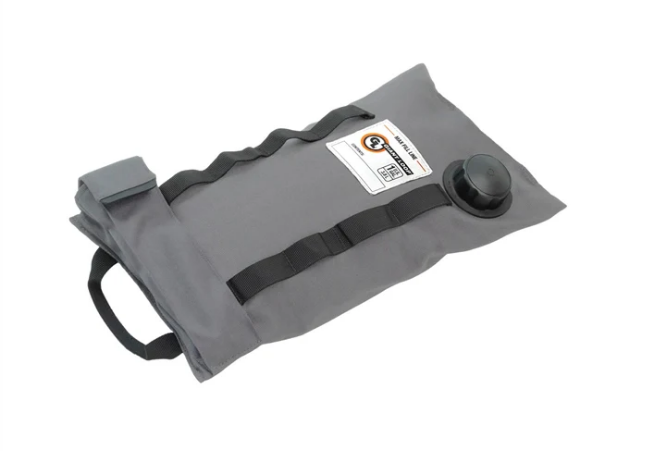
My departure date arrived and I was loaded up and ready to go. Unfortunately, despite my best efforts to avoid a duffle bag on the tail, in the end I needed it because I was trying hammock camping and needed the room for an insulation pad that goes under the hammock. The duffle, however, was very light, containing the pad, my sleeping bag, and a few other items. It looks worse than it was.
Safety chicken with his seatbelt on a little too tight.
I bombed down to Magog where I planned to pick up the TQT—2 hours of highway riding east of Montreal. It was hot, very hot, maybe not by Nevada standards but enough to make my phone battery overheat. When I reached the route, it took me some time to orient myself with the app. That involved some starting and stopping at the side of the road as I fiddled with my phone, and on one occasion, the bike wouldn’t restart, the same problem I was experiencing before. I figured it was because the lithium battery in the bike, like in my phone, was overheating, a problem I’d experienced before with another lithium battery. Using the jump wire, I found that the starter cranked just fine but the bike didn’t start. It was like it wasn’t getting any fuel. Not good. (At the time, I guessed that the ECU must need power to regulate the fueling, but I discovered much later that the issue was actually a loose wire into the fuel pump relay.) With the entire three weeks of remote riding ahead of me, I decided to err on the side of caution and return home.
The next day I started out again, this time with an old AGM battery in the bike. I rode again hard down to Magog, then stopped and started the bike several times, stressing the bike to test it as best I could before committing to the tour. It seemed to be starting fine now so on I went.
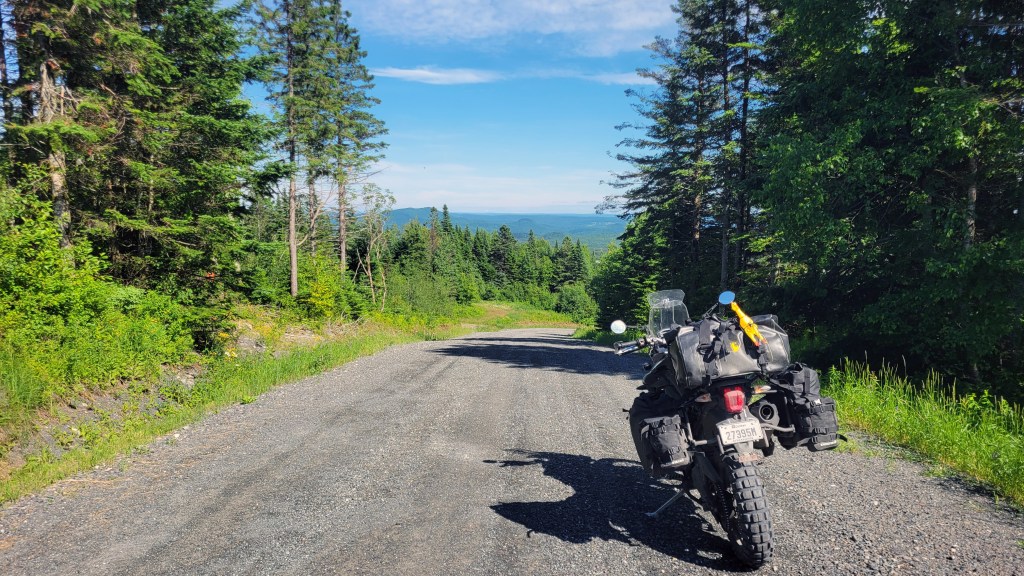
With these glitches behind me and the bike running great, I could finally enjoy the ride, and enjoy I did! I’ve never been east of the Townships up into the Mégantic Mountain Range but this region is beautiful. I passed through rolling hills and farmland in the valleys. The riding is not technical but mostly hard-packed dirt and gravel, which is good if you’re fully loaded.
Farmland near Dixville, Quebec.
The Tiger is perfect for this stuff, and since putting a Mitas Enduro XT+ on the front, the front end is planted, giving me a lot of confidence compared to when I had an Anakee Wild washing out on me.
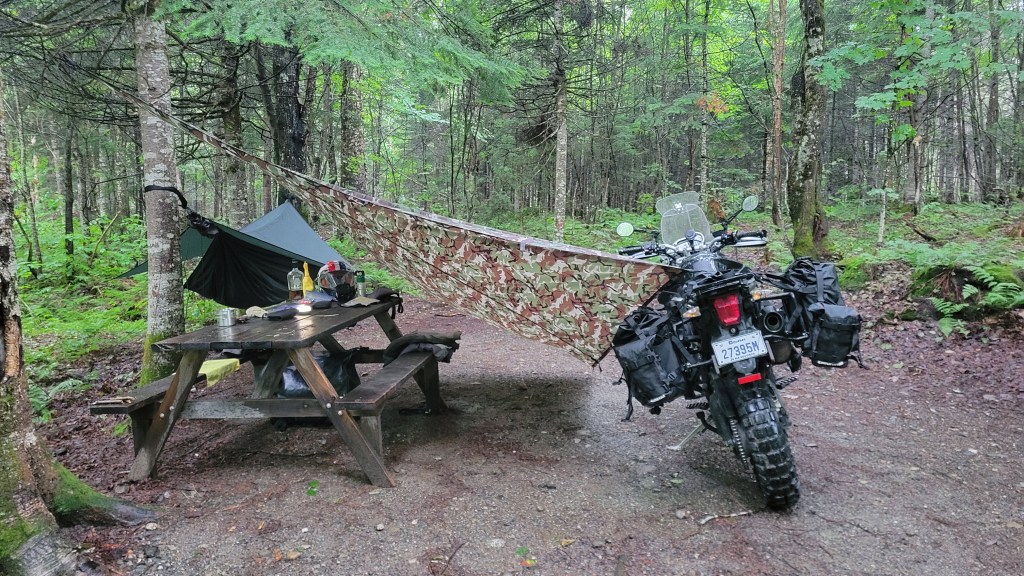
As you can see, I was climbing up into the mountains as I headed northeast. The time came to start looking for a camping spot for the night. This is where the app is really helpful. It automatically detects when you are on the route and brings up sidebar information like next gas station, nearby attractions, and other options. One option is Campgrounds, and pressing it brings up nearby campgrounds relevant to your geolocation. I saw there was one a few kilometres away and pressing on it gave me the option to navigate there in the app of my choice. Nice! I might be explaining this slightly wrong, but trust me, it’s easy, and the next thing I knew I was pulling in to Camping Mont-Mégantic.
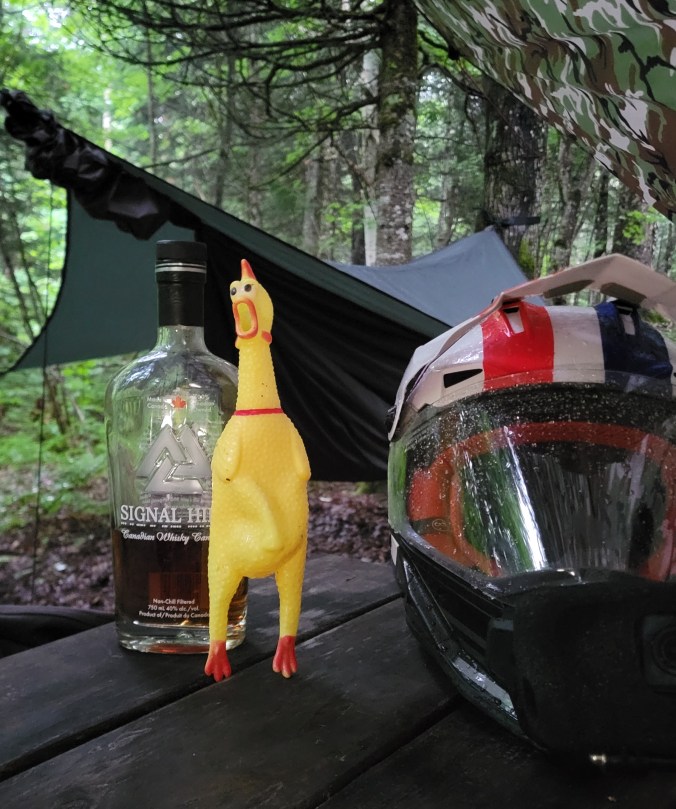
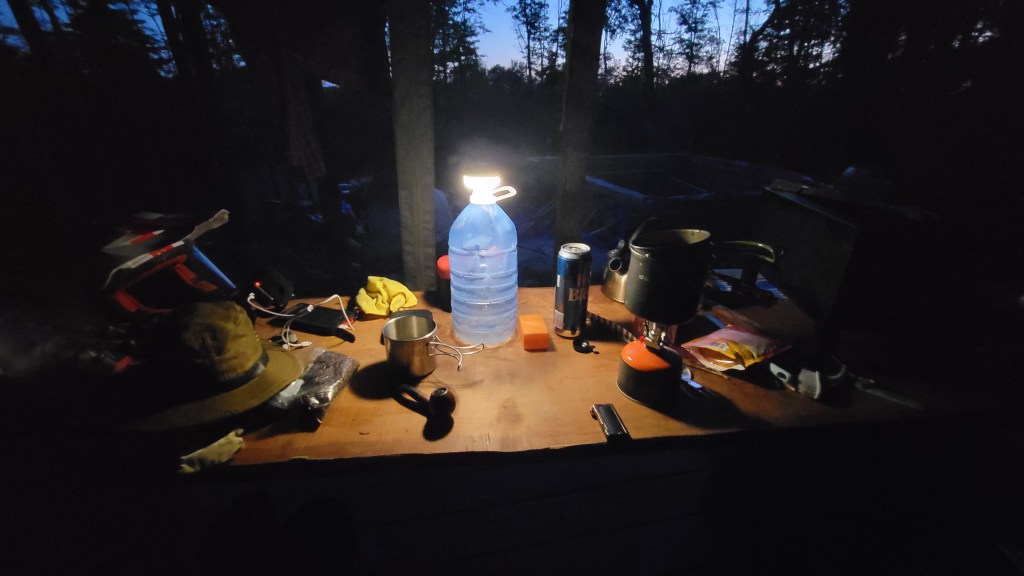
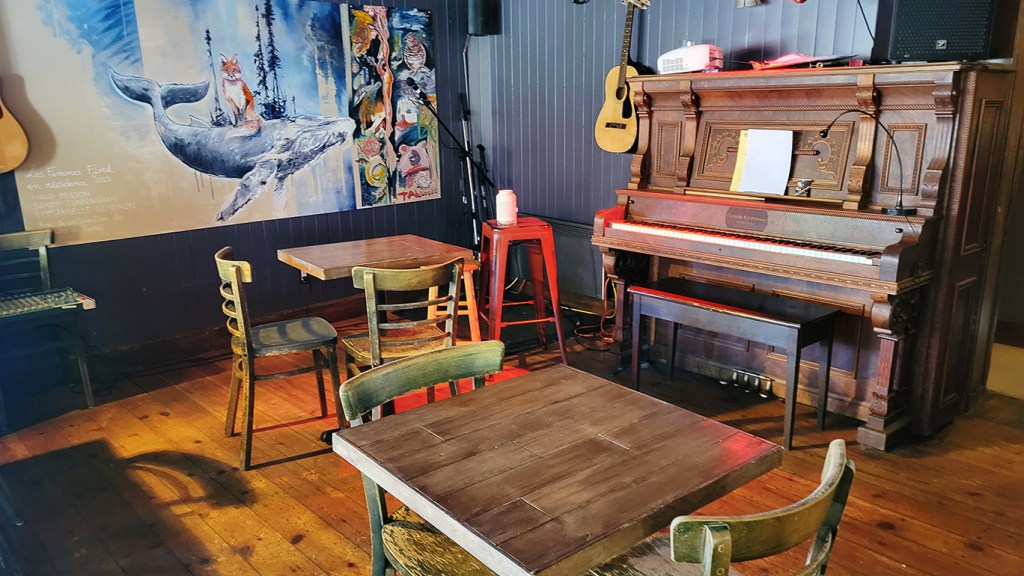
It was starting to rain so I quickly strung a tarp over the picnic table and made my dinner.My drinking buddy likes to sing but doesn’t have much of a voice.
When the sun went down, it wasn’t long before I was in my hammock, enjoying listening to the rain on the tarp.
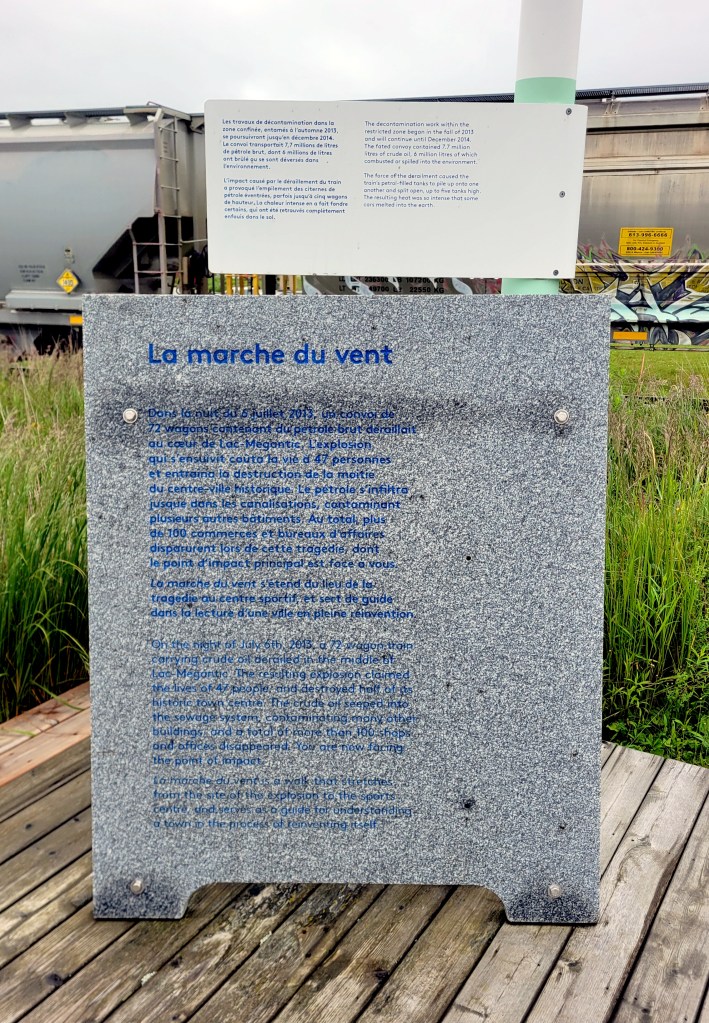
The next day started with a ride down into the lovely town of Lac-Mégantic. If that name sounds familiar, it’s because the town is the site of one of the worst industrial disasters in Canadian history. I soon found the memorial at the place where the accident occurred.
The inscription is a little difficult to read in the photo above so I’ve transcribed most of it below.
On the night of July 6th, 2013, a 72 wagon train carrying crude oil derailed in the middle of Lac Mégantic. The resulting explosion claimed the lives of 47 people and destroyed half of its historic town centre. The crude oil seeped into the sewage system, contaminating many other buildings and a total of more than 100 shops and offices disappeared. You are now facing the point of impact.
It was a moving and reflective moment, and I will admit, the feeling that came to me at the time in addition to sadness was anger, not at the oil industry or the railway workers. The accident was just that—an accident—and I’m not going to fault anyone for being human. No, my thought went to environmentalists who think they can solve our oil dependency by blocking pipelines. As I write this, about one third of global energy consumption is oil, and while it’s slowly dropping, we are still very much in need of moving oil across geography. Blocking a pipeline from being constructed, however well intentioned, does not erase the need. The oil is simply moved by freight instead, sometimes through populated areas like Lac Mégantic. Oil passes less than a few hundred meters from my house.
I don’t have the space here or the expertise to wade into the renewable versus fossil fuel debate. What I will say, however, is that blocking pipelines is short-sighted. A pipeline like the Trans Mountain Pipeline is an easy target, the proverbial line in the sand, but getting Alberta’s oil to global markets means Canada is less reliant on The United States as its sole buyer and can demand international market prices. More importantly, according to one study by the National Bank, getting China and India off of coal will reduce more CO2 emissions than what Canada produces as a whole. In fact, transitioning China alone off of coal will eliminate 8 times the amount of CO2 that Canada produces.
Of course, none of this was in my head as I stood at the site of the disaster and tried to imagine the devastation that the explosion caused, but I was thinking of the Quebec Government’s opposition to the Energy East pipeline proposal. Recently under increased demand for inter-provincial cooperation and trade, there has been a softening. The issues surrounding proposed pipelines are nuanced and complex, but my hope is that decisions are made based more on pragmatic calculations than political ideology or regional interests.
As I stood on the platform, a train carrying oil slowly passed through town, and it seemed to me that families came to witness it. The train was somehow central to this community, part of its collective memory and culture. The marche du vent is a walk that serves “as a guide for understanding a town in the process of reinventing itself,” and I was glad that a moment of reflection at this historic site was a part of my adventure.
I climbed back onto the bike and burnt some more fossil fuels. At times, the route narrowed to single-lane road so I had to keep my speed down and ride right.
I stopped in Saint George for lunch, then continued on northeast through the Beauce. This region is surprisingly still part of the Appalachian Mountains and the route seemed to zig zag back and forth across mountain ranges, providing a lot of fun riding and some spectacular views.
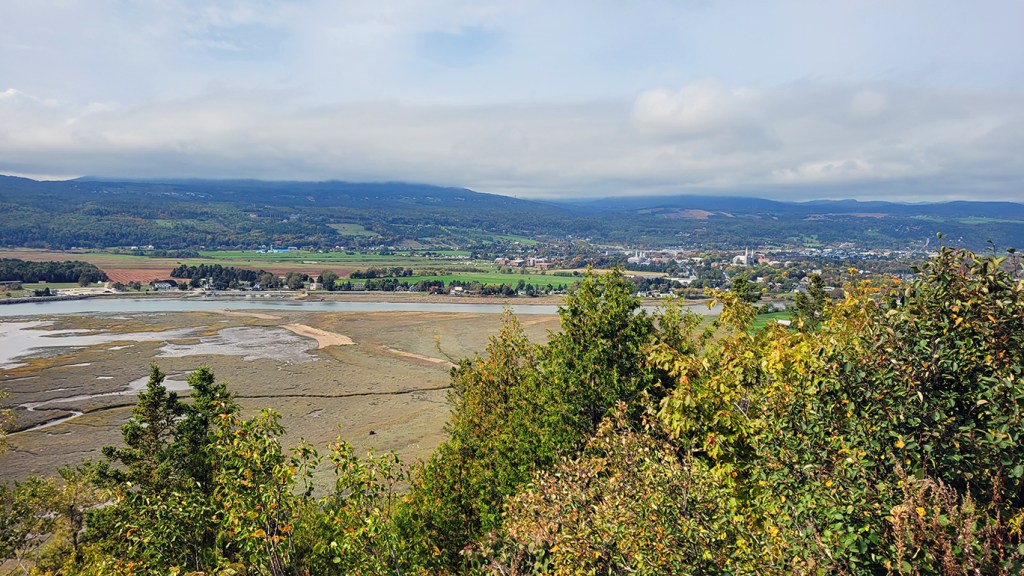
Somewhere around Frampton, QC, looking north toward Quebec City.
My planned destination for the day was just south of Rivière du Loup, where a friend has some property, but my progress was slow. You can’t really get out of 3rd gear on these roads, nor would you want to. In some sections, the route narrows further and becomes sandy, and there were other delays.
As the afternoon progressed, I had a decision to make: whether to start looking for a campsite or to bail on the TQT and get to my buddy’s property where he said I could pitch. I was curious to see his property and the log cabin he was building there, and I was ready to get out of the forest and nearer the coast, so I decided on the latter. 90 minutes of highway riding later, I was there just as the light was beginning to fade. Unfortunately, I happened to be there in one of the rare times that he was back in Montreal.
Bagged curry and beer dinner in the fading light.
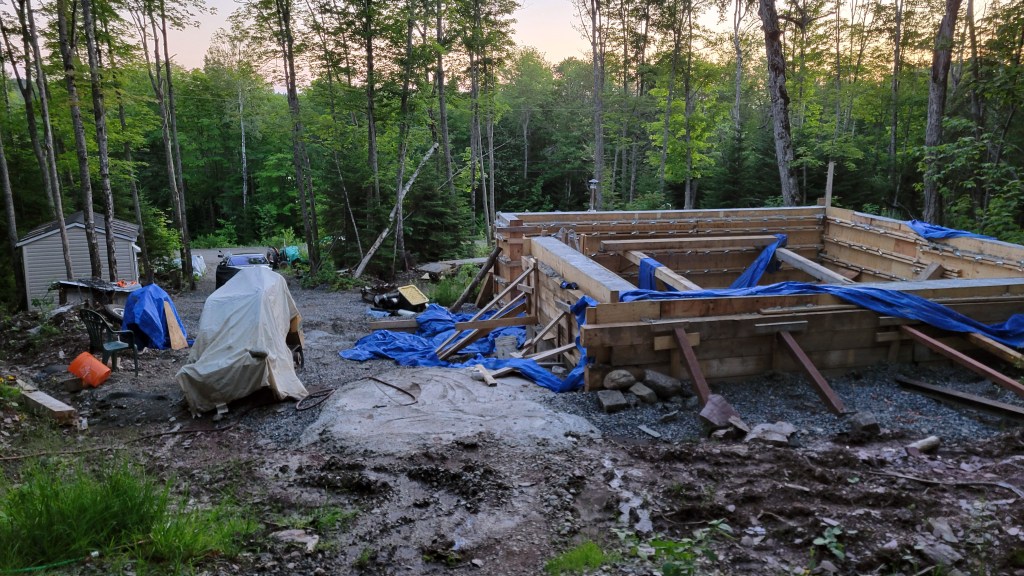
In the morning, I could see that Mark had the foundation poured. He now has the walls up and the roof on, hydro in, and windows and doors installed. That’s pretty impressive for one summer’s work, given that he’s virtually working alone with only his wife to help and provide food services. The only thing he didn’t get to was the chinking, so that will have to be done in the spring. (He has the cabin insulated though.) If you want to see how he’s done most of this construction and other work, check out his YouTube channel, Fierce Tartan. There you will see the nearly-finished project and how he managed to lift those huge beams into place on his own.
The workshite. As with most construction, it’s pretty messy and all comes together at the end.
I decided to stay a second night so I could rest a bit and enjoy the area. I went up to the local public beach for a swim, then rode into town to buy a cheap polar blanket because, even with the insulating pad, I wasn’t warm enough at night.
The camper’s bathtub.
I had mixed feelings about bailing the day before. I tend to get goal fixated and not riding all the TQT to RDL felt like a fail. Honestly, what concerned me was the ZEC section I was heading toward, just south of La Pocatière and Kamouraska. ZECs are nature reserves and there really isn’t anyone in them this time of year when it’s not hunting season. The route skirts the US-Canada border east to Pehénégamook before turning north toward Rivière du Loup. That section looks really interesting as it follows the Notre Dame Mountain Range but would have to wait until I could return with some riding buddies.
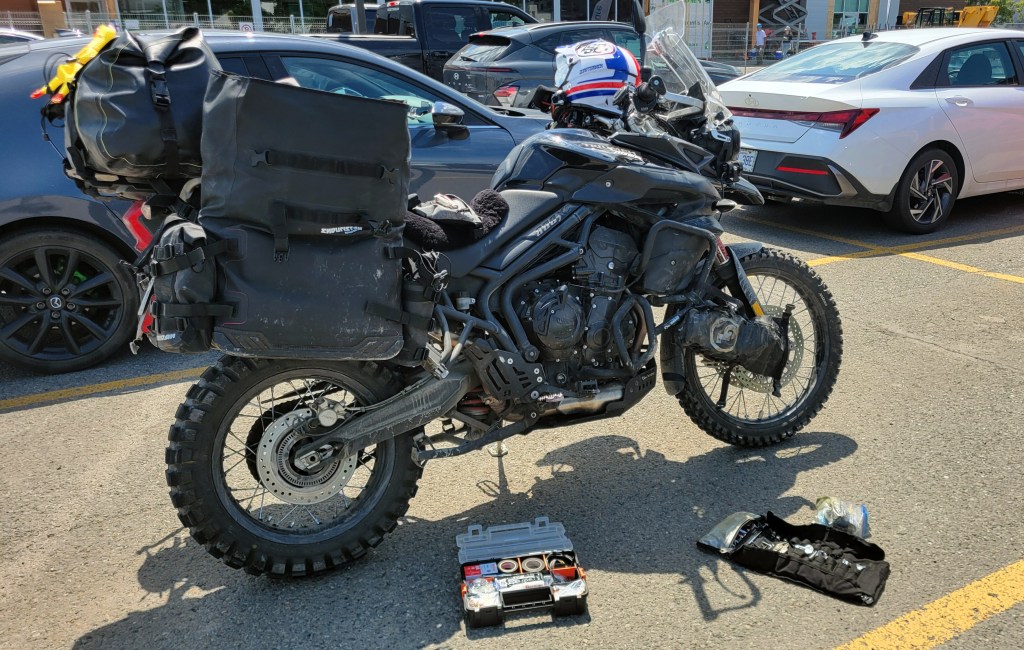
Atlas throttle lock needed adjustment. Every tour requires some parking lot maintenance.
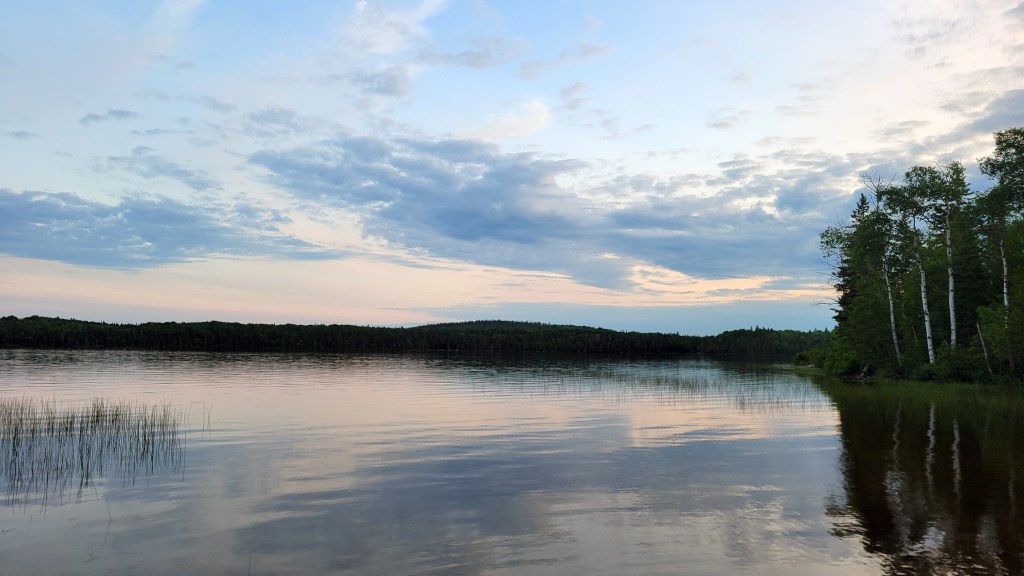
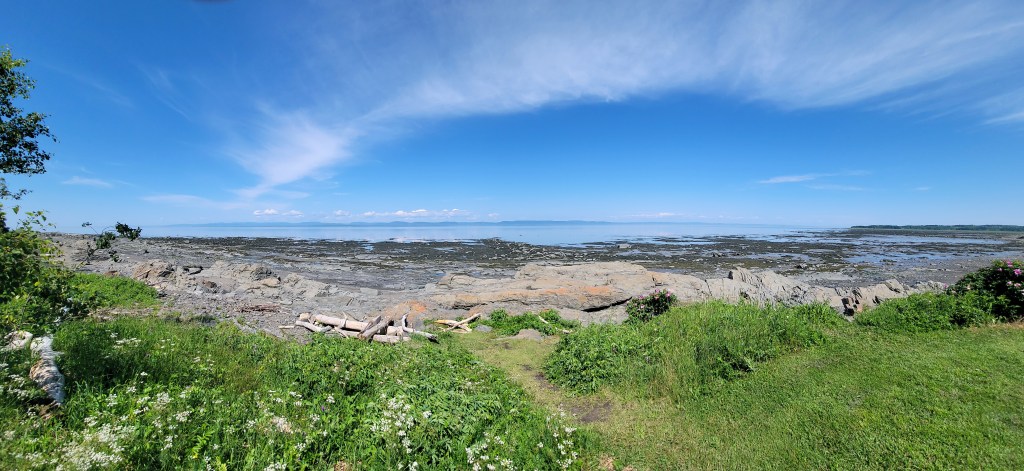
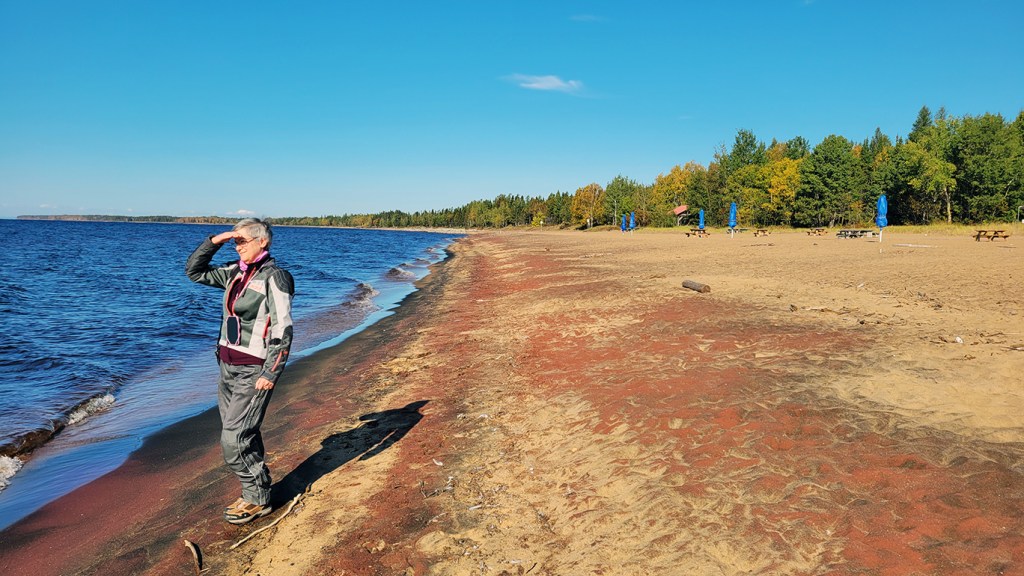
After a McD’s breakfast, I followed my nose and found what I was looking for—a sunny, grassy, spot on the shoreline where I could read and nap in the shade. This is technically still the St. Lawrence River but you can see there is a tide. The water begins to become brackish, and just east it widens into the gulf.
After two days of boreal forest, this is what I was craving and was happy that the route east follows the shoreline a short ways before turning inland again. The next day’s riding took me through more small towns, some with unusual attractions.
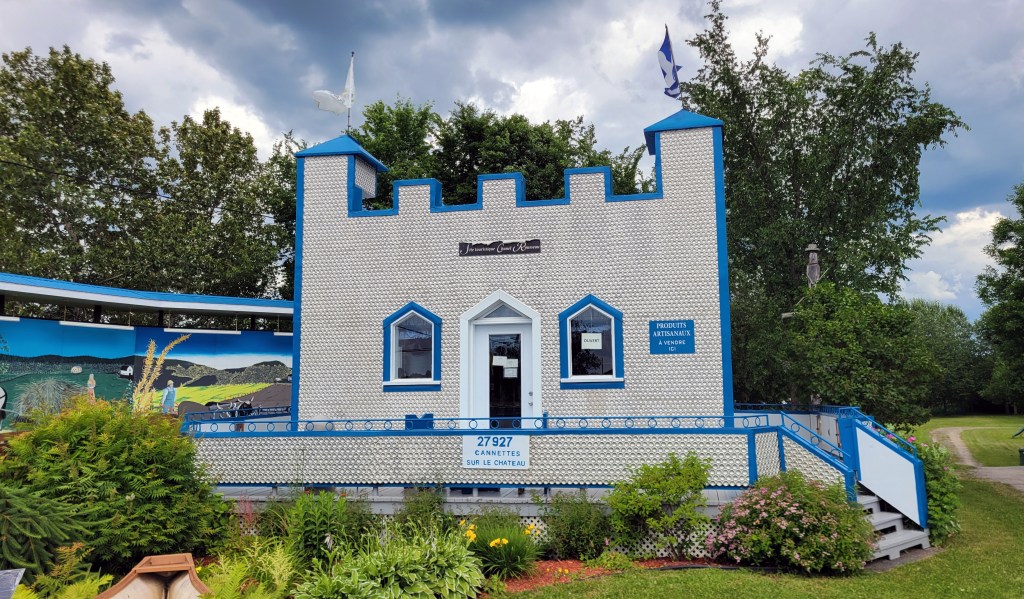
Can Castle in Saint-Jean-de-Dieu. 27,927 cans used to make this castle. Apparently somebody counted.
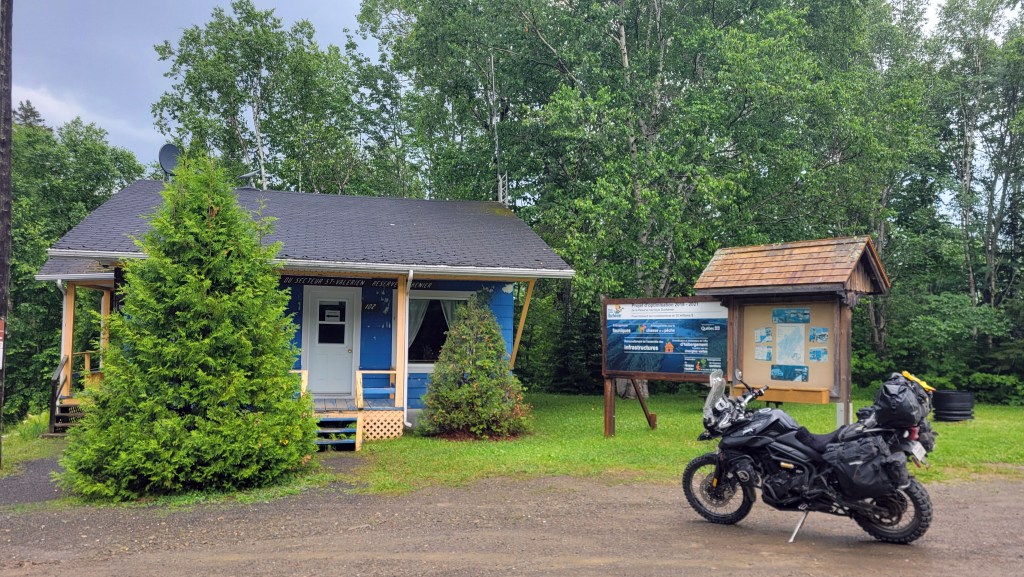
But mostly it was more and more forest on gravel roads, and some of it quite remote.
The northern gate of Reserve Duchenier.
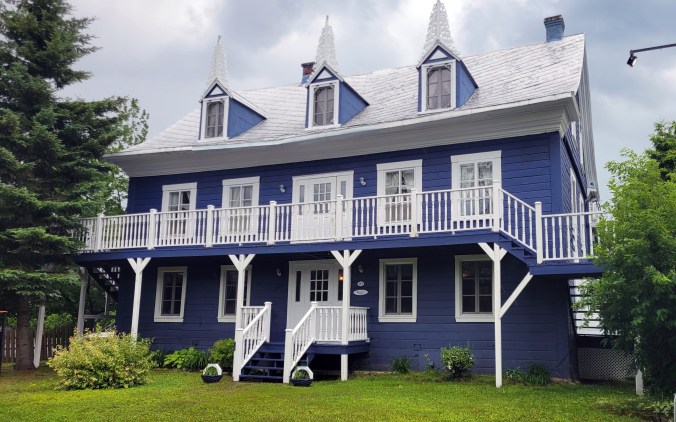
The route now was taking me deeper into the bush and at the same time it began to rain. I decided again to detour off and go back to the coast. By the time I reached Bic, just west of Rimouski, it was pouring so I decided to splurge on a room for the night. Okay, call me a wimp, but one of the gifts of ageing is good judgment.
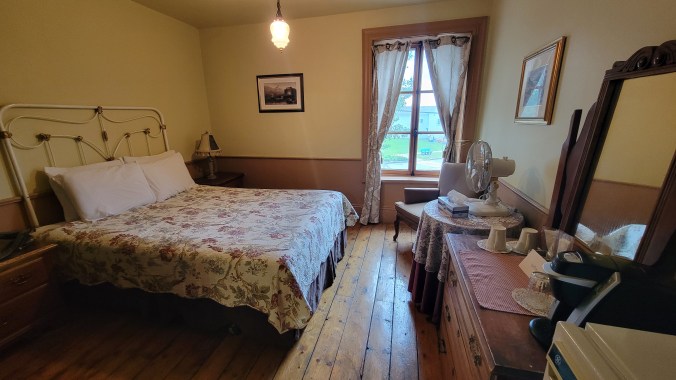
Auberge des Iles du Bic
My room
Lobby
The Auberge des Îles du Bic was constructed in 1840. Rates were very reasonable and came with breakfast. The owner let me borrow the outside tap to hose down my bags before bringing them into the room.
The next morning I went exploring. I’d heard about Parc national du Bic and I was hoping to get a campsite there. Unfortunately, the campground is popular and they had no open sites. A neighbouring private campsite wasn’t very nice, and I was having trouble finding trees near the shore to string a hammock. At the same time, I was coming to some conclusions about the tour thus far.
For one, I wasn’t enjoying the solo touring as much as I had in the past. The shakedown ride with the boys on The Timber Trail in Kawartha Lakes was really fun and I was missing that camaraderie. Or perhaps I was now used to having Marilyn riding pillion. When I’d toured solo before, it was on the street where you run into people and are approached in coffee shops and gas stations. At any rate, riding solo for hours during the day through remote forest was lonely.
I also found that, while the off-road route involved potentially more interesting riding, I had to ride conservatively because I was alone. I didn’t feel comfortable venturing hundreds of miles into a nature reserve alone, and I was having some difficulty finding wild camping or campgrounds where I could string my hammock. Aside from the last few hundred kilometres into Rivière du Loup, I’d accomplished my primary goal of riding the TQT from Magog to Rimouski.
It was sometime around then that I decided to change my plans for the remainder of the tour. I would visit a good friend in central Nova Scotia instead and spend the following week touring that province’s western coastline, a region I’d never fully explored before. It would mean more asphalt and more tourists, but also more cafes, bookshops, and microbreweries. I will definitely be back on the TQT next summer and hope to go further, into Gaspesie and over the Chic-Choc Mountains. Next time I will come with friends.
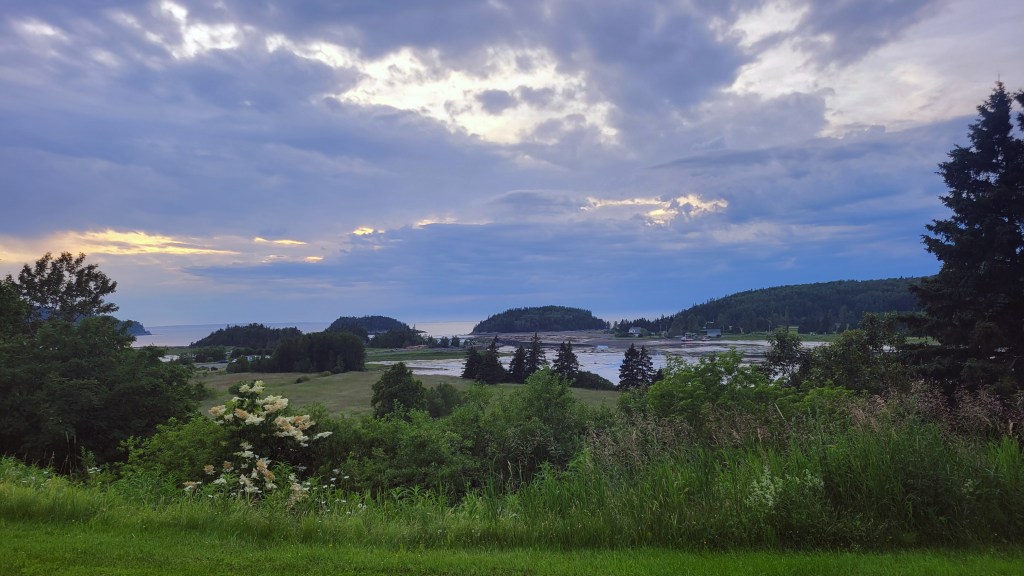
Foreboding skies over Parc national du Bic.
Do you have any thoughts about my decision? Itchy Boots and Lyndon Poskitt and many other ADV riders ride solo. Am I getting old and soft or old and wise? The solo versus group tour debate is an interesting one. What is your preference? Drop a comment below and click Follow if you want to hear how the rest of the tour through NS goes.
The term “adventure” is so over-used today that it’s lost almost all meaning, but this is how I define it.
In a recent episode of Adventure Rider Radio RAW, host Jim Martin and guests tried to define the word “adventure.” It was a rather abstract discussion that quickly deteriorated into subjectivity and personal perspective, yet the poet and wordsmith in me was piqued. Since I use the term in my blog’s byline and hold the expression “life is an adventure” as a personal motto, I thought I should take a crack at defining it. Yes, the term means different things to different people, but here are the elements of adventure riding as I see it.
Exploration and Discovery
photo credit://History Channel/Shutterstock
There has to be an element of exploration and discovery. Adventure riding is going where you’ve never gone before. I suppose in this sense, all travel has an element of adventure, as it gets us out of our milieus. One of my favourite things is seeing something for the first time, and like the proverbial first step into the stream, we can only see something the first time once; it’s never quite the same again.
I’m a curious person, whether in the realm of ideas or things. Adventure riding allows me to follow that curiosity, leading me into the unknown. There’s a mystery at every geolocation in the world and all we have to do to solve it is go there and look. That’s why it’s important to go slow and stop when something catches your eye, because there’s no point on going somewhere if you aren’t looking.
Sometimes what there is to see is geography, sometimes people, sometimes architecture, art, or any number of things, and sometimes it’s an unknown aspect of ourselves.
Challenge and Risk
photo credit://@LifeofSmokey
At one point in the podcast, Jim Martin tries defining the term by finding something that it is not. (This is called Definition by Exclusion, i.e. A is not B.) He uses as his example the quintessential insult of every adventure rider—a trip to the local Starbucks. Surely a ride to Starbucks and back is not an adventure, he posits. But one of the guests argues that for someone suffering from social anxiety, maybe a trip to Starbucks is an adventure.
What this line of thinking suggests is that personal challenge or risk, even perceived risk or fear, is one element of adventure. We are moving out of our comfort zones, however large or small, where personal growth occurs. We are moving, as Jordan Peterson would say, from order into chaos.
I’ve written before about the thrill-seeking aspect of adventure riding, those people who seek danger by riding extremely remote roads like the Trans-Taiga, or dangerous parts of Mexico and South America. On this topic, I like what guest Michelle Lamphere said: the experience has to be meaningful. Risk for risk’s sake is merely being foolhardy, but risk in order to have a transformative experience is another element of adventure as I define it. That’s why I’ll probably never do the Trans-Taiga but surely will go back up The Dempster and complete my ride to Tuktoyaktuk. (I was prevented entry to NWT because of Covid restrictions.) The former is a lot of mind-numbing forest leading to a dam, but the latter is some of the most astounding geography I have ever been privileged to witness.
Risk in itself is not an adventure, but risk is often part of adventure because we need to risk in order to discover.
Off Road, En Route
Odysseus consults the soul of the prophet Tiresias in Hades. Allessandro Allori, 1580
I don’t think you have to go off road to have an adventure but it sure helps. That’s because when we go off road, we get away from the conceptual order of civilization. Canadian nature poet Don McKay refers to this geographical and epistemological space as “home,” and “wilderness,” by contrast, as “not just a set of endangered spaces, but the capacity of all things to elude the mind’s appropriations” (Vis à Vis 21). When we ride off road, we move from the realm of human to other. As the road deteriorates from asphalt to gravel, then dirt, trail, and bush, we shed the trappings of our everyday lives, where deep discovery can happen.
In Classical Literature, this journey is called Katabasis, the motif in which the hero descends into the underworld in search of valuable, hidden knowledge. Aeneas in The Aeneid does it, as does Odysseus in The Odyssey and Dante in The Inferno; they each make the dark journey through Hades in the hope of finding enlightenment. For Swiss psychologist Carl Jung, the route to personal growth involved a similar descent into what he called The Shadow, the unconscious.
I don’t think it’s coincidental that the archetypal symbol of the unconscious in literature across cultures is wilderness—the forest, the jungle, the sea—untamed geography untouched by human power. When we ride off road, we are riding figuratively into the unconscious. Guided by our GPSs and with the support of our satellite trackers, we face adversity in its most primordial form, and what we hope to find, somewhere at the nadir of this adventure, is a mental and physical toughness we never knew we had.
Sibyl leads Aeneas to the Underworld in The Aeneid
Spontaneity and the Unplanned
Do you make reservations ahead of time when you’re touring, or do you wait until mid-afternoon, then start looking for accommodations? I generally like to wait so I’m not committed to being somewhere by a certain time. It allows me flexibility so I can follow my nose and explore where it leads. Similarly, I often don’t have a set route. I have a general destination, but how I get there is a matter of choice. See an interesting dirt road—why not check it out? Once while riding along the Sunrise Trail in Nova Scotia, I noticed some 2-track leading off from the road toward Northumberland Strait. My curiosity got the better of me and so I followed it to a picnic table on the edge of the cliffs looking out over the water—a perfect lunch spot.
The old Beamer near Arisaig, NS.
For this reason, I also often tour solo, although lately my feelings around that are changing. Riding solo of course provides you with complete autonomy to determine the route, the pace, the accommodations, even what attractions to see. The downside, however, is that you have to be more conservative in what risks you take. This past summer I had the opportunity to ride through a ZEC, which is a nature reserve here in Quebec. I was at the gate paying the entry fee when the staff person mumbled something about “trois cents.” What now?! Three hundred kilometres of off-roading solo with no one around? He actually advised against it. There are a lot of moose in there, he said. So I changed my planned route. As I age, I’m less inclined to take risks. The best of both worlds is to find a riding partner or partners who are compatible in riding skills, personality, and philosophy.
If your route, your accommodations, your attractions are all determined before leaving home, if your entire trip is scheduled, you aren’t really on an adventure; you’re touring. That’s fine, if that’s what you’re into, but allowing something unexpected or unplanned to happen, again, provides greater opportunity for discovery. Perhaps what is essential in this aspect of adventure is that we relinquish control and, instead of acting upon the world, we allow something to happen to us.
An ADV Bike
My 2013 Triumph Tiger 800XC
This one is probably going to be the most controversial. Do you need to have an ADV bike to have an adventure? No. Certainly not. There are people riding around the world on postie bikes, 50cc mopeds, and at the other end of the scale, Gold Wings and Harley cruisers. But I’m going to ask the question, why? My dad always said use the right tool for the job, and I question whether these machines are the best choice. While it’s not a requirement, having an ADV bike will allow you to have an adventure a lot easier than on another machine. Here are the key elements of an ADV bike, IMHO.
It has to be off-road capable. That means good ground clearance and knobby tires. Missing one or the other is seriously going to limit where you can go.
It has to be comfortable, with a large seat (not a dirt bike seat), a windscreen and faring, and good ergonomics. ADV riding is not about crunching the miles, but having a bike that can do it gives you the option if needed. You’re going to be spending the entire day on the bike, so it must be comfortable.
It has to be light enough to pick up on your own. It’s ironic that the big GS, at 600 lbs., has become the iconic ADV bike. Can you lift this bike and gear on your own should you drop it in the middle of nowhere? Okay, it carries its weight low and can be lifted with the right technique, but do you need all that power? I think the ideal ADV bike is a middle-weight at 650-900cc, maybe even smaller—big enough to crunch the miles comfortably, but small enough to lift on your own.
It has to be reliable or fixable. One of the reasons the Ténéré 700 is so popular is that it has minimal tech and one of the most reliable engines in the industry. You also have to be able to source parts from remote places when there is a problem.
It should be able to carry some luggage. The adventure rider is going into remote areas so has to be self-sufficient. That means carrying tools and tubes, some spare parts, clothing, maybe a tent and cooking equipment. Itchy Boots has travelled extensively without driving a single tent stake, but carrying camping and cooking gear frees you from the burden of having to find shelter when the sun goes down.
What’s in a word?
No doubt I’ve pissed off a lot of readers with this post, but I’m open to alternate viewpoints. Yes, words and the phenomena they refer to are somewhat subjective, but if we’re trying to define a term, we have to be somewhat exclusive or the word loses precise meaning. When words get over-used, they tend to lose that quality, so this is my attempt to rescue the term “adventure” from marketing and corporate interests.
What would you add or subtract from my definition? Leave a comment below. I’m not an ADV snob, but I am rather careful with words. I agree with Flaubert that one must strive to find le mot juste (the right word), but that begins with having the word right.
In the end, even this poet will acknowledge the limits to language. Words are crude signs we use to point to phenomena but never perfectly convey their meaning, and definitions of words are yet another semantic step away from the actual thing. However, if you get yourself an adventure bike and head out with no definite route but guided by curiosity, pushing through fear into the unknown, you will discover that the word “adventure” means much more than the sum of its parts. It’s the closest thing I’ve found to complete freedom, something even resembling joy, but then these too are only words.
Port Joli Beach at Thomas Raddall Provincial Park, Nova Scotia
The annual wistful synopsis of the summer.
Here we are, at the beginning of autumn. There’s still plenty of good riding left in the season, but the days of summer vacation and touring are already behind us. As usual, I haven’t posted much over the summer since I’ve been busy riding, reading, travelling, troubleshooting, and generally staying away from sitting at a computer, the occupational hazard of my job.
This summer I tried to balance travelling and resting, my two favourite activities. Okay, resting isn’t really an activity, but napping is. In the past, I did a little too much of the former and not enough of the latter and ended up going back to work in the fall not feeling rested. This year, I did a smattering of shorter trips, one longer trip, and a whole lot of resting. I’m a year away from retirement so consider this good practice for the future.
My eldest sister, Susan, and my dad, 96 years young!
The summer began, as it usually does, with La Classique Moto Fest, the big ADV rally here in Quebec held each year over the May long weekend. If you missed my write-up about that event, you can find it here. Then when I was free and clear of all work duties, I made a trip back to Ontario to visit family, and in particular my dad for his birthday. He’s now 96 years old, so I like to get back to see him at least a few times a year. That was followed by my annual literary pilgrimage with my writer friend, Harold. We usually visit the gravesite or home of a famous writer, and this year we planned to get to Orillia and Stephen Leacock’s house. We stopped in Kawartha Lakes, Ontario, in Lanark County at Silent Lake Provincial Park and never made it much further. The historic residence of the author of the enduring Canadian classic Sunshine Sketches of a Little Town will have to wait another year.
While I was there, I scouted the campground for a return trip with some riding buddies the following week. We stayed two nights and rode most of The Timber Trail. I did that Highlands loop solo last fall and, although a few of the boys were on street bikes this time, I knew most of the dirt and gravel roads would not pose them any problems. Yes, even an R1200RT and a Honda ST can do much of this loop, albeit slowly and when dry. It’s not only big bike but also street bike friendly.
That was the shakedown ride for my summer tour and a good time to find out that I had some intermittent starting issues. After stopping for a short break, my bike wouldn’t crank. At first I thought it was a switch (sidestand, clutch, starter?), then a relay. Once home, I changed the starter relay under the battery, then the battery. I ended up doing my tour without incident but had more starting issues once back home. After more troubleshooting, I think I’ve traced the problem to a loose wire into the fuel pump relay. Perhaps it was the relay itself, and I’m still not 100% sure I’ve solved it, but for now the bike is starting fine. You gotta love intermittent electrical issues.
Looking for a short in the wiring harness.
I’ll be writing about my tour over the winter months when I’m off the road, but suffice to say it was one week of the Trans Quebec Trail from Magog to Rimouski, and one week doing The Lighthouse Route that follows the southern and western shores of Nova Scotia. Watch for those posts soon and click Follow if you want notification when they’re posted.
Crossing the Laurentian Mountains on the TQT south of Quebec City.
The summer was capped by another short trip with the boys to the Calabogie, Ontario, area to ride The Pickaxe Loop. I don’t take many photos on these group trips because who wants to ask four guys to stop while you snap a few photos, but here’s one from our final night at Black Donald Tent and Trailer Park, cooking under a tarp in the rain.
L to R: Danny (Triumph Scrambler 1200XE), Steve (Honda ST), Mike (BMW 1250GS), and Riley (Norden 901).
Amid it all, I’ve been dealing with an oil consumption issue with the Tiger. If you read my post on the piston soak, you will know that I had a lot of carbon in the cylinders and I think the oil retention ring was stuck. I used Seafoam and a water treatment to clear a lot of it out in June and the bike seemed fixed. But as the summer progressed, it started to burn oil again—not as much as before, but still about 400 mL over 1,200K (745 miles) on the Pickaxe trip.
The moral of the story is don’t mess with OEM set-up on the engine!
Just the other day I was doing some research on what causes carbon build-up and something caught my attention: “When it comes to the mechanical operation of the engine, air to fuel ratio inconsistencies also plays [sic] a key part in the development of carbon buildup.” Just the mention of air to fuel ratios got me thinking about my Unifilter prefilter that was an early mod I did on the bike. The OEM air filter is under the fuel tank and so kind of a PITA to access. The prefilter replaces the snorkel under the seat and not only reportedly catches 95% of the dirt but is easy to remove and service.
I remember having a nagging concern when I installed this. Don’t I now have two air filters, and what might that do to the air-fuel ratio? But it’s a popular mod and so I dismissed the concern, reassuring myself that the ECU would adjust, as it does for temperature and altitude. Now I was returning to that mod and suspicious it was the cause of my carbon build-up. Isn’t running the prefilter essentially like running a dirty main filter? A quick Google search indicated that, indeed, running a dirty air filter can lead to carbon build-up!
So last weekend I removed the prefilter and reinstalled the original snorkel. The bike seems to start faster, idle smoother, run better, and have more power. I now think the bike was choked all this time! The moral of the story is don’t mess with OEM set-up on the engine! I’m now completely stock with a Triumph air filter and a Triumph oil filter. I’ll be doing another piston soak and engine clean toward the end of the season, and in the meantime I’m adding Seafoam as a fuel additive to start the cleansing. I want to start next season with a clean engine in the hope that it will stay clean.
With the bike running great, I’m looking forward all the more to the fall riding. If there’s a silver lining to the end of summer, it’s the cool, beautiful riding of the autumn, especially here in Canada when the leaves begin to turn colour. I’ll be leading a club ride down through the Eastern Townships at the end of September during the height of the fall colours, and the following week I’ll be participating in the appropriately-named Fall Colours Ride in Barry’s Bay, hosted by Rally Connex. 10 guys in the same cabin is surely going to be an adventure in itself.
How did you spend your summer? Drop a comment below, or at least tell us your favourite destination. What was your best moto moment? Unfortunately, I don’t think WordPress permits photos, but you can always try, or post a link to your own online photo host.
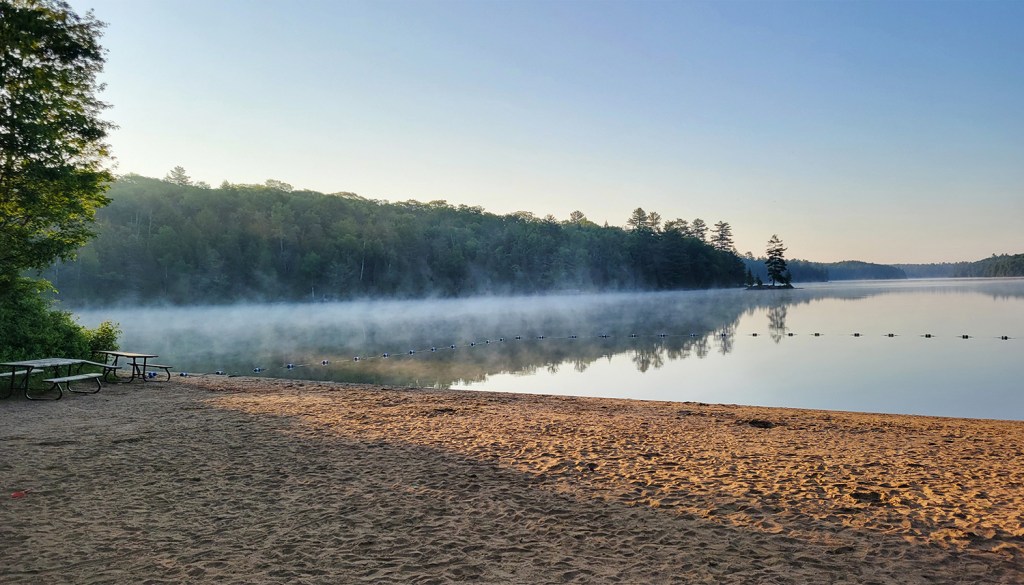
Silent Lake at dawn
Lots more to come in the months ahead, but for now, let’s get out there and enjoy the autumn riding while we still can.
The biggest drawback of hammock camping has nothing to do with the hammock
The first time I tried hammock camping it was with a little recreational hammock, the kind that pack up to the size of a mini-football. I’d bought it with the idea of using it around camp on off days to lounge and read and nap, but not necessarily to sleep in. When I decided to see if I could use it to replace my tent while mototouring, I bought an Aquaquest 10×10 tarp to go over it and a cheap ($17.99) zippered bug net off Amazon. I figured I’d dual purpose the ratcheting straps I now carry when I tour; they are good for bike recovery but I’d also use them to string the hammock.
It took me 1.5 hours to string that hammock first time. My camping friend made a point of noting it, thank you. Okay, the ratcheting straps didn’t work, and I never did figure out how the little bug net was supposed to work with the hammock. I got eaten that night but recognized the potential of hammock camping, so when I got home I bought a Hennessy Jungle Expedition hammock.
The nice thing about the Hennessy is that the fly, ridgeline, bug net, tree straps, and hammock are all included and integrated in a system that is easy to set up and works very well together. There’s even an optional insulated pad for cooler temperatures. I camped exclusively with the Hennessay over a tour of two weeks in July through Quebec and Nova Scotia and found it comfortable but with a few drawbacks.
Hennessy Hammocks
Tom Hennessy began sleeping in a hammock while camping with his family in the 1950s and has been making them for over 60 years. His first was bought at an army surplus store for $3 and he loved it but decided he could improve on it. He began a series of over 50 prototypes that eventually led to the patented hammock that went on the market in 1999. Since then, he’s continually tweaked the design and added some extras. I get the impression Mr. Hennessy sometimes lies awake in his hammock at night trying to figure out how to make it even better.
Features
Hennessy hammocks are asymmetrical. The hammock and tarp are not diamond shaped but are more like a parallelogram.
This allows you to sleep diagonally in the hammock. The problem with conventional hammocks is that you end up like a banana squeezed in the shoulders and hips and with no room to move. The Hennessy strings from opposite corners like a conventional hammock but has tie-outs at the other two corners that you stake to the ground (or can tie to neighbouring trees). The result is more like a floating 1-person tent than a backyard hammock.
The fly is also asymmetrical so matches the shape of the hammock and attaches to two hooks on the ridgeline. At first I removed it each time I broke camp, but eventually I decided to keep it on. That’s a personal preference. Maybe if it were wet I might remove it and store separately.
Hennessy hammocks also have a unique entrance system. Instead of entering from the side, you enter through a slit in the bottom and the hammock snaps closed beneath you under your weight. Apparently this system is better for avoiding mosquitoes. It seemed a bit too vaginal for my liking so I decided on the side zip entrance which was introduced by popular demand. It’s easier to set up your bedding and I imagine to exit for nighttime “excursions.” This is a matter of personal preference and I wasn’t able to try the classic model but was happy with the side zip.
The integrated ridgeline is made of high tension cable with a plastic coating. This ensures a consistently straight and strong ridgeline across the top of the hammock regardless of how you’ve strung it. On the ridgeline inside the tent is a sliding net bag for personal items like glasses, wallet, phone, etc. and the ridgeline can also be used to hang a lantern or water bottle.
Finally, all Hennessy hammocks have very strong mesh that is impermeable to mosquitos, black-flies, and even tiny no-see-ums. There were a few times when it accidentally got caught in the zipper and I feared it would be torn, but when I forced the zipper open again the mesh was unfazed. It’s strong!
Stringing the hammock
The cordage is permanently attached to the hammock and Hennessy provide plenty of it, but you want to find trees that are fairly close to the length of the hammock because, unlike the ridgeline, the cordage stretches. I once had to string the hammock using most of the extra cordage and found myself almost touching the ground no matter how tight I strung it.
Hennessy have a recommended lashing for stringing the hammock. You can use a knot like the Siberian Hitch but you run the risk of it getting hard to undo, especially under weight if it gets wet. The lashing is easy to do and is plenty strong enough. Apparently it will also preserve your cord better than knotting.
Instead of ratcheting straps, the Hennessy comes with tree straps, which are a similar type of wide (1″?) nylon webbing. Using them protects the trees; paracord digs into the bark and can damage a tree. Depending on how thick the trunk is, you might have to wrap the strap around twice.
You want the tree straps about eye-level and the same height so the hammock is level and your feet are slightly off the ground when you are seated upon entering. Instead of bringing gear into a tent, I stored it under the hammock and it never got wet. If you are dry, your gear underneath you is dry. This is a change from tent camping and took some getting used to but the same precautions apply: nothing smelly near the sleeping space except your boots which, if they’e anything like mine, after a week of touring act as a deterrent to any sentient being rather than an attractant.
My hammock came with free Snakeskins, an optional extra that slides over the hammock when packing up to protect the hammock in your pannier and to keep it dry. (I got them free for signing up for Hennessy’s newsletter.) They stay on the ridgeline and slide up to the ends when the hammock is in use and slide down (like a long nylon sock) for packing. At first I thought they were a bit gimmicky but ended up finding them helpful in facilitating set up and take down. I had it so I only had to pull up the stakes on the tie-downs of the hammock, pull down the snakeskins, and unlash everything from the trees. It took maybe 2 minutes. Alternatively, you can leave your sleeping bag in the hammock and stuff everything in a bag when breaking camp and use the snakeskins on the tarp to protect your gear if the tarp is wet.
You can see the snakeskins in use at the very end of this video of Tom demonstrating the classic model.
The Jungle Expedition model
I got the Jungle Expedition Model because it has the double bottom where you can slide a blanket or the optional Radiant Double Bubble Pad. I knew enough about hammocks to know that you don’t get the insulating properties of a mattress as you do in a tent and that the down of your sleeping bag compresses underneath you and loses its R-value, so there is a tendency to be cold. The Double Bubble is like those fold-out reflective screens you put in your car windshield to protect your upholstery from the effects of the sun. In fact, Tom suggests this for those who don’t want to buy their custom one. You just have to cut it to fit.
I decided to get the Hennessy Double Bubble pad even though it would mean I’d have to take a tail duffle. The Hennessy ones have clips sewn into them that attach to hooks in the compartment underneath and keep it from moving out of position. If the Double Bubble pad is not enough, the SuperShelter 4-Season Insulation System has been tested in the Arctic and, as the name suggests, can turn your hammock into a 4-season hammock.
I was trying to pack small and light and so did not buy the SuperShelter. In the end, the Double Bubble was not quite enough for some of the 12C (54F) nights and I had to pick up a cheap synthetic blanket and slide that in too, plus wear merino wool and a wool sweater to bed. Maybe I wasn’t stringing the hammock correctly because I found it did not retain body heat as well as a tent.
Pros and Cons of hammock camping
Aside from the cold, the biggest challenge of hammock camping was finding the right trees. Many campgrounds clear cut their sites or leave only some coniferous trees on the perimeter. Where this was most apparent was near the water, when I was up along the coast of the Gulf of St. Lawrence. I never had to sleep on the ground with the tarp strung off my bike but I came close a few times. Overall, I think the hammock is not practical for motorcycle touring. For that, where the geography is so varied, a self-supporting tent is still the way to go.
The other disadvantage I found with a hammock is that it is more difficult to get undressed (or dressed, as needed) in it. You need to be a contortionist at Cirque du Soleil to get out of your pants or put on a sweater. I guess you have to do all this outside the hammock, but then there’s less privacy. Similarly, getting in and out of a sleeping bag is more arduous, and if you are using a bag liner, that’s even more complicated. In the end, except for the really cold nights, I opened up the bag and used it more as a blanket over me. For the same reason, a mummy bag doesn’t work very well in a hammock and negates the ability to stretch out or be active in sleep. There’s also less room in a hammock to put anything like a book, and what you do bring into the hammock and cannot be hung on the ridgeline ends up underneath you (including said book).
On the plus side, my back was happy throughout the tour and it’s getting fussier in my older age. I also didn’t have the annoyance of a loud inflatable mattress or the sliding around (and off it) that happens with my particular one. When I got home, I bought a self-inflating mattress that is quieter for tent camping and can slide into the bottom of the hammock for cold nights. I’m curious to try this combination when the conditions are right.
I never once got wet, and I had some stormy weather through a couple of nights. Most people are nervous about this, but rest assured, the tarp is impermeable and covers you and your gear sufficiently. In fact, a hammock is arguably less susceptible to wet because it’s off the ground.
The Hennessy Jungle Expedition is a good choice for motocamping when you can be sure to find appropriate trees and when it’s not going to be colder than, say, 15C (60F) at night. I imagine it would be great for travelling through the more temperate United States, but here in Canada, where even midsummer the temperatures drop at night, you aren’t saving any space because you’ll have to bring extra insulation.
But get everything right and the Hennessy will produce a very good sleep, better than sleeping on the ground, regardless of how good your mattress is. It definitely has its place amongst my camping gear and will be my preferred choice for car or canoe camping and some motocamping if it’s not going to be cold.
Before there was such a thing as an adventure bike, or the ADV industry, or a satellite tracker, or a cell phone, GPS, Google Maps, or even the internet, Ted Simon rode around the world. That was in 1973. At the time, he worked for The Sunday Times in England. They sponsored him and he wrote articles for them along the way, sending them back presumably by snail mail, before we called it snail mail. I would have been 10 years old at the time—a mere 50-odd years ago—and yet that world seems very distant now. The first thing I like about Simon’s book is that, like all classic literature, reading it takes you to another place and another time.
There are riders who can write, and there are writers who can ride. Simon is clearly of the latter. From the opening lines, he has us hooked, employing in medias res, a classical technique that dates back to Horace’s Ars Poetica (c. 13 BC) and means “into the middle of things.” We find Simon roadside and out of gas about fifteen miles outside Gaya, India, but by this point in his journey he’s discovered that he needn’t worry; things always find a way of working out. He’s already been on the road several years so has by this time learned what every experienced adventure rider knows: 1) to embrace the unexpected, and 2) to trust the goodwill of strangers. And so he waits . . . and in his waiting reflects on the years and miles behind him, and establishes for us the context. This writing may have started as an article for a newspaper, but Jupiter’s Travels is not a collection of articles. Simon knows how to structure a longer narrative.
He is rescued, of course, by two good samaritans on a Royal Enfield who accept nothing but a handshake and promptly take him to a Rajput wedding complete with dancing girls. If we weren’t already hooked, we are now. Simon’s description of one of them is so detailed, so lyrical, we know this is not going to be just about the ride.
The principal dancing girl held the floor most of the time. She was my favourite too, although her shape was far from my ideal. Her arms and shoulders were impeccable and moved with sinuous grace, and her face was full and pretty. The rest of her was wrapped tight in bodice and sari, but she proudly maintained an enormous and agile paunch, which seemed somehow to be much older than she was. I found myself watching it a great deal, amazed at the liberties it took, but distracted as I was by her belly I could not ignore her face. With true artistry she had created an expression of such supreme contempt for men that if I had been alone in a room with her I would undoubtedly have withered beneath her scorn. And just as surely, if it had softened towards me at all, I would have fallen into a state of deepest bliss. . . .
The dance itself was a strange and fragmentary thing, and at first I thought it quite ineffectual and hardly worth the ten-rupee notes that she peeled off her audience and passed to the tabla player. She would stand, tapping one hennaed foot, shaking the ankle bells, swaying to the beat, and arrange her body into one of several positions, perhaps a hip and shoulder pushing forward, legs slightly bent, head tilted to one side. Then, catching a particular phrase from the musicians, she would shuffle forward across the cloth, moving whatever there was to be moved (the belly moving itself in perfect harmony) for just six steps, before straightening up, letting her arms fall to her sides and sweeping us with a stupendous pout that said quite plainly ‘There, you bastards.’
In those six steps she said everything there was to say about men and women. (11-12)
The writing is like this throughout the 450 pages—observational, insightful, and eloquent—what travelogue ought to be. Ironically, sometimes it takes an outsider’s objective perspective to see into the heart of the matter. For instance, in The Triumph of Narrative, Canadian writer Robert Fulford makes the point that he can clearly see why the marriages of half a dozen of his friends failed but not his own; he’s too much on the inside. Similarly, as an outsider, the travelogue writer is sometimes able to see what others native to a culture cannot. Simon has this power of perception and we are its beneficiaries.
Sometimes, no insight is necessary when observational detail is so well captured. Like a moving picture without narrative or voice-over, Simon brings to life a streetscape by simply listing what he sees:
I went back to the Normandie, dumped the cameras, changed my swank jacket for a disreputable sweater and went out again determined to see something of Alexandria. Not far away, I found the sort of area I had been looking for, a poor working neighbourhood crammed with tiny lockup shops, people caning chairs, plucking chickens, bundling firewood, counting empty bottles, scooping grain out of sacks into small cones of thick grey paper, beating donkeys, dragging trolleys, recuperating scraps of everything under the sun. A small boy in rags, no, in one rag, had his capital spread on the kerbstone in aluminum coins and was counting it solemnly as though about to make an important investment. A number of delicate gilt chairs stood tiptoe on the pavement, like refugees from a revolution, having their seats stuffed. (72)
The listing of items without commentary or predication is called the cataloguing technique and can be traced back through Allen Ginsberg’s “Howl” (1956) to Walt Whitman’s “Song of Myself” (1855). It’s a poetic technique that has an effect comparable to montage in film. Used selectively, as it is in Jupiter’s Travels, it can be incredibly effective in conveying realism since, come to think of it, what is our lived experience but a series of images, impressions, and snippets of dialogue which we render into a narrative in constructing meaning. Simon’s technique presents us with the raw material of life, place, and story.
Another aspect of the writing I admired was its daring honesty. For example, while riding through Sudan, he runs out of gas and, after being handed from one local to another throughout the afternoon and evening, finds himself late at night waiting with an Arab for a bus that would take them to Atbara, where he can purchase more gas. Neither speaks the other’s language so they wait mostly in silence, smoking cigarettes. The bus is due to arrive at midnight, and in the stillness and solitude of the desert at night, he is propositioned by the Arab in a way that is unmistakable despite the language barrier.
“Sudan signora queiss?”
I was still wondering about the question, when I felt a finger tap my thigh, and the voice repeated, with slight urgency:
“You Sudan Signora?”
. . . A little shudder of excitement ran through my body, because I knew, at that moment, that I could not be sure of my responses. The strange emptying effect of the desert seemed to have drained away all my conditioning. I did not know whether I was young or old, wise or foolish, strong or weak, and perhaps I did not even know whether I was male or female. But I did know that the tap on the thigh had released a current of sexual energy, and this invisible figure close to me had become mysteriously potent. . . .
This is a moment when you have absolute freedom of choice. Morality has blown away into the desert, you are not accountable to anyone. This is a privilege you have never allowed yourself before. So, do you want a sexual adventure with this man? (90-91)
Simon ends up declining, but the moment of reflection and self-awareness is revealing and could very easily have been edited from the manuscript once back in priggish England. Instead, Simon leaves it in as testament to the transformational power of travel. When exploring the world, we are not just discovering the world but previously unrevealed aspects of ourselves as well. Pushed out of our comfort zones and placed in unfamiliar and sometimes challenging situations, we broaden our inner as well as outer horizons.
Of course, his trip is not without drama. At one point, he loses his wallet containing his driving licences, vaccination certificates, credit cards, photographs, currency, and an all-important address book. In Brazil, he is arrested and incarcerated for weeks, convinced at times that he will be beaten or worse. He meets a woman named Carol at a commune in California and they live together for a blissful summer. They’re deeply in love and there’s a strong sense that Simon could have very easily abandoned the rest of his planned trip and spent the rest of his life with her. Perhaps it’s only his original commitment to the journey that pulls him away from her.
Simon’s tour is over 63,000 miles in 4 years and covers 54 countries on 5 continents. He begins in London, UK, and heads down through France, Italy, Sicily, and over to North Africa before heading east to Egypt. He then rides down the east coast of Africa to South Africa, crosses to Brazil, and rides up through South America to Los Angeles before crossing the Pacific Ocean to Australia. The final leg takes him through Thailand, Malaysia, then India, and across the Middle East back to England. Each section is headed by a simple black & white map showing his route, which seems appropriate for the book.
He rides a 1973 Triumph Tiger 100, which makes his accomplishment all the more admirable. To ride around the world on a motorbike is one thing, but to do it on a 1970’s era British motorbike is quite another; they were notorious for unreliability, and he has several breakdowns along the way. But in typical Pirsig fashion, he’s able to fix the bike and keep moving, although some parts are hard to come by and there are delays as he waits for parts to ship from England. In the end, we have to hand it to both Triumph and Simon: 60,000 miles of hard ADV riding on a bike of that era speaks for itself. The bike is now in The Coventry Transport Museum and appears in its original state as delivered by Simon upon his return to England in 1978.
The bulk of the book covers his travels in Africa and South America, with less detail in the rest of the trip. For this reason, my only criticism of the book is that it feels unbalanced and a bit truncated, as if the journey should have been covered in two books. Indeed, a sequel, titled Riding High, was published in 1998 and contains more stories that could not fit in Jupiter’s Travels. Perhaps it would have been better to plan the account over two books instead of rushing the ending of the first, but I understand the restrictions of book publishing and how the second probably grew organically out of the success of the first.
People often suggest to me that I should develop my YouTube channel and provide there full videos of my journeys, not just snippets to be embedded here in blog posts, and I’ve certainly considered it seriously. YouTube is where the money’s at these days, and I know from observing my students that reading is on the decline and video is ascending. Some of my more cynical colleagues say we are living in a post-literate society, and when I hear that youth today spend on average six hours a day on social media I can’t help thinking that there is some truth to that or there soon will be. But then I look at a book like Jupiter’s Travels and my confidence in the written word is reaffirmed. It’s the book that inspired Ewan and Charlie to do their Long Way Round tour in 2004, and the rest is history. It continues to inspire others to set out on their own adventures, whether big or small. According to Allied Market Research, the adventure motorcycle market was valued at $31.8B in 2022 and is projected to reach $64.5B by 2032.
But it’s not about the money. In Jupiter’s Travels, Ted Simon taps into something primal and lacking in our modern world, at least in western society. It would be too facile to say “freedom,” although that’s certainly part of it. He writes at one point that he would always rather be riding in heavy rain than sitting dry at home. Similarly, “risk” is attractive to those of us living rather staid, comfortable, cubicle lives, and there’s plenty of trials and tribulations for Simon during the four years. Some argue that risk is the essence of ADV riding (hence the jab about riding your BMW GS to Starbucks). But to understand the effect of a book like this we need to go deeper. What in it compelled Charlie and Ewan and countless others to break the pattern of their lives, sometimes at great personal and financial cost, and ride round the world (RTW), an act now so common it has its own acronym?
I think the answer to that question can be found in a word—adventure—the word that coined the industry. Stemming from the Middle English and Old French aventure, advent -ure, “adventure” has at its root “advent”—yes, that advent, the coming of Christ in the weeks leading up to his birth as Saviour of the World, but also ecclesiastically “his Second Coming as judge, and the Coming of the Holy Spirit” (Oxford English Dictionary). It’s the third of these that I think is the most relevant. What else would compel someone to endure the hardships and insecurity of long-distance travel on a motorcycle but to be in search of some sort of religious experience, to be fulfilled not by the creature comforts of consumerism but something else—a feeling, a spirit. I’m going to suggest that Jupiter’s Travels speaks to a hunger in the adventure rider, a desire to be connected to all things and everyone, even if we have to travel around the globe to find it. We may not be Sir Galahad in search of The Holy Grail, but our horses are made of metal and we are on a quest.
Jupiter loadedIn EgyptRoadside repairsTed and Jupiter today
Click on any image for full size. Photo credits// top: Secrettrips.com; bottom L to R: ADVPulse & Overland Magazine
“April is the cruelest month,” T. S. Eliot wrote as the opening line of his iconic poem “The Wasteland” (1922). Clearly, he had never experienced a Canadian March. As I write this on March 25th, we are 10 days into the new riding season, yet no one is riding. It’s 2C (36F) and the sky is a slab of grey slate pissing cold rain that turns to ice in patches on the treacherous sidewalks. Brown, dirty snow still sits at the sides of the roads and in patches on lawns, slowly melting over weeks to expose winter garbage and dog shit lying underneath, and the grass, when it finally pokes through, isn’t really grass but mud and last year’s soggy, decaying leaves. Eliot’s poem captures postwar disillusionment and his nervous disorder, but it might equally describe the mood of Canadian bikers in late March.
Nevertheless, we continue to plan and prepare for the season to come in a kind of blind faith. Yesterday I did a practice pack of my gear. I’m trying a new gear set-up and have the ambitious plan of eliminating my tank bag, tail duffle bag, and hydration knapsack. I want to ride this year without the extra weight either on the bike or my back. To do that, I had to be as ruthless as Ezra Pound was to Eliot’s manuscript.
Gear
I replaced my tent and mattress with a hammock and bug net. I’ll be touring midsummer so I’m going without a hammock underquilt. I also swapped my MSR Dragonfly stove and 2L Billy pot for an Odoland isobutane stove and pot, but I’ve added to my kit a Bushbox twig stove. I’m not sure which will become my primary stove, but the idea is to use the twig stove when dry wood is readily available and the isobutane when it’s not. And as a back-up to the back-up, just for its simplicity and ease, I’ve also picked up a Trangia alcohol burner. This fits nicely inside the Bushbox and can burn isopropyl alcohol, available at any pharmacy. Can you tell I’m nervous about giving up my Dragonfly?
My camping mates will be happy to know that I finally retired my toy hardware store hatchet and bought a Gränsfors Bruk Wildlife Hatchet. I don’t know why I suffered as long as I did. I’ll be using this around camp to prepare firewood and split firewood into twigs for the Bushbox. I’ll be travelling solo so edited out of my kit the second plate, cup, and cutlery, resulting in my cookware now being considerably smaller and lighter.
When I did The Timber Trail at the very end of last season, I found my Wolfman Expedition tank bag too big and heavy, making the Tiger more top-heavy at slow speed than it already is. It also worked better on the 650GS with the fuel cap on the side of the bike and not under the bag. It would have been possible to move the essentials to my hydration knapsack, but I want to eliminate it too. Water is heavy and the knapsack restricts airflow through a jacket. Mine also interferes with my neck brace. (If it goes under the brace, the brace sits too high; if it goes over the brace, the brace digs into my shoulders from the extra weight.) Instead, I’m going to try a fanny bag with only a few essentials from the tank bag: aux port to USB adapter, some electrical cords, a Leatherman Wave, tire pressure gauge, 8mm socket and micro-ratchet for my pre-load adjuster, and my monocular. I think fanny bags are nerdy, especially if worn in the front (i.e. the scrotum bag), and I wouldn’t be caught dead in one anywhere but on the trail, but one might be the answer to staying cool and unencumbered on the bike. If they find me dead somewhere on a trail this summer, at least my reasons for wearing one are now known.
As for water, since I won’t be needing to bring a fuel bottle for the Dragonfly stove, my bottle holster is free. I’ve moved it from the back of a pannier to the front left side and will try the Simple Modern Insulated Tumbler with Straw and Lid for sips when I can. It’s only 28 mL so I’ll also be carrying an MSR 4L Dromedary to refill it as needed. Marilyn and I took the latter through Newfoundland but never used it much, so I was ready to retire it from my kit, but I’ll be doing some pretty remote riding midsummer so will strap the Dromedary onto the bike along with a 1G Giant Loop Armdillo bag to extend my range to around 400 km (~250 miles).
Giant Loop Armadillo Bag
After the practice pack last night, I can confidently say that almost everything fits into my Enduristan Monsoon Evo bags. I’ve added two Enduristan Fender Bags onto my panniers, into each fits perfectly a 10×10 Aquafest Safari Tarp. (I’ll be taking two—one for over the hammock, one for shelter.) My tools and tubes, as always, will go in two Giant Loop Possible Pouches that I strap to the crash bars at the front of the bike. I say “almost” because I will still have to have a small Enduristan tail bag on the rack at the back for my rain jacket, windbreaker, and down vest—my layering system to deal with temperature changes. I can live with that.
Finally, I’ve added to my gear to prepare for the risks of off-roading. I have a Knox compression suit and recently purchased the chest protector upgrade that doesn’t come standard with the shirt.
Knox Venture ShirtChest protector upgrade
I swapped out Level 1 armour for Level 2. I also recently replaced my ageing Arai Signet-Q helmet with a Contour-X. I know, I know: why didn’t I get an XD-5 or similar adventure helmet? Well, I already have an adventure helmet, the LS2 Pioneer, and this will be my touring helmet. The peak causes wind noise and I was looking for the most comfortable, quietest, safest helmet on the market, and the Contour-X fits me like a glove.
Route
I’m sorry, my American friends, but I’ve decided that I can’t do this summer my planned ride of The Blue Ridge Parkway south and the BDR’s coming back. This will be the 3rd time I’ve postponed this ride, and I don’t do it lightly. I was looking forward to exploring the Appalachian Mountains and challenging myself on the MABDR and especially NEBDR, but after much deliberation, I’ve decided to join my fellow Canadians and stay north of the border this summer, that is, the “artificially drawn border.”
What makes this decision especially difficult is that I have always found Americans extremely friendly and helpful, and I recognize the difference between Americans and their government. But lately we Canadians have been hearing of visitors having their phones confiscated at the border and searched, and some Canadians detained, and even some anti-Canadian sentiment from certain states that shall remain unnamed, so I don’t feel entirely safe to visit while tensions are this high. I’ll be travelling solo in remote regions so am especially vulnerable. It’s really unfortunate that it’s come to this and I hope our good relationship can be restored quickly so I can complete that bucket list ride.
Instead, I’ve decided to do some of the Trans Quebec Trail. This is a system of trails throughout Quebec. Initially I was going to do a section of the TCAT (Trans Canada Adventure Trail) called The Forest that runs from Baie Comeau, Quebec, to Kenora, Ontario, but that gps track isn’t always kept up to date. My Calabogie Misadventure ride a few years ago was largely a result of the track not being kept current; my riding buddy and I didn’t know that a bridge was out and were forced back out onto a gnarly hydro line. The big benefit of the TQT is that there is an accompanying app that is user-submitted; if there’s a problem on the track, one can immediately report it with the press of a button. The app also shows campgrounds, gas, groceries, attractions and more, so I feel I can ride with a lot less stress and simply explore, as I like to do, finding the essentials when needed. Thanks to Marc Chartrand and his team for putting this route and app together.
I plan to pick up the track south of Montreal and follow it east to Rimouski and beyond, perhaps into the Gaspé interior. Then I’ll cross the St. Lawrence River (uh, by ferry) from Matane to Baie Comeau and come back by the north shore, up through northern Quebec with some of the most remote riding I’ve ever done. It loops over Lac Saint Jean, where Marilyn and I visited last fall, but on dirt roads this time. Apparently about 90% of the route is dirt and gravel. You can see the entire trail and photos at the STQT Facebook page. I don’t know how long this will take me and I don’t have a definite schedule, but that’s the kind of adventure riding I like. With the app and riding solo, I can play it by ear and simply explore at my own pace. Teachers’ benefits.
Training
To prepare for the off-road element of this tour, I’ve decided to do some more instruction this summer. When I got my licence in 2016, I did some classes to get a Level 1 foundation, but it’s been several years since and I’m ready to improve on those skills. I’m going to look into the Level 2 class with Académie Ridaventure. Their Level 2 class covers such things as water crossings, clearing obstacles (logs, large rocks), and brake slides. I think it’s always good to develop your skills, and I feel I’ve plateaued recently.
I hope to do a semi-private Level 2 class.
“Ah spring!”
There’s another poem I know about spring. Unlike Eliot’s 434-line masterpiece, this one contains two words: “Ah spring!” I know it by heart. It’s been a brutal winter with record snowfall in Montreal and frigid temperatures for months. No January thaw this year. But we’ve finally arrived at the cusp of spring and the riding season.
If there’s one positive of the off-season, it’s the opportunity to “reculer pour mieux sauter,” as D.H. Lawrence said, step back to jump forward. It’s a time to dream and plan for adventures to come. I’m ready; the bike is ready. It may not be the cross-country tour I did in 2021, but in many ways it feels like this tour will be my most ambitious and the one I’ve been working towards since I began riding in 2015. It’s the kind of ADV remote touring I wanted to do on the cross-Canada tour but didn’t have the time. I discovered then that this country is so large that you have to explore it one province at a time, and I guess I’ll start with the one I’ve called home now for 35 years.
What are your plans for the season? What changes have you made to your bike and kit to prepare? Drop a comment below. Whether you are an armchair adventurer or a seasoned traveller, despite what Nature presents us today, it really is a special time of year. Keep the faith, my motorcycle friends: we’re almost there.
Maybe second only to Gaspé, the Saguenay fjord is the ride to do in Quebec. It’s therefore surprising that I’d never gotten around to riding it until this past fall. From Montreal, you need about four days for this tour. Marilyn and I went over our anniversary weekend in late September when the leaves were beginning to turn colour and it was the best time to visit.
It was getting a bit cold for camping, so we decided to leave the tent at home and get rooms at B&B’s, which in these parts are called gites. This trip would take us not only up the Saguenay fjord but also across the top of Lac Saint-Jean and through the beautiful Charlevoix region, known for its popularity with Quebec’s most famous painters. What Algonquin Park is to The Group of Seven, Charlevoix is to Clarence Gagnon, René Richard, Jean-Paul Lemieux, Marc-Aurèle Fortin, Bruno Côté and Claude Le Sauteur, among others. In fact, Charlevoix is so beautiful it was also visited by A. Y. Jackson and Arthur Lismer of The Group of Seven. When Marilyn first visited Quebec from Alberta in 2007, I knew where to take her. (I’m still wondering if she fell in love with me or La Belle Province first.)
The only issue with Saguenay as a destination from Montreal is that you have about 3 1/2 hours of gross highway riding to do before it starts to get interesting around Beaupré, just east of Quebec City. And to make matters worse, within the first 10 minutes of hitting the highway, I knew I had the wrong windscreen on. I have a touring screen and a standard screen, and I’d been experimenting with different set-ups (they are both adjustable) prior to leaving, looking for a solution to the wind noise on the bike. I’ll be writing something about that elusive search for The Holy Grail in an upcoming post, but suffice to say here that the standard screen doesn’t work for touring. Marilyn and I couldn’t even hear each other in our comms because the wind noise at highway speed was so bad. Damn! I’d prepared the bike by changing the tires from a 50/50 (Anakee Wild) to a 70/30 (Shinko 705) but should have swapped the windscreen too.
There are several options for touring the Saguenay fjord. Many people head north on the 155 at Trois Rivière up through La Tuque all the way to Lac Saint-Jean and then down the Saguenay River on either the 170 (east side) or the 172 (west side). Others go all the way to Tadoussac, and either cross on the ferry and ride up the river on the 172 or don’t cross and ride up the 170. If you do that, you have a few options for how to come down: the 169 from Alma, the 175 from the town of Saguenay, or the 381 that cuts through the interior. Basically, all roads in this region lead to Lac Saint-Jean, and you have your option of no less than five to choose from on how to get there and back.
We had already driven up the 155 as far as La Tuque a few years ago when we camped at La Mauricie National Park so didn’t want to repeat that, even if it would be on the bike this time. We had a recommendation of an excellent B&B in L’Anse Saint-Jean on the 170 so decided to make that our destination for the first day. And I had a recommendation from someone at the Overland North gathering I attended in Calabogie to not miss the 381, which is smaller and twistier than the other roads. We also wanted to see Tadoussac, so connecting these dots meant riding part-way up the 170 on our first day, then doubling back the next morning to Tadoussac, riding the 172 up to Lac Saint-Jean, and taking the fun 381 back down. It wasn’t the most efficient route, but when does efficiency matter when you’re on a bike?
We blasted past Quebec City and didn’t stop until Sainte-Anne-de-Beaupré, where there is a famous cathedral. When the Pope recently visited Canada, he did a mass there, so if it’s suitable for the Pope, we figured it’s worthy of our presence as well. But we were on a tight schedule and it would have required a significant time commitment to go inside, so we opted instead just to make it a quick rest stop. (We’ve gone inside before and, trust me, it’s beautiful.) We still had a ways to go and had a dinner reservation at our inn in L’Anse Saint-Jean.
Our true sanctuary is nature and we were eager to get up into the hills of Charlevoix. Shortly after leaving Beaupré, Highway 138 begins to climb, and the geography suddenly takes on a completely different vibe. It’s hilly, pastoral, and there’s open road overlooking the St. Lawrence River with historic houses dotting the roadside.
The recommendation from our club captain was a good one! While I didn’t do those rides, my club has stayed a few times at La Fjordeliase and it’s become a favourite. After an exquisite dinner (the scallops are not to be missed), we went for a walk along the shoreline. L’Anse Saint-Jean is magical, and there was a full moon that night!
The next morning we hiked the trail behind our inn up to a lookout. It’s about a 2 km hike but all uphill with some steep sections. We were definitely feeling our age but happy we’re still able to do such a hike as the view at the top was worth the effort. (See banner photo above.)
Back at the inn, we took in the shoreline and the view of the fjord one last time, packed up the bike, and headed off, down the 170 toward the 138 again. We didn’t get far before we saw a sign for Petit-Saguenay and a small road heading toward the river. One of the disappointments, I must say, with the tour is the lack of access to the Saguenay River. The major roads are inland and you don’t actually see the river very much. (By contrast, the 155 mentioned above hugs the shore of the Shawinigan River all the way to La Tuque and is more scenic.) But rue du Quai, splitting off from the 170 at the town of Petit-Saguenay, provides a rare opportunity to get down to the river so we took it. I’d heard it’s a special spot, where the Saguenay and Petit-Sageunay rivers meet. Indeed, this inlet provides the longest unobstructed view upriver of the fjord, according to a placard on the wharf.
Looking upriver at Petit-Saguenay
Back on the 170, we were cruising and taking in the views, and I guess I wasn’t checking my mirrors very often because I was suddenly startled out of my saddle by a sport bike passing me at twice my speed. And another, and another, and on it went, a stream of maybe a dozen sport bikes out for their Saturday morning rip. I guess the police presence in these parts is pretty thin and there’s no track that I’m aware of so if you have a sport bike, these are the roads you use as a track. They were passing other vehicles on the two-lane road like there was no tomorrow, which there wouldn’t be for any who make a mistake. No wonder they have to pay $2000 a year to register their bikes here in Quebec compared to the “paltry” $800 I pay to register my adventure bike. Later we saw them gathered beside the road down at the 138 in Saint-Siméon, clearly taking a breather before turning around and doing it all over again.
We took the free short ferry and arrived in Tadoussac. I’d passed through Tadoussac a few times before but didn’t remember it being so touristy, which is not my cup of tea. You know you’re in a tourist town when you have to pay for parking, and we rode around quite a while looking for where to leave the bike while streams of tourists blindly criss-crossed the road in front of us. Finally, we found a spot in front of a microbrewery pub that was a little off the main street and had a terrace with a view of the gulf. Nice!
Our next stop after lunch was The Dunes. You will find them just east of Tadoussac. It’s an unexpected area of sandy hills overlooking the river. I wanted to play in the sand but the bike was fully loaded and undersprung, and I was feeling the weight the entire trip as the bike had a tendency to wallow at slow speed. (I changed the spring and serviced the shock once back in Montreal.) Marilyn was digging the place because you can see the different depths of the water from this vantage point, and she took a bunch of photos while I stayed with the bike. I would get my fun on the dirt road shortcut that lead us back to the 138 while Marilyn grumbled into the comms that we should have doubled back on the asphalt.
The Dunes, overlooking the St. Lawrence River just east of Tadoussac.
Soon we were heading north on the 172. It’s a fun road, and yeah, the cops are few and far between in this region, but I had speed control riding pillion so had to be good. Since we couldn’t hear each other very well in the comms due to the wind noise, Marilyn and I had developed a system whereby if she wanted me to slow down, she’d tap my left shoulder, and if she wanted me to stop, she’d tap my right. This form of backseat driving worked reasonably well, but unfortunately sometimes the D3O shoulder armour in my jacket worked a little better.
Marilyn had done a little research prior to leaving (somebody has to) and said there was a good rest stop at Sainte-Rose-du-Nord, a pretty little town that has a quay and offers a good view of the river. What L’Anse Saint-Jean provides on the west side of the Saguenay, Sainte-Rose-du-Nord does on the east—access to the river and a view of the fjord. We pulled in mid-afternoon in search of coffee.
Ste-Rose shorelineSte-Rose shops and diner
As many of you know, I’m not big on planning a tour before I go. I like the element of spontaneity and the ability to change plans on the fly. However, for this trip, since we were staying at B&B’s, I did take some time before leaving to find some sweet ones. We really, really, enjoyed all three of our gites on this tour. I love staying in an old historic house rather than a modern motel, and I love meeting the owner, finding out about the history of the building and the area, meeting other guests, practising my French, and enjoying the simple but tasteful breakfasts the hosts provide.
Our house in Alma, the Gite Almatoit, is home to a family and there were black and white photos of the house in winter and the kids playing in the garden. We were told that although the children must take a bus to school, snow days are (unfortunately for the kids) quite rare. After breakfast, I took a stroll around the property and learned from a sign on the lawn that the house was built in 1927 and is named La Maison Naud, after its original owner. Children of the Naud family lived in it until the early 2000s. It was the fall equinox, and our host had prepared this nice display on the front porch to celebrate the season. I’m too anti-social to be a B&B host, but I appreciate people who have decided to go into the hospitality business in order to make it work where they want to live. Maybe for them—I suspect for most—they enjoy the work so it’s a win-win.
The next day took us over the top of Lac Saint-Jean. We headed north on the 169 and pulled off at Pointe-Taillon “National” Park to see the beach and lake. I’m putting national in quotation marks because I’m not a Quebec nationalist and I disagree with Quebec’s nomenclature for its parks, which in any other province would be called provincial parks. You can’t have it both ways: receive billions of dollars in equalization payments from the rest of Canada and then call yourself an independent nation. Or maybe you can, if you are Quebec. As a Quebecer, I feel uncomfortable with this hypocrisy, especially when that nationalism is based on ethnicity, not language, which anyone who has lived here for any length of time will attest.
I’m thinking of Quebec politics now as I write this, and I was thinking of them then as we sat in a Tim Horton’s coffee shop in the heart of separatist Quebec, north of Lac Saint-Jean. It’s pretty much unilingual in these parts, so if you don’t know French, you’ll have to use the point and grunt method to order your donut. My French isn’t great but I can get by, but for all the talk of language in this province you’d think it was the most important issue facing Quebecers. It’s not. Just today I read that one of the major health service providers in the Montreal area has entered creditor protection. Marilyn and I are currently without a doctor, and I’ve been waiting for an MRI for months to diagnose a lump that I discovered last June on my collar bone. This is the state of healthcare in Quebec, and don’t even get me started on the state of education. (I’ve been a teacher since graduating in 1994.) It’s time that the Quebec government stop stoking the fires of nationalism and get its house in order by prioritizing issues like healthcare, education, infrastructure, and social services that have a direct impact on the quality of life for most Quebecers.
I’ve railed against Quebec politics elsewhere in this blog so won’t repeat myself, except to say that Marilyn and I will be leaving the province when I retire in a few years. We have mixed feelings about this because we’ve developed some very close friends here, but speaking for myself, I no longer want to pay another tax dollar to a government that sees me as a second class citizen because I’m not French (note that I didn’t say “speak French,” because I do, however poorly), that doesn’t hold and promote values I can be proud of, and that has its priorities mixed up. It’s time that Quebec as a nation either sh*ts or gets off the pot, to put it crudely. If it’s going to pass legislation that goes against the Canadian Charter of Rights and Freedoms and can only be enacted by using the Notwithstanding Clause, it’s time to leave Canada and stop taking handouts. In 2025-26, Quebec will receive $29.3B in equalization payments, more than all the other provinces and territories combined. Vivre le Québec libre!
Parc national de la Pointe-Taillon on the shore of Lac Saint-Jean
Back at the Tim’s, I had that feeling I got once before, when my son and I stopped in a small town in northern Quebec for dinner after canoe camping. As I listened to the French conversations around me, I wondered what it would be like to be unilingual French, how narrow your window onto the world would be, and how your views and opinions would be shaped exclusively by French media. I understand the fear of losing your language and culture; as a Canadian, I face this everyday living beside The United States which threatens to devour the subtleties of Canadian English and our unique culture. But I’m convinced that forced monolingualism is not the answer for French Quebecers. And besides, as stated by famous Canadian lawyer Julius Grey in a recent talk at my college, no language that is taught in mandatory public education has ever disappeared. If freedom really is in the interest of the Quebec government, it should begin with linguistic freedom. Languages open doors to other cultures, other ideas, and broaden one’s horizons. I wouldn’t be living in Quebec for the past 34 years if I hadn’t done a summer immersion program in Quebec back in 1989 to develop my French. But as I write this, the Legault government is working to restrict access to education in English, leaving the vast majority of Quebecers linguistically and culturally isolated, not to mention vulnerable to media manipulation.
Blueberry fields north of Lac Saint-JeanRest stop at Chutes des Pères off the 169 in Dolbeau-Mistassini
We looped the lake and came back into the town of Saguenay, then picked up the 381 south, the preferred route for motorcyclists. It cuts through dense bush between mountain ranges, separating on the west the Laurentides Wildlife Reserve and on the east Parc national des Hautes-Gorges-de-la-Rivière-Malbaie. There was a lot of tapping on my left shoulder on that ride, all the way into Baie-Saint-Paul.
Baie-Saint-Paul at the foot of the 381
For our third and final night, we had a reservation at Auberge Les Sources in Pointe-au-Pic, just west of La Malbaie. I would say it was my favourite of the three, but they were all my favourite. The room itself was special with a lovely sunroom off of the main room where we could sit and listen to our little bluetooth speaker and journal and drink port. Yes port. Only we enjoyed it a little too much and somebody had to go fetch dinner. Thankfully, we were a stone’s throw from the Fairmont Le Manoir Richelieu which had take out St. Hubert chicken. It wasn’t the swankiest dinner of our trip, but it hit the spot under the circumstances.
After dinner, we decided to walk off the chicken by taking a stroll down to the hotel that overlooks the river. It really is a spectacular building, furnished exquisitely inside with original artwork (including a piece from one of Marilyn’s favourite painters, Michael Smith) and historical photographs and artifacts. The Fairmont hotels are a sort of relic from another era, and this one clearly is kept alive by the adjoining casino, accessible from the hotel by a tunnel. I’m rather morally ambivalent about gambling, but I guess in this instance I’m okay with other people spending their money this way if it’s going to prevent an historic building from being turned into condos. We peered through the glass doors into the carnival lights, bells, and glitter of gambling while a couple of bruisers stood guard outside, ensuring only hotel guests could lose their money.
Outside, fog had rolled in. We strolled along the boardwalk overlooking the river, and in the mysterious lighting of the outdoor lamps, with a foghorn sounding in the distance, you could easily imagine being another person 100 years ago.
Our final day would be more of the gross highway riding to get home, but before leaving our beloved Charlevoix, we indulged ourselves by stopping in at Saint-Joseph-de-la-Rive, a quaint village at the base of Les Éboulements, right on the river. The view as you descend is pretty good, and there’s an interesting little artisanal paper store there called Papeterie Saint Gilles, which still makes paper by hand, pressing petals of local wildflowers into the sheets.
The infamous descent from Les Éboulements.
This hill is so steep that several years ago a tour bus lost its brakes and crashed off the embankment. I spared Marilyn that story.
Our original plan was to cross on the ferry from here to Île-aux-Coudres and do a quick loop of the island I’d heard so much about. I’ll go to great lengths to find a good boulangerie. But it was off season and we figured a lot would be closed and we still had the return leg to Montreal to do, so we stayed on the mainland and strolled along another boardwalk, taking a last look at the rolling hills and tide flats of Charlevoix.
Saint-Joseph-de-la-Rive
Finally, it was time to climb reluctantly onto the bike and start heading home. The tour had been everything we’d hoped it would be. We weren’t able to do a holiday over the past summer, but this little excursion made up for it and cured our travel bug before the bike went into storage for the winter.
The Saguenay fjord has dramatic geography and the roads are windy and fun. Prices are reasonable and everyone we met was friendly and welcoming. Wherever I travel, whether in The United States, across Canada, or into the heart of pure laine Quebec, the people I meet rarely match assumptions based on what I’ve heard in the media. Perhaps that’s the best thing about travel: learning first-hand that people everywhere are essentially the same. I’m glad that I finally did this tour, if only to discover, with my own weak French, that the only thing separating English and French Canadians is language.