The 2025 Season Begins

Photo credit://Sentier Trans-Québec Trail

Preparing for my most ambitious ADV tour yet.

“April is the cruelest month,” T. S. Eliot wrote as the opening line of his iconic poem “The Wasteland” (1922). Clearly, he had never experienced a Canadian March. As I write this on March 25th, we are 10 days into the new riding season, yet no one is riding. It’s 2C (36F) and the sky is a slab of grey slate pissing cold rain that turns to ice in patches on the treacherous sidewalks. Brown, dirty snow still sits at the sides of the roads and in patches on lawns, slowly melting over weeks to expose winter garbage and dog shit lying underneath, and the grass, when it finally pokes through, isn’t really grass but mud and last year’s soggy, decaying leaves. Eliot’s poem captures postwar disillusionment and his nervous disorder, but it might equally describe the mood of Canadian bikers in late March.

Nevertheless, we continue to plan and prepare for the season to come in a kind of blind faith. Yesterday I did a practice pack of my gear. I’m trying a new gear set-up and have the ambitious plan of eliminating my tank bag, tail duffle bag, and hydration knapsack. I want to ride this year without the extra weight either on the bike or my back. To do that, I had to be as ruthless as Ezra Pound was to Eliot’s manuscript.

Gear

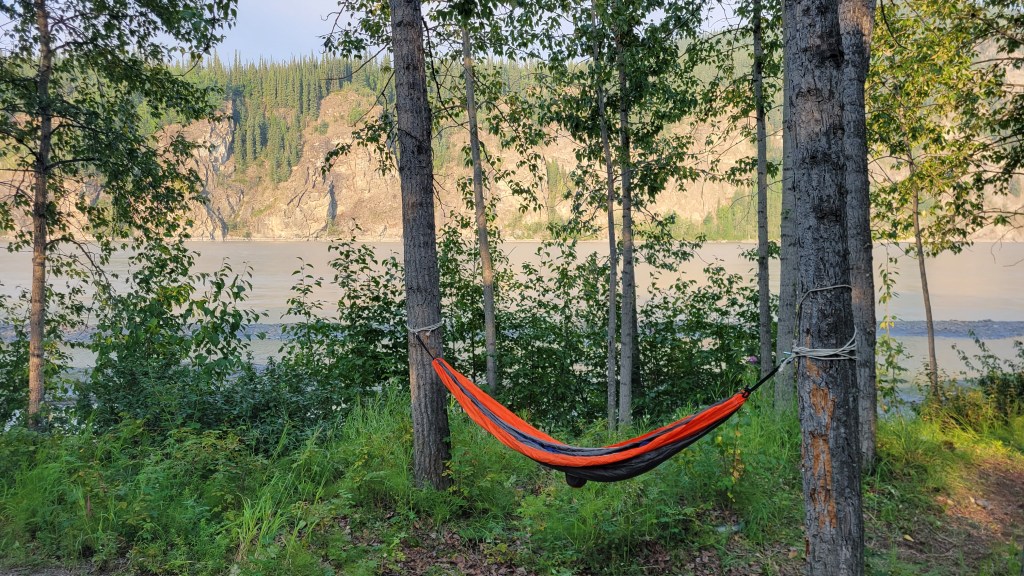
I replaced my tent and mattress with a hammock and bug net. I’ll be touring midsummer so I’m going without a hammock underquilt. I also swapped my MSR Dragonfly stove and 2L Billy pot for an Odoland isobutane stove and pot, but I’ve added to my kit a Bushbox twig stove. I’m not sure which will become my primary stove, but the idea is to use the twig stove when dry wood is readily available and the isobutane when it’s not. And as a back-up to the back-up, just for its simplicity and ease, I’ve also picked up a Trangia alcohol burner. This fits nicely inside the Bushbox and can burn isopropyl alcohol, available at any pharmacy. Can you tell I’m nervous about giving up my Dragonfly?

My camping mates will be happy to know that I finally retired my toy hardware store hatchet and bought a Gränsfors Bruk Wildlife Hatchet. I don’t know why I suffered as long as I did. I’ll be using this around camp to prepare firewood and split firewood into twigs for the Bushbox. I’ll be travelling solo so edited out of my kit the second plate, cup, and cutlery, resulting in my cookware now being considerably smaller and lighter.

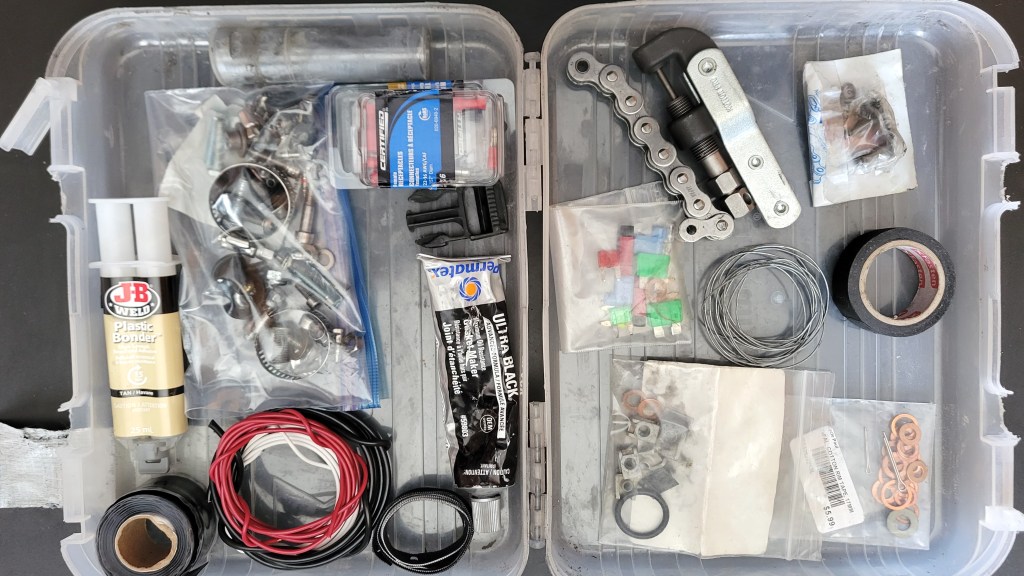
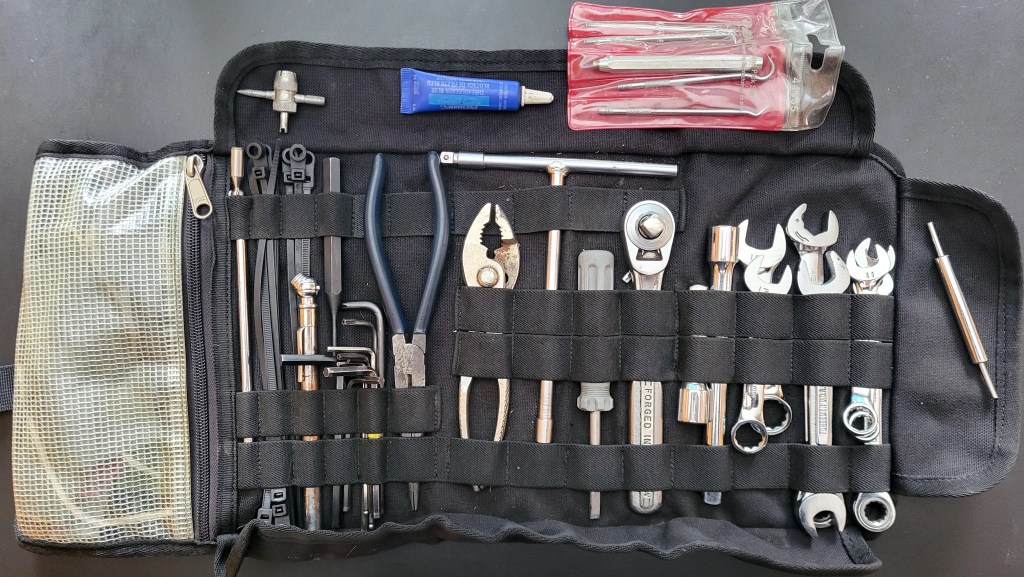
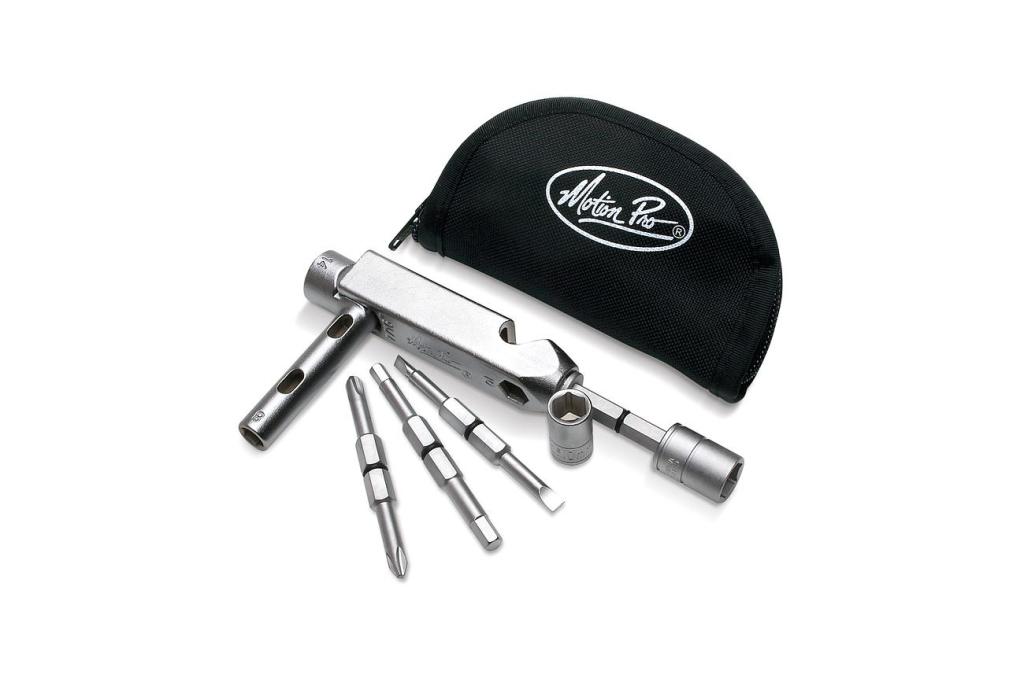
When I did The Timber Trail at the very end of last season, I found my Wolfman Expedition tank bag too big and heavy, making the Tiger more top-heavy at slow speed than it already is. It also worked better on the 650GS with the fuel cap on the side of the bike and not under the bag. It would have been possible to move the essentials to my hydration knapsack, but I want to eliminate it too. Water is heavy and the knapsack restricts airflow through a jacket. Mine also interferes with my neck brace. (If it goes under the brace, the brace sits too high; if it goes over the brace, the brace digs into my shoulders from the extra weight.) Instead, I’m going to try a fanny bag with only a few essentials from the tank bag: aux port to USB adapter, some electrical cords, a Leatherman Wave, tire pressure gauge, 8mm socket and micro-ratchet for my pre-load adjuster, and my monocular. I think fanny bags are nerdy, especially if worn in the front (i.e. the scrotum bag), and I wouldn’t be caught dead in one anywhere but on the trail, but one might be the answer to staying cool and unencumbered on the bike. If they find me dead somewhere on a trail this summer, at least my reasons for wearing one are now known.

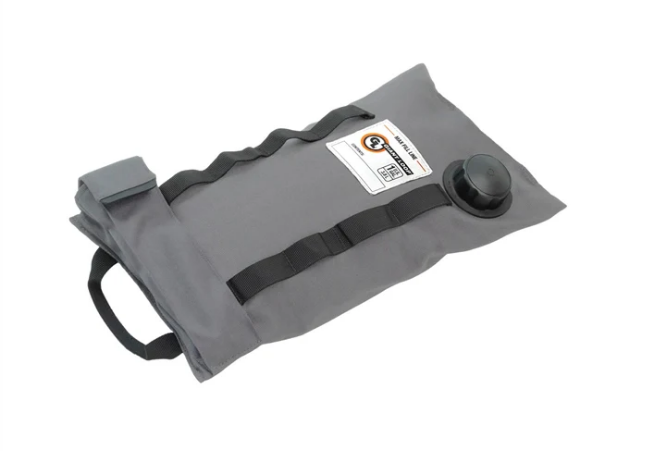
As for water, since I won’t be needing to bring a fuel bottle for the Dragonfly stove, my bottle holster is free. I’ve moved it from the back of a pannier to the front left side and will try the Simple Modern Insulated Tumbler with Straw and Lid for sips when I can. It’s only 28 mL so I’ll also be carrying an MSR 4L Dromedary to refill it as needed. Marilyn and I took the latter through Newfoundland but never used it much, so I was ready to retire it from my kit, but I’ll be doing some pretty remote riding midsummer so will strap the Dromedary onto the bike along with a 1G Giant Loop Armdillo bag to extend my range to around 400 km (~250 miles).

Giant Loop Armadillo Bag

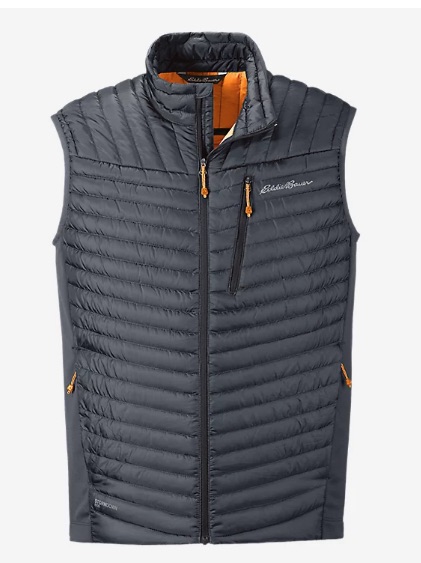
After the practice pack last night, I can confidently say that almost everything fits into my Enduristan Monsoon Evo bags. I’ve added two Enduristan Fender Bags onto my panniers, into each fits perfectly a 10×10 Aquafest Safari Tarp. (I’ll be taking two—one for over the hammock, one for shelter.) My tools and tubes, as always, will go in two Giant Loop Possible Pouches that I strap to the crash bars at the front of the bike. I say “almost” because I will still have to have a small Enduristan tail bag on the rack at the back for my rain jacket, windbreaker, and down vest—my layering system to deal with temperature changes. I can live with that.

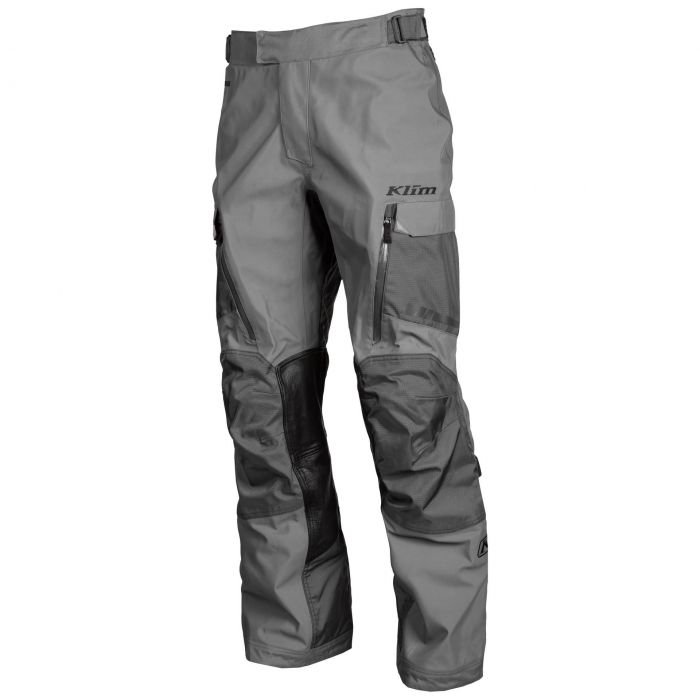
Finally, I’ve added to my gear to prepare for the risks of off-roading. I have a Knox compression suit and recently purchased the chest protector upgrade that doesn’t come standard with the shirt.

I swapped out Level 1 armour for Level 2. I also recently replaced my ageing Arai Signet-Q helmet with a Contour-X. I know, I know: why didn’t I get an XD-5 or similar adventure helmet? Well, I already have an adventure helmet, the LS2 Pioneer, and this will be my touring helmet. The peak causes wind noise and I was looking for the most comfortable, quietest, safest helmet on the market, and the Contour-X fits me like a glove.

Route

I’m sorry, my American friends, but I’ve decided that I can’t do this summer my planned ride of The Blue Ridge Parkway south and the BDR’s coming back. This will be the 3rd time I’ve postponed this ride, and I don’t do it lightly. I was looking forward to exploring the Appalachian Mountains and challenging myself on the MABDR and especially NEBDR, but after much deliberation, I’ve decided to join my fellow Canadians and stay north of the border this summer, that is, the “artificially drawn border.”

What makes this decision especially difficult is that I have always found Americans extremely friendly and helpful, and I recognize the difference between Americans and their government. But lately we Canadians have been hearing of visitors having their phones confiscated at the border and searched, and some Canadians detained, and even some anti-Canadian sentiment from certain states that shall remain unnamed, so I don’t feel entirely safe to visit while tensions are this high. I’ll be travelling solo in remote regions so am especially vulnerable. It’s really unfortunate that it’s come to this and I hope our good relationship can be restored quickly so I can complete that bucket list ride.

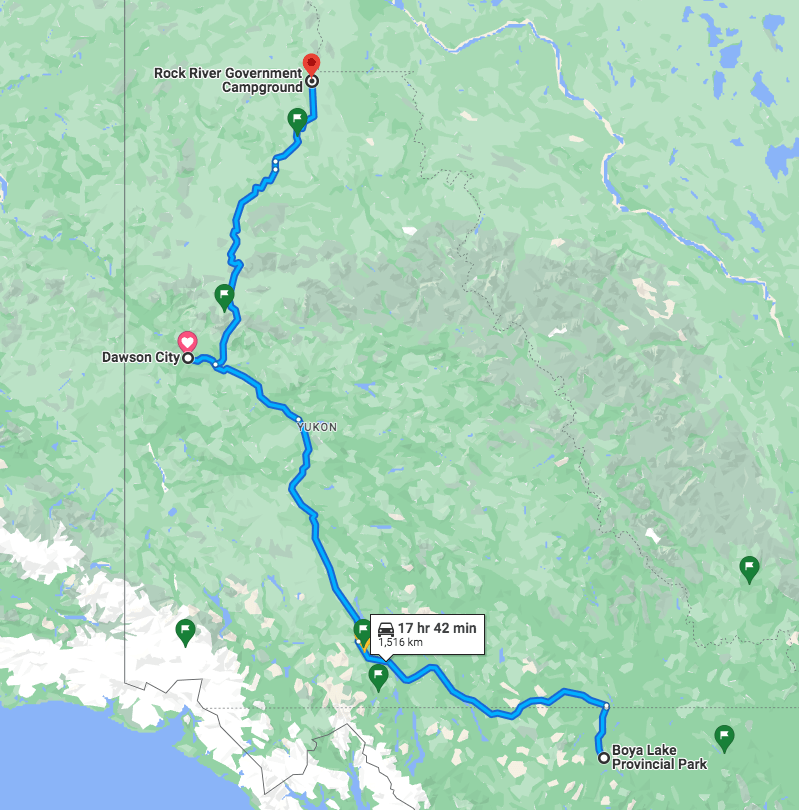
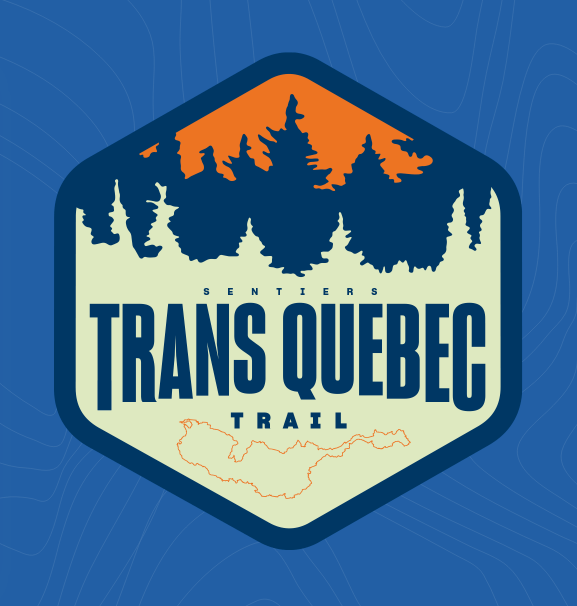
Instead, I’ve decided to do some of the Trans Quebec Trail. This is a system of trails throughout Quebec. Initially I was going to do a section of the TCAT (Trans Canada Adventure Trail) called The Forest that runs from Baie Comeau, Quebec, to Kenora, Ontario, but that gps track isn’t always kept up to date. My Calabogie Misadventure ride a few years ago was largely a result of the track not being kept current; my riding buddy and I didn’t know that a bridge was out and were forced back out onto a gnarly hydro line. The big benefit of the TQT is that there is an accompanying app that is user-submitted; if there’s a problem on the track, one can immediately report it with the press of a button. The app also shows campgrounds, gas, groceries, attractions and more, so I feel I can ride with a lot less stress and simply explore, as I like to do, finding the essentials when needed. Thanks to Marc Chartrand and his team for putting this route and app together.

I plan to pick up the track south of Montreal and follow it east to Rimouski and beyond, perhaps into the Gaspé interior. Then I’ll cross the St. Lawrence River (uh, by ferry) from Matane to Baie Comeau and come back by the north shore, up through northern Quebec with some of the most remote riding I’ve ever done. It loops over Lac Saint Jean, where Marilyn and I visited last fall, but on dirt roads this time. Apparently about 90% of the route is dirt and gravel. You can see the entire trail and photos at the STQT Facebook page. I don’t know how long this will take me and I don’t have a definite schedule, but that’s the kind of adventure riding I like. With the app and riding solo, I can play it by ear and simply explore at my own pace. Teachers’ benefits.

Training

To prepare for the off-road element of this tour, I’ve decided to do some more instruction this summer. When I got my licence in 2016, I did some classes to get a Level 1 foundation, but it’s been several years since and I’m ready to improve on those skills. I’m going to look into the Level 2 class with Académie Ridaventure. Their Level 2 class covers such things as water crossings, clearing obstacles (logs, large rocks), and brake slides. I think it’s always good to develop your skills, and I feel I’ve plateaued recently.

I hope to do a semi-private Level 2 class.

“Ah spring!”

There’s another poem I know about spring. Unlike Eliot’s 434-line masterpiece, this one contains two words: “Ah spring!” I know it by heart. It’s been a brutal winter with record snowfall in Montreal and frigid temperatures for months. No January thaw this year. But we’ve finally arrived at the cusp of spring and the riding season.

If there’s one positive of the off-season, it’s the opportunity to “reculer pour mieux sauter,” as D.H. Lawrence said, step back to jump forward. It’s a time to dream and plan for adventures to come. I’m ready; the bike is ready. It may not be the cross-country tour I did in 2021, but in many ways it feels like this tour will be my most ambitious and the one I’ve been working towards since I began riding in 2015. It’s the kind of ADV remote touring I wanted to do on the cross-Canada tour but didn’t have the time. I discovered then that this country is so large that you have to explore it one province at a time, and I guess I’ll start with the one I’ve called home now for 35 years.

What are your plans for the season? What changes have you made to your bike and kit to prepare? Drop a comment below. Whether you are an armchair adventurer or a seasoned traveller, despite what Nature presents us today, it really is a special time of year. Keep the faith, my motorcycle friends: we’re almost there.

Review: Pod K8 Knee Braces

Let me start by addressing the elephant in the room and deal with the controversy surrounding knee braces. A few years ago, a reader commented on a Wish List post of mine that included some knee braces. I’m always happy to receive comments from readers and wasn’t even aware of any controversy. He pointed me toward Ryan Hughes, the leading spokesperson against braces, who argues that they restrict movement on the bike and lead to incorrect body position. There have also been anecdotal claims that braces have led some people to breaking their tibia or fibula.

On the other side of the argument is Adam Reimann. He admits that he’s tried and abandoned some pretty bad braces that were painful and obstructive, but he suggests to keep looking around to find some that fit you well, then you will not want to ride without them. It will be, he says, like “riding without your helmet.” He refers to a brace as like a second knee, a knee over your knee, that adds strength when you need it, whether in a twist, hyperextension, or hard knock.

I think this is one each rider has to decide for him or herself. For me, I’ve seen guys blow out their knees playing soccer, and I’ve seen (on video) a now friend severely damage his knee in a little tip-over. (Reimann comments that’s it’s often not the high speed accidents but the silly little slow-speed ones that cause the most damage.) These are very heavy bikes we’re taking off-road, and it doesn’t take much to tear a meniscus or AC ligament or worse. Since I’d like to keep my mobility well into my retirement, I decided to get some braces.

The problem was I never could find the $1000 or so to buy a pair. Then one day I had an idea, such a brilliant idea (if I may say so) I don’t know why I hadn’t thought of it before. (I get my best ideas upon waking, as if my mind has been mulling over a problem in sleep and decides to present me with the answer upon waking.) Maybe I could get a portion of the braces covered under my group insurance at work? I’d heard of people getting covered for a brace after an accident, but shouldn’t doctors and insurance companies logically cover preventative braces too? I looked into it and discovered they do! You need a doctor’s prescription, so off to the clinic I went.

The young doctor I got (this is Quebec healthcare—no one actually has a doctor) was not familiar with knee braces and I had to show her a photo of one on my phone and explain what I’d be using it for. After dutifully checking that my knees were indeed still fine, she thankfully wrote me the prescription but added, just to cover herself, “for preventative use” on it.

I mention all this because if you’ve been considering getting braces but the cost has been a deciding deterrent, check your insurance policy. Ideally, medicine should be preventative, just like bike maintenance. Just make sure the braces you get are medically certified because some are not.

With 80% covered, I decided to go “top of the line,” as my parents used to say. That’s the Pod K8 2.0 braces with the forged carbon frame. Pod also make the K4, which is also medically certified but slightly heavier with an “impact modified composite frame.”

The design genius of the Pod braces is the synthetic ligament that simulates the AC ligament that is so vulnerable. Unlike traditional knee pads, the brace’s frame prevents torsional movement and hyperextension, but the synthetic ligament does not hinder bending. I’m no orthopedic surgeon or industrial designer so won’t go into the weeds of how the brace is designed or works, but I can speak to the fitment and comfort of the Pods.

As with all motorcycle gear, fitment is crucial. That starts with getting the right size brace, with the width or circumference of your knee the crucial element. (The sizing chart has both measurements. Just be sure to measure while standing, i.e. load-bearing.) Like a helmet, the brace should be snug but not tight, and the Pods come with various pads and spacers that fit inside the knee cup to get the perfect fit. If you are between sizes, they suggest going up a size.

There are two crucial elements of putting on the brace. First, make sure the hinge of the brace is next to the hinge of your knee. Doh! That seems obvious, but many people fit them too low. To ensure correct placement, put them on with a bent knee. Then they should naturally fall to the right place on your leg. The straps are numbered and the other crucial element is to fit the first strap above your calf muscle and ensure it’s tight. Doing so will prevent the brace from sliding down during the day.

Images credit://https://podactive.com/fitting-and-adustment/

The rest of the straps are straightforward, working outward from the knee. Initially I made the outermost straps too tight and they dug into my flesh, leaving a mark by the end of the day. I backed off on those and the brace is now more comfortable.

Yeah, when I first put them on I felt like Robocop, but I soon got used to them. I did a couple of rides at the end of last season—four days in Vermont and The Timber Trail in Ontario—and wore them all day every day without discomfort. Okay, they are like your adventure boots: you’re happy to get them off at the end of the day but don’t mind them during. I bought a pair of the Pod KX knee sleeves to go under the braces and would recommend something similar. They provide just a little more protection to your skin, and folding the ends over the brace top and bottom ensures nothing gets snagged on the inside lining of your pants.

On the bike, I did not find the Pods obstructed my movement. However, I’m not racing and doing berms or pulling any Pol Tarrés moves. What I am doing is squeezing the bike with my knees, and especially pressing the inside of my knee into the bike to stabilize it around corners, and the Pods didn’t dig into the inside of my knee; they have rubber pads that fix into the knee cup with velcro to prevent that. There isn’t much flesh on these knees and the Pods with the knee sleeves didn’t irritate any bones or skin.

The knee is such an important yet complicated and vulnerable body part. Why not invest in doing everything you can to protect them? Overall, I’m very satisfied with the Pod K8 knee braces. I haven’t had the bike come down on one yet, but I now ride off-road with the peace of mind of knowing that if it does, my knees are protected, certainly better than in a knee pad or with traditional knee armour.

Disagree? Go ahead: the comments section is open below, and like in my classrooms, I encourage diversity of ideas.

The Wish List, 2023

I interrupt the journey across Newfoundland for the annual holiday wish list.

It’s become a tradition on this blog—the annual Christmas wish list. It’s probably one of the least favourite posts of the year for readers, but it sure is fun to write. The season has recently come to an end, the long winter months still lay ahead, and all we have to propel us out of bed in the mornings are thoughts of spring and planned journeys. And part of that planning is dreaming of the mods we will do and the gear we will buy to help prepare for the adventures to come.

This year’s list is pretty short. Yes, inflation is hurting everyone, and we find ourselves buying the cheap tomatoes instead of the fancy vine ones (and regretting it later). Marilyn is paying tribute to her late father by scanning the grocery store flyers and clipping coupons. Even the dog has sacrificed his Greenies (and his breath is the price we all have to pay).

But honestly, the bike is pretty much done. It’s got the auxiliary lights on it now, the crash protection, skid plate, pannier racks, hand guards, off-road pegs, and tail rack. I got soft panniers last year and they have been great. So it’s pretty modded out. What the bike needed most was some maintenance, so I spent a chunk of time before I put it into storage doing the valves and servicing the starter motor, which was acting up. By the way, I’m now advocating checking your valves on the recommended service interval. I waited until the bike had 45,000K and all my exhaust valves were tight, some significantly.

Shorty Levers

The only thing it could use are some new levers. The stock levers are okay, but they are long and I’ve already bent the brake lever once. Actually twice, since I bent it back. I think I’m the only one in my club who rides two-fingered and I asked myself the other day why on earth haven’t I ever had shorty levers?

I looked at all the options and am undecided between Vortex and Pazzo. Both are top-quality levers that fit well without any slop, which is often the case with cheap Chinese aftermarket levers. At about $200, they are comparable in price.

Vortex V3 levers

The Pazzo levers have quite a swooped design to them, which brings the lever down close to the grip. I know there’s some adjustment but this still makes me nervous because I like to have a short clutch that completely disengages before the lever hits my knuckles of the remaining fingers wrapped around the hand grip. For this reason, I’m leaning towards the Vortex design. Is it just perception, or do they look straighter? My ideal lever would be a Pro Taper, but I don’t think they make one for the Tiger.

Pazzo also gives the option of a folding lever, but I don’t think I need that since I have the Barkbuster guards. It would have to be a very unfortunate fall for a rock to come up inside the guard and break a shorty lever. But I guess it could happen. My sense, however, is that folding levers are for true dirt bikes that have wimpy, folding hand guards. If you have any experience or thoughts on this, drop a comment below. I won’t be getting anything until the spring so I have some time to decide.

A new helmet

Honestly, that’s about it for the bike (my wife will be happy to know). But wait! My current lid is at least five years old, so I probably should get a new one soon, despite what Bret Tkacs has recently said about that 5-year limit being bogus. If I were forced to, I’d probably go with the Arai Tour-X5 or maybe find a deal on the now discontinued X4.

No, I’m not trying to emulate Itchy Boots. This would go well with my touring jacket that is grey with matching hi-viz accents.

I’ve been very happy with my Arai Signet-Q helmet. The brand speaks for itself and the shape fits my intermediate- to long-oval noggin well. This time, however, I’d go with the Tour X because I want a peak. There have been many times while riding into the sun when I wanted a peak. Sometimes I have to shade my eyes with my clutch hand, it can get that bad, even with the Pro Shade system.

Knee braces

To be honest, I’ll probably forego the helmet for another big-ticket item. I plan to do some pretty serious dirt riding next year, and the only thing that scares me about that is the potential to damage a knee if the bike falls on one. I’ve somehow managed to play 15 years of beer league soccer without any major damage to a knee, and I’d like to keep it that way so I can enjoy my retirement with full mobility. I therefore am adding to my wish list a pair of Pod knee braces.

Anyone who is serious about dirt riding should be wearing knee braces. I know, they are uncomfortable, but so is tearing tendons and surgery. I’ve heard The Awesome Players advocate the use of braces, and recently a video by Riemann convinced me I should just bite the bullet on a pair.

At $750 a set, these babies aren’t cheap, but money well spent if it prevents a serious knee injury, especially if you are riding solo as I do.

Dirt Gloves

There’s one more piece of off-road gear I’d like before attempting the BDRs next summer. That’s a pair of light MX or rally gloves. I have a pair but Marilyn has appropriated them, so I’m in the market for another pair. When riding dirt, it’s important to have maximum feel on the levers so you can modulate both clutch and brake. It’s similar to how football (i.e. soccer) players are always looking for a boot that provides the most feel on the ball, for example one with kangaroo leather instead of cow hide.

That might be something like the Leatt Moto 4.5, a popular choice or, going even lighter, the 100 Percent Airmatic.

DOUBLETrak Multitool

Finally, what wish list would be complete without a tool of some kind on it? I came across a great little multitool in a video by Chris Birch on his favourite tools.

The DOUBLETrak multitool by engduro here in Canada consists of several hex, torx, Phillips, and flat head drivers, and 6, 8, and 10mm socket drives that fit into the handle itself and stay there by magnetic force until needed. There’s also a 1/4″ hex to 1/4″ square drive adapter. If you want a comprehensive review of this tool, check out this video in which Dude does an oil change using only the DOUBLETrak. Okay, I’m not going to be doing trailside oil changes, and this will not replace tools that are in my tool roll, as he suggests, but it’s a convenient tool to keep at hand for small adjustments or tightening something on your or someone else’s bike. Best of all, for a few dollars more, you can get a vanity engraving on it and tell yourself it’s to prevent theft.

That’s it. Like I said, a small list this year. That’s okay because we’re still paying off expenses from the Newfoundland trip last summer and I’ve got more ambitious plans for next summer. This time it will involve dirt and I’m both a little nervous and excited about taking the Tiger off road . . . like, really off road, not just gravel and dirt roads but trails and Class 4 roads, water crossings, mud, sand, rocky hill climbs . . . the works. It’s known as primarily a street bike that is capable of doing “light off-roading,” so I’ll be pushing it beyond its intended limits as I do the MABDR and NEBDR back to back. I’ll either die or bond with this bike in ways I haven’t yet.

What are your plans for next season? I’d love to hear them because the best wishing is not the accessories or gear we want to buy but the places we’d like to visit on our bikes, or even the roads we want to ride. We can’t all be Itchy Boots, but we can explore a little piece of paradise close to home, whatever your paradise might be. I wish you happy holidays, and happy dreaming of another season doing what makes our souls sing.

ADV Riding as Thrill-Seeking

Is extreme remote riding simply gratuitous risk-taking?

Video credit: Troy R. Bennett

Recently a story was circulating about Eric Foster, a guy who crashed on the Trans-Taiga Highway. Perhaps you’ve seen it. He was riding solo and woke up eight hours later in a hospital in Montreal. It’s actually an old story from 2017 but was republished end of November and that’s when I saw it. It’s a pretty gripping story, as far as crash stories go. He was riding in perhaps the remotest area of North America when he crashed, breaking his back and a leg. Some trappers saw the smoke from his motorcycle on fire and came to his aid, but it took hours for first responders to get to him, and then hours to get him to a hospital. The story has a happy ending; he returns to the spot where he had the accident and finishes his trip, stopping to thank the trappers along the way who helped him.

I’d never heard of the Trans-Taiga, so the article got me looking. It’s a dirt road built by Hydro Quebec to service their dams, and it is indeed about as remote as you can get in Quebec. According to Wikipedia, it’s the “northernmost continuous road in Eastern North America,” snaking 582 kilometres (362 mi) through forest from James Bay Road to the Caniapiscau Reservoir. That’s right—that’s all there is at the end of a dangerous journey: a reservoir. Then you turn around and ride the same road back.

Why would someone want to do such a ride? Well, the answer is in the article. Eric Foster describes himself as “a challenge guy.” When asked why he wanted to ride the Trans-Taiga, he replied, “Just to say I did it,” then added, “I love a good challenge.” I’ve found myself saying the exact same words of that last sentence, and I’ve written about risk-taking in an earlier post when discussing my decision to try The Dempster, another dangerous highway. Quoting Jordan Peterson, I wrote at the time:

“When untrammeled—and encouraged—we prefer to live on the edge. There, we can still be both confident in our experience and confronting the chaos that helps us develop. We’re hard-wired, for that reason, to enjoy risk (some of us more than others). We feel invigorated and excited when we work to optimize our future performance, while playing in the present. Otherwise we lumber around, sloth-like, unconscious, unformed and careless. Overprotected, we will fail when something dangerous, unexpected and full of opportunity suddenly makes its appearance, as it inevitably will.”

12 Rules for Life

Research on the Trans-Taiga led me to looking at James Bay Road, a highway so remote that you have to sign in at a check point before riding it so officials can keep track of who’s up there. I watched a YouTube video of a group of guys who rode it to James Bay, including a few kilometres of the Trans-Taiga, “just to say they did.” And then the YouTube algorithm did its thing and showed me another series of videos of a father and son riding the Trans-Labrador Highway, which was right up my alley because I was considering riding it back from Newfoundland this summer after crossing to Blanc-Sablon.

Coincidentally, this series is also by Troy Bennett.

The Trans-Labrador Highway is one of those classic ADV rides you’ve apparently got to do to call yourself an ADV rider. It also snakes through some pretty remote territory, and until recently, was mostly gravel. (The final remaining section of dirt has recently been paved.) I watched the six-part series and the riders did have some adventure. They had a break-down and had to be saved by some locals, and they encountered some unseasonable weather and were held up for a few days by a late snow fall. There was some good bonding time, for sure, but in terms of the ride itself, it seemed like hours and hours of mind-numbing coniferous forest. No lakes, no mountains, no cliffs, no hill climbs, and as of last summer, no dirt.

Why would the Trans-Labrador be such a popular ADV ride? It has to be its remoteness, and if you live in the northeast of North America, the Trans-Lab is one of the few remaining truly remote roads.

If you’re looking for a challenge, remoteness will provide it. For one, there is the not-so-little issue of fuel; you have to be able to cover upwards of 400 kms between fuel stops, which can be done by carrying extra fuel in a Rotopax or another fuel container. With remoteness usually comes some challenging riding too since no one wants to pave a road that has limited use. And if it rains, that challenge increases significantly, especially on roads like The Dempster or The Dalton that are sprayed with calcium chloride as it makes the mud greasy. Then there’s the danger of wildlife, whether it be an aggressive grizzly bear or, worse, the black flies.

Stuck in otherwise pretty safe lives, we seek danger in answer to an ancient call somewhere in the reptilian brain that harkens back to another era when we lived close to death.

But the real challenge of riding remote is simply the lack of assistance should you have a mechanical or medical problem. I won’t say you are on your own because even on these remote highways there are still trucks passing periodically, but parts and medical assistance become scarce. This is where you have to be prepared: know how to fix your bike, carry spare parts, bring a first-aid kit, and have on you a satellite tracker like the Garmin inReach units that are connected to emergency services.

Is it worth it? Well, to each his or her own, but for me, the risk itself is not enough. In fact, I’ve been wondering if riding remote for its own sake is really just a way for some people to feel alive again. Stuck in otherwise pretty safe lives, we seek danger in answer to an ancient call somewhere in the reptilian brain that harkens back to another era when we lived close to death. Some people skydive. Others bungee jump. Some climb mountains. And some race The Isle of Man TT in search of what Guy Martin calls “The Buzz,” that adrenaline hit you get when you are on the edge of life and death.

But watching these videos has led me to rethink my upcoming tour. I don’t think I’ll be coming back from Newfoundland via The Trans-Lab. It’s not because I’m scared of remote riding, but in my world, there has to be some pay-off for the risk, and bragging rights just isn’t enough. When I rode up The Dempster, every kilometre was worth the risk for the magnificent views the highway provided. I’d never seen geography like that before and likely won’t until I get up there again.

Golden Sides Lookout just north of Tombstone Territorial Park, Yukon.

But the Trans-Lab, the James Bay Road, and the Trans-Taiga don’t offer much beyond hours and hours of forest. From what I can determine, there aren’t even places to pull off safely for a rest or to camp. These are roads built exclusively for trucks to get from Point A to Point B, cutting a single line through otherwise impenetrable bush. I’ll leave it to the black flies.

For a challenge, I’ve decided instead to ride this summer the NEBDR and MABDR (North East and Mid Atlantic Backcountry Discovery Routes respectively) down to The Blue Ridge Parkway, and while there, I’ll probably do Tail of the Dragon, although riding a curvy section of road at the limit of my skill and the bike is not my preferred mode of challenge these days. Rather, I’m looking forward to testing my metal on those Class 4 roads of the NEBDR. I’ll take a rocky hill climb over speed or gratuitous remoteness any day; it’s what drew me to ADV riding in the first place. Off-roading provides a challenge that is relatively safe. That might sound like an oxymoron, but you don’t have to risk your life to get “The Buzz.” Successfully completing a technical section of road or trail will give you a hit too, and if you don’t make it and drop the bike, well, you live to try another day. And along the way, there are some pretty great views, villages, and campgrounds.

What do you think? If you ride a motorcycle, you’re familiar with managing risk. Is remote riding your thing, and if so, why do you do it? If not, what kind of riding gives you The Buzz? And if you don’t ride, what do you do to step outside your comfort zone and feel alive? Drop a comment below; I’m always interested in hearing from readers.

Ready for Anything

In the penultimate post in a series on gear, I discuss what I carry when touring.

The Container of Last Resorts

The first major tour I did was to Cape Breton to ride the Cabot Trail. As you cross the border from New Brunswick to Nova Scotia, heading east, you see at the side of the highway a mini-lighthouse advertising Tourist Information. I naturally pulled off for maps and a rest. In the parking lot, I noticed a burley, bearded, rider on his back beneath his Harley, trying to tighten an oil filter with a pair of pliers.

“Hey, can I help in some way?,” I offered. None of his fellow riders seemed either able or willing.

“Not unless you have a 14mm socket,” was the reply that emanated from beneath the bike.

I rummaged to the bottom of a pannier and emerged with the requested item.

“Here you go,” I said, and handed it down to him.


Every touring group should include at least one ADV rider. Because we venture into remote areas, we have to be self-sufficient, and that means being prepared for anything. Anything. Mechanical problems, medical emergencies, security issues—we need to carry on the bike into the bush the tools, spare parts, first-aid materials, and safety items required to get us back out of the bush.

The basis of my touring kit is my tool roll. I use the Kriega roll because I like the little pouch at the side for all the odds and ends that don’t fit anywhere else.

Kriega Tool Roll

That includes an assortment of hardware and fuses, pipe cleaners, emery paper, safety wire, thread lock, a valve stem tool, picks, and a tool for removing pins from electrical connectors (viewed far right above). The latter contains two tubes of different diameters, one on each end; hopefully one is the perfect diameter to slide over the pin but inside the hole in the connector. The tool pushes the barbs of the pin in so the wire can be extracted out the back of the connector.

I once had a flasher that had a break in the wire inside the connector plug, so I couldn’t simply splice the wire. Every time I put on the flasher, I’d blow the fuse to the circuit that included my dash, so no speedometer, tachometer, and other instrumentation. The only way to fix it, other than getting a new connector and splicing wires, was to remove the pin from the connector using a tool like this. Since then, it’s become part of my toolkit.

Left to right above in my roll is a telescopic magnet, zip ties, various Allen keys particular to my bike, needle-nose pliers, slip-joint pliers, a 1/4″ T-handle, reversible screwdriver (standard/Phillips), 3/8″ ratchet, socket extensions, various wrenches. I like the stubby wrenches from Home Depot because they are lighter—not as light as titanium wrenches, but my wallet is heavier for it. I indulge myself with a ratcheting 10mm wrench.

Why the 1/4″ T-handle? Some of those sockets are 1/4″, but with the Motion Pro T6 adapter, I can use all my 3/8″ sockets on the T-handle.

Where are the vice-grips, you ask? They are in my other tool kit since they don’t fit in this one. As I’ve said elsewhere, I don’t use vice-grips very often when working, but they are handy in a pinch, so to speak (sorry).

Sockets, etc.

In a Dollar Store pencil case, I have my sockets, some hex bit sockets (3/8″ and 1/4″ stubbies), an elbow socket, spark plug socket, a couple of crowfoot sockets (again, particular to my bike), a spoke wrench, and said vice grips (aka locking pliers). I used to carry torx bits with the BMW, but since switching to Triumph, I now carry hex bits.

There’s some redundancy here, for sure. I probably don’t need both Allen keys and Allen sockets, but the keys don’t take up much space, and sometimes one tool is better than the other for a particular purpose.

I also carry:

  • Tubes. I know you can get by with one, the front, and cram it into the rear if needed, but I carry both a front and rear tube.
  • A chain breaker, spare links, and a master clip. I like the Motion Pro Chain breaker for on the road. It doesn’t do rivets like the DID one does, so I have both. I use the DID at home when changing my chain, but take the smaller Motion Pro one on the road with a clip master link.
  • A digital multimeter for troubleshooting electrical problems. Don’t ask me how to use it beyond the basics because I’m still learning The Dark Arts, but I take one nonetheless. I have the Neoteck NT8233D Pro, which is cheap enough to get wrecked while ADV riding but still decent enough quality and reasonable in size. I’ve considered getting a smart meter, but wondered if it would be reliable enough. Anyone have any experience with these?
  • An Arteck battery jumper.
Arteck battery jumper

Tools, sockets, tubes, multimeter, and chain tool all go in Giant Loop Possibles Pouches that attach to my crash bars at the front, helping to keep the bike balanced front to back.

In one of my panniers, I carry a plastic box that contains other items and spare parts (see image at top). The spare parts have gone with the sold BMW so need to be replenished, but they were a spare clutch cable, spare levers, and a spare water pump. If I were doing a RTW tour, I’d carry more spare parts than this, but so far my tours have been in North America, where parts are readily available.

Also in that container:

  • JB Weld Steel Stick, for fixing engine casing.
  • JB Weld Plastic bonder. I’ve use this to fix body panels and broken mirrors.
  • Self-sealing tape. This stuff is amazing and can seal a high-pressure hose.
  • High-temperature electrical tape for wrapping electrical wires.
  • An assortment of electrical connectors, including Posi-Lock, and heat shrink.
  • More hardware, more fuses, assorted copper crush washers, cotter pins, O-rings, velcro.
  • Various gauge wire
  • Gasket maker
  • An extra buckle for my Wolfman tank bag.

Finally, to round out my emergency preparedness, I carry a first-aid kit and bear spray. The kit I put together myself. I took a look at what you get in those prepared kits and it didn’t look like much for the cost, so I bought another trusty Dollar Store pencil case and filled it myself. I won’t go through all that I have in there, but will say the few things you won’t get in those commercial kits:

  • Carbon capsules. Eaten something that doesn’t agree with you? Take two, wait half an hour, take a dump, job done.
  • Arnica Montana. Homeopathy for any trauma to the body.
  • Robax. I have a vulnerable back, which tends to go at the most unexpected times.
  • Antihistamines. These are great for any inflammation from bee stings or allergic reactions.
  • Triple Action Polysporin

These items, along with the essentials I always carry on the bike, round out my touring kit. They say an ounce of prevention is worth a pound of cure, and all this stuff adds up to a quite a few pounds, so I think I’m covered. The challenge is always to find the right balance between taking what you need while keeping the weight down. I’d rather sacrifice some creature comforts like a camp chair, but I rarely sacrifice when it comes to tools and other items needed to keep the bike running (although the camp chair would come in handy if stranded in the middle of nowhere).

I’ll add one more item this winter to my tools: a satellite communicator. I’ve been meaning to get one for a while, and it really is silly to travel into remote areas without one. I’ve considered them all and almost bought a Garmin inReach Mini, but I’m leaning toward getting a Zoleo at half the price. Any thoughts, anyone? I don’t see what the Garmin does that the Zoleo cannot. Am I missing something?

Have I missed anything in my touring kit? As always, your kit is personal to you, so let me know in a comment if there’s something you carry that I do not. Like I said, I’m a self-confessed gear weanie, so I’m always interested in learning about a tool I have to buy. Buying gear is one of the ways we riders in the North get through the off-season, and yesterday I put the Tiger into storage, so I’m all ears.

I’ll wrap up this series in my next post on the navigation apps I use. If that interests you, click Follow and you’ll be notified of it and future posts when they are published.

The Essentials

In this fourth post on gear, I talk about the essential tools I carry on the bike.

Clockwise from top left: manufacturer’s toolkit with 17mm stubby hex drive and Motion Pro 3/8″ driver adapter, patch kit, Motion Pro Trail Tool, zip ties, Leatherman Wave+, rags, pump, siphon, jumper cables, latex gloves, Motion Pro Bead Breaker and spoon lever. Centre: OBD Link LX Bluetooth adapter, spare fuses and electrical joiners, MSR tow strap, Mastercrap allen key set.

It’s a constant balancing act: having enough tools to fix most problems but keeping it light. You don’t want to be burdened carrying around stuff you never use, but neither do you want to be stuck somewhere, knowing you’ve left the essential tool or part at home. And then there’s the question of what type of ride you are doing. If I’m riding with the club, I tend to take less, knowing there will be others with some tools and why double-up? If I’m riding solo into remote territory, I take the full works: my tool roll, bag of sockets and drivers, even a container of spare parts. But let’s begin with what is always on the bike, even if I’m just commuting to work 30 minutes along the highway. That’s what is shown in the above photo.

The most common problem you’re going to have is a flat tire, and with tubed tires, you have to be able to get both wheels off. So you’re going to need a big wrench of some kind. For the Beemer, I have the Motion Pro combo tire lever and 24mm socket. It’s a little small, but if you place it right on the nut so you can stand on it, you can remove even the rear lug nut at 73 ft/lbs torque. Into that I place the Motion Pro 3/8″ drive adapter, which enables the lever to drive 3/8″ sockets. For the Tiger, it’s the same set-up but Triumph have a 27mm rear lug nut. Fortunately, the manufacturer’s toolkit includes a wrench with integrated handle so I only needed to buy the corresponding drive adapter and a 19mm hex bit socket (to remove the Tiger’s front wheel).

The Tiger has a captive nut on the left side rear, but for the Beemer, you need a 19mm wrench, which is big and heavy, so I carry a crowfoot wrench for that which I can snap into a 3/8″ drive.

Apparently, the founder of Motion Pro was once asked what tool he would carry if he could only carry one, and he replied without hesitation the Trail Tool.

I carry the Motion Pro Bead Breaker and lever set. They’ve never let me down yet in breaking a bead, and double as levers. I know you can remove a tire with only two levers, but I indulge myself on this one and carry an extra, one of my favourite spoons from . . . you guessed it, Motion Pro.

As you can tell, I love Motion Pro tools. Apparently the founder of that company was once asked what tool he would carry if he could only carry one, and he replied without hesitation the Trail Tool. This thing is amazing. Best of all, it packs up so small, I tuck it under my seat. If you add a few bike specific sockets to it and eat your Wheaties, you can pretty much remove any fastener other than the wheel lug nuts.

I also carry a patch kit, of course, so I can repair the puncture once I get the tube out (Duh!).

Included in my essential toolkit is a Leatherman Wave+, just because THAT IS THE LAW if you are an ADV rider. I don’t use the saw tool to clear any trails, but it’s nice to have a good pair of pliers at all times, and the knives and screwdrivers are also handy in a pinch. I added the ratchet drive that came out a few years ago and a set of torx bits, since BMW are so crazy about torx bolts. Now that I’ve switched to the Tiger, I carry a cheap allen key set because Triumph are so crazy about hex bolts.

If a hand pump is good enough for Lyndon Poskitt to ride around the world for five years, it’s good enough for me.

Yes, that is a bicycle hand pump you see above. I owned the Stop & Go Mini Air Compressor that connects to your SAE battery lead, but it has a design flaw and broke. See RyanF9’s video about that; the nipple pulls out of the hose. Then I looked into the Cycle Pump by Best Rest Products, but at $145 US it would have been over 200 bawks with conversion and shipping! What now? For a pump?! I know it has a lifetime warranty, but at 59, I don’t have that long to live, so I go with the manual pump and muscles. If it’s good enough for Lyndon Poskitt to ride around the world for five years, it’s good enough for me. And beside the pump, you see some cut up socks that I use to protect my rims when I lever off a tire.

I carry a siphon hose, should I or someone else run out of gas, and little jumper cables. I did use these last week, as a matter of fact, on a club ride when someone had electrical problems, but honestly, the easiest way to start a bike with a dead battery is to push start it, assuming it doesn’t have a slipper clutch.

Something I’ve recently purchased is a Bluetooth ODB reader. If you are venturing into remote territory, you really should carry an ODB reader. This was never an option on the Beemer. The proprietary connector on it is round so doesn’t accept third-party readers, and the GS911 tool is something stupid like $900. But with the Tiger, I’ve bought ODB Link LX and use it with TuneECU, an app available for Windows (via USB cable) and Android. The entire kit came to about $150 and provides a lot of diagnostics, including error codes and info from all sensors. You can even use it to remap the ECU! I’ll be using it to balance my throttle body because it tells me that cylinder 3 is a little off. That might be why I was getting vibration in my throttle grip, although that has improved since replacing the air filter. Of course, I carry spare fuses and electrical connectors, and if all else fails, a tow strap.

You see everything above on a changing mat I also carry at all times. You may recognize the Cordura material from my previous post on camping gear in which I write about the bags I made. This is the leftover material and it provides a clean surface to work on while removing tires. You don’t really want to be grinding dirt into your bearings while you wrestle with the tire trailside.

With what is happening in Europe at the moment, those of us who enjoy the safety of civil society have all the more reason to be thankful.

On the Beemer, I use velcro straps to attach the levers and pump to the subframe, and the tow strap tucks in behind the ECU under the seat, with the jumpers and siphon tube on top in a Ziploc. The rest goes in the tail compartment. On the Tiger, there’s no compartment, but everything except the levers, changing mat, and rags goes under the seat. Unfortunately, try as I might, I haven’t found a way to make it all fit, so I have a small bag containing those remaining items in a side case. (Dollar Store pencil cases work well as cheap tool bags.) If I were doing any serious off-roading, which I’m not yet because I still have a road tire on the front, I’d carry those items in a knapsack and ride unencumbered without cases.

This is my set-up for day-to-day and club riding. In the next post, I’ll talk about what I carry when I tour, and then I’ll finish the series by talking about navigation apps. I know I had planned to do all in one, but this is getting long, so I’ll split the planned post up into three.

Am I missing something? How does your essential toolkit compare? Drop a comment below, and if you haven’t already, click Follow to receive word of new posts.

Here in Canada, it is Thanksgiving Monday, so I’ll wish my Canadian readers a happy Thanksgiving and everyone else happy riding and safe travels. With what is happening in Europe at the moment, those of us who enjoy the safety of civil society have all the more reason to be thankful.

Let’s Talk About Off-Road Gear

In this post, I describe the off-road gear that’s worked for me.

In an earlier post, I discussed my touring gear. In this one, I’ll cover the gear I use for off-road riding. As before, I’ll move from head to toe.

Helmet

I didn’t want to spend a lot of money on a secondary helmet I use only occasionally, so the LS2 Pioneer was in the right range at about $230. It’s also a long oval, so the right head shape for me. In fact, it might be a bit tight even for me; towards the end of a long day, I wish it were a little wider. But it has excellent ventilation, and this is the helmet I reach for on stinking hot days even for street riding. It has a large eye port that accommodates goggles, a drop-down sun visor, and most importantly, looks really cool!

LS2 Pioneer Quarterback

Upper Body

The foundation, literally, of my off-road gear is the Knox Venture Shirt. I decided to go with a soft compression suit for comfort and safety. I know many will say I should have gotten a roost protector or some hard-shell armour, but for the kind of riding I do, which is not motocross but trail riding, I thought that would be overkill.

The nice thing about the compression suit is that I can wear it under an off-road jersey on really hot days. Also, unlike a jacket, the armour stays in place when you have an off. Because I live about 45 minutes from dirt, I like to wear my jacket to the trail, then swap it for the jersey. This means I need to carry a tail bag or knapsack, but I just don’t feel entirely comfortable riding asphalt without a jacket; it’s like how I don’t feel comfortable driving without a seat belt on.

This product wasn’t available in Canada and I had to order it at Revzilla. It’s since been discontinued but you can still get a similar zip-up armoured shirt from Knox or Bohn. It uses the latest D30 (Knox calls it Microtek) technology in the armour, which is pliable when wearing and stiffens upon impact. I upgraded the back protector to the Dianese Pro G2 because I found the Knox pad did not provide enough ventilation.

Pro-Armor G2

I wear over that either an off-road jersey, as I said, or my Klim Traverse jacket.

Klim Traverse

The Traverse is just a shell, and it doesn’t come with any armour. It’s very light and comfortable, and it has big zipper vents under the arms. It’s Gore-Tex, which makes it a little hot, but I also use it for street riding when there’s risk of rain. And because it’s going to get muddy, it’s got to be black. This is my go-to does-it-all jacket, and I love it!

Lower Body

Klim Dakar Over the Boot Pants

For pants, I use the tried and true Klim Dakar pants, over the boot model. These aren’t waterproof, and the first time I toured in them I got caught in a shower and soon learned that. They just aren’t designed for that purpose. Instead, they have a dense, tough mesh that provides some airflow yet resists snags when you’re riding through brambles and thorny branches. There are also elastic accordion panels in key areas that provide a lot of stretch. Big zipper vents front and back enhance airflow, and there are the usual Klim angled zippered pockets for wallet and phone.

If you are going to be doing some serious off-roading—and that involves a lot of movement on the bike—these pants are designed for that. There are also some nice touches like the leather inseams on the lower pant leg where you are gripping the bike. A very durable, ventilated, stretchy pant for off-road riding. And of course, they come with Klim’s D30 armour in hips and knees.

If I’m going to be doing some technical riding, I pull on the Forcefield Sport Tube Knee Armour. Forcefield, like Knox, is also a company dedicated to just armour, so they do it right, and like the Knox shirt, these tubes, although a little uncomfortable, ensure that the armour stays in place when I go down.

Forcefield Sport Tube, the most comfortable knee armour I’ve found.

If I did more off-roading, I’d probably invest the big bucks in some knee braces. I’ve ridden with the Awesome Players Off-Road Club and Mark did some major damage to his knee a few years ago that got me and others thinking about that possibility. So far I’ve been lucky, but there might be knee braces in my future. For now, these knee pads are the best I’ve found. They won’t prevent torsional damage, but they will help with direct impact.

I use my SIDI Adventure 2 boots when off-roading. They are not motocross boots, but have adequate protection should you get a foot caught under the bike.

One piece of armour I’ve recently started using is wrist braces. I broke my thumb off-roading, and I’ve seen a few riding friends break their wrists recently, which got me wondering why riders don’t wear what skateboarders and snowboarders wear to prevent broken wrists. Apparently, it’s the most common snowboarding injury, for obvious reasons; it’s instinctive to put out your hand to break a fall.

Recently I started wearing EVS Wrist Braces. They are comfortable, and once I have them on, I forget I’m wearing them. Honestly. Okay, maybe you have to be off-roading to forget you have them on, but really, they do not encumber your movement on the bike, your grip on the handlebars, or your control of the levers. I had a friend break his wrist in a silly tip over when his hand hit a rock. It doesn’t take much with this fragile part of the body. They say the extremities are the most vulnerable, so if you off-road, consider picking up something like this and avoid losing six weeks of your season.

EVS Wrist Braces

Gloves

I took a tip from The Awesome Players and use a cheap pair of Mechanix gloves bought at Canadian Tire. You generally want a thin leather for the upmost feel on the controls, and mechanic’s gloves provide that dexterity, depending on the weight you choose. They also often have D30 on the back (for when that wrench slips and you were pushing instead of pulling) and are a fraction of the cost of dedicated motorcycle gloves. Go around Father’s Day and you will often see them on sale.

Mechanix Wear M-Pact Gloves. The motorcyclist in me likes these gloves; the English teacher hates the name.

Finally, the only other bit of gear that I use on but particularly off road is my Klim water bladder, or fuel cell, or hydration system, or Camelbak, or whatever you call it. It’s kind of a pain to carry water on your back. It’s heavy and hot, preventing airflow, but I’ve found that on hot days these inconveniences are worth avoiding the two-day headache I get if I don’t drink enough. When you are working hard in the heat, a sip from a water bottle every few hours during a rest stop is not enough. But if it’s cool and I can get away with it, I’ll put a Nalgene bottle of water in one of those canister holders on the back and ride unencumbered.

Klim Fuel Pak

This one is now discontinued and there are tons of others to choose from, including some with room for tools and first aid, if you want to get everything off the bike. Ryan F9 just did a good video comparing some backpacks that he particularly likes, and an upgrade might be in my future if I were to do a lot more off-roading than I currently do.

Summary

So as you can see, I’m pretty much a Klim guy. Their gear is expensive, but I’ve already said, you can get it on sale if you’re willing to watch and wait. I trust the quality of the materials and workmanship and the thought that’s gone into the design. Some will say I’m getting fooled by marketing and there is comparable gear available for a fraction of the cost, and they may be right. But with the fuel pak, for example, Klim’s is unusual in that the seams of the bladder are radio frequency sealed, so you can turn it completely inside-out to clean and dry. It’s for qualities such as that I’m willing to pay a premium price. And when the mouthpiece split and started to leak, Klim sent me a new one. Again, I am not sponsored by Klim; it’s just my go-to brand for gear.

One of the pains with dual sport riding is that you have to buy two sets of gear, one for road and one for off-road. It’s a significant investment up front, and buying all this stuff almost broke my marriage as well as the bank account. But take your time, get a little at a time, prioritizing, and look for discontinued and end-of-season sales. There are sports that are more expensive, I like to remind my wife, and there are more frivolous things to buy than protective gear.

Off-roading is not a dangerous sport. In fact, I got into it because I felt it is a way to challenge myself safely. There’s only so fast you can go on the street before it’s not safe, and the stakes there are a lot higher. Off roading does not involve high speeds—not the trail and dirt-road riding I do—but you can still get hurt playing in low-traction terrain with a 450 lb. bike. Investing in some good gear minimizes the risks and therefore increases the enjoyment of the ride.

This is what I use and have found works for me. What do you use? I’m a gear weenie so I’d love to hear what works for you. Please leave a comment or send me an email. In the next post, I’ll talk about the camping gear I use. If you are interested in moto-camping, click the Follow button and you’ll be notified of new posts.

Let’s Talk About Gear

The first in a series of posts on my riding gear. In this one, I discuss my touring gear.

I’ve had a few queries about the gear I use, usually from someone about to set out on a similar long tour, so I’ll devote a few blogs to the subject. This one is on what I wear when touring. In the next, I’ll talk about my off-roading gear. I’ll then cover my camping gear, and round out the series on navigation apps and other equipment I carry on the bike.

Let’s move from head to toe.

Helmet

The first time I bought a helmet, I had no idea what I was doing so relied on the salesperson. Unfortunately, she put me in the wrong helmet. She would put a helmet on me, wriggle it from side to side, say “Too big,” then put on a smaller one. Eventually she had me in an XS which, yeah, fit side to side, but within half an hour at my first class had created a pressure point that felt like a nail was slowly being driven down though the crown of my skull.

I’m surprised that head shape is not emphasized more than it is. It’s the starting point of finding the right helmet, but rarely talked about in reviews or explicitly mentioned in product descriptions. I have a long-oval-shaped head, so after a little research, I bought an Arai Signet-X as my touring helmet. I know there are cheaper helmets, but when one’s brains are at stake, I don’t mind paying a little more. I need all of what’s left of mine. The Arai brand speaks for itself, but I like that the helmet is Snell rated and comes with a Pinlock visor; I’ve never had any issues with fogging. I replaced the original visor before my big tour with the pro-shade visor, which is great, but I still find myself shading my eyes with my hand when riding directly into low sun. My next helmet will probably be an ADV helmet with a peak like the Aria X4. I know the peak will create wind noise but I suspect it’s worth it for the speeds I usually do.

Arai Signet-X

Helmets are extremely personal, so the only advice I can provide is to get one that feels right for you. Just bear in mind that, according to The Hurt Report, 1/5 of all impacts on a helmet in an accident are on the chin. And if you don’t know if you are a round, intermediate oval, or long oval, ask someone to take a photo of the top of your head. It will narrow your search and potentially save you a mistake like mine.

Neck Brace

A lot of people, even motorcyclists, ask me what that thing is around my neck. The neck brace was designed by Dr. Chris Leatt after he saw one too many riders die or become paralyzed from the neck down. There is a great interview with him on Adventure Rider Radio, if you’re interested in the origins. Otherwise, all you need to do is look at this independent study to be convinced that neck braces make a significant difference in preventing cervical spine injury and even death. It does that by stopping your helmet from rotating beyond what your neck can withstand and by transferring those forces down through your skeletal structure. Once I have it on (and properly fitted), I forget that I’m wearing it; it doesn’t obstruct my head movements at all, such as when I check my blind spot.

What about an air vest, you ask? Doesn’t it do the same? Well, yes and no. According to Dr. Leatt, there is a difference in safety, and I’m not going to try to explain it but will refer you again to the ARR episode in which they cover this subject, also speaking to the head of safety at the Dakar Rally, which recently switched from mandatory neck braces to air vests. (Incidentally, many riders were not happy with the switch.) I’m not going to advocate against air vests. I think if you are wearing either a brace or a vest, you’re ahead of the crowd. I personally decided against a vest because it’s another layer in the heat. And do they all have to be the same colour as piss after you’ve taken your Vitamin B complex?! Let’s have some air vests that look a little more cool, please.

Leatt STX neck brace

I bought the Leatt STX; the wider scapula wings do not conflict with back armour or an aero hump if you’re rockin’ full leathers on track days. Yeah, neck braces are pricey. There’s a lot of R&D that goes into them and I guess they are still a niche market, but like most of my gear, I bought it significantly reduced (like 50% off) once the particular model became discontinued. I now make it part of my everyday gear, even when commuting to work. I’d hate to have some bad luck on the day I leave it sitting at home.

Upper body

After some trial and error, I decided to go with a layering system when touring. For one, I didn’t have $1,500 for a Klim Badlands Pro jacket, and two, it weighs a ton. At first I bought a Klim Traverse jacket and tried that. It’s Gore-Tex, which is great because you don’t have to watch the skies but can ride through rain or shine uninterrupted. But Gore-Tex is hot! Yes, it wicks sweat, but it doesn’t allow much air flow. I was imagining the stifling-hot days of midsummer and decided to buy the best mesh jacket money can buy, and in my opinion, that is the Klim Marrakesh.

Klim Marrakesh

I have to admit, the Marrakesh is nothing to look at. Plain Jane. For some, that might be part of its appeal. Who wants to look like a Transformer character in an action animation? But put one on, and you will not want to wear another jacket again. It is my most comfortable riding jacket. Perhaps it’s my most comfortable jacket, period. That’s because the Marrakesh is all about the fabric: a 1000 denier 4-way-stretch mesh that breathes, stretches, and protects. Just a little hi-viz is all that is needed, and it has D30 armour in shoulders, elbows, and back. Okay, the armour is Level 1, not 2, but I decided to sacrifice a little on safety for the sake of comfort, with the compromise of upgrading the back protector to Level 2. I was very happy that I went with this jacket when I got into the midsummer heat that followed me all the way up to Dawson City.

Okay, it’s not waterproof, so I had to carry a rain outer layer in my tank bag. (Klim says the material is “hydrophobic,” which does not mean afraid of the water but water repellent.) There are plenty of good light rain jackets to choose from and they will all do the trick fairly inexpensively. I bought the Scott Ergonomic Pro DP Rain Jacket. This outer layer was helpful not just in the rain, of which I didn’t get much, but also when I just wanted something to break the wind.

Underneath, I had either a light athletic shirt if it was hot, or a merino wool base layer if it wasn’t. I also kept in my tank bag, or somewhere quick at hand, a good quality (800 fill) down vest. It saved me many times on and off the bike. It packs down into the breast zippered pocket to about the size of a mini football (remember those?) and did just the trick when I needed a little something under the jacket in addition to the merino wool base layer or around camp when the sun went down. Doing without the sleeves meant it packed down smaller, and if you keep the main organs warm, the extremities will be too. The Microtherm 2.0 down vest from Eddie Bauer has become my favourite piece of touring gear.

I had one more layer, if needed—a good quality polar fleece jacket. This also doubled as my pillow at night when folded or rolled. So between the different base layers, the fleece, the vest, and the wind/rain breaker, I had lots of options for the varying conditions; I could ride from single digits to 35C, rain or shine.

Lower Body

I decided to go with Klim Carlsbad pants, which are Gore-Tex, but you don’t get much airflow over the legs anyway, and who enjoys pulling on rain paints by the side of the road? It’s one thing to pull on a rain jacket and another to remove boots or deal with zippers halfway up your legs. The Carlsbad pants do have some decent venting, so when my nether regions feel a little hot, I just stand up on the bike for a few seconds to air them out, so to speak.

Klim Carlsbad pants

One of the reasons I like Klim is that the Gore-Tex is in the outer layer. With other brands, it may be an inner layer, so you may stay dry, but the clothing still gets soaked and, aside from being heavy, may take days to dry out completely. I also like the D30 armor (Level 2) in knees and hips (removable so you can wash the pants periodically), and the little Level 1 tail-bone protector.

Underneath, I wear soccer shorts with a mesh liner. They double as swimming trunks (to borrow vocabulary from my dad’s era), dry quickly, and, ah hem, provide some freedom for the boys. I never needed anything else, but I have worn thermal underwear (i.e. long johns) in early spring and late fall riding here in Canada.

So layering on top, vented Gore-Tex below. It was a good combination that worked for me.

I should add that I’m not sponsored by Klim (I wish!). I just find they make the best gear, and motorcycling is so important to me that I’m willing to pay a premium for their gear. But as I’ve said above, I never buy full price. I spend part of the off season researching and window shopping, and when the item I want goes on clearance, I pounce.

Boots

Like the pants, I went with Gore-Tex boots that I could ride in rain or shine. No dorky-looking overboots, no plastic bags inside the boots, no waterproof socks—just a really good pair of Gore-Tex adventure boots. For me, that is the SIDI Adventure 2 boots. These are amazing, and not just because they look so cool! (When I first showed them to my son, he said, “Dad, these are Batman boots.”)

SIDI Adventure 2 Gore-Tex Boots

Adventure riding is all about compromises, and a good quality adventure boot like these offers a balance of protection and comfort. I’ve had the bike come down on my foot in an off-roading off and literally walked away from it, and I’ve climbed mountains and walked for miles around town in relative comfort because they are hinged. I know some will say only a motocross boot provides adequate protection, but for touring, you need something you can walk in. You also need something with a good tread in case you have to push your bike out of mud. The buckle system of SIDI boots is unparalleled in the industry. If you have a particularly wide foot, you might want to look at the Alpinestar ADV boots; I know Lyndon Poskitt recently switched from SIDI to Alpinestar Toucans because he found his feet were a little cramped in the SIDIs. Like the helmet, boots are all about fitment, so not gear to buy online.

The SIDI Adventure 2’s are a premium item but will probably be the first and last pair I’ll ever buy; you can get the sole on these replaced by your local cobbler when they wear out.

Socks

While we are down here, let’s quickly talk about socks. I wore one pair pretty much the entire tour. They are actually not motorcycle gear, per se, but athletic compression socks from The Running Room here in Canada. Compression helps with blood circulation over those long days, and the height (over the calf) prevents chafing at the top of the boot. They are also anti-bacterial and wicking. There’s no point in wearing a Gore-Tex boot over a nylon sock.

For cold or wet weather, I have a pair of Pearly’s Knee-High Possum Socks. Possum, you ask? Yes, Pearly’s has managed to turn road-kill into a business. Each strand of possum fur apparently is hollow inside, creating a dead-air space that is unmatched for insulation and warmth with the exception of caribou hide, which shares the same property. If that were not enough, Pearly’s has woven it with merino wool, resulting in a wool that is pretty special. They are also a premium item and it took me a few years to pull the trigger on these babies, but there’s nothing more comfortable or warm for cold-weather riding.

Gloves

Finally, let’s move to the other extremity. It may surprise you, but I went minimalist with my gloves: only one pair for the entire tour. If a pair of deerskin gloves is good enough for Pirsig, who writes about them in Zen and the Art of Motorcycle Maintenance, they’re good enough for me. I have a pair of BMW Gore-Tex insulated gauntlet gloves for cold weather riding, and a short pair of Five Stunt gloves for summer riding, but for the Epic Adventure Tour, I took only a pair of Aerostitch Touchscreen Elkskin Ropers.

Aerostitch Elkskin Ropers

Why? Mostly for comfort. Like the Marrakesh jacket, once you put these on, you will know why. They are super soft and super comfortable, yet provide sufficient abrasion protection in an off. I have heated grips so rarely need an insulated glove, especially for summer touring, and Elkskin, unlike cowhide, can get wet without drying hard. In fact, on a hot day, if you wet them and wear them riding, they will shrink as they dry and mold to the shape of your hands on the grips. Neat.

Aerostitch do a good job with these gloves, still handmade in The USA. There’s touchscreen thread sewn into the thumb and fingertips of the first two fingers, and a visor squeegie on the thumb. They may feel a little bulky compared to the thin leather of other gloves, but the dexterity they provide is adequate for touring, and I suspect they will last for years and years. In fact, like wine and some women, they are one of those items that gets better with age.

Conclusion

Adventure touring requires that you be ready for all kinds of weather yet minimalist because you’ve only got so much room on the bike. This is what has worked for me. What are your preferences? Did I miss something? Let me know in a comment below what your favourite piece of touring gear is and why. I’m always ready to learn, and we Canadians need something to keep us occupied during the long off season.

Klondike Days

Continuing north, I explore Dawson City, then venture up The Dempster Highway.

When I was at Grasslands National Park in Saskatchewan, a neighbouring camper wandered over to examine the stickers on my panniers. He had a box on the back of his camper and also collected stickers, so we struck up a conversation about the places we’d been. He told me that he and his wife had been all over Canada and their two favourite places were Newfoundland and Yukon. I’d never been north, as in North, and I had a bucket list item to see Canadian tundra, so I was especially excited about entering Yukon. The trip so far had been amazing, but in many ways this felt like the climax of the tour.

I left Boya Provincial Park and soon entered Yukon. I was expecting the 3rd degree but in the end didn’t even need to show my vaccination passport. There was a roadside check and I had to fill out some paperwork but was soon on my way.

Nisutlin Bay Bridge

The Klondike Highway (2) is long and under considerable construction, so there were delays and some tricky deep dirt and mud in the bypasses that was warm-up for The Dempster later. Apparently they’ve been working on this road for longer than Transport Quebec has been rebuilding the Turcot Interchange, but I suspect the mafia aren’t behind these delays. It led to a long hot day in the saddle. The heat was following me all the way north and it was 32 degrees Celsius in Dawson City when I arrived late afternoon.

Fortunately, there was ice cream.

The first thing you notice about Dawson City are the colours. I suspect it has something to do with there being little light for major portions of the year, like putting up Christmas lights midwinter. Or perhaps residents know that tourism is a major part of their economy so why not make the buildings look nice. Lord Elgin High School, built in the 70s in my hometown of Burlington, Ontario, with its purple and orange colour scheme has nothing on this school in Dawson City.

Robert Service School in Dawson City

I crossed the mighty Yukon River on the free 24-hour ferry and set up camp right on the river at Yukon River Campground. I love the Territorial campgrounds! They are $12/night including firewood. Like the recreation sites in BC, they work on an honour system, with envelopes and a secure deposit box at the gate.

The forecast was clear so I decided to try sleeping in my hammock. That would turn out to be not a good idea. My sleeping bag is good down to 7 degrees Celsius plus I have a silk liner, but I was still cold. The relentless heat that had been following me across the country was finally abated at night in the Yukon. I also found it very difficult to get in and out of both bags (liner inside of bag) in the pitch dark for those nighttime bathroom breaks. I wish I had a video of me trying to climb back in. I tried climbing into the hammock and then inserting legs; I tried standing and pulling the sleeping bag up first and then climbing in. Both were comical, and I felt like I was in a Charlie Chaplin movie. The next night I slept comfortably in my little warm tent.

The next day I took a guided tour of Dawson City. Yukon Tourism provides tours with a guide in period garb and you get access to buildings that are normally locked to the public. We went into the local bank (one of the first in the region), the post office, the saloon, but for some reason not the brothel. I was surprised to find the same BC fir on the ceiling of the post office that is in my 1934-era home in Quebec. I guess that wood was freighted right across this country.

After the tour, I wandered up to Writers Lane, which contains the homes of three major Canadian writers—poet Robert Service, Pierre Berton, and Jack London—all a stone’s throw from each other.

I don’t know what is in the water in these parts, but there is some major literary talent up here. In fact, Maria Rainer Rilke and other writers like Robert Bly have written that the main ingredient for good writing is solitude, and there’s certainly plenty of that up here. There is also some pretty dramatic history that makes for good fiction.

The next day I pulled up stakes and headed up The Dempster Highway. I write that casually but in fact the decision of whether to try any of The Dempster had been on my mind the entire tour as I was traversing the country. My original plan, as anyone who has been following this blog knows, was to reach the Arctic Ocean at Tuktoyaktuk. I knew I didn’t have the right tires (Michelin Anakee Adventures) but thought I’d be okay at least for the bottom 70K into Tombstone Territorial Park if it was dry. Only once I was on The Dempster, all that was on my mind was “This isn’t so bad . . . I can do this . . . I wonder if it’s all like this? . . . I don’t want to have regrets that I didn’t try . . . you won’t be here again for some time . . . don’t be a wuss,” etc., looping through my brain like the daredevil “friend” who always gets you into trouble.

So when I got to Tombstone, the first thing I did was ask at the the Interpretive Centre if The Dempster is like this all the way up. The nice young ladies at the centre replied, “Have you received permission to enter Northwest Territories?” What now? I had been following the Covid restrictions on the Yukon border all winter because it was closed for much of it, but hadn’t checked NWT! Turns out strictly residents and people doing business were allowed in. The staff did encourage me, however, to go to Eagle Plains, about halfway, and from there I could ride another 45 minutes for the photo-op at the Arctic Circle sign.

Hmm . . . I had the rest of the day to mull that over, looking closely at the forecast. (If there were any rain, I’d be stuck and would have to wait for the highway to dry out, which could be days.) In the meantime, I decided to do a hike just north of the Interpretive Centre on Golden Sides Mountain. A short ride got me to a horse trail that leads to this spectacular view of four valleys—three in front, and one behind.

Feeling like I’m on top of the world.

That night in my tent I did the mileage calculations over and over again in my head. You need to have a range of at least 370 kilometres to get to Eagle Plains. Although I had not planned to go up The Dempster, I fortunately filled up at the base of it first. (One gets gas when one can in these parts.) My bike has a 17-litre tank and I have another couple of litres in bottles on the back, only one of those bottles was half full because I use it for my stove. So I had about 18.5 L and my bike gets 20-25 K/L, depending on the riding, so I calculated my worst case scenario and concluded it would be tight but I had enough to get me there. And in the end, I did. I cruised at 80 K/hr. and my fuel light came on about 60 K from Eagle Plains but I made it.

Click on any image to enlarge.

Once there, I treated myself to a steak at the restaurant at the lodge. I guess dining etiquette is a little relaxed in these parts because you can apparently play ball with your dog in the dining room here, and why not? I think you should be able to play ball with your dog in any dining room!

Eagle Plains Lodge. I like how the server casually steps over the rope toy.

There I met Mountain Man Mike. Mike is an avid outdoorsman with his own YouTube channel about his adventures in his truck-top camper. He told me about Rock River Campground just south of the NWT border so I decided I’d follow him up there for the night.

I headed up to the Arctic Circle sign. Mike was already there doing some filming and took the requisite photo. Thanks Mike!

I set up camp next to Mike and we had a nice campfire through the evening. At one point, about 10 o’clock at night, he was chopping wood and it was LOUD! I asked, “Isn’t it a bit late to be chopping wood?” He paused for a second, thought about it, then said simply, “It’s expected.” Well, it’s not like Security is going to come tell you it’s quiet time.

Washing my cookware the next morning in the turquoise Rock River. Strange to see the water flowing north.

Now there are a few places on Earth where you especially don’t want your bike not to start, and halfway up The Dempster is one of them. I had put 20W/50 oil in this bike in North Van when the heat had been relentless, but now it was about 2 degrees Celsius and my bike wouldn’t start. It doesn’t like 20W/50 in cold weather; the flywheel is just too big to crank over fast enough.

Mike could hear what was going on and wasn’t surprised when I slunk over to ask him for a push. He’s fortunately over 200 lbs. and very fit, but it even took him a few tries to get me going. Thanks again, Mike. You were a Godsend!

It was drizzling as I pulled out of Rock River so I high-tailed it down into lower climate where there was sun. A quick gas stop in Eagle Plains and I was on my way again.

I saw Mike only one more time, somewhere down The Dempster. He’d stopped to take some drone footage. After saying our good-byes, I pushed on and was soon back at Yukon River Campground for one night, exhausted but happy that I’d made it as far as legally possible. I didn’t make it to the Arctic Ocean, but it’s not going anywhere soon, and I’ll return to complete The Dempster when the time is right.

I’m glad I risked it. The geography up there is nothing like I’d ever experienced. The area is vast, remote, and pristine, untouched and unblemished by humans. And in that rawness is a natural beauty that is unparalleled by any park or nature reserve I’ve visited. There are very few places on Earth like it, and those are quickly dwindling. I hope that when I return, it will be as I remember it.

This marked the turnaround point of my tour and now I started heading back home. I had to be in Montreal in a little over a week for work. But first Bigby needed an oil change, so I went to Whitehorse, where I knew there is a Canadian Tire. Unfortunately, the large and excellent Robert Service Campground was closed so I ended up at High Country RV Park.

Note scavenged box underneath with plastic liner to catch the oil. You gotta do what ya gotta do. The dirty oil did end up back in containers and dropped off at the local Can Tire.

I found a private corner of the crowded camp and did an oil change. Now Bigby was ready to make the big sprint home across the country.

Trip Planning: Secondary Decisions

Talus Lake, Tombstone National Park. Photo credit: Travel Yukon

In my first post on planning my big trip this summer, I discussed the essence of the route, some preliminary considerations regarding how much dirt to ride, and got some gear to help with navigation and heat. In this one, I make a significant change in the route, start getting fit for long days in the saddle, and prep the bike for the start of season.

Change of Plans

The initial plan was to ride from Montreal to Calgary, where I’d meet up with my wife, and then we’d ride together through southern BC, including Vancouver Island. After that, I was going to head off south solo down the west coast to California and make my way back through The United States. However, after watching Covid-19 numbers in The United States climb through the winter and political tensions cause rioting on both sides of the country, I decided that perhaps now is not the best time to be travelling in The States. As it turns out, our American friends are doing better now with their vaccination program than we are, and the political tensions have calmed, but I still have concerns about the sharp rise in violent crime rates in the US. The causes of that increase are currently being debated, but no one can deny the alarming spike.

I don’t like to get political here, but there’s nothing more political than personal safety. The Grand Canyon is not going anywhere soon, and besides, I keep hearing on Adventure Rider Radio that you don’t need to leave your home country to have an adventure, especially a country as big as Canada. So while our American friends are sorting out a few things, I’ll take the opportunity to explore and discover fully the country I’ve proudly called home my entire life. When I hit the Pacific Ocean, instead of turning south, I’m heading north. The Far North.

With the US no longer in the picture, the technical riding of the BDRs and TAT was out of the equation. Most of my trip would be on the pavement, so I went looking for a new goal to challenge myself and decided to try to make it up to Tuktoyaktuk, NWT, as my final destination. A solo trip up to the Arctic Ocean seems like a worthy goal.

I’ve been trying to figure out why it’s so important to me to have that kind of a crazy goal, as if crossing the country is not enough of a challenge. It’s hard to explain to my wife and others what would motivate me to ride solo into that remote wilderness. I didn’t even understand it myself, until I read recently something by Jordan Peterson that provided an answer. In his best-selling book 12 Rules for Life: An Antidote to Chaos, in the chapter on Rule 11, Do Not Bother Children When They Are Skateboarding, Peterson makes a case for allowing our children to risk pushing their limits, whether it’s athletically in play or otherwise. Early in the chapter, he writes:

“When untrammeled—and encouraged—we prefer to live on the edge. There, we can still be both confident in our experience and confronting the chaos that helps us develop. We’re hard-wired, for that reason, to enjoy risk (some of us more than others). We feel invigorated and excited when we work to optimize our future performance, while playing in the present. Otherwise we lumber around, sloth-like, unconscious, unformed and careless. Overprotected, we will fail when something dangerous, unexpected and full of opportunity suddenly makes its appearance, as it inevitably will” (287).

In other words, I like a challenge! Yes, there is risk involved, and I often find myself strangely reluctant to leave on one of these adventures because I am literally leaving the comfort of my home and increasing my stress level. There’s a mild anxiety that descends on me, and part of that stems from going solo. But anxiety is just another shade of excitement if you frame it differently, and once I’m on the road, that’s how it appears to me. (I’m referring to mild anxiety, to be clear, not the debilitating kind that afflicts some people.) It’s akin to the performance anxiety of a big game or a race; once the game or race has started, it’s all fun, even the tough bits. And I haven’t even mentioned yet the rewards of the ride, which in this case will include seeing the tundra, the northern lights, and the Yukon Mountain Ranges—all firsts for me. Who knows what else the trip will bring? 

Anxiety is just another shade of excitement if you frame it differently.

I have to add that this is not foolhardy behaviour. I’ve been preparing for this kind of trip since I started riding in 2015—developing technical riding skills, learning about my bike, and getting the right gear (which in this case includes bear spray). Heck, I’ve even been teaching myself this winter the 5 best knots to add to my bushcraft. Maybe Peterson could have simply said: the antidote to chaos is preparation.

Now I’m just waiting to see if the territorial borders will open. Currently, anyone crossing into the Yukon and the Northwest Territories has to self-isolate for two weeks. I haven’t had my first vaccination yet, but at 57 years old, I’m next in line, and our fair Prime Minister has promised that all Canadians will be vaccinated by July 1st, so I’m betting that they will open. This might be a game-time decision near the end of July, but I’ll ride up to northern British Columbia and see how far I can get.

Getting Fit

Sitting on a motorcycle all day is like sitting on a stool all day, unless you have a backrest (which my bike doesn’t) or have loaded the pillion seat with bags (which I can’t, leaving room for my wife when she joins me). Usually this time of year I’d be swimming and running and playing indoor soccer, but Covid has killed all that, leaving me pretty sedentary. I realized I had to get going again, so on March 1st my wife and I made a mutual pledge to do 30 minutes of exercise 5 days a week. So far it’s been working out (ha ha, bad pun) and we are starting to feel the effects.

For me, the key to exercising regularly is finding the right activity at the right time of day. Those two elements are the combination that unlocks the door to fitness. We decided that 10:30 a.m. was the best time for us. We’ve had our coffees and have done a little work at the computer and are ready for a break, especially one that involves moving. And since I’m mostly interested in core strength and cardio fitness, I’m alternating between Pilates and running every other day. This way, each muscle group gets a recovery day between workouts.

My wife alternates between Pilates and her stationary bike, so every other day we do Pilates together. There’s a saying in the Pilates world: do 10 workouts and you’ll feel better, 20 and you’ll look better, and 30 to have a completely new body. I’m not sure that last one is possible at our age but we certainly are feeling better after our first 10. We do a very simple routine using only a yoga mat. If you want to improve your core strength and flexibility, check out Pilates. It has cured my lower back issues and gives me better overall body awareness and posture.

I’ve had some foot issues so the running has been difficult, but a new, wider, pair of running shoes has fixed that and I’m literally on the road to improved cardio. Come April, I’ll move on to some strength training, particularly upper body, and I’m working hard to rehabilitate my thumb that was injured last fall in a little off.

Prepping the Bike

Our riding season here in Quebec officially kicked off on March 15th. I wasn’t on the road that day, but some unseasonably warm weather has allowed me to get out to the shed a little early and do what I needed to do to get the bike road-ready. This is the first year I haven’t done something major, like change my shock, chain, sprockets, brake lines, or even fluids, and it’s been nice! For once, a few little jobs and Bigby is ready to ride.

itcontroller

I mounted the Carpe Iter Controller. There wasn’t room on my handlebar for it so I had to make a little bracket that mounts on the mirror stem. I also upgraded my navigation software (OsmAnd, Locus Maps, Kurviger) to the pro versions and updated my maps. I added a little guard for my rear brake master cylinder (thanks Rick / Kildala), and flipped my auxiliary lights on the mounting bracket to get them a little lower and add separation from the main headlamp—all easy stuff and I went for my first ride last Tuesday. I even figured out a workaround for my tank bag harness that was damaging the plastics, and I’m really happy to have my Wolfman Explorer Lite tankbag back.

Also in that other post, I mentioned the product AT-205 Re-Seal I was going to add to my oil to recondition the engine seals. I’m always nervous about adding anything to the engine oil so thought I’d contact the company first, just to be sure. Good thing I did! Turns out they do not recommend it in applications that involve a wet clutch. I’ll have to make do with the bike as is, keeping an eye on the oil level throughout the tour, and switching to a 20W/50 once we get into the warmer weather.

Good to Go

I haven’t done much specific route planning yet, but with my departure date roughly three months away that is about to kick into high gear. I’m reading ride reports on ADVRider, but if you have recommendations, please let me know. In particular, I’m looking for good campgrounds, must-see attractions, must-ride roads, and good restaurants and accommodations through southern BC and Vancouver Island, since my wife and I will not be camping much while on the road. Feel free to drop them in the comments section below or send me an email through the Contact page.

Enjoy the spring riding.