Port Joli Beach at Thomas Raddall Provincial Park, Nova Scotia
The annual wistful synopsis of the summer.
Here we are, at the beginning of autumn. There’s still plenty of good riding left in the season, but the days of summer vacation and touring are already behind us. As usual, I haven’t posted much over the summer since I’ve been busy riding, reading, travelling, troubleshooting, and generally staying away from sitting at a computer, the occupational hazard of my job.
This summer I tried to balance travelling and resting, my two favourite activities. Okay, resting isn’t really an activity, but napping is. In the past, I did a little too much of the former and not enough of the latter and ended up going back to work in the fall not feeling rested. This year, I did a smattering of shorter trips, one longer trip, and a whole lot of resting. I’m a year away from retirement so consider this good practice for the future.
My eldest sister, Susan, and my dad, 96 years young!
The summer began, as it usually does, with La Classique Moto Fest, the big ADV rally here in Quebec held each year over the May long weekend. If you missed my write-up about that event, you can find it here. Then when I was free and clear of all work duties, I made a trip back to Ontario to visit family, and in particular my dad for his birthday. He’s now 96 years old, so I like to get back to see him at least a few times a year. That was followed by my annual literary pilgrimage with my writer friend, Harold. We usually visit the gravesite or home of a famous writer, and this year we planned to get to Orillia and Stephen Leacock’s house. We stopped in Kawartha Lakes, Ontario, in Lanark County at Silent Lake Provincial Park and never made it much further. The historic residence of the author of the enduring Canadian classic Sunshine Sketches of a Little Town will have to wait another year.
While I was there, I scouted the campground for a return trip with some riding buddies the following week. We stayed two nights and rode most of The Timber Trail. I did that Highlands loop solo last fall and, although a few of the boys were on street bikes this time, I knew most of the dirt and gravel roads would not pose them any problems. Yes, even an R1200RT and a Honda ST can do much of this loop, albeit slowly and when dry. It’s not only big bike but also street bike friendly.
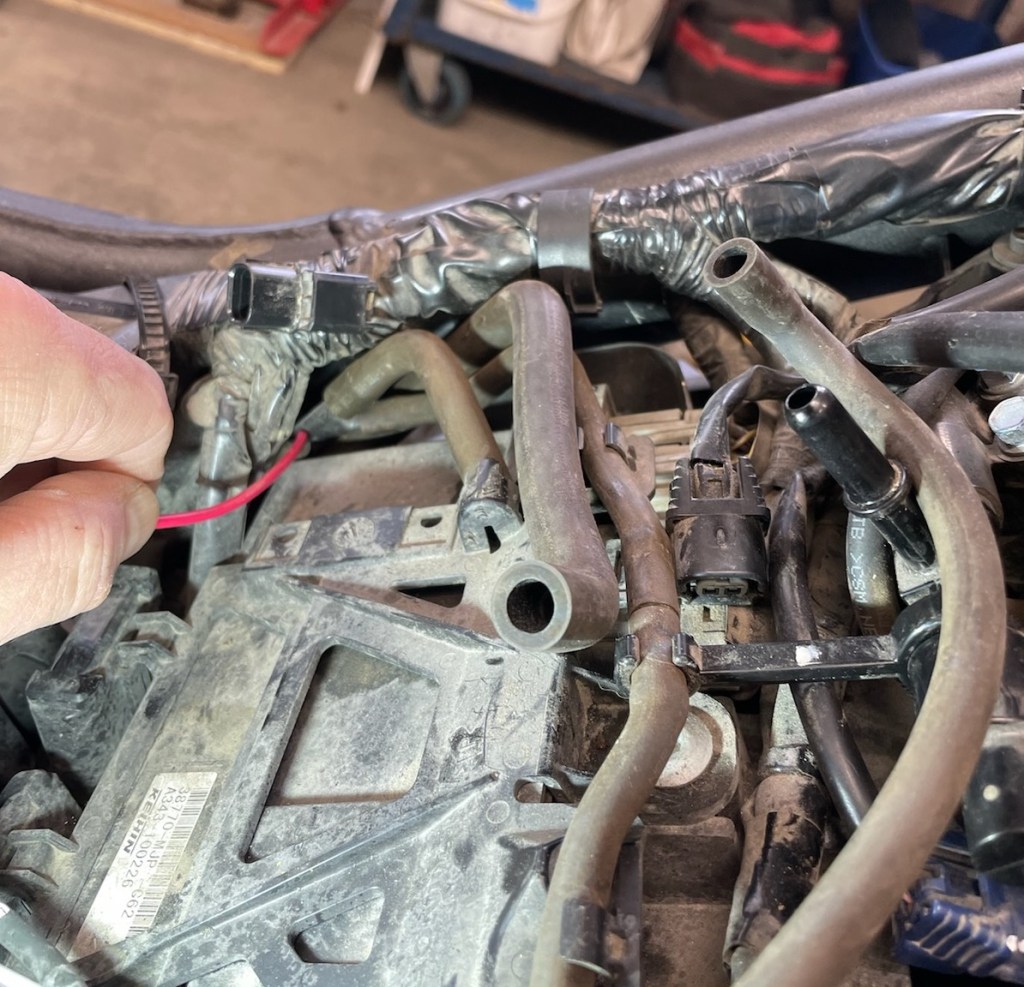
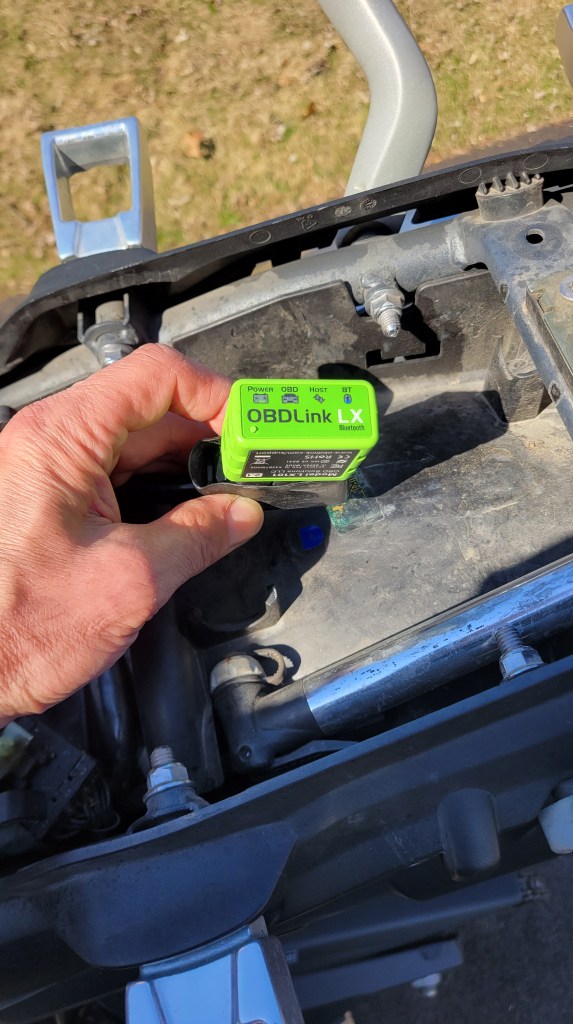
That was the shakedown ride for my summer tour and a good time to find out that I had some intermittent starting issues. After stopping for a short break, my bike wouldn’t crank. At first I thought it was a switch (sidestand, clutch, starter?), then a relay. Once home, I changed the starter relay under the battery, then the battery. I ended up doing my tour without incident but had more starting issues once back home. After more troubleshooting, I think I’ve traced the problem to a loose wire into the fuel pump relay. Perhaps it was the relay itself, and I’m still not 100% sure I’ve solved it, but for now the bike is starting fine. You gotta love intermittent electrical issues.
Looking for a short in the wiring harness.
I’ll be writing about my tour over the winter months when I’m off the road, but suffice to say it was one week of the Trans Quebec Trail from Magog to Rimouski, and one week doing The Lighthouse Route that follows the southern and western shores of Nova Scotia. Watch for those posts soon and click Follow if you want notification when they’re posted.
Crossing the Laurentian Mountains on the TQT south of Quebec City.
The summer was capped by another short trip with the boys to the Calabogie, Ontario, area to ride The Pickaxe Loop. I don’t take many photos on these group trips because who wants to ask four guys to stop while you snap a few photos, but here’s one from our final night at Black Donald Tent and Trailer Park, cooking under a tarp in the rain.
L to R: Danny (Triumph Scrambler 1200XE), Steve (Honda ST), Mike (BMW 1250GS), and Riley (Norden 901).
Amid it all, I’ve been dealing with an oil consumption issue with the Tiger. If you read my post on the piston soak, you will know that I had a lot of carbon in the cylinders and I think the oil retention ring was stuck. I used Seafoam and a water treatment to clear a lot of it out in June and the bike seemed fixed. But as the summer progressed, it started to burn oil again—not as much as before, but still about 400 mL over 1,200K (745 miles) on the Pickaxe trip.
The moral of the story is don’t mess with OEM set-up on the engine!
Just the other day I was doing some research on what causes carbon build-up and something caught my attention: “When it comes to the mechanical operation of the engine, air to fuel ratio inconsistencies also plays [sic] a key part in the development of carbon buildup.” Just the mention of air to fuel ratios got me thinking about my Unifilter prefilter that was an early mod I did on the bike. The OEM air filter is under the fuel tank and so kind of a PITA to access. The prefilter replaces the snorkel under the seat and not only reportedly catches 95% of the dirt but is easy to remove and service.
I remember having a nagging concern when I installed this. Don’t I now have two air filters, and what might that do to the air-fuel ratio? But it’s a popular mod and so I dismissed the concern, reassuring myself that the ECU would adjust, as it does for temperature and altitude. Now I was returning to that mod and suspicious it was the cause of my carbon build-up. Isn’t running the prefilter essentially like running a dirty main filter? A quick Google search indicated that, indeed, running a dirty air filter can lead to carbon build-up!
So last weekend I removed the prefilter and reinstalled the original snorkel. The bike seems to start faster, idle smoother, run better, and have more power. I now think the bike was choked all this time! The moral of the story is don’t mess with OEM set-up on the engine! I’m now completely stock with a Triumph air filter and a Triumph oil filter. I’ll be doing another piston soak and engine clean toward the end of the season, and in the meantime I’m adding Seafoam as a fuel additive to start the cleansing. I want to start next season with a clean engine in the hope that it will stay clean.
With the bike running great, I’m looking forward all the more to the fall riding. If there’s a silver lining to the end of summer, it’s the cool, beautiful riding of the autumn, especially here in Canada when the leaves begin to turn colour. I’ll be leading a club ride down through the Eastern Townships at the end of September during the height of the fall colours, and the following week I’ll be participating in the appropriately-named Fall Colours Ride in Barry’s Bay, hosted by Rally Connex. 10 guys in the same cabin is surely going to be an adventure in itself.
How did you spend your summer? Drop a comment below, or at least tell us your favourite destination. What was your best moto moment? Unfortunately, I don’t think WordPress permits photos, but you can always try, or post a link to your own online photo host.
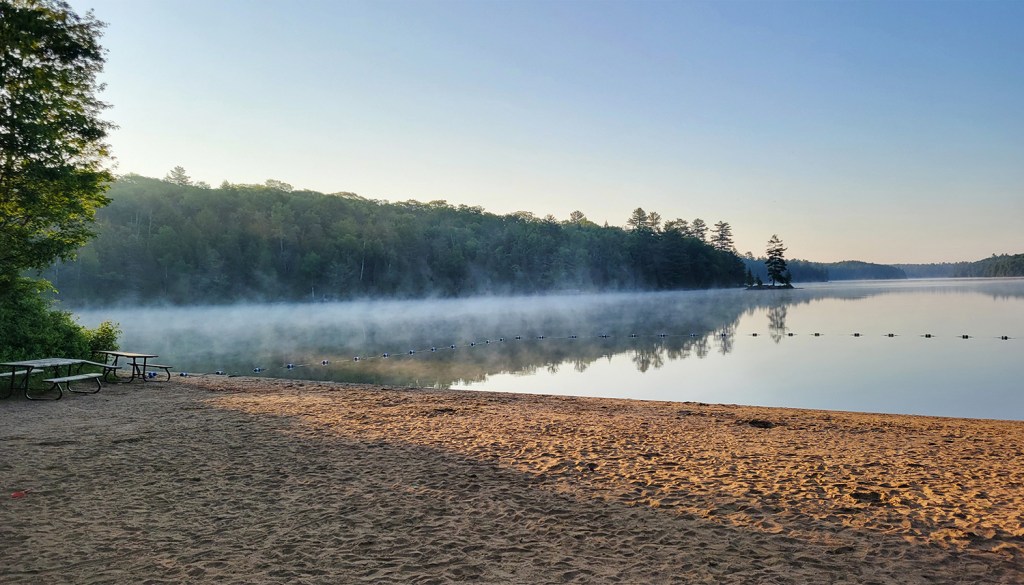
Silent Lake at dawn
Lots more to come in the months ahead, but for now, let’s get out there and enjoy the autumn riding while we still can.
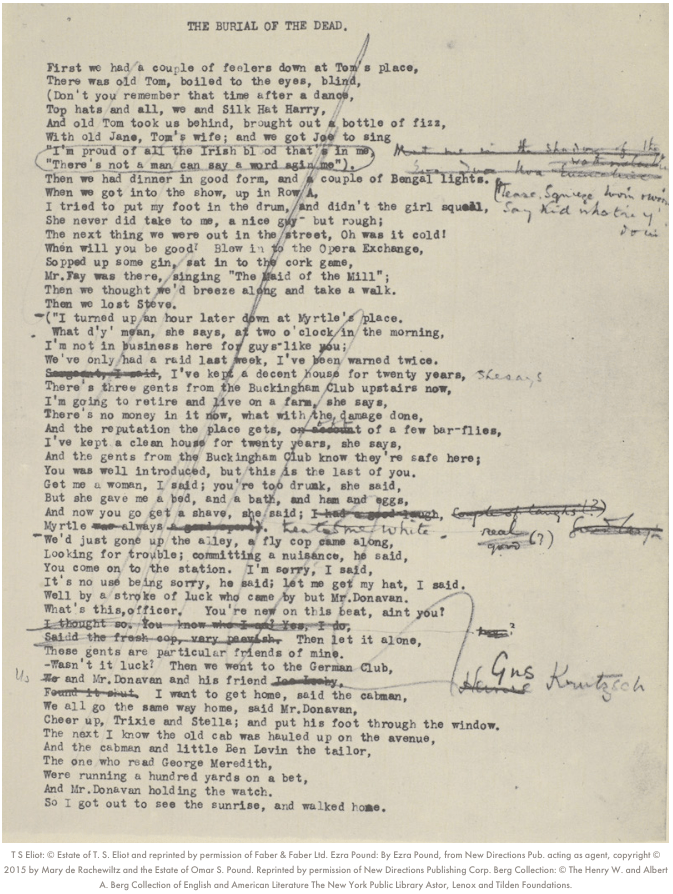
“April is the cruelest month,” T. S. Eliot wrote as the opening line of his iconic poem “The Wasteland” (1922). Clearly, he had never experienced a Canadian March. As I write this on March 25th, we are 10 days into the new riding season, yet no one is riding. It’s 2C (36F) and the sky is a slab of grey slate pissing cold rain that turns to ice in patches on the treacherous sidewalks. Brown, dirty snow still sits at the sides of the roads and in patches on lawns, slowly melting over weeks to expose winter garbage and dog shit lying underneath, and the grass, when it finally pokes through, isn’t really grass but mud and last year’s soggy, decaying leaves. Eliot’s poem captures postwar disillusionment and his nervous disorder, but it might equally describe the mood of Canadian bikers in late March.
Nevertheless, we continue to plan and prepare for the season to come in a kind of blind faith. Yesterday I did a practice pack of my gear. I’m trying a new gear set-up and have the ambitious plan of eliminating my tank bag, tail duffle bag, and hydration knapsack. I want to ride this year without the extra weight either on the bike or my back. To do that, I had to be as ruthless as Ezra Pound was to Eliot’s manuscript.
Gear
I replaced my tent and mattress with a hammock and bug net. I’ll be touring midsummer so I’m going without a hammock underquilt. I also swapped my MSR Dragonfly stove and 2L Billy pot for an Odoland isobutane stove and pot, but I’ve added to my kit a Bushbox twig stove. I’m not sure which will become my primary stove, but the idea is to use the twig stove when dry wood is readily available and the isobutane when it’s not. And as a back-up to the back-up, just for its simplicity and ease, I’ve also picked up a Trangia alcohol burner. This fits nicely inside the Bushbox and can burn isopropyl alcohol, available at any pharmacy. Can you tell I’m nervous about giving up my Dragonfly?
My camping mates will be happy to know that I finally retired my toy hardware store hatchet and bought a Gränsfors Bruk Wildlife Hatchet. I don’t know why I suffered as long as I did. I’ll be using this around camp to prepare firewood and split firewood into twigs for the Bushbox. I’ll be travelling solo so edited out of my kit the second plate, cup, and cutlery, resulting in my cookware now being considerably smaller and lighter.
When I did The Timber Trail at the very end of last season, I found my Wolfman Expedition tank bag too big and heavy, making the Tiger more top-heavy at slow speed than it already is. It also worked better on the 650GS with the fuel cap on the side of the bike and not under the bag. It would have been possible to move the essentials to my hydration knapsack, but I want to eliminate it too. Water is heavy and the knapsack restricts airflow through a jacket. Mine also interferes with my neck brace. (If it goes under the brace, the brace sits too high; if it goes over the brace, the brace digs into my shoulders from the extra weight.) Instead, I’m going to try a fanny bag with only a few essentials from the tank bag: aux port to USB adapter, some electrical cords, a Leatherman Wave, tire pressure gauge, 8mm socket and micro-ratchet for my pre-load adjuster, and my monocular. I think fanny bags are nerdy, especially if worn in the front (i.e. the scrotum bag), and I wouldn’t be caught dead in one anywhere but on the trail, but one might be the answer to staying cool and unencumbered on the bike. If they find me dead somewhere on a trail this summer, at least my reasons for wearing one are now known.
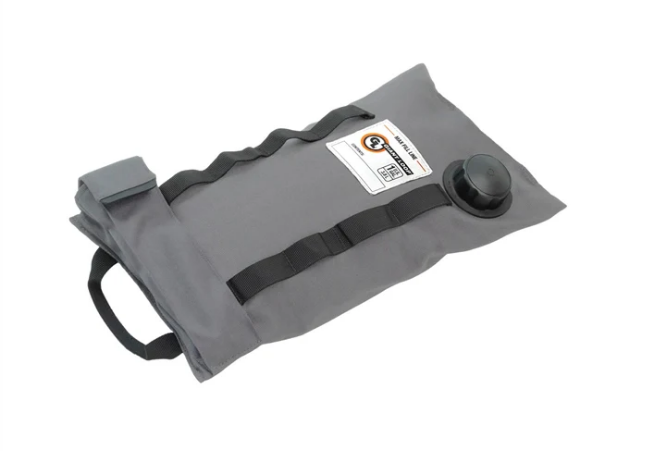
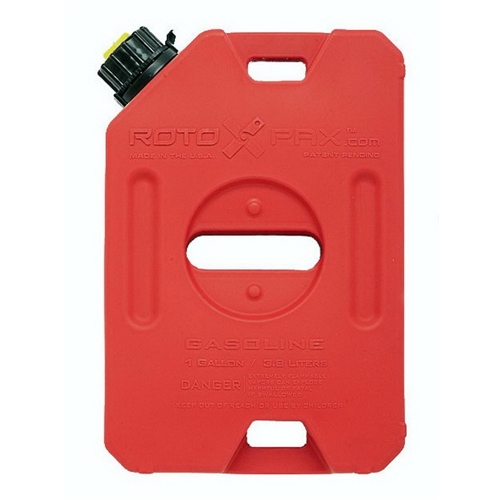
As for water, since I won’t be needing to bring a fuel bottle for the Dragonfly stove, my bottle holster is free. I’ve moved it from the back of a pannier to the front left side and will try the Simple Modern Insulated Tumbler with Straw and Lid for sips when I can. It’s only 28 mL so I’ll also be carrying an MSR 4L Dromedary to refill it as needed. Marilyn and I took the latter through Newfoundland but never used it much, so I was ready to retire it from my kit, but I’ll be doing some pretty remote riding midsummer so will strap the Dromedary onto the bike along with a 1G Giant Loop Armdillo bag to extend my range to around 400 km (~250 miles).
Giant Loop Armadillo Bag
After the practice pack last night, I can confidently say that almost everything fits into my Enduristan Monsoon Evo bags. I’ve added two Enduristan Fender Bags onto my panniers, into each fits perfectly a 10×10 Aquafest Safari Tarp. (I’ll be taking two—one for over the hammock, one for shelter.) My tools and tubes, as always, will go in two Giant Loop Possible Pouches that I strap to the crash bars at the front of the bike. I say “almost” because I will still have to have a small Enduristan tail bag on the rack at the back for my rain jacket, windbreaker, and down vest—my layering system to deal with temperature changes. I can live with that.
Finally, I’ve added to my gear to prepare for the risks of off-roading. I have a Knox compression suit and recently purchased the chest protector upgrade that doesn’t come standard with the shirt.
Knox Venture ShirtChest protector upgrade
I swapped out Level 1 armour for Level 2. I also recently replaced my ageing Arai Signet-Q helmet with a Contour-X. I know, I know: why didn’t I get an XD-5 or similar adventure helmet? Well, I already have an adventure helmet, the LS2 Pioneer, and this will be my touring helmet. The peak causes wind noise and I was looking for the most comfortable, quietest, safest helmet on the market, and the Contour-X fits me like a glove.
Route
I’m sorry, my American friends, but I’ve decided that I can’t do this summer my planned ride of The Blue Ridge Parkway south and the BDR’s coming back. This will be the 3rd time I’ve postponed this ride, and I don’t do it lightly. I was looking forward to exploring the Appalachian Mountains and challenging myself on the MABDR and especially NEBDR, but after much deliberation, I’ve decided to join my fellow Canadians and stay north of the border this summer, that is, the “artificially drawn border.”
What makes this decision especially difficult is that I have always found Americans extremely friendly and helpful, and I recognize the difference between Americans and their government. But lately we Canadians have been hearing of visitors having their phones confiscated at the border and searched, and some Canadians detained, and even some anti-Canadian sentiment from certain states that shall remain unnamed, so I don’t feel entirely safe to visit while tensions are this high. I’ll be travelling solo in remote regions so am especially vulnerable. It’s really unfortunate that it’s come to this and I hope our good relationship can be restored quickly so I can complete that bucket list ride.
Instead, I’ve decided to do some of the Trans Quebec Trail. This is a system of trails throughout Quebec. Initially I was going to do a section of the TCAT (Trans Canada Adventure Trail) called The Forest that runs from Baie Comeau, Quebec, to Kenora, Ontario, but that gps track isn’t always kept up to date. My Calabogie Misadventure ride a few years ago was largely a result of the track not being kept current; my riding buddy and I didn’t know that a bridge was out and were forced back out onto a gnarly hydro line. The big benefit of the TQT is that there is an accompanying app that is user-submitted; if there’s a problem on the track, one can immediately report it with the press of a button. The app also shows campgrounds, gas, groceries, attractions and more, so I feel I can ride with a lot less stress and simply explore, as I like to do, finding the essentials when needed. Thanks to Marc Chartrand and his team for putting this route and app together.
I plan to pick up the track south of Montreal and follow it east to Rimouski and beyond, perhaps into the Gaspé interior. Then I’ll cross the St. Lawrence River (uh, by ferry) from Matane to Baie Comeau and come back by the north shore, up through northern Quebec with some of the most remote riding I’ve ever done. It loops over Lac Saint Jean, where Marilyn and I visited last fall, but on dirt roads this time. Apparently about 90% of the route is dirt and gravel. You can see the entire trail and photos at the STQT Facebook page. I don’t know how long this will take me and I don’t have a definite schedule, but that’s the kind of adventure riding I like. With the app and riding solo, I can play it by ear and simply explore at my own pace. Teachers’ benefits.
Training
To prepare for the off-road element of this tour, I’ve decided to do some more instruction this summer. When I got my licence in 2016, I did some classes to get a Level 1 foundation, but it’s been several years since and I’m ready to improve on those skills. I’m going to look into the Level 2 class with Académie Ridaventure. Their Level 2 class covers such things as water crossings, clearing obstacles (logs, large rocks), and brake slides. I think it’s always good to develop your skills, and I feel I’ve plateaued recently.
I hope to do a semi-private Level 2 class.
“Ah spring!”
There’s another poem I know about spring. Unlike Eliot’s 434-line masterpiece, this one contains two words: “Ah spring!” I know it by heart. It’s been a brutal winter with record snowfall in Montreal and frigid temperatures for months. No January thaw this year. But we’ve finally arrived at the cusp of spring and the riding season.
If there’s one positive of the off-season, it’s the opportunity to “reculer pour mieux sauter,” as D.H. Lawrence said, step back to jump forward. It’s a time to dream and plan for adventures to come. I’m ready; the bike is ready. It may not be the cross-country tour I did in 2021, but in many ways it feels like this tour will be my most ambitious and the one I’ve been working towards since I began riding in 2015. It’s the kind of ADV remote touring I wanted to do on the cross-Canada tour but didn’t have the time. I discovered then that this country is so large that you have to explore it one province at a time, and I guess I’ll start with the one I’ve called home now for 35 years.
What are your plans for the season? What changes have you made to your bike and kit to prepare? Drop a comment below. Whether you are an armchair adventurer or a seasoned traveller, despite what Nature presents us today, it really is a special time of year. Keep the faith, my motorcycle friends: we’re almost there.
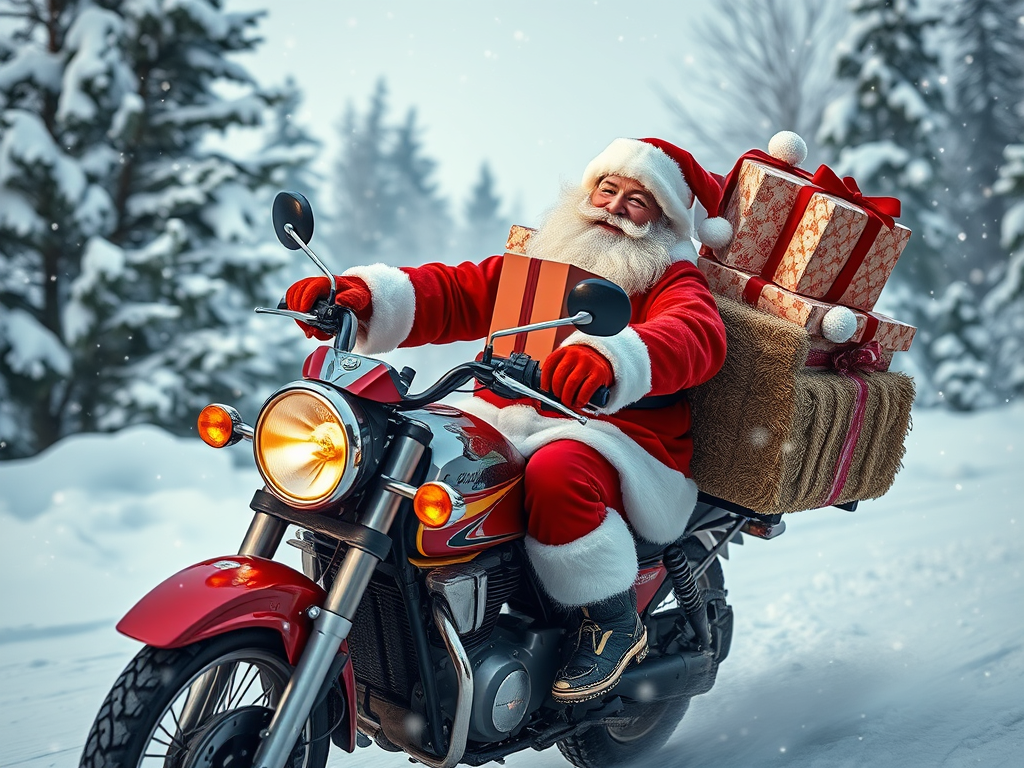
This Christmas I ask for only one thing: that my students stop cheating using AI. It gobbles up my time preparing for the meetings and zaps my morale when they deny it all the way through the appeal process.
Accordingly, I’ve begun this post with an AI-generated image. Whatever generator WordPress uses apparently doesn’t know what an adventure motorcycle is, just as ChatGPT doesn’t really know how to write an insightful analysis of a short story. In both cases—looking at the photo and the essay—it’s pretty obvious they’re fake. What is that square thing on Santa’s lap? Is it supposed to be a present, and if so, why is it on his lap when he’s got all that room on the . . . hay bale? And somebody needs to tell Santa that Sorels don’t provide much foot protection when he lowsides in the snow.
We live in a world where the real and the natural occupy an increasingly small part of our lives. That’s one of the things I love about adventure riding—its ability to help us get away from civilization and screens and the news (and students) and take in, as the saying goes, The Great Outdoors. This year my wish list does not contain mods and accessories for the bike but mostly camping gear. I want to downsize my gear and be more comfortable around camp.
Cookware
If you read my post on motocamping gear, you’ll know that I use an MSR Dragonfly stove and a Zebra 3L stainless steel Billy pot as my motocamping kitchen. This is the same gear I use canoe-camping, but now I’m ready to go even smaller. When I’m canoe-camping, it’s usually with my son and, uh, we’re in a canoe, where there’s lots of space, and weight is only an issue on the portages, but when I’m adventure touring, I’m usually on my own and less is more, so to speak. Space in the panniers is at a premium, and I feel every extra pound on the bike.
I came upon this little unit via Adam Riemann’s video on his gear. I’ll probably leave the cup and fold-out base at home, and I’ll probably substitute the folding cutlery for real stuff. I’m not that minimalist. (While I’m trying to reduce weight, I won’t be cutting my toothbrush in half anytime soon.) This kit will cut down my cooking gear considerably.
It means switching from liquid fuel to butane, which I never thought I’d do. Liquid fuel has a lot going for it: no canisters to buy or dispose of, the ability to refill at any gas station, and as an emergency supply for the bike. But the Dragonfly is loud and slow. You can get a Dragon Tamer by BernieDawg, but at 82€, that’s almost the price of the stove, and it doesn’t seem to speed it up, just silence it. An 8 oz cylinder fits nicely inside the Odoland pot with room for the burner on top, so it’s very compact. I like Adam’s suggestion of wrapping the canister in a goggle bag to provide some padding. The entire kit is, incredibly, only $38 Canadian, so I hope at that price it isn’t, in the immortal words of my late mom, “cheap and nasty.” ADV touring is hard on gear, so it has to be tough.
Whether I take a separate frypan and plate remains to be decided. Maybe I’ll go hardcore and try to get by just with this.
Ditch the Tent and Mattress
Speaking of hardcore, I’m seriously thinking of switching to a hammock system for sleeping. I was talking to my brother-in-law about a canoe camp he did north of Lake Superior—5 nights using a hammock—and he swears by it now. He strung up a tarp overhead, just in case of rain.
This would allow me to leave behind my tent and mattress, which together weigh 7 lbs. More importantly, my tent doesn’t fit in a side bag, so I have to strap it on top lengthwise or across my tail rack in a duffle bag. I’d love, I say love, to be able to do without a duffle bag up high on the back. (BTW, I’m ditching the tank bag too.) With weight down low in the panniers and only a few small bags with tools and tubes up front, the bike would be a lean mean machine, helping me to do the kind of riding I want to do, especially now that the Tiger’s suspension’s been upgraded. It’s not quite a rackless system, but something resembling it.
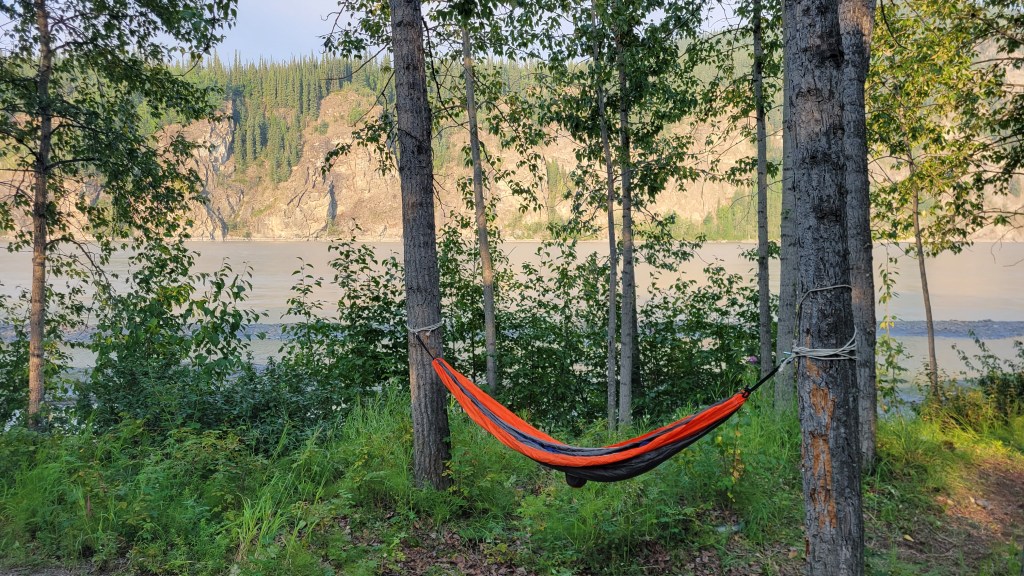
I’ve slept in a hammock before and froze my butt off. Okay, it was at Yukon River Campground, so not the best place to try. One of the issues with hammock camping is that the down in your sleeping back gets compressed underneath you, and you don’t have the insulation of a mattress to keep you warm. You can get a hammock quilt and string that up underneath, but they are heavy and bulky, so you lose any savings gained in weight and space.
Yukon River Campground
My other concern is that there may not always be two trees to string the hammock. I’ve been at sites before where this was the case, and I’m imagining, say, being out at a campground on the Outer Banks— basically a sand bar on the eastern seaboard of North Carolina—where they’re aren’t any trees. Would I be able to sleep on the ground and string a tarp off the bike in case it rains? What about bugs? Night visits? Privacy? You don’t see any RTW riders using a hammock.
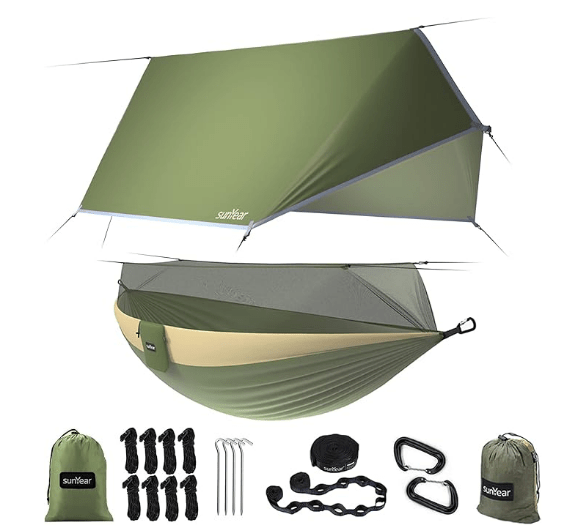
Well, there’s only one way to find out. After some initial research, the SunYear hammock is on my wish list.
The SunYear is made of parachute nylon, and if someone is trusting it from ten thousand feet, I’ll trust it from 2 or 3. As you can see, it comes complete with a bug net and a tarp. A nice feature is the triangular shape of the tarp for some privacy, not that I care.
But before I go investing in a new set-up that costs about the same as a new tent, I’ll try a shorter trip using my existing hammock and see how it works. Alternatively, I could just buy a separate bug net and tarp if that works out. And for stringing it, I’m thinking I’ll carry a couple of ratcheting straps for bike recovery (a lesson learned from my last trip to Vermont) and they will work just fine to anchor the hammock without damaging the trees.
What do you think? Am I crazy? Have you tried hammock camping? How did you find it? Great recent development in camping gear or latest fad? Leave a comment below.
Shelter
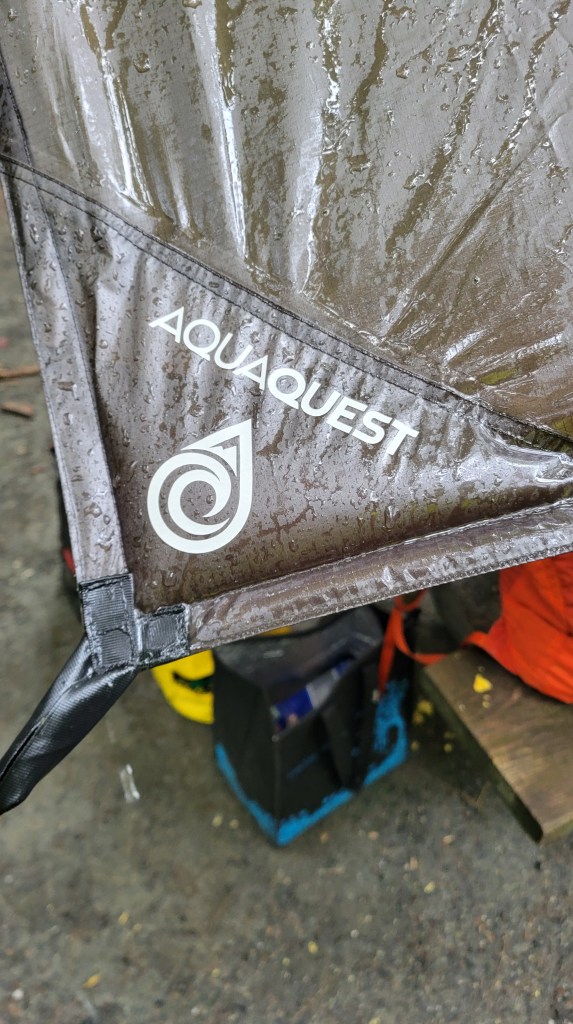
Without a tent, a reliable tarp is all the more essential for rainy days around camp. When Riley and I had rain in Vermont last August, we strung his tarp up over the picnic table and were happy.
I was so impressed with his tarp that I took a picture of the logo. I later looked it up online and nearly shit my pants. I didn’t know that a tarp can cost $260. I usually get mine from the dollar store. Okay, they smell of plastic off-gassing and are as loud as my Dragonfly stove, so I’m ready to upgrade. When it’s your home away from home, a reliable tarp is worth its weight in gold. A good one will also pack up small.
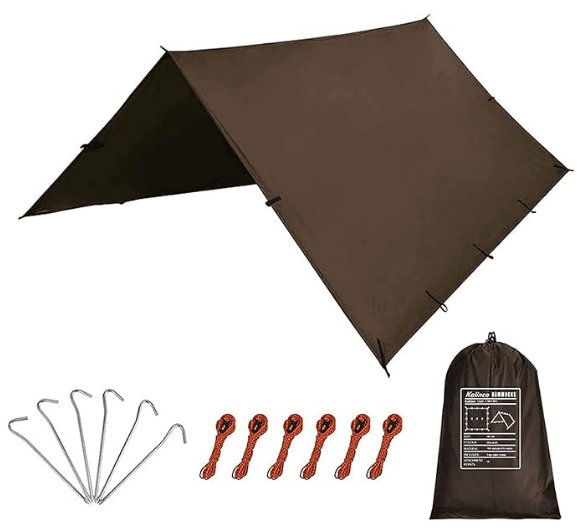
I haven’t decided on the size yet, but I’ll want something big enough to shelter from driving rain. The only question is: Aquaquest or cheap Chinese rip-off?
Two items that never made it off my wish list last year are a new helmet and shorty levers. I’ve had the same Arai Signet-Q since I started riding in 2015. Don’t tell the cops. You’re supposed to change it every 5 years by law. That means I really should either get a new one or move to New Hampshire.
Last year, I was looking at the Arai Tour-X5. Arai make arguably the safest helmets on the market, but as every Harley rider in a skid lid will tell you, safety is over-rated. More importantly, there’s fashion. But seriously, other factors include comfort, weight, ventilation, and a big one for me, wind noise.
The Arai Tour-X5. Sadly, still on The Wish List.
Recently I was intrigued by what Chris (Chap in a Cap) at MotoLegends was saying about flip helmets. He argues that modular helmets should be considered the true adventure helmet, and the only reason most ADV riders have a helmet with a peak is for fashion. “Get over yourself,” he says elsewhere.
One thing I didn’t know is that, according to Chris, a flip helmet is the quietest type of helmet, even quieter than a full face. I thought that the hinge system created some wind noise, but perhaps that was just the case with the early modular helmets. It’s not just the absence of the peak that makes it quiet but also because the neck opening is smaller. With a flip helmet, you naturally lift the chin bar to put it on, so the neck opening can be smaller and less wind enters the helmet from underneath.
I’m sold. I have to admit, I’m interested in the idea of having the quietest helmet possible. As some of my readers know, I’m completely deaf in one ear so have to protect what’s left of the other one, and even with earplugs, which I always wear, the wind noise can be loud on the highway with a bad helmet like my LS2 Pioneer.
Champion Helmets, who do the most comprehensive and reliable testing in the industry, in my opinion, put the HJC RPHA-91 not only as the quietest helmet on the market but also the best overall modular helmet of 2025. The Shoei Neotec 3 was a close second. Schuberth helmets don’t fit my intermediate oval noggin, and Arai, well, Michio Arai doesn’t believe in flip helmets. So I think either the HJC RPHA-91 or the Shoei Neotec 3 is in my future.
The HJC is about half the price of the Shoei, but honestly, for something as important as the helmet, it will probably come down to which has the best graphics.
Back to Levers
The other item that never made it off my 2023 Wish List are shorty levers. What I did instead was move the levers perch inward on the handlebar as per another of Reimann’s suggestions, so I was pulling with two fingers but on the end of the OEM levers. This seemed to be the best of both worlds: I could use two fingers but still had the leverage of a full-length lever.
The downside to this set-up, I discovered, is that the front brake master cylinder is part of the lever assembly, and now it’s so far in it’s slightly tipped because the bracket is on the slope of the handlebar. The mirrors are also part of the same unit, so their position is affected. I can see okay, but all things considered, maybe it’s just easier to get shorty levers.
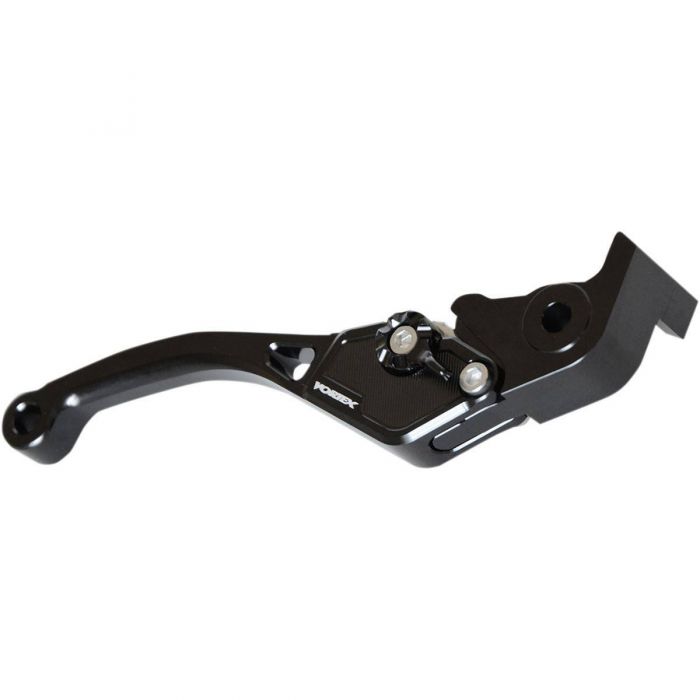
Last year I had the Vortex levers on the wish list. This year, it’s ASV, but don’t be surprised if they, at over $400 a set, are on next year’s list too.
VortexASV
So if you didn’t think I’m crazy for giving up my tent, you probably do now. What can make someone pay that kind of money for levers, especially when you can get cheap Chinese ones on Amazon or eBay for $35? Probably the same thing that would compel someone to pay $260 for a tarp. It’s the quality of the product, and in this world, you usually get what you pay for, despite proclamations of cheapos to the contrary.
Aside from being unbreakable with an unconditional 5-year crash damage guarantee, the ASV levers apparently have excellent feel, if you believe comments on forums. That’s a result of the pivot that has precision-sealed bearings, the only lever on the market for my bike with a bearing pivot. ASV also have a micro-indexing adjuster with 180 increments, so you can literally dial in each lever to your exact preference. The C-series have a matte finish and cost a little more than the polished finish of the F-series.
I really don’t know if I’ll get these, but it’s nice to dream. Isn’t that the purpose of a wish list?
One More Thing
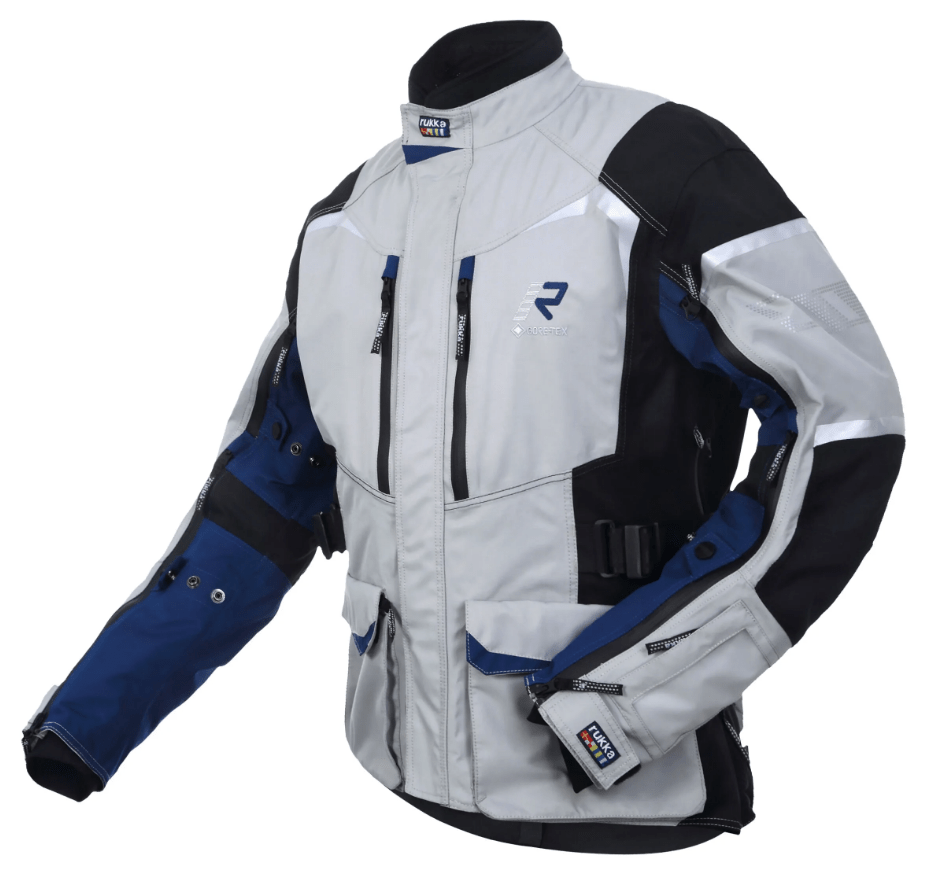
“Oh yeah, one more thing.” That’s what Steve Jobs used to say to introduce the most exciting new Apple product at the very end of his keynotes. I’d love to get a new jacket, one made for cold weather. I’d love to get a Rukka jacket, any Rukka jacket, but preferably one with a down-filled liner. I’m tired of freezing on early- and late-season rides.
My warmest jacket is the one I bought off eBay for $55 US when I started riding. It’s a Joe Rocket with textile front and back and leather arms and shoulders. It’s my warmest jacket because it has a quilted liner. My other two jackets are hot weather: the Klim Marrakesh, which is mesh, and the Traverse, which is a Gore-Tex liner.
Again, the option here is premium or budget-friendly. I’ve been hearing a lot about the MSR Xplorer jacket from Rocky Mountain ADV and it might work with some good heated gear inside.
Rukka Rimo-R for $1000or MSR Xplorer for half the price?
One of the most viewed posts on this blog is the one on how to make your own heated jacket for under $50, and it’s a good option for commuting. However, the cheap Chinese controller is fragile and doesn’t hold up to the demands of adventure riding. I’ve already broken and fixed it a few times. The other thing I don’t like about the jacket is that it’s a rather thick, puffy jacket, that doesn’t pack well, so it’s either the homemade heated jacket or a wool sweater, but not both, and for around the fire, I’ll take wool any day.
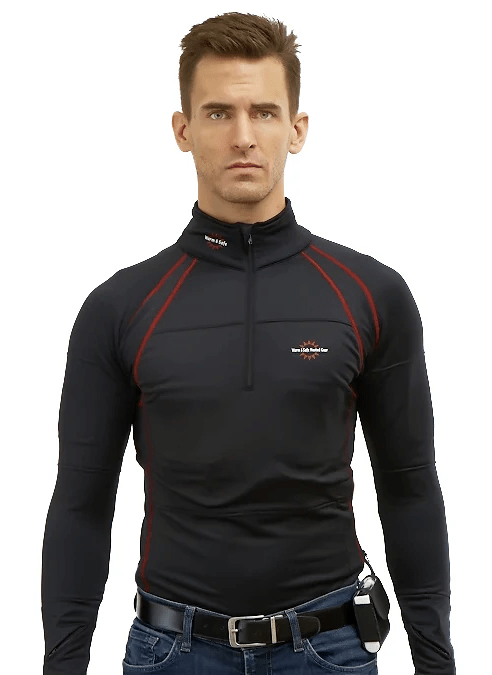
My friend Riley of The Awesome Players posted a video of a late-season ride he did on which he was wearing a Warm and Safe Heated Jacket. He later texted me that he also has the baselayer, and so I looked into it.
Warm and Safe Heat Layer Shirt
I like the idea of a base layer. It just makes sense to have the heat next to your skin instead of having to penetrate layers of thermal clothing first. Other people like the flexibility of having a light heated layer that you can easily remove if it warms up.
The company has over 25 years of experience and R&D. Each product connects to a heat troller that controls the heat. Instead of just three settings like with the controller on the Chinese-made pads, the W&S troller has a dial, so there’s a lot more variability. Okay, Warm and Safe don’t win the award for the most imaginative naming, but some of their gear also make it onto The List.
Conclusion
Well that list ended up being longer than I anticipated. As the instructor of my motorcycle course said first night, “This sport is harder on your wallet than an ex-wife.” Thankfully, my marriage is still strong, although would be considerably weaker if Santa fulfilled all my wishes.
And as I usually do at the end of these fun Christmas-themed blogs, I have mixed feelings about being so materialistic when wars are continuing in other parts of the world and some people lack heat, food, shelter—the basic materials of life. I don’t feel I can do much or anything about that, but I can help those closer at home in need. This year, Marilyn and I have decided to give a significant donation to a food bank. It will be a drop in the bucket, but it will be our drop, and I hope it provides a little relief to someone in greater need than me. With inflation and current food prices, the need is greater than ever.
The Wish List posts come at the perfect time of year, just after the bike is pulled off the road for four months by law here in Quebec. They help me though the transition to no riding by thinking of the rides being planned for next season and the gear that will make them all the more enjoyable. I’m still planning to do the tour that has been postponed now for two seasons—down the Blue Ridge Parkway into West Virginia, maybe over to the The Outer Banks, and back up via the MABDR and NEBDR.
What are your plans for next season? Drop a comment below and don’t feel they have to be anything as ambitious as mine. I’m always interested in hearing from my readers.
Merry Christmas and Happy Hanukkah to all my readers, and safe riding in 2025.
Spend a little time and money to adjust your suspension and it will transform your ride.
In a recent interview on Adventure Rider Radio, Chris Birch talks about spring rate and preload not as factors of sag but balance. The standard thinking about sag is that it’s to keep the tire in contact with the road through potholes and over bumps, but Chris says he thinks about the preload adjuster as what keeps the bike in neutral balance front to back. Too much sag and you’re going to be light in the front and risk washing out in corners; too little sag and you will be nose-heavy and at risk of losing the rear in corners or tucking the front in sand or mud. He said when you get the bike balanced right, it’s an “aha” moment and it just feels easy to ride and right.
There are lots of videos available on YouTube on how to measure sag so I won’t go into that here. What I will say is that most adventure bikes come off the production line set up for street riding. I could be cynical and say that’s to have a comfy test ride and sell bikes, but the truth is that most adventure bikes don’t see much dirt. My Tiger 800XC was the same. The stock spring gave the bike a static sag of 18% (10% is the target) and I was well below recommended rider sag (30%) when loaded, even with preload fully wound.
I recently worked with Stadium Suspensions here in Quebec to correct this. We had tried a 13.2 kg/mm spring on the shock a few summers ago when Marilyn and I went to Newfoundland and were fully loaded with the hard cases. It got us the correct sag but was a little tough on our butts. So more recently Stadium swapped it for a 12.5 with an extra 4mm preload collar and it’s the Goldilocks set-up for me. It puts the static sag at a perfect 10% and rider at 37% but without any hydraulic preload, so I’m definitely within range.
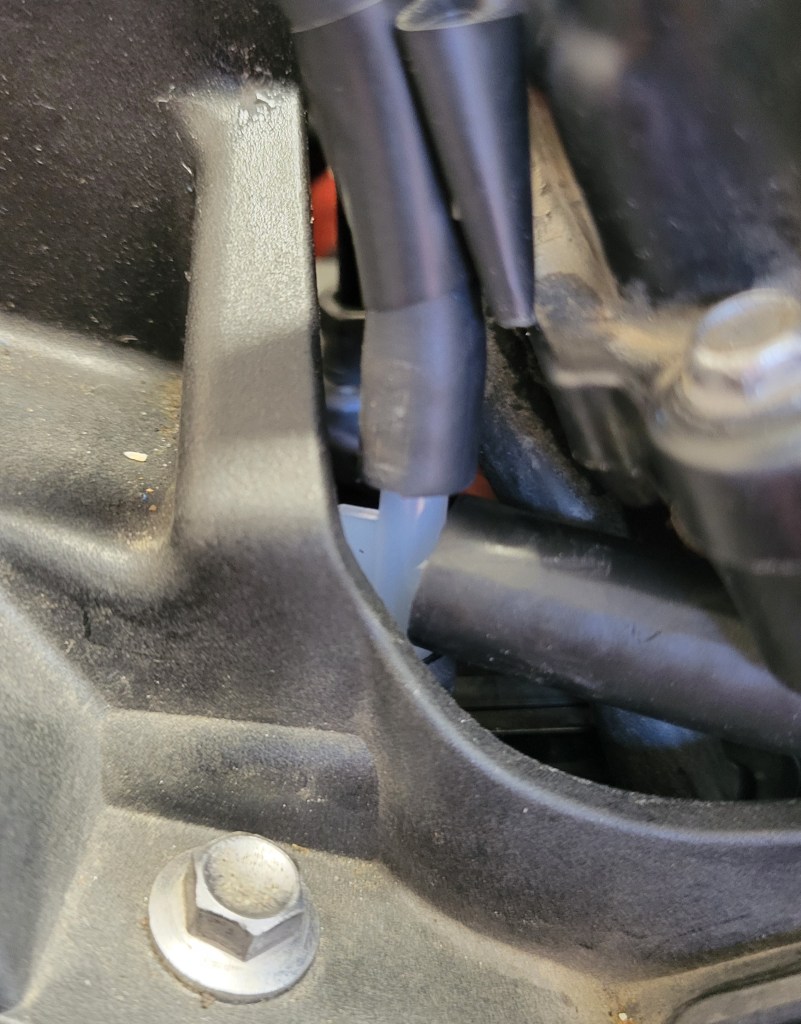
A tie-rod boot helps keep dirt and water out of the preload chamber.
Another reason the bike was sitting low is that the preload wasn’t working very well. Over the years, dirt and water had gotten behind the black plastic collar on the chamber. The components inside had become corroded and had started to seize. Stadium tore it down and cleaned everything up, including machining the housing. The technician suggested I try protecting the now exposed seal with a tie-rod boot, so I ordered a variety pack off Amazon and luckily there was one that fit perfectly. For the Tiger’s Showa shock, you need a boot with ID 11mm top and 37mm bottom, but the latter can be stretched if needed. I put a little waterproof grease across the face of the seal inside and on the lips of the boot and used a zip tie to hold everything in place.
Since I’d stiffened up the rear, I thought I should stiffen up the front too, which was a little prone to fork dive. The OEM springs are .49 kg/mm so we went with .6 kg/mm. If you do the math (do you remember how to cross-multiply fractions to calculate x?), that’s about the same ratio as what we did at the rear. With everything back together, as soon as I pulled the bike off the centre stand, I noticed it was sitting higher. I haven’t had the chance in the late season to try the new suspension on dirt yet, but from commuting on Montreal’s notorious roads, I can tell it’s a big improvement. I had an “aha” moment.
The Tiger’s suspension doesn’t have a lot of adjustment, but there are still ways to customize. I rode both the GS and the Tiger for years before doing anything with the rebound adjustment. (On most shocks, that’s the screw at the bottom of the shock.) Thierry at Stadium said I’d probably have to slow the rebound down with a stiffer spring on now, so I took the time to watch Dave Moss’s tutorial on how to do this. It’s so easy I feel stupid for not doing it earlier. You simply push down on the tail of the bike and watch to see if it bounces upon release. You want the softest setting without even the slightest bounce; it should return to rest in only one stroke. When I did this and dialled in the rebound damping, I felt a noticeable improvement in how the bike tracks over bumps and potholes. Try it.
The forks on the Tiger don’t have any adjustment, but again, suspension guru Dave Moss says the oil height specified in your service manual is only a starting point for the average rider. If you are a light rider like me (145-150 lbs, depending on if I’ve had breakfast) or a less aggressive rider (like me), you could try a larger number. (Remember, a larger number means less oil since you are measuring from the top of the tube to the oil level.) If you are heavier than average or a more aggressive rider, use more oil and a smaller number. Just note the caveat from Dave in the video linked above about hydrolock, so test that you can bottom the fork before putting it back in the bike. And of course there’s always the option of trying different weight oils and different brands of the same weight since there’s no standardization of weight for fork oil. There are charts online showing the different viscosities of brands.
As a final thought, I’ll just add that before you go playing around with your suspension settings—and I’m suggesting you do—make a note of where everything is now so you can always return to your current set-up if necessary. There are many elements to suspension and you can get lost in the combinations, so change one thing at a time and test ride the bike on a familiar piece of road or trail before changing something else. Setting up your suspension takes a little time and patience, but when you get your bike dialled in, it will produce an “aha” moment and transform your ride.
Fully loaded and ready to ride to Newfoundland. (July 1, 2023)
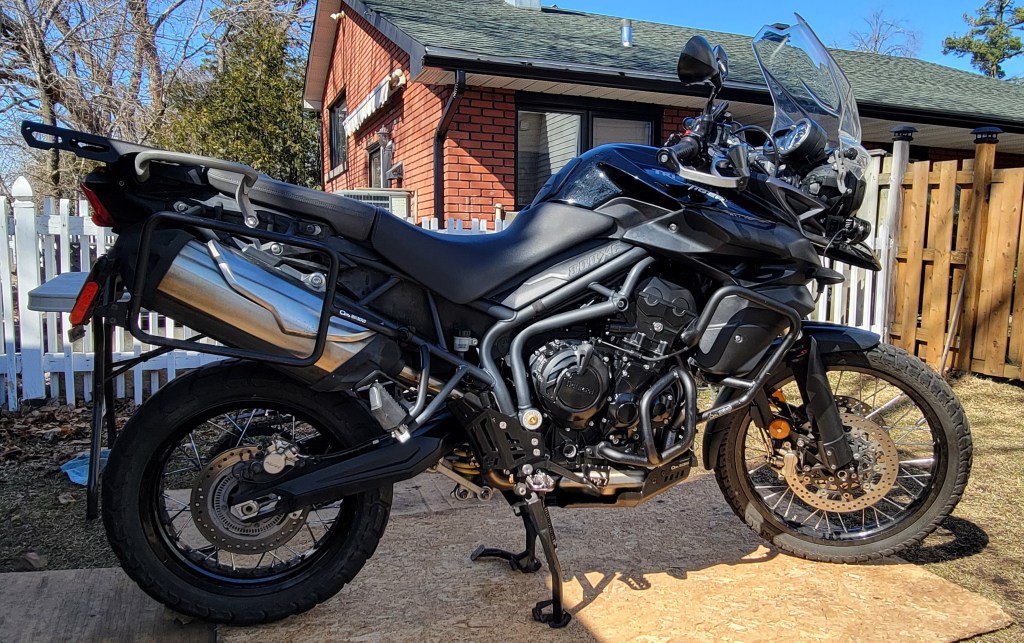
Spirited on road, capable off road, the Tiger 800XC is a great all-round middle-weight bike.
My review of the 650GS has been the most viewed page on this blog for years, so I thought I’d write one on the Tiger, which I’ve had now for three full seasons and over 45,000K. These are both old bikes, so I know most people reading the reviews already own the bike and want to see if they’ve made a mistake. You have not. Well, as always, it depends on the type of riding you do. But if you’re looking for a long-distance ADV touring bike, the Triumph Tiger 800XC is a good choice.
But I’m getting ahead of myself. As I did before, I’ll break down the review into components.
Engine
The heart of any bike is the engine and the Tiger’s is a gem. When I pulled into my driveway on the GS at the end of my 2021 cross-country trip, I knew I wanted a smoother bike. The big thumper got me to the Pacific Ocean and the Arctic Circle and back, but it wasn’t very comfortable, especially on those highway miles. When I test rode the Tiger, I knew I would buy it even before I was around the block; I couldn’t believe what I was feeling. This engine is SMOOOTH! I’d go as far as to say it’s the bike’s defining characteristic. This is the 800, so before Triumph moved to the T-plane crank and off-set firing order, so it’s about as smooth as a triple can be. If you’re coming from the nuts-numbing world of a big thumper, the inline triple with a 120 degree crank is a world apart and exactly what I was looking for.
Aside from being smooth, this engine has a ton of character. It has comparable torque to its rival, the BMW F800 GS (58 ft.lb @ 7850 rpm vs. 59 ft.lb @ 5750 respectively), but gets that torque much higher in the rev range. And it likes to rev! It spins up fast, so even pulling away from a stop light you find yourself pulled involuntarily into The Giggle Zone. Yet despite that high peak rpm, the torque on the Tiger is incredibly linear.
photo credit:// ADVMoto. 1st Gen Tiger 800 dyno results. Note the linear (flat) torque “curve” above 3000 rpm.
The gearbox is also smooth, both upshifting and downshifting. It’s so smooth, someone I swapped bikes with once asked if it has a slipper clutch. The high-revs, the smoothness of both engine and gearbox, combined with a wonderfully guttural exhaust note make the Tiger 800 a really fun bike to ride. It feels like Triumph has shoe-horned a sport bike engine into an adventure chassis, which I guess they have since the engine comes from the 660 Sport. I’m not afraid of the dirt but, to be honest, most of my adventure touring is on asphalt, and the Tiger makes crunching those miles enjoyable.
Where the engine does come up short is in slow-speed technical riding, a downside the T-plane crank of its successor, the Tiger 900, attempts to address. The 800 is happy when revved, but is prone to stalling at slow speed, especially in sticky mud or over obstacles—anything that requires careful clutch work in 1st gear. It has no tractor-factor, so if you like ATV and snowmobile trails, single-track and getting out into the woods, the Tiger is probably not for you. It can do it, but you have to keep the revs up and feather the clutch a lot, which can be tiring on your hand and the clutch.
Handling
The XC model I have has a 21″ front and a 17″ rear wheel—an unusual combination in the ADV world where an 18″ rear is the norm. Perhaps Triumph did that to compensate for the nose-heavy geometry of the big triple compared to a parallel twin. (It still has a stink bug stance.) They’ve also increased the rake on the front forks beyond the competitors’ to 23.9˚ (compare with 26˚ for the BMW 800). What this weird-ass geometry does is make the 21″ front wheel surprisingly easy to turn in yet planted through corners. For an ADV bike, the Tiger is surprisingly agile and confidence-inspiring through the twisties. That’s when it’s in its element, whether on asphalt, gravel, or dirt.
Lanark County Trail System on 70/30 tires.
The cost is a tendency for the front end to tuck in mud or sand, especially if you forget to steer with the pegs. My crash this past August was a direct result of that happening on a muddy downhill corner, although I think balance of the bike front to back was also a factor. (I was under sag.)
Front-end tuck on the Bailey-Hazen hero section.
The Tiger is also a little top heavy, despite its flat horseshoe-shaped gas tank. That’s probably a result of the tall and wide engine. (To get the 660cc Sport engine to 800, Triumph lengthened rather than widened the bore.) You don’t feel it once the bike is rolling, but again, it’s another characteristic that makes the Tiger a challenge off-roading at slow speed. What all this means is that if you want to ride hero sections on the Tiger, you’d better have skills.
Triumph says that the Tiger is for “light off-roading” and they don’t lie. The engine and balance of this bike are designed for 2nd gear and up. But the biggest indicator that this bike is not for serious off-roading is the placement of the spark plugs and air filter, both of which are under the tank. If you’re doing water crossings—and what serious off-roader isn’t—you’d better not swamp the bike or you’re going to be removing bodywork and lifting the tank trailside. Been there, done that. It’s not much fun. To lift the tank, you need first to remove the beak, radiator side panels, indicator panels, and trim. I’ve done this perhaps a dozen times now and have the whole process down to about 20 minutes. Needless to say, for an ADV bike, this is a major design flaw, or at least a serious limitation.
Suspension
The Showa suspension on the XC is a step up from the XR version. Rear travel is 215mm and front is 240mm. That’s more than what I’ll need because I’m not blasting down rocky trails as much as trying to thread my way through them. (The 650GS, for comparison, has 165mm rear and 170 front.) With the Outback Motortek skidplate, ground clearance on mine is about 9 1/4″ or 235mm. The shock has hydraulic preload and rebound adjustment. The forks are a beefy 45mm but with no adjustment. That’s a fairly basic system, but again, sufficient for ADV touring.
Like most ADV bikes off the production line, the Tiger 800 is set up for road use. The suspension is soft and cushy, making a plush ride around town (and during test rides, I should add). But if you want to use this bike for how it’s intended—ADV touring (the XC stands for cross country)—you’re going to have to stiffen the suspension.
The OEM shock has a spring rate of 9.7 kg/mm which, surprisingly, gives me a static sag of 18% (40mm). This means that under its own weight on the OEM spring, the bike is under sag. Rider sag for me is 35%, even with preload fully wound. (Note to newbies: static sag is unloaded with no rider and should be 10%; rider sag is loaded with rider and should be 30%.) At 150 lbs (177 in all my gear), I’m not a big guy, and with about 66 lbs of luggage (56 on the back, 10 on the front), I don’t think I’m overloaded, although I’ll be working over the off season to reduce that weight. Nevertheless, it’s clear to me that the OEM spring on the shock is too soft for anything but solo street riding.
I recently upgraded the suspension and will publish a separate post on that topic, so click Follow if you’re interested in what I’ve done.
Ergonomics and Comfort
The ergonomics on the Tiger are generally comfortable whether you are seated or standing. The wide handlebars are what you’d expect and want on a bike designed for the dirt, yet they don’t feel like ape-hangers when seated either. I haven’t added any bar risers because the bar mounts are already high, and when I stand the bars fall to the right place when I’m in the correct body position with hips slightly bent. (Most people who add risers are seeking comfort while standing erect.)
One unusual feature of the bike’s ergos is the distinct sensation of the fuel tank between your, uh, thighs. It was something I immediately noticed on that brief test ride and something others have commented on when we’ve swapped bikes. The tank is wide, and it forces your knees apart. (No bad jokes here). I find it actually reminds me to squeeze the bike, which is good practice whether riding on and especially off road.
The seat is generally comfortable for long days, although when touring I add a sheepskin pad to improve comfort and airflow. Triumph sell a comfort seat for this bike but I haven’t needed it. Similarly, Marilyn hasn’t complained about the seat on the back. The 1st generation Tigers do not have a heated seat option but subsequent ones do.
My knees sometimes complain over long days but I’m pretty long-legged, so they are bent slightly more than 90˚. I put my Fastway pegs in the low position and the adjustable seat in the high position and this set-up has been pretty good. With the bike now sitting even higher, I’m anticipating improved comfort for my ageing knees. In the raised position, seat height is 34.5″ or 885mm, which is comparable to its BMW competitor.
My biggest complaint about comfort is in the area of wind management. I’ll be doing a separate post on my search for a solution, but let me say here that the OEM windscreens for the Tiger suck! The stock screen is notorious, and the touring screen is little better. Maybe it’s too much to ask of a screen to allow airflow at slow speed when off-roading and a quiet ride at speed on the highway. The best solution I’ve found is the touring screen with a cheap clip-on wind deflector, which helps with the wind but ruins both the lines of the bike and video footage from my chin-mounted camera. Oh well.
Aesthetics
Canadian poet Robert Bringhurst has a collection titled The Beauty of the Weapons and I think the Tiger is a beautiful weapon, especially the all black model. I get a lot of compliments on the bike, even from other riders. You can see in the neoclassic bikes like the new Bonnevilles that Triumph pays a lot of attention to how a bike looks, and they’ve done a great job with the Tiger. Okay, you may say they’ve copied their competitor with the beak, but I think a bike without one looks weird. There are a lot of complimentary parallel angular lines on the bike that thankfully Outback Motortek has followed. Aesthetics is something not everyone is into, but I want a bike that makes me turn around and look at it as I walk away in the parking lot, and the Tiger does that.
Reliability
There are a few known issues with this bike, not surprising given that it’s a first generation model. The shifting mechanism is known to fail, and mine did, but not in the expected way of the return spring or the pin for the return spring breaking. No, it was the selector arm that failed at about 45,000K, so while I was in there behind the clutch, I decided to replace not only the selector arm but also the problematic spindle, the return spring, and the detent wheel, all of which have been redesigned. You can read about that work here. The bike also let me down once in the bush during a water crossing when somehow about 3-4L of water got in the tank. I still think the only viable theory is that water got sucked up through the tank breather tube and I’ve since redesigned the tube to avoid this happening again.
I cut the breather tube behind the airboxand added a T-joint and short length of hose
The other known issue with this bike is the starter motor. There are many accounts of it failing to restart the bike when the engine is hot. It was fine for me the first two years but then started to act up and got progressively worse. I’ll be doing a separate blog post on that too, but I’ll let the cat out of the bag here and say the problem was, at least in part, a dirty main ground on top of the engine block that was causing a voltage drop. If you have the dreaded starter motor issue on your Tiger, clean the main ground and contacts on the starter relay before changing the starter or battery.
That’s it. Clutch, stator, voltage rectifier, water pump, oil pump—all good—and no issues with any of the electronics. That’s not bad, in my opinion, for a bike with over 60,000K on it.
I adjusted the exhaust valves at 45,000K; the intakes were perfect but all the exhausts were tight. There are some reports of the engines, particularly on the 2nd gen Tigers, to start burning significant oil at about that mileage, but thankfully that has not been the case with mine. It burns a little oil now, particularly at high-revs on the highway, but nothing significant. I’ll come back from a tour of a few thousand kilometers and top up maybe 200mL. I’ve been using Castrol Power 1 4T and, more recently, Motul 7100, but when I mentioned my oil consumption to my dealer, he said they put Motul 300V in all the “high-revving bikes.” I thought it was only for racing bikes, but henceforth that’s what will be going in this bike.
I like that the 2011-14 Tigers are still relatively simple and easy to service on my own. There’s no ride-by-wire and rider modes or complicated electronics that require a computer to diagnose and repair, although I wish turning off ABS were easier than navigating menus. The 1st Gen Tigers that ran 2011-14 are at the tail end of an era before things got pretty complicated electronically. Build quality and fit-and-finish are excellent, and the bike is looking as good as new with no rust or corrosion on it anywhere, despite its age.
Summary
Pros
Fun, spirited engine
Smooth gearbox
Agile and planted through corners
Comfortable seat and ergonomics
Good looks
Aside from a few early-model issues, generally reliable
Relatively easy to service
Cons
No tractor-factor; stalls easily in 1st gear
A little top heavy
A tendency for the front end to tuck in low-traction terrain
Poor wind management
Shifting mechanism weak
Some reports of starter issues with OEM starter
Plugs and airbox under the tank
Vulnerability in water if the tank is rapidly cooled
Looking at the length of those two lists, you’d think I’m not happy with the bike, but I am. That’s because the main elements of the bike are good—the engine, the handling, the reliability. The bike has a few issues, like any bike, but they are overshadowed but just how much fun it is to ride, and isn’t that the main thing we want in a bike?
Conclusion
When I participated in La Classique Moto Fest here in Quebec a few years ago, I saw my bike in a long line of other bikes there for the rally. Maybe it was my subjective perspective, but it seemed slightly out of place. It occurred to me that most of the bikes there were set up for off-road riding whereas the Tiger, at least my Tiger, is more an adventure bike, and I was reminded of a comment made years ago on the ARR Raw podcast about this distinction. (I’ll link to the podcast but can’t remember the specific episode.) They were talking about tire choice, if I remember correctly, and one of the guests made the distinction between what they do as RTW riders and what weekend warriors do. He said he’d never attempt half the stuff some guys do off road because, when you’re touring halfway around the world, you can’t afford to break something on your bike and wait weeks, perhaps longer, for parts to arrive. In other words, they ride more conservatively, and that was reflected in his tire choice. I’ll add that it’s also reflected in your bike choice.
Off-road versus adventure bikes. An arbitrary distinction?
As we all know, the adventure bike is the ultimate compromise. It has to be good on road and off road, capable of crunching out miles on the highway as well as getting you down a logging road. It has to be quiet and comfortable for long days in the saddle, powerful enough to climb mountains and carry camping gear, maybe a pillion, yet small and light enough to pick up on your own in the middle of so-called nowhere. It has to be reliable, and simple enough to fix yourself, trailside if necessary, if something does break. With these considerations in mind, the middleweight Triumph Tiger 800XC is a great all-rounder and an excellent choice as a long-distance ADV touring bike. It has its drawbacks, for sure, and may be master of none, but it’s the best Jack of all trades I’ve been able to find.
Getting ready for the new season this year meant a little more than adding a few farkles.
When I bought my 2013 Triumph Tiger 800XC in May 2022, it had only 14,500 kilometres on it, despite being nine years old. In the following two years, I’ve put another 34,000 on it. I’ve done basic service during that time, like changing the oil, coolant, brake fluid, and cleaning the air filter. I’ve also changed the plugs. But it was time for some major service.
Last fall I did the dreaded valves, swingarm and rear suspension bearings, and cleaned the starter motor. This spring I’ve fixed a problem with the shifting mechanism, cleaned and lubed the steering head bearings, overhauled the front forks, and made a few mods to get it ready for the BDRs. It’s been a long process, but it’s finally ready for the new season.
Valves
It’s the job everyone loves to avoid, and I did too. In fact, when I bought the bike, the dealer said they no longer recommend checking the valves at the manufacturer’s recommended 20,000K because, more often than not, when they get in there at that mileage, the valves are fine. I guess if you’re paying the dealer $1000+ to check them, it’s bittersweet when they don’t find anything out of spec. I was happy to wait. My buddy who rides a Triumph Scramber 1200 XE has never checked his and he’s got I think now over 78,000K on it. “If they’re slappy, they’re happy,” he said, although I always thought you don’t want to hear the valves. At any rate, with now over 48,000 kilometres on the Tiger, it was time to get in there and see how happy they are.
All the intakes were fine, but all the exhausts were tight, some significantly. Here are my calculations. Sorry about the grease.
Highlighted is the amount out of spec. I’m using metric.
As you can see, all the intakes were spot on at 0.15 (specs are 0.10 – 0.20). The exhaust specs are 0.325 – 0.375, so ideally you want them at 0.35. Some of mine were 0.20, so .15mm out of spec. I’m glad I didn’t wait any longer or I might have started causing damage to the valve seat. Live and learn: sometimes there’s reason behind the manufacturer’s recommendations.
An egg carton works well for keeping all the buckets and shims organized.
You want the same bucket to go back on the original valve, so keep any happy dogs with long tails out of your workspace. Nobody likes removing the cams, but just make sure you’ve got it locked at top dead centre and turn the engine over several times by hand once you get it back together to make sure you didn’t slip a tooth on the timing gear. I almost did because I didn’t put enough tension on the timing chain while torquing down the holder. (You have to remove the tensioner.) So you have to find a suitable wedge of some kind to manually tension the chain while tightening. The first two (2!) times I torqued down the holder the chain climbed a tooth.
Timing marks should line up parallel to the crankcase on the inside.
Thanks to MuddySump for his excellent videos. I was following my Haynes manual, but it’s always good to watch someone else do it first, especially when that person has the same bike as you and is a licensed Triumph mechanic! Once I got everything buttoned back up, I checked the valves again and they are now all spot on.
It’s always a little unnerving starting the bike back up again afterward, but it fired right up. I’m hoping the bike will run a little easier now with less tendency to stall.
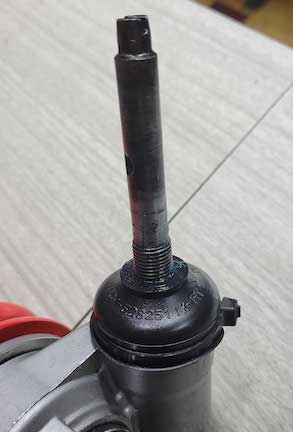
Starter Motor
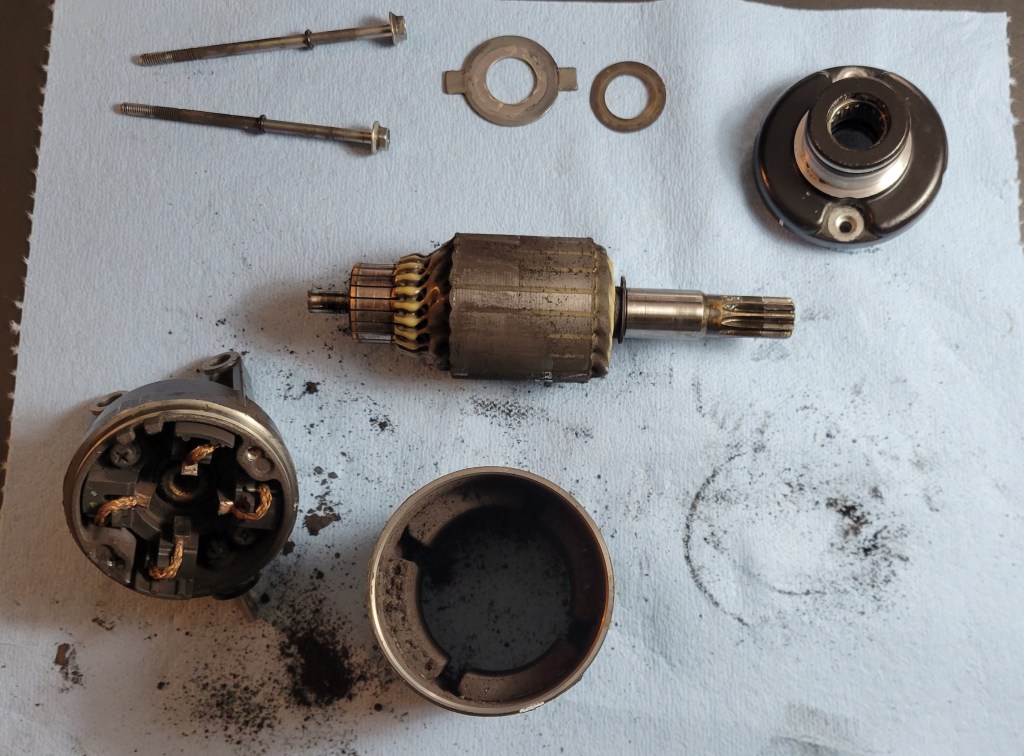
A known issue with the Tiger 800, at least the first gens, is a weak starter motor. There is a tendency when the engine is hot for the starter to fail. I’ve had it happen to me a few times. You stall the bike and the starter is reluctant. I’ve managed to fix it by keying off and on, but it was getting worse. Many guys swap out the starter with Rick’s and I considered it, but since I was already down to the throttle bodies, I figured I’d lift them to access the starter and give it a good clean.
I took it apart and there was a lot of carbon dust in there, and some discolouration on the armature. Some 1000 grit emery paper cleaned everything up, including the shoes. The bearing was fine, and I’m hoping I’ve breathed another few years at least of life back into the OEM starter.
Swingarm and Suspension Linkage
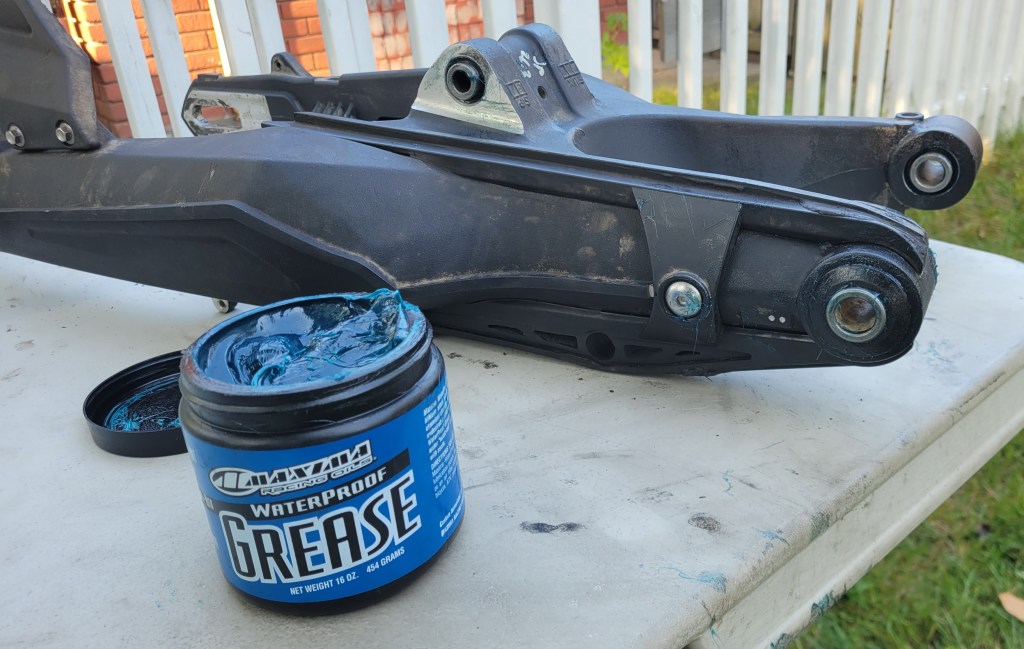
The swingarm bearings take a lot of abuse down there right in front of the rear wheel. Even if you aren’t doing water crossings, they’re going to get water and grit and grime thrown up at them. And when there’s crud or corrosion, you won’t feel it as you will with steering head bearings. I remember when I finally did this job on the 650GS, one of the bearings was in very bad shape and I had a bugger of a time getting the pivot bolt out due to the corrosion. This is one you want to do on the recommended interval, and it’s one of the easier ones so why not? You aren’t opening up the engine, just taking the rear wheel off, unclipping all the wiring from the swingarm, then removing the pivot bolt.
Thankfully, it wasn’t that bad this time, but I still left it a little too long. There was some discolouration on the bushings, but the bearings looked fine, albeit missing some grease. I cleaned everything up as best I could using 1000 grit emery paper and repacked the bearings with waterproof grease.
It’s always a good feeling when you restore these crucial components.
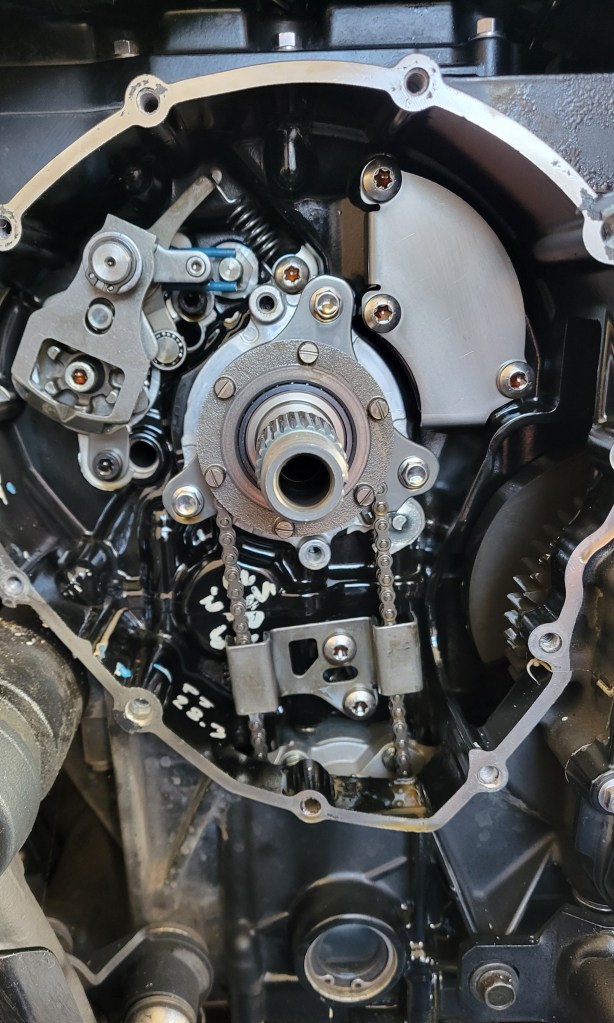
Shifting Mechanism
Problematic selector arm is top left. Centralizing spring is blue, indicating it’s been upgraded.
On the last ride of the season last year, the Tiger started being reluctant to downshift. I noticed it as I pulled away from the house and came to the first stop sign. I was heading to Vermont and would have turned around, except I was leading a club ride and there were people counting on me, so I continued.
My first thought was that the clutch cable needed adjustment. It’s normal for those to stretch over time and need to be tightened. But adjustment didn’t help, and as the day continued, the problem got worse. I somehow managed to finish the day, but coming up through Smuggler’s Notch wasn’t much fun and I was happy to get home. That was the final ride of the season. I decided I’d use the remaining nice weather to do maintenance but before I could get to this job the snow arrived, so it had to wait.
I store my bike in an unheated shed, so working on it over the winter wasn’t an option. As you can imagine, my curiosity nagged at me all winter. Was it the clutch, the shifting mechanism, the gearbox? Some research online revealed that there are some known issues with the shifting mechanism on this bike. There’s a pin on the shifter spindle that holds the centralizing spring and it’s known to break. When that happens, the shift lever doesn’t return to centre, ready for the next downshift, but flops down. You can still shift the bike, but you have to lift the lever first with your foot.
That didn’t appear to be my problem because, while there was a little play in the lever, it wasn’t flopping down. But I wondered if it was starting to break. Also, there was a recall to upgrade the centralizing spring, which is known to fail, and I didn’t know if my bike had the old or new spring. I also wondered if the problem was as simple as a worn clutch.
At the first warm day, I finally got in there to see what is happening. To get to the shifting mechanism, you need to remove the clutch. That was fairly straightforward, and the plates looked good. In fact, the stack measures 42.25mm and the tolerances are 41.54 to 42.54, so I’ve only burned .29mm of my clutch over 48,000 kilometres. I’m happy about that.
I had some trouble removing the bushing and bearing but with a friend’s help, we got them and the basket out. What we noticed is that on a downshift, the shifter arm slips off the pins of the detent wheel. A close inspection of the arm revealed wear on the respective pawl.
Wear in the corner of the pawl where it engages with the detent wheel pins. This arm is under tension from a spring (behind, out of view) and it’s also possible that the spring was fatigued.
There has been a redesign on this part as well as the detent wheel that engages with it. I decided to change the whole spindle because Triumph has also redesigned the problematic pin for the centralizing spring. Here are comparisons of the crucial parts, old (on top) versus new.
Old and new selector arms. Triumph has squared the pawls.Old and new detent wheels. Strengthening webs have been added. Original pin was riveted. New pin is machined.
Dear reader, do you care? If you are a mechanical engineer or just a mechanical nerd like me, maybe you do. If you have a 1st gen Tiger 800, you should. These are the wrinkles that were ironed out sometime during production. I’m glad to have the stronger parts in my bike, and it’s shifting great again. Here in Canada, the spindle unit is under $200 and the detent wheel and selector arm come as a kit for under $100, so the hit wasn’t too bad.
Forks Overhaul
I don’t think the fork oil or seals have ever been changed on this bike. I’d never done inverted forks before. They are a little more difficult and require a seal driver. (You can’t use plumbing ABS pipe to drive the seals because the outer tube is in the way.) Figuring this would not be my last bike, I went with the adjustable kind that will work on a variety of bikes but are a little more trouble to use.
Everything came apart easily enough, once I bought a set of thin spanners. (Every job requires at least one trip to Canadian Tire.) There isn’t much room between the spacer tube and the top cap, and you have to get a wrench in there to hold the lock nut while you remove the cap. That was the only snag on the disassembly.
Laying everything out in the order it came off.
The bushings were discoloured with wear, but I didn’t want to wait for new parts so cleaned them up as best I could with fine grit emery paper. For the new seals, I decided to go with SKF because I’d read good things about them. Thanks to Triple Clamp in Toronto for stocking these. A neat trick I learnt from Tusk is, when using those tricky adjustable fork seal drivers, use safety wire to avoid driving your fingers instead of the seal. Nice!
Driving the new sealsRefilling the fork in The World’s Smallest Workshop
The only weirdness of this job was that the amount of oil listed in my manual was way off. It said 619mL for the XC and 107mm from the top of the tube, but I had to pour out about 100mL to get the correct height. Yes, I drained all the old oil, and yes, I pumped the damper rod several times to dispel all the air when adding the new. I asked my dealer about this and he said they only use the height measurement. When I tipped the old oil into a measuring beaker, it was about 1L for the two forks, so with loss, 519mL sounds about right. Anyway, fresh oil, seals, and socks will help the front end this summer.
Steering Head Bearings
This one too had never been done. You can see in the image above that there isn’t much of the factory grease left in there. For this one, I didn’t use the waterproof general lithium grease but bearing grease. The only difficult aspect of this job was avoiding paying for the Triumph tool for accessing the head-stock. Instead, I used a C-spanner and Ryan F9’s tip on using a luggage scale to get the correct torque. The initial preload once you get everything back together is 40Nm, then you back it off and tighten the bearings to 10Nm, which is a little over 7ft/lbs. My C-spanner is about a foot long with a hole at the end of the handle, so all I had to do is convert Nm to ft/lbs.
After having the forks and triple-T out, I needed to align everything again. Thankfully, Delboy’s Garage just put out a video on how to do that.
Fuel Tank Breather Tube Fix
In my last post, I talked about how I ended up with about 3 litres of water in my fuel tank after a failed water crossing. In the post, I presented the theory that the water was sucked up from the tank breather hose when the tank had negative pressure. I considered rerouting the breather tube to keep it out of potential water, but my friend Mike came up with a better solution. While servicing his Africa Twin, he noticed that the tank breather on that bike has a Y-fitting with a length of hose staying high on the bike and the other draining down.
My buddy Mike’s Africa Twin. He’s pointing to the Y-joint with the piece of red wire. The short tube fits into that little cup, presumably to keep it clean. That’s the battery area.
So I picked up a set of assorted vacuum T-connectors and a length of rubber tubing at Canadian Tire and did the same on the Tiger. I cut the tank breather tube and inserted the T-connector, then added the extra tubing. I haven’t decided yet where it will terminate but for now it comes up the siderail and loops across under the fuel tank and is tucked in the other siderail. I think I will shorten it and add a loose end cap like on the AT.
Back right corner of the airbox
If you have a Tiger and want to do this mod, just be sure to cut the right hose. There are two leading out of the tank. One is the drain tube and one is the breather. The drain tube has a check valve on it so doesn’t allow water to come up. The breather tube is the larger of the two where they attach to the tank.
A Few Mods for Dirt
Fender Extender
I saw MotoBob add a front fender extender to his Triumph Tiger and thought it would be a good modification, given the dirt I plan to ride this summer. It keeps a lot of mud off the front header pipes and radiator, not to mention rain water off your pants. He used the Pyramid Plastics version, but my dealer, Montreal Moto, actually had a Triumph one in stock so I snapped it up.
Some extenders come with sticky pads, but I was advised to use silicone. I decided to make things easy for myself and remove the fender. Sounds reasonable, right? I could have done this mod just by removing the front wheel, but I decided to give myself some extra room and removed the fender. It was three bolts on each fork, so how hard can it be, right?
Little did I know that someone had used red threadlocker on the bolts, and one snapped off in the fork. Perhaps someone at Triumph can explain to me how a front fender is a permanent install?
Bolt broken in the fork foot.Yes, that’s definitely red threadlocker.
So I lost a day there. I drilled it out and was retapping it when I got distracted and broke the tap inside the old bolt. Ugh! What a mess, going from bad to worse. I bought some carboy drill bits (after some research on what the hardest, sharpest drill type is), but even a carboy bit wouldn’t touch the tap. Fortunately, my friend Mike, whom I’ve already mentioned a few times, came to my rescue. (He was the guy who refinished the bodywork of my old GS.) He has a proper workbench on a cement floor and drove the tap out with a punch, and then we could re-tap. The thread was a little loose from the abuse it had taken, but he showed me a trick to strengthen it with some 5 minute epoxy. Apply the epoxy like threadlocker but coat the bolt in WD40 so it doesn’t glue inside. Thread it in and after a few minutes remove the bolt and let the epoxy harden to the old threads. Neat! When I reinstalled the fender, I used blue threadlocker.
Lowering Footpegs
My Fastway Adventure footpegs give you the option to mount them standard or lowered. I mounted them standard so I wouldn’t have to adjust my foot levers, but with the dirt coming up, I thought I’d swap to the lowered position. Fortunately, Fastway provide a tool to use to press the pin out. Then you simply press it back in from the other side—from the top of the peg.
Out with the oldand in with the new.
Unlike the fender extender and most other jobs, this one went smoothly and I had the pegs back in again in no time. It was easy to adjust the height of my brake lever; just undo the lock nut and screw the adjuster into the master cylinder. Because I was screwing in, I didn’t even need to bleed the brake. And when I put the shift lever back on, I rotated it slightly from its previous position. This set-up lowers my pegs 8-10mm, which may not sound like much, but I suspect will be significant for knee comfort on long days and lowering centre of gravity when off-roading. The downside is that the pegs are a little closer to the road, but I don’t think I’ll be dragging them anytime soon. Or so we’ll see.
Before I reattached the brake lever.
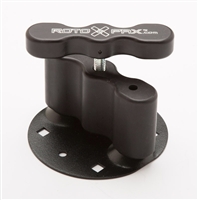
Sidestand Extender
Another mod for the dirt. I’ve always gotten by without one of these, although it’s sometimes a pain to find a stone or stick to use instead when you are forced to stop in mud or soft grass. I went as far as to install a Touratech one on the GS once, but it lasted all of one ride. I got hung up on some rocks and when I got home I noticed I had an extender no more . . .
Needless to say, I was skeptical about buying another from Touratech, but different bike, different design. Besides, I got this one half price. One of the benefits of riding a discontinued bike is that if you keep your eye out you can sometimes snag accessories at discontinued prices. We’ll see how long this one lasts.
Now I remember what I don’t like about sidestand extenders: they interfere with the centre stand. Oh well, I’ll just have to put the sidestand down first before using the centre stand. No big deal, and maybe it will help stop my centre stand from rattling so much. Or maybe now there will be two stands rattling together. Anyway, I’m not wedded to this accessory and we’ll see how long it lasts.
Oil Filter Guard
The Outback Motortek skidplate for the Tiger 800 does not protect the oil filter. Some would say that’s a design flaw, but I suspect OM did it that way so you can change the oil without removing the guard. (They put a cutout in the guard for the sump plug.) But it does leave the oil filter a little vulnerable at the front of your engine. Triumph make a push on metal guard. It’s a simple design with indents that engage with the filter for an interference fit. Easy to remove when it’s time to change the filter, which I will do after running the bike a bit this spring. The engine’s been open for some time as I worked on everything, but with oil being so damn expensive (it costs me now over $80 for an oil change), I will just change the filter. Anything that might have strayed in will be captured in the filter.
It’s been a long haul but I think I’m ready now for another season and another 50,000K. I took the Tiger for a test ride yesterday and it’s shifting smooth again and the clutch feels great. The engine is running well, and I’m happy to be back on the road.
Here in Montreal, it’s Easter Monday and I think I can safely say we’ve had our last snowfall. Crocuses are pushing up and there are buds on the trees. Geese are returning and everywhere the signs of spring are upon us, including the sound of motorcycles back on the roads. For Canadian riders, it’s the best time of year. I wish everyone, wherever you are, a safe and enjoyable 2024 season.
Please leave below any comments you have and consider following. What mods and maintenance did you do in the off season? What are your plans for the coming season? I love hearing from readers, so drop me a line.
I interrupt the journey across Newfoundland for the annual holiday wish list.
It’s become a tradition on this blog—the annual Christmas wish list. It’s probably one of the least favourite posts of the year for readers, but it sure is fun to write. The season has recently come to an end, the long winter months still lay ahead, and all we have to propel us out of bed in the mornings are thoughts of spring and planned journeys. And part of that planning is dreaming of the mods we will do and the gear we will buy to help prepare for the adventures to come.
This year’s list is pretty short. Yes, inflation is hurting everyone, and we find ourselves buying the cheap tomatoes instead of the fancy vine ones (and regretting it later). Marilyn is paying tribute to her late father by scanning the grocery store flyers and clipping coupons. Even the dog has sacrificed his Greenies (and his breath is the price we all have to pay).
But honestly, the bike is pretty much done. It’s got the auxiliary lights on it now, the crash protection, skid plate, pannier racks, hand guards, off-road pegs, and tail rack. I got soft panniers last year and they have been great. So it’s pretty modded out. What the bike needed most was some maintenance, so I spent a chunk of time before I put it into storage doing the valves and servicing the starter motor, which was acting up. By the way, I’m now advocating checking your valves on the recommended service interval. I waited until the bike had 45,000K and all my exhaust valves were tight, some significantly.
Shorty Levers
The only thing it could use are some new levers. The stock levers are okay, but they are long and I’ve already bent the brake lever once. Actually twice, since I bent it back. I think I’m the only one in my club who rides two-fingered and I asked myself the other day why on earth haven’t I ever had shorty levers?
I looked at all the options and am undecided between Vortex and Pazzo. Both are top-quality levers that fit well without any slop, which is often the case with cheap Chinese aftermarket levers. At about $200, they are comparable in price.
Vortex V3 levers
The Pazzo levers have quite a swooped design to them, which brings the lever down close to the grip. I know there’s some adjustment but this still makes me nervous because I like to have a short clutch that completely disengages before the lever hits my knuckles of the remaining fingers wrapped around the hand grip. For this reason, I’m leaning towards the Vortex design. Is it just perception, or do they look straighter? My ideal lever would be a Pro Taper, but I don’t think they make one for the Tiger.
Pazzo
Pazzo also gives the option of a folding lever, but I don’t think I need that since I have the Barkbuster guards. It would have to be a very unfortunate fall for a rock to come up inside the guard and break a shorty lever. But I guess it could happen. My sense, however, is that folding levers are for true dirt bikes that have wimpy, folding hand guards. If you have any experience or thoughts on this, drop a comment below. I won’t be getting anything until the spring so I have some time to decide.
A new helmet
Honestly, that’s about it for the bike (my wife will be happy to know). But wait! My current lid is at least five years old, so I probably should get a new one soon, despite what Bret Tkacs has recently said about that 5-year limit being bogus. If I were forced to, I’d probably go with the Arai Tour-X5 or maybe find a deal on the now discontinued X4.
No, I’m not trying to emulate Itchy Boots. This would go well with my touring jacket that is grey with matching hi-viz accents.
I’ve been very happy with my Arai Signet-Q helmet. The brand speaks for itself and the shape fits my intermediate- to long-oval noggin well. This time, however, I’d go with the Tour X because I want a peak. There have been many times while riding into the sun when I wanted a peak. Sometimes I have to shade my eyes with my clutch hand, it can get that bad, even with the Pro Shade system.
Knee braces
To be honest, I’ll probably forego the helmet for another big-ticket item. I plan to do some pretty serious dirt riding next year, and the only thing that scares me about that is the potential to damage a knee if the bike falls on one. I’ve somehow managed to play 15 years of beer league soccer without any major damage to a knee, and I’d like to keep it that way so I can enjoy my retirement with full mobility. I therefore am adding to my wish list a pair of Pod knee braces.
Anyone who is serious about dirt riding should be wearing knee braces. I know, they are uncomfortable, but so is tearing tendons and surgery. I’ve heard The Awesome Players advocate the use of braces, and recently a video by Riemann convinced me I should just bite the bullet on a pair.
At $750 a set, these babies aren’t cheap, but money well spent if it prevents a serious knee injury, especially if you are riding solo as I do.
Dirt Gloves
There’s one more piece of off-road gear I’d like before attempting the BDRs next summer. That’s a pair of light MX or rally gloves. I have a pair but Marilyn has appropriated them, so I’m in the market for another pair. When riding dirt, it’s important to have maximum feel on the levers so you can modulate both clutch and brake. It’s similar to how football (i.e. soccer) players are always looking for a boot that provides the most feel on the ball, for example one with kangaroo leather instead of cow hide.
The DOUBLETrak multitool by engduro here in Canada consists of several hex, torx, Phillips, and flat head drivers, and 6, 8, and 10mm socket drives that fit into the handle itself and stay there by magnetic force until needed. There’s also a 1/4″ hex to 1/4″ square drive adapter. If you want a comprehensive review of this tool, check out this video in which Dude does an oil change using only the DOUBLETrak. Okay, I’m not going to be doing trailside oil changes, and this will not replace tools that are in my tool roll, as he suggests, but it’s a convenient tool to keep at hand for small adjustments or tightening something on your or someone else’s bike. Best of all, for a few dollars more, you can get a vanity engraving on it and tell yourself it’s to prevent theft.
That’s it. Like I said, a small list this year. That’s okay because we’re still paying off expenses from the Newfoundland trip last summer and I’ve got more ambitious plans for next summer. This time it will involve dirt and I’m both a little nervous and excited about taking the Tiger off road . . . like, really off road, not just gravel and dirt roads but trails and Class 4 roads, water crossings, mud, sand, rocky hill climbs . . . the works. It’s known as primarily a street bike that is capable of doing “light off-roading,” so I’ll be pushing it beyond its intended limits as I do the MABDR and NEBDR back to back. I’ll either die or bond with this bike in ways I haven’t yet.
What are your plans for next season? I’d love to hear them because the best wishing is not the accessories or gear we want to buy but the places we’d like to visit on our bikes, or even the roads we want to ride. We can’t all be Itchy Boots, but we can explore a little piece of paradise close to home, whatever your paradise might be. I wish you happy holidays, and happy dreaming of another season doing what makes our souls sing.
Paired with an OBD-II reader, this app is an essential tool for DIY’ers.
When I had my BMW GS, there was only one OBD diagnostic tool and it was called GS-911. At over $800 for just the Enthusiast (WIFI) version, it was always a little too much for me to swallow, even though I knew you really shouldn’t be riding anywhere remote without one; there are just some issues that require you to be able to communicate with the ECU to solve.
Now that I have the Tiger, there are more options available, and a popular one is an app called TuneECU. I recently used it to balance my throttle body, but it can be used to do so much more.
Background
TuneECU began because of a fuel mapping problem on some Triumph bikes. One owner was so annoyed at Triumph’s unwillingness to fix a gap in the rev range, he took matters into his own hands and created an app that can read and write fuel maps to the ECU. I’m happy with the mapping on my 2013 TigerXC, but I had noticed a little buzz in the right hand-grip and a forum post advised to check the balance of the throttle body.
For those who might not know what that means (I didn’t, having come from a thumper), as I understand it, it’s basically getting all your cylinders to fire with the same force. If one is more powerful than the others, it destabilizes the engine and creates vibration up into the handlebars. Sure enough, when I checked mine, the third cylinder was a little out of sync with the other two.
Tools Required
an Android phone
a WIFI OBD-II reader (OBDLink LX recommended)
TuneECU (Doh!)
The hardest part of this job is getting down to the throttle body. On my Tiger, I have to lift the tank and remove the airbox, and that requires removing a lot of body panels first. I won’t go into that because it’s bike specific, but just follow your service manual (you have one, right?), photograph everything before it comes off, and lay parts and hardware out methodically in the order they came off. And because you might have to unplug a sensor—at least temporarily—it’s probably a good idea to remove the cable from the negative terminal of your battery.
You’ll be required to run the engine to do this, so be sure to keep all sensors plugged in or you’ll get an error code. (You can clear codes in TuneECU too, but more on that later.) On the Tiger, that meant unscrewing the sensors from the airbox and throttle housing and laying them out of the way. You also have to ensure that hoses essential to the correct running of the engine are plugged, for the same reason. This may require some creative solutions since you have to find things with just the right diameter. (No bad jokes here.)
Bike Set-Up. Tank lifted to expose throttle body but all sensors and hoses plugged. Actually, I should have left the breather tube unplugged. (That’s the one with the drumstick in it.)
Connect your scanner
Once you are ready to go, replace the ground on the battery but don’t start the engine just yet. First, plug in your OBD-II reader. There are lots of them available, some for as little as $25 on Amazon, but you take your chances with the cheap ones. You might find that it can’t read your bike or communicate with TuneECU. I’d heard that the one to get is OBDLink LX. It’s a little more expensive, but it works without issues.
You need to know where your OBD-II connector is. On the Tiger, it’s under the passenger seat. When you plug in the scanner, you’ll see its power light go on, indicating that it’s already getting power from the battery. Now get your phone and open TuneECU and select Select from the ECU menu. You’ll see a long list of motorcycles and hopefully yours is there. If not, select Other.
By the way, for Triumph bikes, there are two ECUs: Sagem and Keihin. You’ll see both options under the ECU menu. I wasn’t sure which ECU my bike has, but I figured 50/50 odds were pretty good, guessed Keihin and got lucky. I’m not positive, but I think TuneECU can autodetect if you choose the wrong one.
Once you’ve selected your bike, click Connect. (Later, you can simply choose Connect from the ECU menu.) You’ll see some flickering, both on the scanner and in the bottom right corner of the TuneECU screen, and when it turns green, you are connected.
Make your adjustments
Now start the bike and let it warm up to running temperature. You’ll see the three cylinders listed in the Adjustments screen. Cylinder 1 is the left-most cylinder on the bike (facing front, when seated on the bike), and Cylinder 3 is right-most. Cylinder 2 is not adjustable but is the baseline to which you adjust the other two. In the photo below, the adjustment screws are circled in red. Triumph have thoughtfully added a stripe of yellow paint to each screw so you can keep track of where you are.
Go slowly! Do small adjustments one at a time, blipping the throttle and waiting for the engine to settle back into idle after each adjustment to see what it has done. It didn’t take me long before I had all three relatively the same. They should be within 10 hPa of each other.
The pressure will jump around a bit but the cylinders should stay relatively the same.
Run tests
When you’re satisfied you’ve got it as close as you can, slide the screen right to left to get to the Sensors screen. Under the List menu, select which sensors you want to test. This is where TuneECU becomes an excellent diagnostic tool! You’ll see what voltage is getting to each sensor. You can also see and clear error codes, run specific tests, reset the ECU adaptations, and reset the service reminder. Normally the latter can only be done at a dealer, but TuneECU can also clear it. If you do your own maintenance, you no longer have to see that annoying little reminder (wrench symbol) every time you start your bike.
While I had the airbox off, I added a Uni Filter pre-filter to my bike. It replaces the snorkel and apparently removes 95% of the dirt, and since I have to remove my fuel tank to service my main air filter, I was all over that. The pre-filter sits under the seat so access is a lot easier, and I think it will keep my engine cleaner too. Some people swear by K&N filters; others say they’re not trustworthy (I’ve written about this earlier), but with two filters in there, I think I’m good.
Final adjustments
Because I added the pre-filter, I decided to reset the ECU adaptations so it would learn the new parameters. When you do this, just beware that the bike may act a bit weird at first afterwards. For example, my idle was low, and the bike in fact stalled once. But after a short ride, it was back to normal.
I had another small issue that will be of interest to other Tiger owners and perhaps others. Once I put everything back on the bike and went for a test ride, my fuel gauge was showing empty and my gas light was on. I thought I hadn’t plugged in the fuel level sensor correctly so off came all the plastics again and up came the fuel tank. But I had, and a little Google research reminded me that you have to ride the bike a few kilometres for the level to be updated. I’d noticed this after filling the bike—how it seems to take a long time before the display adjusts—but forgot in this context. Every job requires at least one “mistake,” but I’ve come to look upon mistakes as “opportunities to learn.”
TuneECU is a powerful tool, so just a word of caution and a disclaimer to use at your own risk. Writing to the ECU is no small thing, and I don’t like second-guessing Triumph engineers, so be careful. I have a minimalist approach to this stuff, and now that the throttle body is adjusted, I’ll be using it primarily as a diagnostic tool.
TuneECU is €24.99 and OBDLink LX is about $100, depending on where you live. That’s a price I’ll gladly pay to have the silky smooth Triumph triple running even smoother, and for the peace of mind of having an excellent diagnostic tool with me while on tour. It’s small enough to fit easily in my kit and can give me a ton of information about all the mysterious electrics of the bike. As motorcycles become increasingly complex and computerized, it’s nice that there are tools like TuneECU and OBDLink LX at an affordable price for DIY mechanics.
Here in Montreal, the 2023 motorcycle season has officially begun. As of March 15th, we can legally be back on the road. The reality, however, is that no one is stupid enough to do so. I saw—or rather, heard—a scooter on the road yesterday, but I wouldn’t want to take a bigger bike out yet. In fact, I can’t get my bike out yet; there’s still several feet of snow blocking the doors to my shed.
Nevertheless, the air is filled with anticipation as it won’t be long now. Motorcyclists are scurrying about like squirrels uncovering nuts, or birds building nests. I’ve seen a few Facebook posts about preseason maintenance and, for the Harley riders, preseason cleaning and polishing. T. S. Eliot wrote that April is the cruelest month, but for motorcyclists in northern climates, it’s these last few weeks of March during The Big Melt (aka dog shit season) that are the most painful. To ease the pain, we undergo a ritual process of preparation for the season to come. Here is what I do to get ready to ride.
Bike Prep
The first thing I do is undo everything I did last fall to prepare the bike for storage. That involves removing whatever I’ve used to block the intake and exhaust ports, removing the wax I left on the bike to protect it through the cold winter months, replacing the battery and saddle, lowering the bike off the jack-stand, and topping up the tires. The bike is now ready to run, and I might start it up, just to hear its familiar exhaust note and reassure myself that all is well in the world.
Depending on the mileage, I change most of the fluids on the first warm day of spring. (I don’t have the luxury of a heated garage, so all maintenance is done outside.) I changed the oil before putting it into storage, but apparently oil ages even if unused, so I’ll do an early oil change, maybe not right away but soon. For this reason, some people put a cheap oil in the bike in the fall just for storage purposes, then change to the good stuff in the spring. I think that’s a little over-kill, so I put the same top quality synthetic oil in before and soon after storage. And no, I’m not going to start an oil thread by revealing what I use, as much as I always enjoy a good oil thread.
I change the coolant and brake fluid every two years or 20,000 kilometres, whichever comes first. I also remove the brake pads, clean them up with a wire brush, and clean and lube the callipers, paying special attention to the calliper pins. The brake cleaning might be over-kill too, but I like to know the pins are moving freely and generally to keep the brakes free of grit and grime. They’re just one of those essential moving parts that is exposed to road debris. If you’ve never done your brakes before, it really isn’t difficult.
I’m fortunate to have MuddySump’s channel to follow for routine maintenance. He’s an excellent mechanic and has the same bike as me.
I change the air filter, or in my case, because I use a K&N, clean and re-oil it. This year I’ll be adding a Uni pre-filter to my bike. On my Tiger 800XC, the OEM filter is under the tank, so adding a pre-filter will not only help protect the engine but also significantly cut down on the service intervals for the filter in the air box.
Then the fun begins: I add all the mods I’ve bought through the winter.
Gear Prep
If you didn’t launder your gear and wash your helmet liner in the fall, now might be a good time to do it. I also get out the leather conditioner and go a little crazy with it. First I do my leather jacket, then my gloves. Then while the rag is damp I do my satchel, my shoes, my wallet, my fountain pen cases, my belt . . . like I said, I go a little crazy. I do this once in the fall when I put my jackets away and once in the spring. We have baseboard heaters which pull all the moisture out of the air in the house, so I do this at least twice a year.
My favourite brand of leather conditioner? This might start a thread as long as an oil thread, but I’ll say that someone who works at the high-end store in Montreal where I bought my satchel once graciously confided that Armor All Leather Care Gel is just as good as the expensive stuff they sell. That was my brand until Canadian Tire stopped selling it. Then I switched to Simoniz, which I didn’t like as much, and lately it’s been Chemical Guys, although this year I’ve noticed that it’s leaving a white film on the leather once it dries. So after doing a little research, I’m going to try Cobbler’s Choice. Like I said, I’m a little obsessive about moisturizing my leather goods. The best moisturizer, however, is good ol’ beeswax, although it leaves the jacket sticky for a few days.
So with every leather item in my house sufficiently moisturized, my gear is almost ready for the season. I squirt a little WD40 on the buckles of my ADV boots, some Pledge on my helmet, wipe some silicone onto the rubber that seals the visor, and polish my visor with Plexus. Yeah, this stuff costs a lot, but Ryan F9 has done a video showing that it’s the best. If the visor is old and too badly scratched to restore, this is when I get a new one; there’s no sacrificing when it comes to vision on the bike.
Treat your tent fly to Kiwi Camp Dry Heavy Duty Waterproofing. The name says it all.
I also get out my camping gear and give it some love. Last fall, I treated the tent with Kiwi Camp Dry Heavy Duty Waterproofing Spray. I like this stuff because it’s non-toxic and doesn’t leave an after-smell. I also clean my stove and make sure anything that needs replacing is replaced, because there’s nothing worse than a temperamental stove when on tour. The one that I use runs on liquid fuel and requires maintenance from time to time.
Body Prep
Touring for weeks on end and crawling in and out of tents, as I’ll be doing this summer, requires some fitness and flexibility. The long days in the saddle are easier if you have some cardio fitness, so I’ve been running fairly regularly. I do a 5K loop with the dog 2-3 times a week, and when I’m inspired, I run a little longer. Now that the warmer weather is almost here, I’ll be bumping that up and doing some 10K and even longer runs. Running has always been easy for me and it’s my go-to exercise for body and mind.
With all that running, I need to do stretching or my legs get tight and my back becomes prone to injury. This year I invested in some athletic therapy which gave me a set of stretches to do, and as Robert Frost said, that has made all the difference. I used to pull my back a few times a year, often at the worst possible time, laying me up for a week, but with this stretching, I haven’t had an incident in a while. I think I’ve found the answer to my back issues.
In addition to the cardio and stretching, I work on strengthening my core, so some Pilates, yoga, and generally, abdominal work. Sitting on the bike all day is like sitting on a stool with no backrest, so you need a strong core. When you start doing any off-roading, there are even bigger demands on your muscles. I’ve already done a blog about fitness and strengthening, so if you’re interested in the specific exercises I do, check that out. One thing I’ve added since making that post is to work on balance. You can do that with a wobble board, but a simple way to improve your balance skills is to stand on one foot . . . with your eyes closed. Try it. This develops all those nerves in the foot that are essential to good balance, and according to Jimmy Lewis, off road riding is all about balance.
This year, to account for the extra weight of the top-heavy Tiger, I started doing some strength training with kettle bells. I may be a natural runner, but I’ve always had the upper body of Pee-wee Herman. I really like kettle bells and I think they will become a regular part of taking care of myself. The main reason I like them is that you get cardio, strengthening, and core work all in the same workout. Because kettle bells are asymmetrical (unlike barbells), you’re always working your core, and if you string reps together EVOM (Every Minute On the Minute), you also get your cardio workout. Best of all, you really only need a couple of kettlebells to get started and can do it in a small space in the house. I’ve been doing kettlebelling for the past month or so and am loving it! I’m following Mark Wildman’s YouTube channel. He’s excellent and has a series of videos specifically for people like me just starting out.
If that sounds like a lot, it kind of is, and I’m trying to figure out how to fit it all in. At my age, recovery time is not what it used to be, if you know what I mean. At first, I tried staggering running and strengthening on alternating days, but that didn’t leave me any days off to recover. Currently I do a run after my long days at work to run off the stress, then a double workout of kettlebelling followed by a light run when I can, which wipes me out but then I take a full day off with just some stretching. In other words, I listen to my body and adjust accordingly, keeping in mind that you need to do an activity 3-4 times a week to see benefits.
Finally, the only other muscle I exercise is . . . eh, hem . . . not what you’re thinking but my clutch hand. I keep one of those spring grip devices on my desk all winter and pick it up from time to time. Works better than a stress ball and helps avoid arm pump when off roading.
One hand on the mouse, one hand on the grip strengthener.
Eye on the Prize
It was the best of times, it was the worst of times . . . it was the spring of hope, it was the winter of despair. Charles Dickens wasn’t a motorcyclist, but in describing the Victorian era he caught something of the spirit of this intermediary period. As I come to the end of my March Break and head back to work tomorrow, I keep in mind that at least I’ll soon be able to commute by bike, and before I know it, the semester will be drawing to a close and we’ll be getting ready to leave for Newfoundland. Marilyn and I booked our ferry crossing the other night so that trip is a go! 18 days together on the bike camping through Gaspé, Gros Morne, and across The Rock. It’s going to be epic.
Keep your eye on the prize, folks, whatever that may be for you. Have a safe and enjoyable season.
There’s a balance between customizing a bike and over-modifying it. I remember an episode of Adventure Rider Radio in which Jim Martin talks with Warren Milner, who worked at Honda for 30 years in product planning and R & D. Warren warns against rashly modifying your bike, especially based on advice given on internet forums. For example, at one point in the interview, he talks about the exhaust system, describing how manufacturers spend hundreds of hours developing and testing it before the bike goes into production. That’s because today’s bikes use back-pressure from the exhaust as an integral part of the combustion process to optimize fuel efficiency and emissions, yet one of the first mods owners often do is to slap on an aftermarket exhaust. One can almost hear the collective groan of the engineers as they do.
At the same time, every bike that rolls off the assembly line is built for the average rider—average build, average riding (whatever that is), average skills, average goals. That’s why it’s important to customize it for your specific needs. Tall rider? You might want a taller windscreen to avoid buffeting, or add a wind-deflector. Long legged? You might want to lower your pegs or raise your seat. Or the opposite: you might want a lowering kit so you can flat-foot. Going off-road? You’ll need different tires, etc.. There are a lot of considerations, and fortunately, a lot of options available. The industry is healthy with aftermarket products.
I decided to ride the Tiger for a season pretty much as I bought it. I wanted to get a feel for it stock before making changes. I still have the stock front tire on that came with the bike. The only changes I made were in the realm of protection: crash guards and a beefier skid plate. I’d learned my lesson with the BMW, waiting to buy some upper protection and ending up buying a new radiator along with the guards when I eventually did. After studying the market, I went with Outback Motortek. The guards and plate set me back a cool Grand, but I think they’re the best on the market. The only other mods I’ve done to the Tiger so far were to add an AltRider rear brake extender and a wind deflector.
But with two big tours planned for 2023, it’s time to ask Santa for some items to get the bike ready. Here’s what’s on my wish list for 2023.
Panniers
The Tiger came with Triumph racks and cases. The system is fine for commuting and light touring, but those side-opening cases aren’t practical for moto-camping.
I deliberated (read, “agonized”) over this decision for a long time. I love my Touratech hard cases, but the Tiger has a high exhaust on the right side so I really should go with an asymmetrical system. When I had the 650GS on the market, I had offers just for the racks and cases, but I was reluctant to separate them from the sale of the bike. The new owner wanted to buy them too, but in the end, I decided I couldn’t separate from them either.
They are great cases and contain a ton of memories with all the stickers from where I’ve been. They are the original puck system, which you can’t get anymore, and I like that you can lock them. I’ll probably use these when I tour the East Coast with Marilyn because they are big and we need the space and I won’t be doing much dirt on that tour anyway. We’ll just have to pack them so the bike stays reasonably balanced.
However, I also plan to ride the NEBDR and MABDR next summer, and from what I’ve seen on YouTube, there are some challenging dirt sections of the NEBDR in particular for which I’ll need a smaller, soft-pannier system. (Soft panniers are generally considered safer for off-roading; there is less chance of breaking a leg.) I know everyone is getting the Mosko bags these days, and they are beautiful bags, but I decided to go with the Enduristan Monsoon Evo 34L/24L system.
I’m using the past tense because Santa took advantage of a Black Friday sale and got these 20% off. I picked up at the same time the matching bottle holster (for my stove fuel) and a can holster (for water, chain lube, or bear spray). One of the nice things about this system is that it’s modular, and I’ll probably be adding more to it as I figure out my needs.
Marilyn and I used the Enduristan pannier topper through the West Coast and loved it. Enduristan products are completely waterproof and designed by ADV riders to withstand the abuse of adventure touring. But the main reason I went with this system is the weight; they are the lightest panniers on the market, with no backing or mounting plates to worry about. This also means that the bags and cases will be easily interchangeable.
Racks
It’s Outback Motortek all the way. They put a lot of R & D into their products and back them up with some brave testing, dragging expensive bikes along the ground. Even though the bars do not come up as high as Heed’s and others, they are sufficient to keep the plastics and vital parts off the ground and protected. The bars look like crap afterward but have done their job and can be re-powder coated.
The rear racks offer protection for the silencer and rear of the bike, in addition to carrying the panniers, so again, I went with the strongest. These are a full 18mm + with the powder coating. In fact, they are industry leading in their size, so big that Dual Sport Plus, where I bought the Enduristan bags, includes a workaround kit of washers so the bags fit these bars.
To these bars, I’m going to add on the left side an X-frame plate so I can mount a RotoPax 1G fuel container inside the bars. This will increase my range when remote riding and help balance the bike, especially when using the symmetrical TT cases. Clint at Dual Sport Plus has my exact planned set-up—racks, panniers, and RotoPax—seen here.
Hand and Lever Protection
The final bit of protection I’ll need before attempting those gnarly sections of the NEBDR is some protection for the levers. I considered going again with foldable levers but that would still leave the front brake reservoir and my hands unprotected. After looking at all my options, I decided to go with Barkbusters. They have a model that is made for my specific bike so the install is straightforward. And if I had any lingering doubts, they were quashed when I saw that BB make a plastic with my bike’s name on it. I know the Jet plastics don’t provide as much wind protection as the Storm and other plastics, but I think they suit the styling of the Tiger, and sometimes you just have to sacrifice a little practicality for vanity . . . I mean, aesthetics.
The angles of the Jet plastics match the bike, I think.
I’m not going to change my mirrors for now. I’m really not fond of the look of the double-take mirrors and am hoping the crash guards will sufficiently protect the OEM ones. And if they don’t, well, the decision will have been made for me.
Foot Pegs
What’s the most important part of the bike when off-roading? Given that I’ve posed this question in the subsection titled Foot Pegs, you’ve probably guessed correctly. If your body position while off-roading is correct, you really shouldn’t have much weight on the bars; you should be pretty much balanced on the pegs and steering the bike with your feet (i.e. peg-weighting). Of the four contact points with the bike (hands and feet), the pegs are the most important, so a good set of foot pegs is a must if you are going to do any technical riding.
The Triumph pegs aren’t small but they aren’t large either. I’ve heard that a large foot peg can make a big difference (sorry, bad pun), changing the entire feel of the bike and inspiring confidence. They will also save you resoling your boots quite as often. I looked at IMS, but they don’t make pegs for the Tiger. When I found that Fastway did and that there was a Canadian distributer, I jumped, Black Friday sale or not.
Fastway Adventure Foot PegsFor comparative purposes. Above is OEM off a KTM 950. Photo Credit: Yardstick at ADVRider.com
As you can see, at 2.25″ x 4.75,” these pegs are huge. They have adjustment for height and camber, and come with two lengths of cleats: 10mm and 12mm. I’ll probably start with the 10mm since my adventure boots already have a tread. They are expensive, but you only have to buy them once; Fastway sell bike-specific fit kits for mounting, so I will hold onto these babies when the time comes to sell the Tiger.
The OEM tail plate is too small for a duffle and has no good strapping points. It also shifts side to side as part of that Triumph system that shifts as you corner. I really like the AltRider tail plate, but at $260 for a piece of metal, I’m considering other options. You can get an eBay Special from China for 1/3 of that price, but will it be the same? Will the cut-outs be bevelled so they don’t cut into your straps? Will the powder coating begin to wear off after a season or two, as happened on my Kildala rack? AltRider make good stuff, and I like how this one projects out the back of the bike so there’s still plenty of room for Marilyn behind me. I might just watch and wait for this item to go on clearance somewhere, but I’ll definitely need a new tail rack before I tour.
Tires
I’ve had the Dunlop Trailmax Mission tire on the rear of the Tiger, and I had them on the GS when I took it to Vermont last summer. This 70/30 tire is a good choice if you are doing a lot of street with some dirt or gravel roads. That’s what I expect when Marilyn and I go through Gaspé, PEI, New Brunswick, Nova Scotia, and Newfoundland. So I’m going to put the matching tire on the front first thing in the spring before we head off.
For the tour in the US, that’s a little different and more complicated. I plan to start out on some BDRs (Backcountry Discovery Routes) that will take me from the Quebec border down to Pennsylvania, then I’ll be riding principally asphalt as I make my way over to the Outer Banks, including The Blue Ridge Parkway—a bucket list ride for me—and, why not, Tail of the Dragon while I’m in the area.
What do you do when faced with such diverse riding, everything from Class 4 (i.e. unmaintained) roads to the most renown section of twisties in The U.S.? Well, based on my experience, you have to go with the most aggressive tire required for your off-roading needs. You can ride a knobby on asphalt but if you try to take a street tire into mud and gnarly stuff, you can get yourself in trouble. Of course I could by-pass the gnarly stuff, but where’s the fun in that, and besides, I like a challenge!
I’m currently deliberating between Shinko 804/805s and Michelin Anakee Wilds. I know the Shinkos are surprisingly quiet and smooth on the road, despite being a 40/60 road/off-road tire. However, they aren’t great with lateral stability. The Wilds are listed as a 50/50, but I have a sense they might be better in the dirt but louder on asphalt. (I’ve never ridden a set of these before.) I also like that the Anakees are a radial tire, so they will run cooler in the heat at speed. And for what it’s worth, Lyndon Poskitt just put a set of these on his Norden 901 for his tour of Iceland where he’ll be doing similar riding.
The Shinkos are about half the price of the Anakees, but for a tour like this, having the right tire is more important to me than a few hundred dollars. I have run the Shinkos before and they were great . . . until they weren’t. From one day to the next, they started skidding and sliding out on me.
What do you think? Anyone tried either of these tires?
Michelin Anakee Wild 50/50Shinko 805 40/60
Tools, More Tools . . .
Finally on my wish list are some tools for helping me with these tire changes. I’ve always worked off the grass, but it’s not ideal; you’re grinding dirt into your bearings as you wrestle with the tire, and it’s hard to stabilize the wheel while levering. I think I’m going to ask Santa to get me a tire changing stand and some Motion Pro tools to facilitate this work and protect my rims.
Motion Pro Bead BuddyMotion Pro Rim ShieldsMotion Pro 16″ tire leverSRT Portable Tire Change Stand
The Tiger is basically a sport bike in adventure clothing; it rips, and I love how it handles through twisties. But I’ve yet to really test it off-road in technical terrain. Fully protected, with an aggressive knobby and soft panniers, Jet will be ready to hit the dirt and I’ll be eager to get back to exploring. Gros Morne National Park is a bucket list item for Marilyn and me, and I’m hoping we’ll be able to get deep into the park on the bike.
In the meantime, we’ve just received here in Montreal the first big snowfall of the winter. I’ve been shovelling the driveway for the past 24 hours, but I really don’t mind. It will be nice to have a white Christmas. I’ve just finished all my grading in my teaching work, and we are sufficiently stocked with holiday sweets and treats.
I was just remarking to Marilyn that, in many ways, I prefer the midwinter holiday to the summer one. While I can’t ride, being a bit house-bound provides an opportunity to step back from everyday life and reflect—a sort of retreat. And what comes to me this year as I do that is how incredibly blessed I am in so many ways. I and my loved ones are healthy, we have enough money, I have a fulfilling job . . . I could go on, but I’m thinking mostly of the people in Ukraine and other parts of the world who are less fortunate. In the immortal words of Ron MacLean, “count your blessings, not your presents.” It’s nice to dream and plan to buy stuff for what we are passionate about, but the most precious gifts cannot be bought.
I wish you and yours a healthy, happy holiday, and safe riding and travelling in 2023.