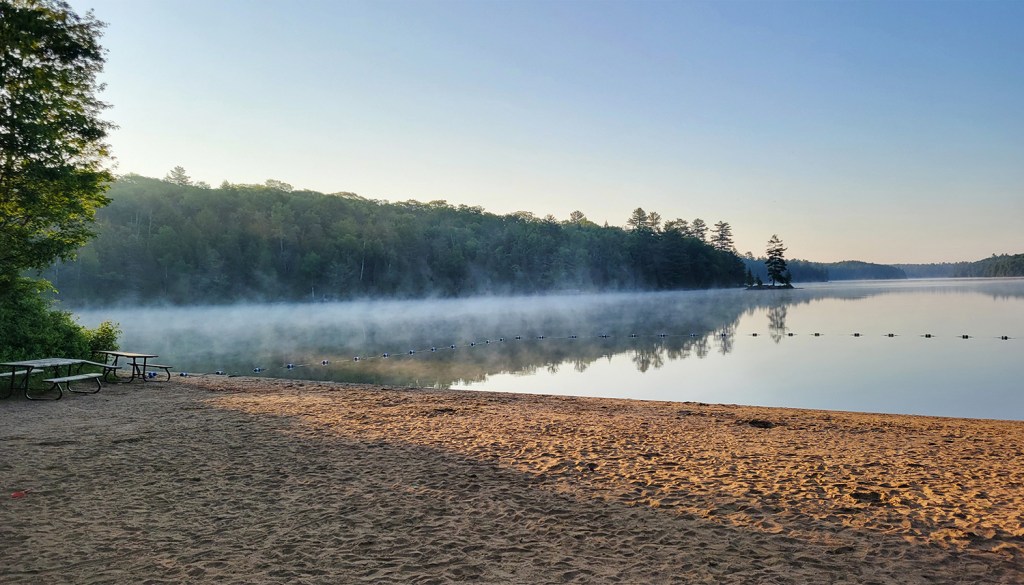
Port Joli Beach at Thomas Raddall Provincial Park, Nova Scotia
The annual wistful synopsis of the summer.
Here we are, at the beginning of autumn. There’s still plenty of good riding left in the season, but the days of summer vacation and touring are already behind us. As usual, I haven’t posted much over the summer since I’ve been busy riding, reading, travelling, troubleshooting, and generally staying away from sitting at a computer, the occupational hazard of my job.
This summer I tried to balance travelling and resting, my two favourite activities. Okay, resting isn’t really an activity, but napping is. In the past, I did a little too much of the former and not enough of the latter and ended up going back to work in the fall not feeling rested. This year, I did a smattering of shorter trips, one longer trip, and a whole lot of resting. I’m a year away from retirement so consider this good practice for the future.
My eldest sister, Susan, and my dad, 96 years young!
The summer began, as it usually does, with La Classique Moto Fest, the big ADV rally here in Quebec held each year over the May long weekend. If you missed my write-up about that event, you can find it here. Then when I was free and clear of all work duties, I made a trip back to Ontario to visit family, and in particular my dad for his birthday. He’s now 96 years old, so I like to get back to see him at least a few times a year. That was followed by my annual literary pilgrimage with my writer friend, Harold. We usually visit the gravesite or home of a famous writer, and this year we planned to get to Orillia and Stephen Leacock’s house. We stopped in Kawartha Lakes, Ontario, in Lanark County at Silent Lake Provincial Park and never made it much further. The historic residence of the author of the enduring Canadian classic Sunshine Sketches of a Little Town will have to wait another year.
While I was there, I scouted the campground for a return trip with some riding buddies the following week. We stayed two nights and rode most of The Timber Trail. I did that Highlands loop solo last fall and, although a few of the boys were on street bikes this time, I knew most of the dirt and gravel roads would not pose them any problems. Yes, even an R1200RT and a Honda ST can do much of this loop, albeit slowly and when dry. It’s not only big bike but also street bike friendly.
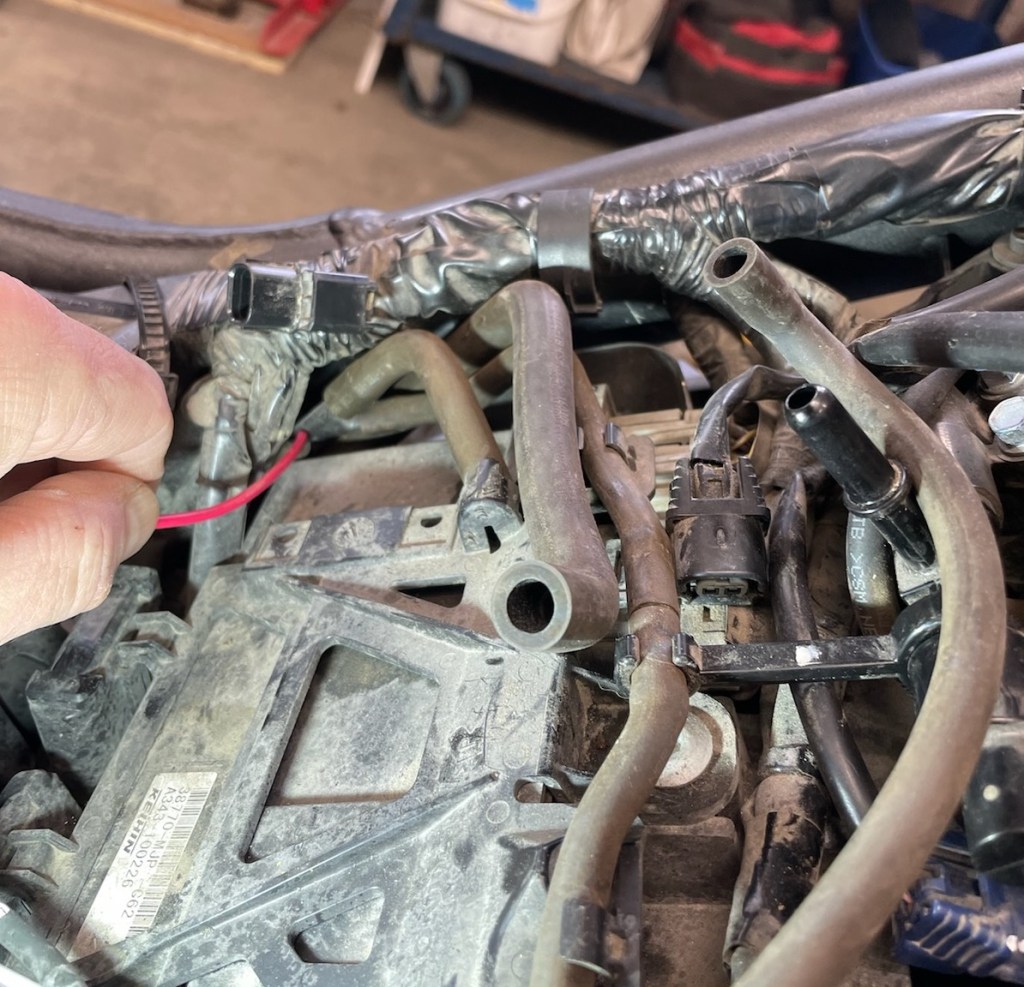
That was the shakedown ride for my summer tour and a good time to find out that I had some intermittent starting issues. After stopping for a short break, my bike wouldn’t crank. At first I thought it was a switch (sidestand, clutch, starter?), then a relay. Once home, I changed the starter relay under the battery, then the battery. I ended up doing my tour without incident but had more starting issues once back home. After more troubleshooting, I think I’ve traced the problem to a loose wire into the fuel pump relay. Perhaps it was the relay itself, and I’m still not 100% sure I’ve solved it, but for now the bike is starting fine. You gotta love intermittent electrical issues.
Looking for a short in the wiring harness.
I’ll be writing about my tour over the winter months when I’m off the road, but suffice to say it was one week of the Trans Quebec Trail from Magog to Rimouski, and one week doing The Lighthouse Route that follows the southern and western shores of Nova Scotia. Watch for those posts soon and click Follow if you want notification when they’re posted.
Crossing the Laurentian Mountains on the TQT south of Quebec City.
The summer was capped by another short trip with the boys to the Calabogie, Ontario, area to ride The Pickaxe Loop. I don’t take many photos on these group trips because who wants to ask four guys to stop while you snap a few photos, but here’s one from our final night at Black Donald Tent and Trailer Park, cooking under a tarp in the rain.
L to R: Danny (Triumph Scrambler 1200XE), Steve (Honda ST), Mike (BMW 1250GS), and Riley (Norden 901).
Amid it all, I’ve been dealing with an oil consumption issue with the Tiger. If you read my post on the piston soak, you will know that I had a lot of carbon in the cylinders and I think the oil retention ring was stuck. I used Seafoam and a water treatment to clear a lot of it out in June and the bike seemed fixed. But as the summer progressed, it started to burn oil again—not as much as before, but still about 400 mL over 1,200K (745 miles) on the Pickaxe trip.
The moral of the story is don’t mess with OEM set-up on the engine!
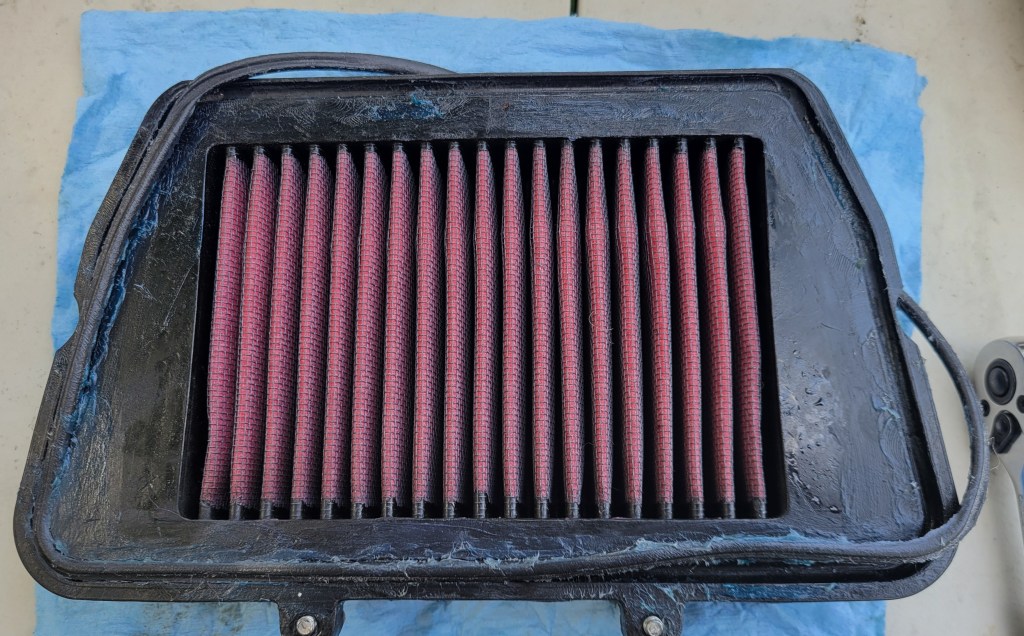
Just the other day I was doing some research on what causes carbon build-up and something caught my attention: “When it comes to the mechanical operation of the engine, air to fuel ratio inconsistencies also plays [sic] a key part in the development of carbon buildup.” Just the mention of air to fuel ratios got me thinking about my Unifilter prefilter that was an early mod I did on the bike. The OEM air filter is under the fuel tank and so kind of a PITA to access. The prefilter replaces the snorkel under the seat and not only reportedly catches 95% of the dirt but is easy to remove and service.
I remember having a nagging concern when I installed this. Don’t I now have two air filters, and what might that do to the air-fuel ratio? But it’s a popular mod and so I dismissed the concern, reassuring myself that the ECU would adjust, as it does for temperature and altitude. Now I was returning to that mod and suspicious it was the cause of my carbon build-up. Isn’t running the prefilter essentially like running a dirty main filter? A quick Google search indicated that, indeed, running a dirty air filter can lead to carbon build-up!
So last weekend I removed the prefilter and reinstalled the original snorkel. The bike seems to start faster, idle smoother, run better, and have more power. I now think the bike was choked all this time! The moral of the story is don’t mess with OEM set-up on the engine! I’m now completely stock with a Triumph air filter and a Triumph oil filter. I’ll be doing another piston soak and engine clean toward the end of the season, and in the meantime I’m adding Seafoam as a fuel additive to start the cleansing. I want to start next season with a clean engine in the hope that it will stay clean.
With the bike running great, I’m looking forward all the more to the fall riding. If there’s a silver lining to the end of summer, it’s the cool, beautiful riding of the autumn, especially here in Canada when the leaves begin to turn colour. I’ll be leading a club ride down through the Eastern Townships at the end of September during the height of the fall colours, and the following week I’ll be participating in the appropriately-named Fall Colours Ride in Barry’s Bay, hosted by Rally Connex. 10 guys in the same cabin is surely going to be an adventure in itself.
How did you spend your summer? Drop a comment below, or at least tell us your favourite destination. What was your best moto moment? Unfortunately, I don’t think WordPress permits photos, but you can always try, or post a link to your own online photo host.
Silent Lake at dawn
Lots more to come in the months ahead, but for now, let’s get out there and enjoy the autumn riding while we still can.
I did a Seafoam piston soak and water treatment in an attempt to clear carbon deposits and stop oil consumption.1
This season my 2013 Tiger 800XC started burning oil. The bike now has 65,000K on it, and from what I’ve read on forums, it’s not uncommon for Tigers to start burning oil at this mileage. I met someone at the Overland Gathering in Calabogie who switched to a 900GS when his Tiger started losing oil, yet “none on the engine and none on the garage floor,” in his words. 2nd gen Tigers apparently are especially susceptible to this fault, and many owners unload them at about this time.
I spoke to the head mechanic at my dealership and he suggested I switch to Motul from the OEM-recommended Castrol. At first I switched to 7100, but in a follow-up conversation, he said they put the V300 Racing formula in all their “high revving bikes.” I hadn’t really considered my triple as high-revving, but I guess it is, or is supposed to be.
In a recent video on one of my favourite channels, Adam Reimann has decided to buy and ride a KLR across Australia. After four hard days in the upper quarter of the rev-range, the bike hasn’t lost a drop of oil. He posits that “anyone who’s been having an oil-burning issue, they’re not flogging it hard enough.” He’s talking about the KLR, a notorious oil-burner, but it got me wondering about my issue. Is it possible that I haven’t been riding in the correct rev-range? Ryan F9 has also done a video on this topic, and in it he mentions that the Italian tune-up helps clear carbon deposits from the cylinders.
I decided to give the bike a good run and headed off to Vermont a few Sundays ago with a couple of buddies. What I discovered is that at over about 6,000 rpm the bike transforms. It smoothens out and comes alive. The slight vibration coming up into the right hand-grip disappears, and all I can hear of the engine in my helmet is a whistle from the intake. According to specs, the bike hits peak torque (78 ft/lbs) at 7850 rpm, and that’s probably closer to wear I should have been riding it for the past three years! I’d been riding it like a single or a parallel twin.
I also discovered on that ride that the oil consumption was getting worse. After 450K (280 miles), the bike had burned about 250mL of oil—basically from the top of the sight glass to the bottom in one day. This was concerning, especially since I am preparing for a multi-week tour.
Compression Test and Inspection
When I got home, I decided to run a compression test and have a look in the cylinders. To do that on the Tiger, the first thing you need to do is remove the tank.
The numbering of the coils is obvious from the wiring, but I still like to tape and number them.
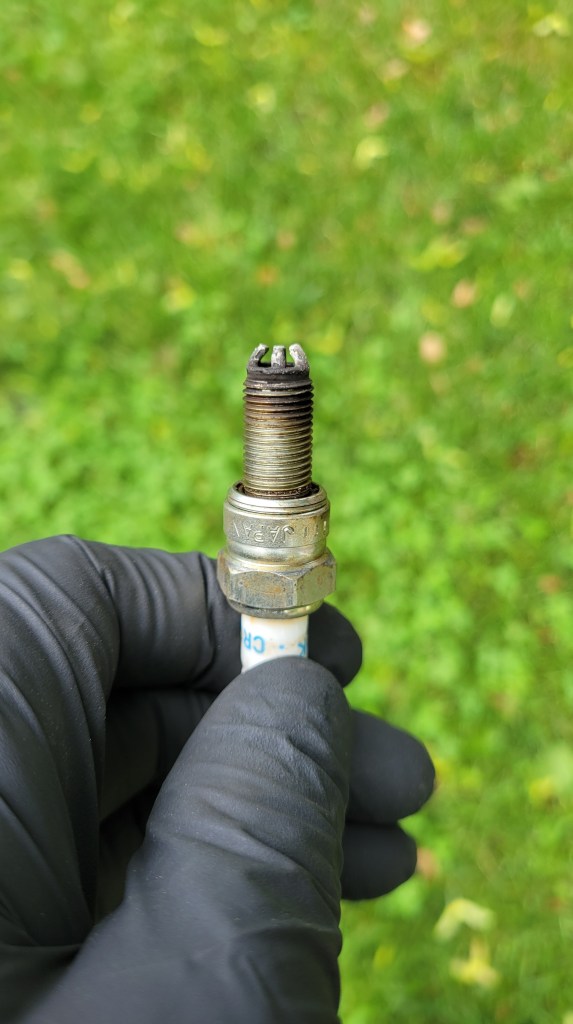
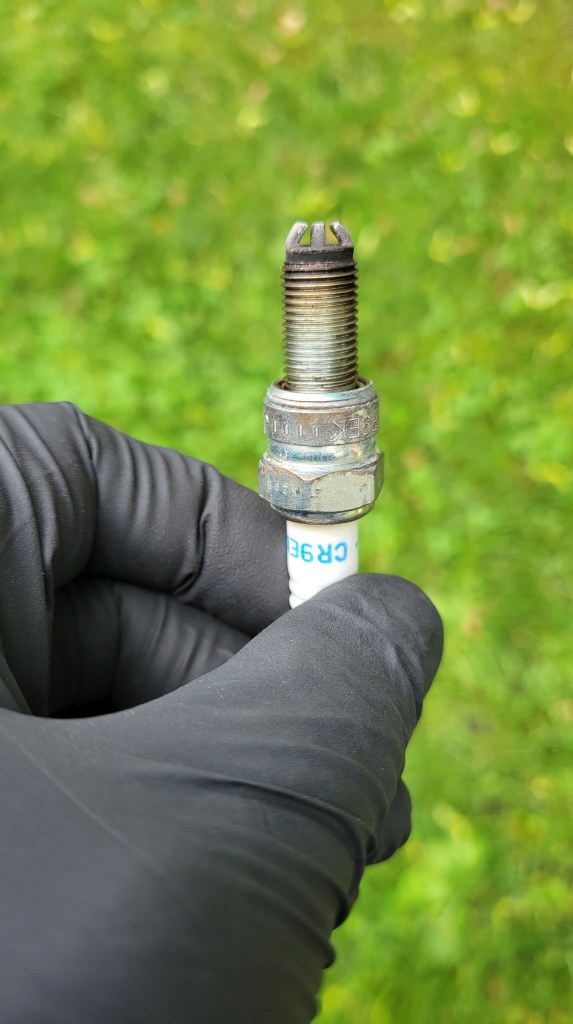
Next I removed the spark plugs and examined them. They showed some white deposits that indicated oil burnt in the chamber. There was no wet oil in the threads. That brownish colour is the copper grease I use to prevent them seizing in the block.
Plug 1Plug 2Plug 3
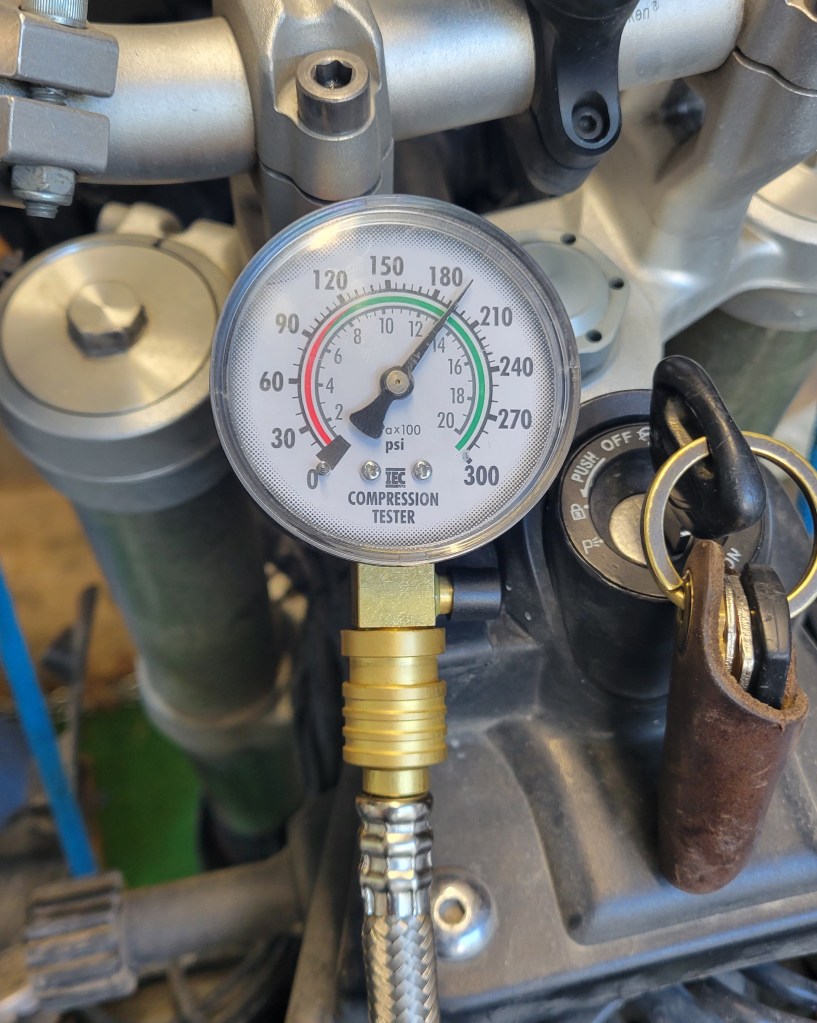
Next I ran the compression tests. Much to my relief, compression was good with all cylinders over 180 psi, so I know there’s nothing physically wrong with the cylinders (i.e. scoring, major wear).
Cylinder 1Cylinder 2Cylinder 3
However, a compression test does not tell you much about the state of the oil retention ring. There are two compression rings on top and they can be working fine, but the oil retention ring can be “stuck” with carbon and not doing its job. I knew my bike had carbon deposits on the top of the intake valves and had tried to clear that last fall with a Seafoam treatment. My working theory now was that running the bike at low rpm had left unburnt fuel in the system that resulted in carbon deposits gumming everything up. Perhaps I wasn’t the only one who wasn’t flogging their bike hard enough.
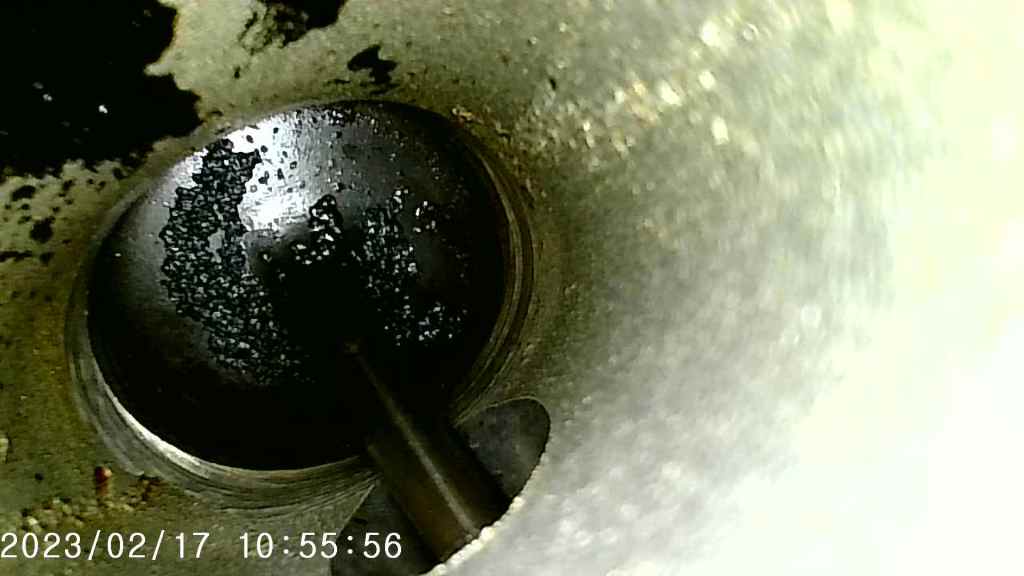
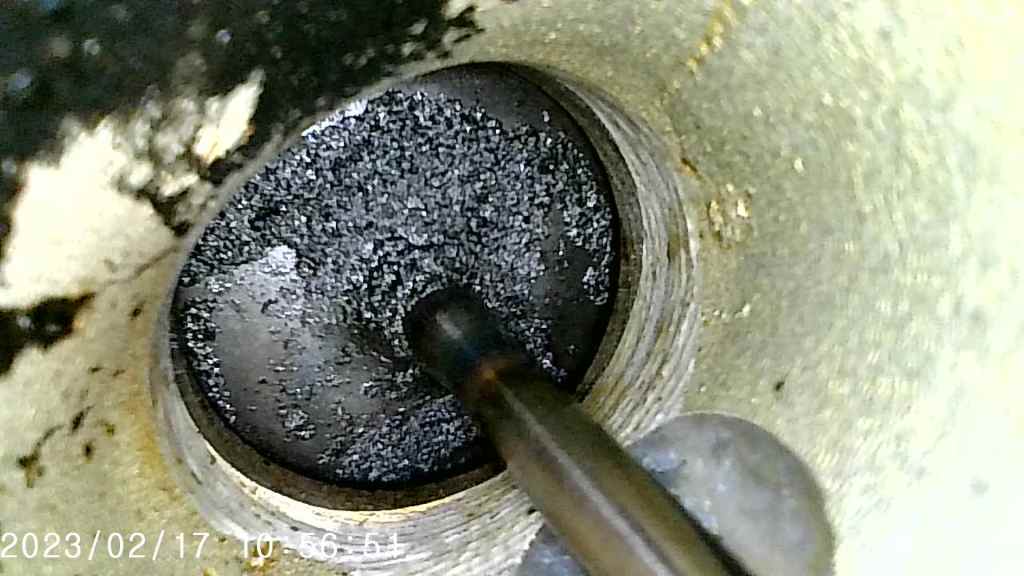
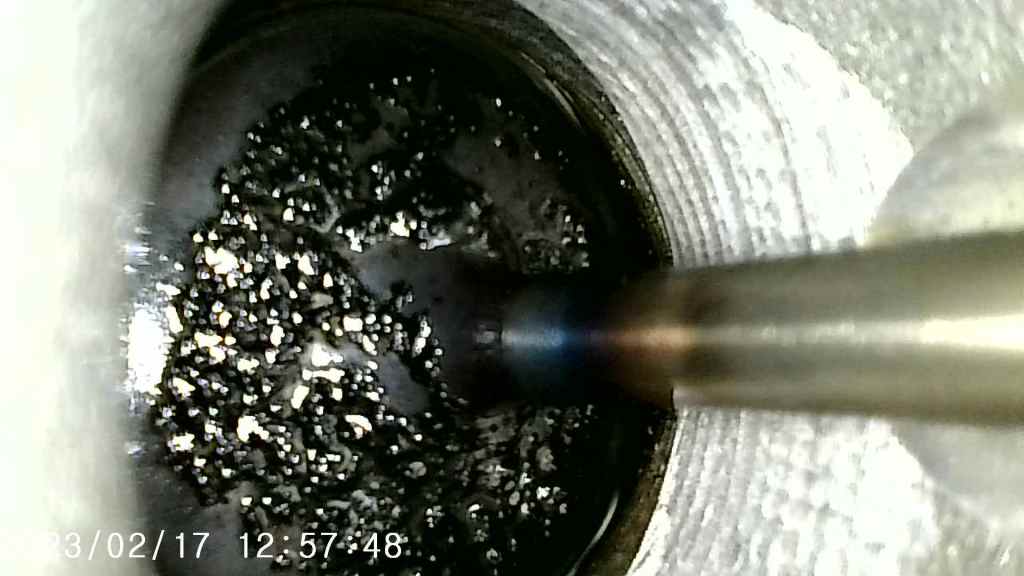
Next I got out my scope and had a look, and what I saw on top of each piston went far in confirming my theory.
Yikes! Is this normal? It certainly wasn’t on the Beemer.
L to R: Pistons 1 to 3. Click on any for a better view. Of the three, piston 1 is the best, and the compression test shows it. Piston 2 is clearly the worst. I wonder how close to my valves the carbon was getting?
The Piston Soak Treatment
This led me to watching YouTube videos on how to remove carbon with a piston soak. Basically that involves pouring a carbon cleaner into the spark plug hole and letting it sit for a while. Some people let it sit for 24 hours; others top it up after 24 hours and let it sit more. One guy soaked his pistons for about a week. You can replace the plugs finger tight to prevent evaporation, but just remember to remove them and turn the engine over several times to clear the cylinders before trying to start the engine again or you will hydrolock it and cause catastrophic damage, which would not be good.
The popular product is Berryman’s B-12 Chemtool, but it can’t be found easily in Canada and, more importantly, it’s not recommended for motorcycles with a wet clutch. (The additive will seep down past the rings into the crankcase.) I decided to go with the milder, less corrosive, tried-and-true Seafoam to help loosen the deposits. I watched another video comparing Berryman’s and Seafoam in which a guy soaks his valves for 10 days using each and the Seafoam did very well, so off to Canadian Tire I went.
Before putting the Seafoam into the cylinders, I wanted to know roughly where each was in its cycle, so I inserted a long pipe cleaner (fringe benefits of smoking a pipe) into each spark plug hole, then reconnected the battery and turned the engine over in very small increments until the cylinders were all a little ways down from TDC. (I know this will produce an error code but I can clear that later using TuneECU.) I didn’t want the Seafoam simply to leak out through one of the valves.
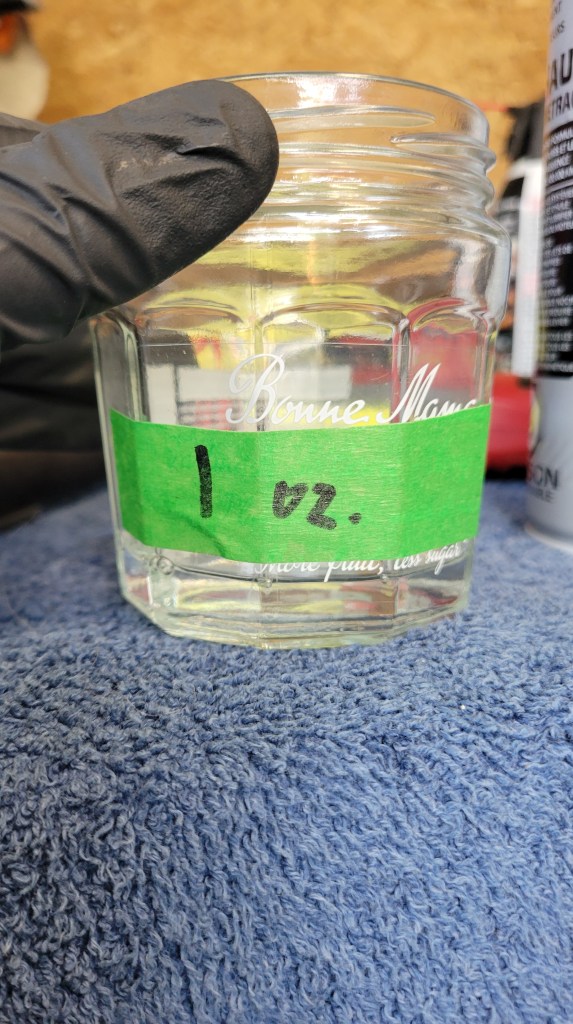
It’s pretty much impossible to get them all down when they are 120 degrees apart, so I started with cylinder 2 high and decided I would rotate the engine the following day. In the videos I’d seen, the guy would jiggle the crank to work the Seafoam (or Berryman’s) below the compression rings to where the oil ring is. Each day I added another ounce, but I really didn’t need to; by the third day, any additional Seafoam leaked out of the exhaust valve and down the front of the engine via the header.
Measuring and pouring 1 oz of Seafoam into each cylinder.
Meanwhile, I was waiting on a part for the windscreen which prevented me from riding so it was a good time to do this work. I screwed the plugs finger tight back into the block and headed off to visit family for the weekend. This is where the story gets interesting.
The Water Treatment
While passing through Whitby, I stopped at GP Bikes to pick up that bracket for the windscreen. I got to talking with the guy in the parts department about what I was doing and he said when they were young they would spray water into the engine to clean the carbon. He said he once brought a gutless oil-burner back to life using this method. And sure enough, here is Eric The Car Guy decarbonizing an engine with water. Apparently, the water instantly vapourizes and steam-cleans the carbon from the engine.
Here’s how you do it. You start the engine and let it warm up at idle to operating temperature. Then you hold the engine at around 3,000 rpm (I used my throttle lock) while injecting the water. You will hear it bog a little so adjust accordingly so it doesn’t stall. Using a spray bottle rather than a cup will prevent accidental hydrolock and, again, catastrophic damage.
By the time I got back into town, the pistons had been soaking for over a week. It was time to clear the chambers and start the engine.
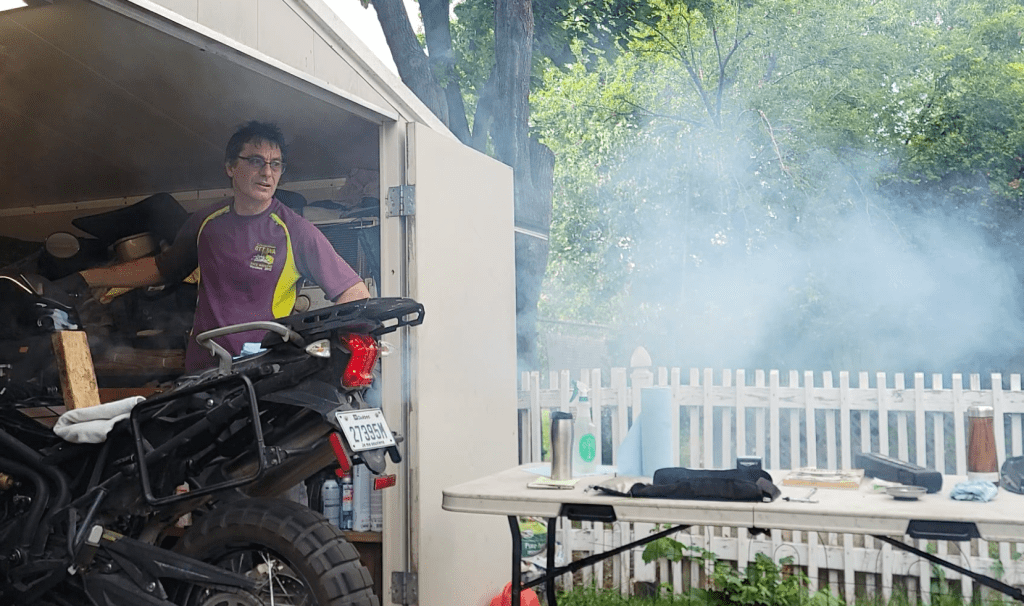
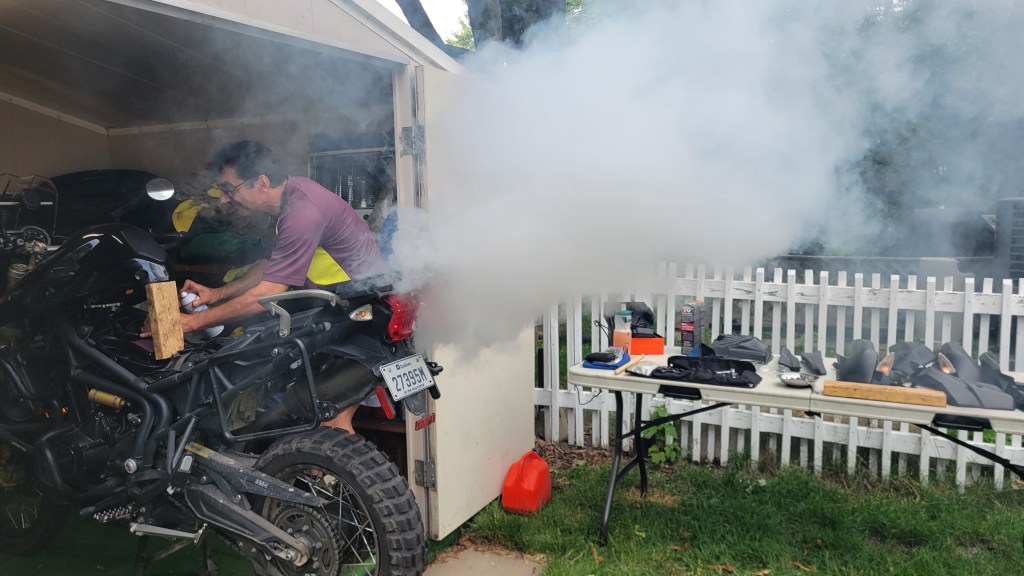
Restarting the engine after the Seafoam piston soak. Yeah, my wife and neighbours were not impressed.
Once the smoke had dissipated, I did the water treatment. I still had the airbox open so sprayed RO water directly into each throttle body.
After about 15 minutes and 150mL of water, I cut the engine and drained the oil and put in a new filter. The oil might be contaminated with water, and the filter might be full of carbon deposits.
The Results
I was very curious to take the plugs out and look at the pistons again, but my curiosity would have to wait. I was heading off on a 3-day motocamp in the Kawartha Lakes region the next day and didn’t have any more time.
I had decided to put Rotella T6 in after all this because, being a diesel oil, it has extra detergents that help clean deposits that tend to build up in diesel engines. Part of my research for this project led me to The Motor Oil Geek, a tribologist, and you can find out what a tribologist is as well as the specific properties of Rotella diesel oil here.
You really should do a double flush, just to be sure you get any water and crud out of the engine, so I decided to run the Rotella just for the trip and then swap it for a regular gasoline engine oil. I also added the remainder of the Seafoam to my fuel tank and used top-tier fuel for the next two fills to help with the cleansing.
At the end of the first day of riding (450K), I checked the oil. As I tipped the bike toward me off the sidestand, I saw the oil rise up in the sight glass all the way to the top! To my great relief, the bike hadn’t burned any oil. After 1,200K when I pulled back into my driveway, the bike still hadn’t burned any oil.
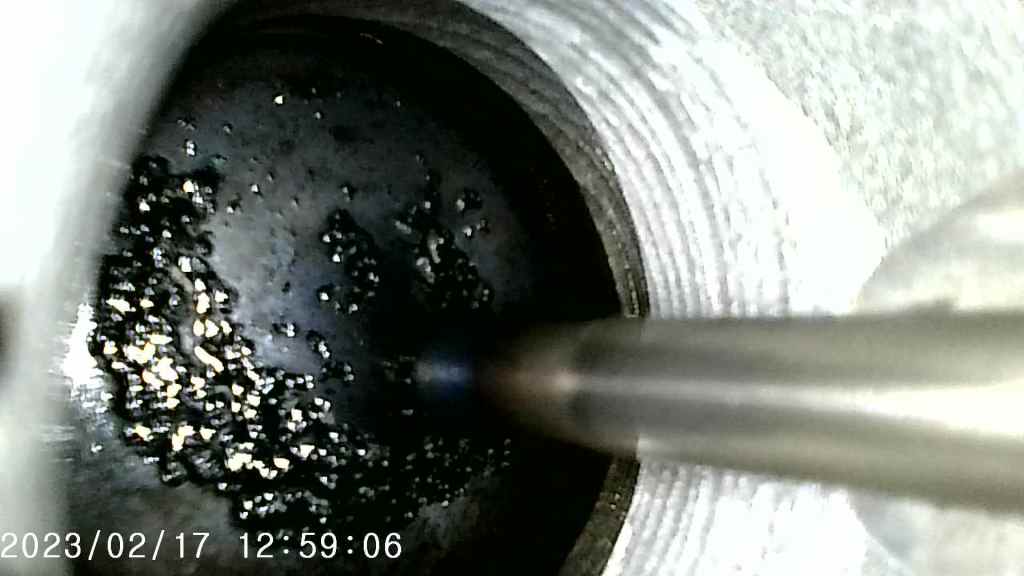
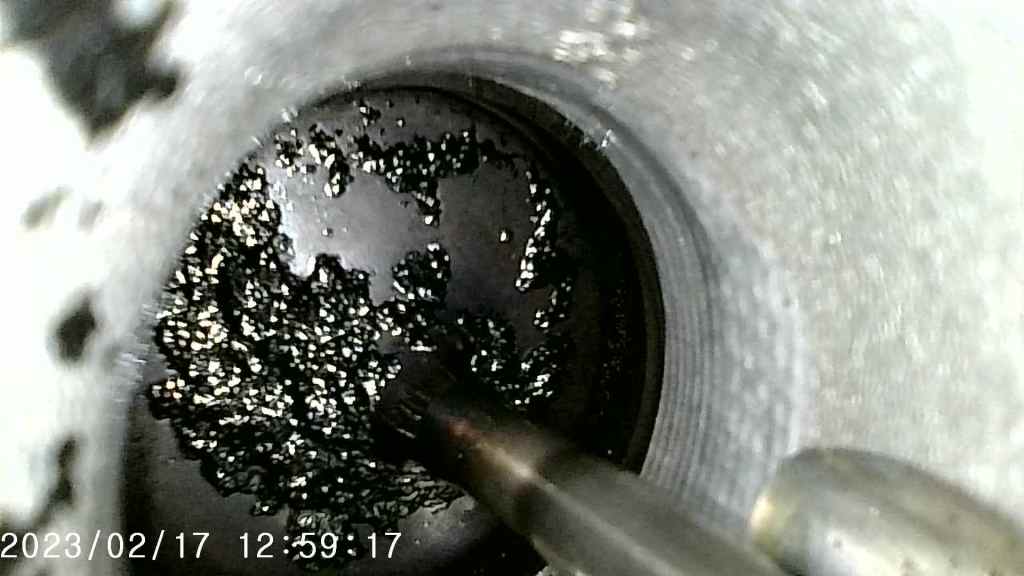
The next day, I removed the tank and spark plugs again and had a look at the pistons. They were considerably cleaner. Before images on left; after on right. Top to bottom are pistons 1 to 3.
Again, click on any image above for a larger view.
Okay, they’re not spotless, but there is considerably more metal and less carbon showing. More importantly, the bike isn’t burning any oil, so I guess carbon was preventing the oil retention ring from doing its job. I’m going to run a fuel additive for one more fill to help clean the last of those deposits out.
Just out of curiosity, I ran compression tests again. I’m now getting 10-15 psi more compression per cylinder.
Cylinder 1Cylinder 2Cylinder 3
Conclusion
Needless to say, I’m more than pleased with these results—I’m relieved. I love the Tiger and want to get many more years of fun out of it. As I write this, I’m prepping the bike for my summer tour. I’m going to drain the Rotella, but this time I’m not replacing it with Motul V300. One of the things I learned through researching this project is that race oils have a shorter change interval. Yes, they are the highest spec, but they are also designed to be changed after a race weekend or track day. Motul 7100 and a set of new plugs are going in this bike.
Another thing I learned is to never put any oil additive in your engine. Oils are carefully designed with a balance of friction modifiers, cleansers, and other additives in a balance engineered by tribologists. Adding something to the oil only upsets that balance. If you want to cleanse your engine, a much better approach is to use a fuel additive. They are safe and will clean injectors, intake valves, and the combustion chamber. I’ll be adding some Chevron Techton fuel additive to a tank of gas after each oil change to help prevent those deposits from building up again. If you want to know why, watch this video by The Motor Oil Geek.
I’ll also be riding the bike higher in the rev range. My fuel economy will suffer a hit, but the Tiger really is happier over 6,000 rpm.
Take-Aways
Ride your bike in the correct rev-range.
Don’t use diesel oil in your gasoline engine.
Don’t use oil additives.
Use fuel additives to help clean deposits.
Top-tier fuel has extra cleansers as well as higher octane.
Seafoam and water can clear carbon deposits from the combustion chamber and improve compression.
Questions, comments? Okay guys, there’s nothing quite like a good mid-season oil thread. What oil do you put in your engine and why?
The ideas in this post are presented for information purposes only and are not given as advice. Any work you do on your engine is at your own risk. ↩︎
In the end, the infamous hot starter issue was an easy and obvious fix.
1st Gen (2010-14) Triumph Tiger 800’s have a known issue with the starter motor when the bike is hot. I read about it even before buying my bike but it didn’t put me off. Every bike has a couple of weak spots. The BMW f800GS, for example, the Tiger’s direct rival, has the cam chain tensioner issue, and my old Beemer, the f650GS, has a water pump that fails every 50K or so. It’s good to know the issues on your bike so you are prepared should they occur. That’s why I spend a stupid amount of hours reading about other people’s misfortunes and frustrations.
Like most issues, they appear to be on some bikes but not all, so you just have to hope you have one of the good ones. I thought I did. I rode the bike for a good, hard year before it started showing any signs. What usually happens is, you are riding and the engine is hot and you stall the bike in traffic (the Tiger is easy to stall) and when you hit the starter, it struggles, fails. This is not my bike but what it sounded like.
Okay, Avi won’t be winning an Oscar anytime soon, but the video displays the issue well.
At first, all I had to do was cycle the ignition off and back on and that would fix it. Then it became progressively worse. I’d have to wait a second or two, then longer. After about two years and close to another 40,000K on the odometer, it was so bad I’d have to wait 10-15 minutes for the engine to cool before it would start again.
Discussions on online forums tend to look to replacing the starter as the first course of action. When I was doing my valves and had the bike stripped down, I decided to remove the starter and clean it up.
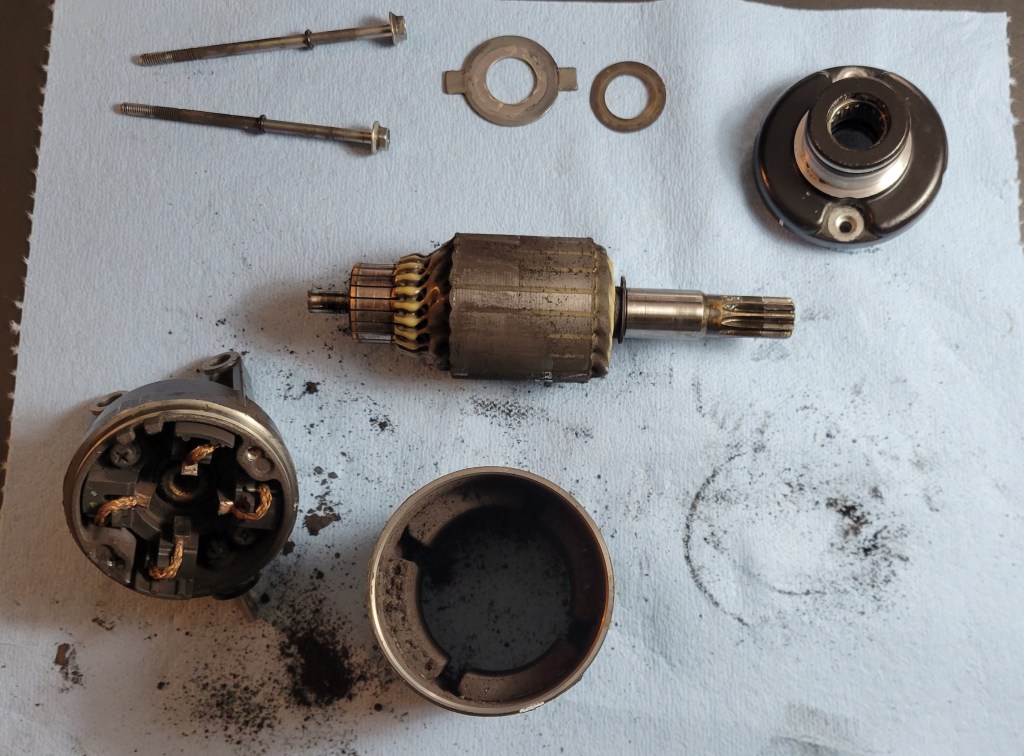
OEM starter innards, late 2023
Yes, there was a lot of carbon dust inside and some tarnishing of the armature, but cleaning it all up didn’t fix the problem. I rode it for another year before it became bad enough to warrant some action.
Reading the forums, it’s clear that there’s a lot of mystery and frustration in diagnosing this problem. There’s one famous 70-page thread on ADVRider by a father and son team who never did get to the bottom of it on their bike, and apparently they are mechanics. So I knew I was in for a long diagnosis.
Triumph doesn’t recommend just changing the starter. It comes as a kit including a new Sprag clutch and costs a sweet $800+. One guy compared the original and new gears and discovered the new one is slightly larger with a few extra teeth, as if Triumph knew the starter needs a little more torque to help it out.
Before going that route, I decided to try a cheap Chinese starter off Amazon. $135 including shipping, all the way from the other side of the world, and what a strange world it is we live in. At that price, I couldn’t really go wrong and thought it was worth a try. The cost was really more in my time because getting to the starter requires removing all the plastics, lifting the tank, removing the airbox and the throttle bodies, so it’s several hours work for an experienced mechanic and a full day’s work for an amateur like me.
The Chinese imitation looked exactly the same as the Denso original. If the Chinese do anything well, it’s copying. When your entire culture, including its economic system, is based on uniformity and sameness, I guess you become very good at copying. The clever Chinese copied the original so well that it too was crapping out when hot.
One of the frustrations for me with this diagnosis was that the starter would work fine when tested on the driveway. I’d idle the bike until the engine was at operating temperature, turn it off, and it would spin up without any sign of hesitation. But after a test ride it would not. My friend Mike tipped me off that the two tests are not the same and the temperature gauge is a crude indicator: the heat when idling is top-end heat, but after a ride it’s crankcase and gearbox too. This was another indicator of the eventual source of the issue.
After the disappointment and frustration of the Chinese experiment, I decided to pull out all the stops and replace the starter with Rick’s and upgrade the battery, the two other popular courses of action.
At under $300, Rick’s starter is less than half the price of the Triumph replacement and by all accounts is superior in design, cranking power, and longevity. You can see right away that American culture is based on difference and individuality.
Rick’s on left, original Denso (or is it the Chinese knock-off . . . ?) on right. The wrench is to stop them rolling.
Rick’s is slightly larger and has a different terminal. The internals are different too, with a double-sealed and protected bearing. The larger-diameter casing apparently prevents the armature from shorting against the housing when it expands with heat. I don’t think that was what was happening in my case, but sometimes size does matter.
In most reported cases, swapping the OEM starter with Rick’s has fixed the problem, a sign that Rick’s is more powerful. However, in some cases, owners have reported problems starting to occur again after some time, even with Rick’s installed, a sign that the source of the problem is ultimately elsewhere.
Another possible fix is to replace the battery with a more powerful one. I unfortunately went the other way, which probably exacerbated the problem. When the OEM battery on my bike got old and weak after near draining it in my Calabogie Disaster, I replaced it with a cheaper and smaller battery. Yeah, part of what I learned through this troubleshooting are the high demands on the battery and the importance of replacing the OEM one with its equivalent or better.
In this case, I decided to go better. I bought a lithium battery with 315 CCA (the OEM Yuasa has 270). I’d owned a Shorai battery with my 650GS and was pleased with it, and since I already had the dedicated charger, I went with another Shorai. The charger plugs into a port on the battery and can run all sorts of diagnostics and reconditioning programs on the battery. And since May 2022, Shorais have an advanced Battery Management System that protects the battery from over discharge that can damage a lithium battery beyond repair.
When it came time to install the new parts, I went the further step of testing and cleaning up the starter circuit. I’d noticed a significant voltage drop upon starting the bike so knew something was up. Again, my friend Mike, who knows more about bikes than I ever will, told me that electrical resistance increases with heat so to look for frayed or corroded wires.
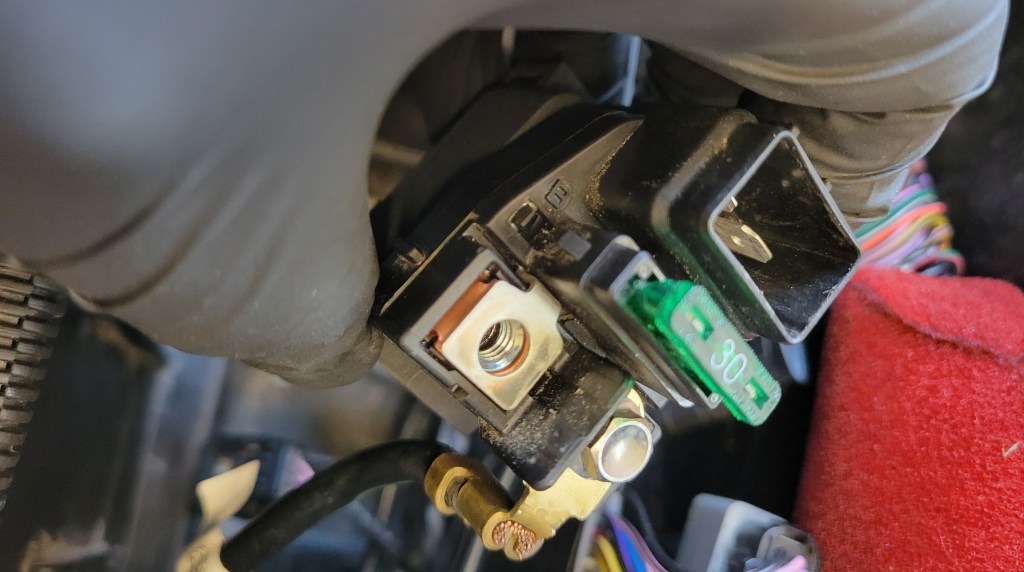
I started with the starter relay, located under the battery.
It looked pretty clean, but I polished the contacts nonetheless with some emery paper and added a smear of dielectric grease.
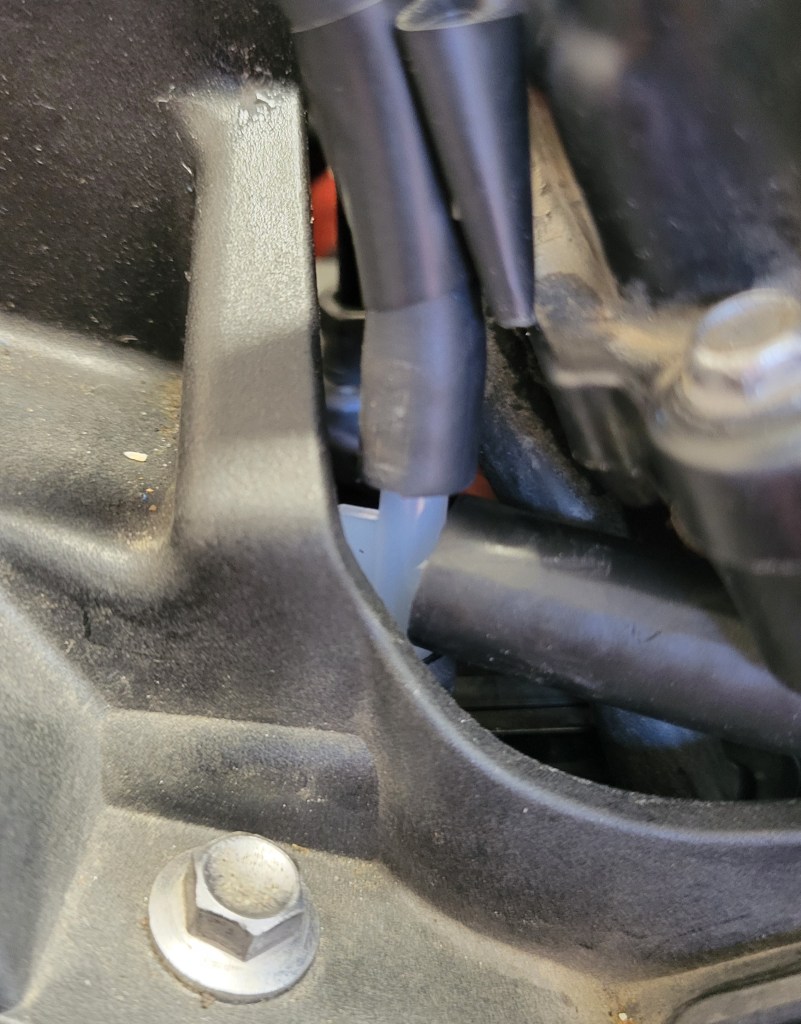
Next, I dug down to the main ground on the bike. It’s located under the airbox and is, significantly, on the top of the crankcase. It was grimy!
Oh boy! The main ground on the bike.
It clearly had never been cleaned. I was beginning to think this was the true source of the problem. It would explain a lot: the progressive nature of the issue, and the reason why it doesn’t happen with top-end heat. When the crankcase is hot, the resistance in this poor electrical connection would go up, causing a voltage drop, and resulting in the starter not getting enough power.
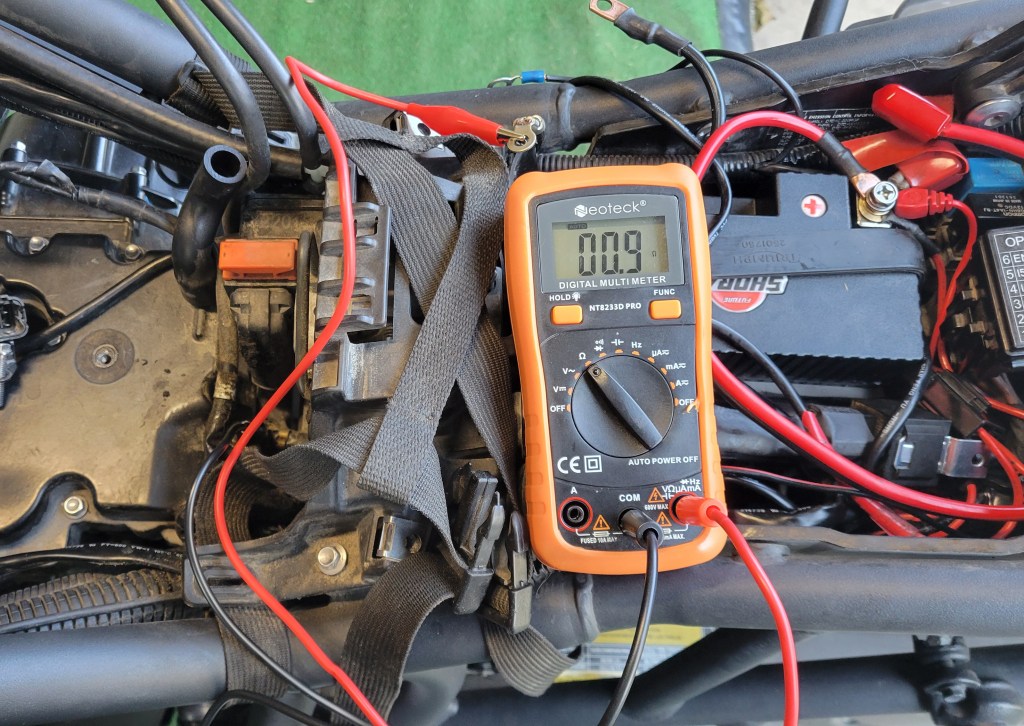
I tested the resistance from the negative battery terminal to the ground. It was .9 ohm!
Before cleaning
A quick Google search indicated that a circuit shouldn’t have more than .2 ohm resistance. I’d found the underlying source of the issue.
After cleaning up the ground and all terminals, the resistance dropped to .1 ohm.
After cleaning
And while I was at it, I added a smear of dielectric grease to the battery terminals too.
Since installing Rick’s starter, the Shorai battery, and cleaning up the circuit, the starter hasn’t had as much as a hiccup.
Whether or not the problem would have been solved by only cleaning the ground we will never know. But if you are having starter issues, I’d begin your diagnosis by looking there. Being under the airbox, it doesn’t get inspected very often, but I’m going to be keeping a closer eye on it from now on. In fact, I’ll probably do some preventative cleaning as part of my annual maintenance.
I don’t mind having Rick’s starter in the bike. The Denso is weak, and mine was 11 years old. I also don’t mind having the more powerful and much lighter Shorai battery in there as well. I could have avoided getting the cheap Chinese starter (now sitting in my workshop), but troubleshooting is a process and there are costs to be incurred and lessons learned along the way.
As I write this, it’s March 15th, a special day if you’re a biker in Quebec. It’s the official opening day of the season. (Yes, we are required by law to be off the roads Dec.1 – March 15.) There’s still a foot of snow blocking the doors to my shed where I store the bike over winter, so I won’t be riding today but soon! It’s been a unusually cold winter in Montreal, as it has been across North America, and we’ve broken a bunch of snowfall records. As far as I’m concerned, that makes this spring especially sweet, made all the sweeter because for the first time that can remember, my bike was put into winter storage running perfectly and not needing any maintenance whatsoever. We are finally into the plus Celsius weather (+32 F), and yesterday I heard the unmistakable sound of a woodpecker while walking the dog.
There’s nothing quite like hearing your bike fire to life the first time after four months of storage. It’s the unofficial sound of the start of a new season. This year my big summer tour will be a section of the TCAT (Trans Canada Adventure Trail) called The Forest that runs from Baie Comeau on the Quebec-Labrador border to Kenora on the Ontario-Manitoba border. This will include some of the most remote riding I’ve ever done, but one thing I know is that my bike will start when I need it to.
What are your plans for this season? A big tour? Rallies? Lots of smaller rides? Share the excitement and let me know. I’m always interested in hearing from readers.
Spend a little time and money to adjust your suspension and it will transform your ride.
In a recent interview on Adventure Rider Radio, Chris Birch talks about spring rate and preload not as factors of sag but balance. The standard thinking about sag is that it’s to keep the tire in contact with the road through potholes and over bumps, but Chris says he thinks about the preload adjuster as what keeps the bike in neutral balance front to back. Too much sag and you’re going to be light in the front and risk washing out in corners; too little sag and you will be nose-heavy and at risk of losing the rear in corners or tucking the front in sand or mud. He said when you get the bike balanced right, it’s an “aha” moment and it just feels easy to ride and right.
There are lots of videos available on YouTube on how to measure sag so I won’t go into that here. What I will say is that most adventure bikes come off the production line set up for street riding. I could be cynical and say that’s to have a comfy test ride and sell bikes, but the truth is that most adventure bikes don’t see much dirt. My Tiger 800XC was the same. The stock spring gave the bike a static sag of 18% (10% is the target) and I was well below recommended rider sag (30%) when loaded, even with preload fully wound.
I recently worked with Stadium Suspensions here in Quebec to correct this. We had tried a 13.2 kg/mm spring on the shock a few summers ago when Marilyn and I went to Newfoundland and were fully loaded with the hard cases. It got us the correct sag but was a little tough on our butts. So more recently Stadium swapped it for a 12.5 with an extra 4mm preload collar and it’s the Goldilocks set-up for me. It puts the static sag at a perfect 10% and rider at 37% but without any hydraulic preload, so I’m definitely within range.
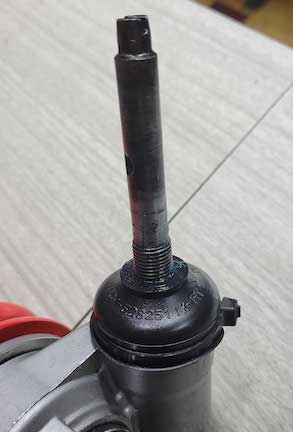
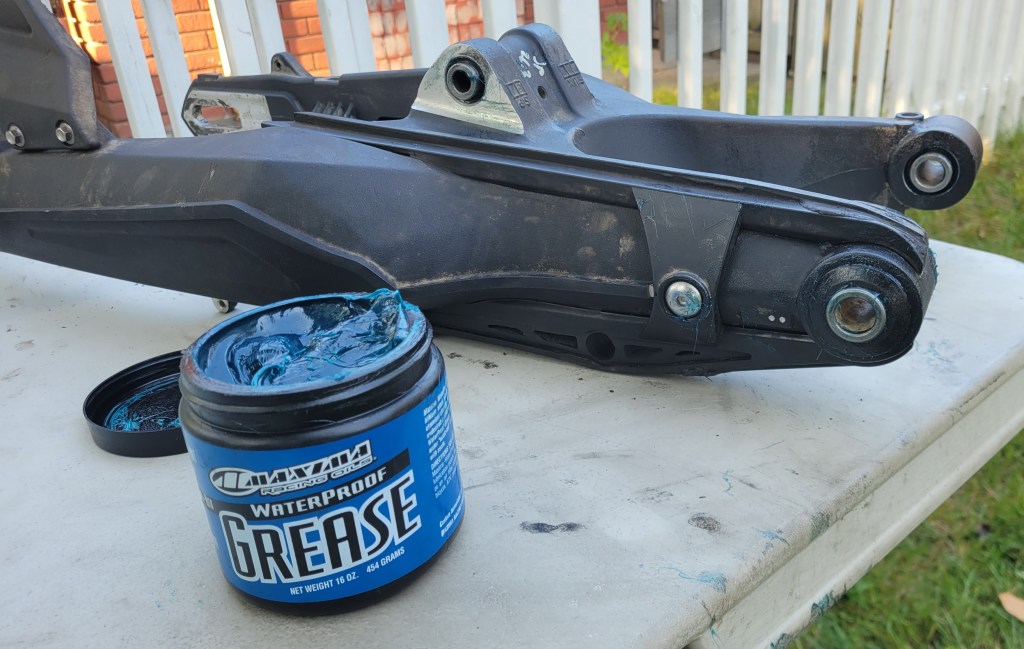
A tie-rod boot helps keep dirt and water out of the preload chamber.
Another reason the bike was sitting low is that the preload wasn’t working very well. Over the years, dirt and water had gotten behind the black plastic collar on the chamber. The components inside had become corroded and had started to seize. Stadium tore it down and cleaned everything up, including machining the housing. The technician suggested I try protecting the now exposed seal with a tie-rod boot, so I ordered a variety pack off Amazon and luckily there was one that fit perfectly. For the Tiger’s Showa shock, you need a boot with ID 11mm top and 37mm bottom, but the latter can be stretched if needed. I put a little waterproof grease across the face of the seal inside and on the lips of the boot and used a zip tie to hold everything in place.
Since I’d stiffened up the rear, I thought I should stiffen up the front too, which was a little prone to fork dive. The OEM springs are .49 kg/mm so we went with .6 kg/mm. If you do the math (do you remember how to cross-multiply fractions to calculate x?), that’s about the same ratio as what we did at the rear. With everything back together, as soon as I pulled the bike off the centre stand, I noticed it was sitting higher. I haven’t had the chance in the late season to try the new suspension on dirt yet, but from commuting on Montreal’s notorious roads, I can tell it’s a big improvement. I had an “aha” moment.
The Tiger’s suspension doesn’t have a lot of adjustment, but there are still ways to customize. I rode both the GS and the Tiger for years before doing anything with the rebound adjustment. (On most shocks, that’s the screw at the bottom of the shock.) Thierry at Stadium said I’d probably have to slow the rebound down with a stiffer spring on now, so I took the time to watch Dave Moss’s tutorial on how to do this. It’s so easy I feel stupid for not doing it earlier. You simply push down on the tail of the bike and watch to see if it bounces upon release. You want the softest setting without even the slightest bounce; it should return to rest in only one stroke. When I did this and dialled in the rebound damping, I felt a noticeable improvement in how the bike tracks over bumps and potholes. Try it.
The forks on the Tiger don’t have any adjustment, but again, suspension guru Dave Moss says the oil height specified in your service manual is only a starting point for the average rider. If you are a light rider like me (145-150 lbs, depending on if I’ve had breakfast) or a less aggressive rider (like me), you could try a larger number. (Remember, a larger number means less oil since you are measuring from the top of the tube to the oil level.) If you are heavier than average or a more aggressive rider, use more oil and a smaller number. Just note the caveat from Dave in the video linked above about hydrolock, so test that you can bottom the fork before putting it back in the bike. And of course there’s always the option of trying different weight oils and different brands of the same weight since there’s no standardization of weight for fork oil. There are charts online showing the different viscosities of brands.
As a final thought, I’ll just add that before you go playing around with your suspension settings—and I’m suggesting you do—make a note of where everything is now so you can always return to your current set-up if necessary. There are many elements to suspension and you can get lost in the combinations, so change one thing at a time and test ride the bike on a familiar piece of road or trail before changing something else. Setting up your suspension takes a little time and patience, but when you get your bike dialled in, it will produce an “aha” moment and transform your ride.
Fully loaded and ready to ride to Newfoundland. (July 1, 2023)
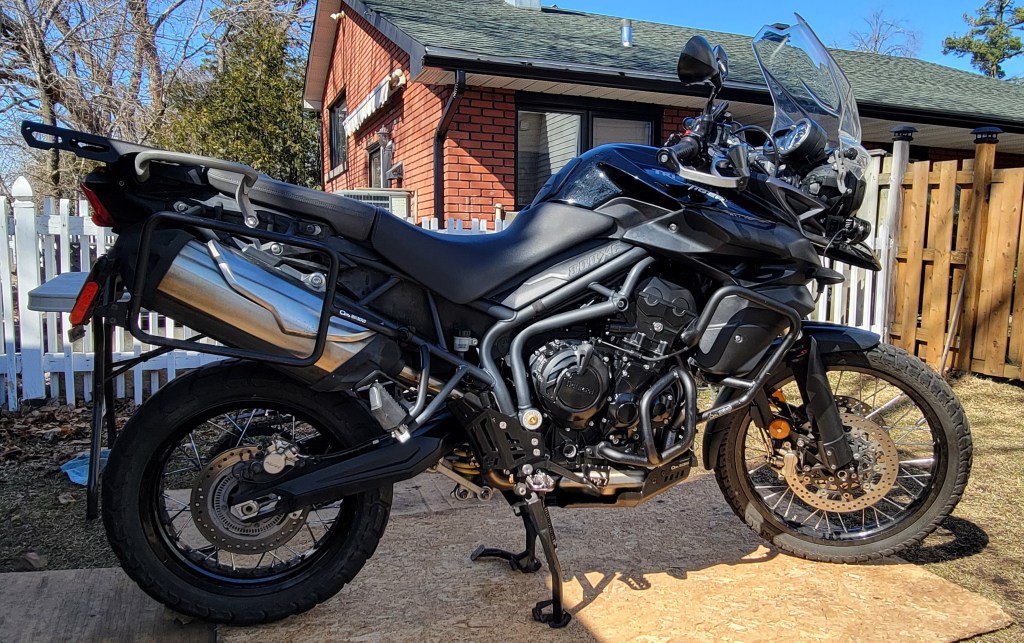
Spirited on road, capable off road, the Tiger 800XC is a great all-round middle-weight bike.
My review of the 650GS has been the most viewed page on this blog for years, so I thought I’d write one on the Tiger, which I’ve had now for three full seasons and over 45,000K. These are both old bikes, so I know most people reading the reviews already own the bike and want to see if they’ve made a mistake. You have not. Well, as always, it depends on the type of riding you do. But if you’re looking for a long-distance ADV touring bike, the Triumph Tiger 800XC is a good choice.
But I’m getting ahead of myself. As I did before, I’ll break down the review into components.
Engine
The heart of any bike is the engine and the Tiger’s is a gem. When I pulled into my driveway on the GS at the end of my 2021 cross-country trip, I knew I wanted a smoother bike. The big thumper got me to the Pacific Ocean and the Arctic Circle and back, but it wasn’t very comfortable, especially on those highway miles. When I test rode the Tiger, I knew I would buy it even before I was around the block; I couldn’t believe what I was feeling. This engine is SMOOOTH! I’d go as far as to say it’s the bike’s defining characteristic. This is the 800, so before Triumph moved to the T-plane crank and off-set firing order, so it’s about as smooth as a triple can be. If you’re coming from the nuts-numbing world of a big thumper, the inline triple with a 120 degree crank is a world apart and exactly what I was looking for.
Aside from being smooth, this engine has a ton of character. It has comparable torque to its rival, the BMW F800 GS (58 ft.lb @ 7850 rpm vs. 59 ft.lb @ 5750 respectively), but gets that torque much higher in the rev range. And it likes to rev! It spins up fast, so even pulling away from a stop light you find yourself pulled involuntarily into The Giggle Zone. Yet despite that high peak rpm, the torque on the Tiger is incredibly linear.
photo credit:// ADVMoto. 1st Gen Tiger 800 dyno results. Note the linear (flat) torque “curve” above 3000 rpm.
The gearbox is also smooth, both upshifting and downshifting. It’s so smooth, someone I swapped bikes with once asked if it has a slipper clutch. The high-revs, the smoothness of both engine and gearbox, combined with a wonderfully guttural exhaust note make the Tiger 800 a really fun bike to ride. It feels like Triumph has shoe-horned a sport bike engine into an adventure chassis, which I guess they have since the engine comes from the 660 Sport. I’m not afraid of the dirt but, to be honest, most of my adventure touring is on asphalt, and the Tiger makes crunching those miles enjoyable.
Where the engine does come up short is in slow-speed technical riding, a downside the T-plane crank of its successor, the Tiger 900, attempts to address. The 800 is happy when revved, but is prone to stalling at slow speed, especially in sticky mud or over obstacles—anything that requires careful clutch work in 1st gear. It has no tractor-factor, so if you like ATV and snowmobile trails, single-track and getting out into the woods, the Tiger is probably not for you. It can do it, but you have to keep the revs up and feather the clutch a lot, which can be tiring on your hand and the clutch.
Handling
The XC model I have has a 21″ front and a 17″ rear wheel—an unusual combination in the ADV world where an 18″ rear is the norm. Perhaps Triumph did that to compensate for the nose-heavy geometry of the big triple compared to a parallel twin. (It still has a stink bug stance.) They’ve also increased the rake on the front forks beyond the competitors’ to 23.9˚ (compare with 26˚ for the BMW 800). What this weird-ass geometry does is make the 21″ front wheel surprisingly easy to turn in yet planted through corners. For an ADV bike, the Tiger is surprisingly agile and confidence-inspiring through the twisties. That’s when it’s in its element, whether on asphalt, gravel, or dirt.
Lanark County Trail System on 70/30 tires.
The cost is a tendency for the front end to tuck in mud or sand, especially if you forget to steer with the pegs. My crash this past August was a direct result of that happening on a muddy downhill corner, although I think balance of the bike front to back was also a factor. (I was under sag.)
Front-end tuck on the Bailey-Hazen hero section.
The Tiger is also a little top heavy, despite its flat horseshoe-shaped gas tank. That’s probably a result of the tall and wide engine. (To get the 660cc Sport engine to 800, Triumph lengthened rather than widened the bore.) You don’t feel it once the bike is rolling, but again, it’s another characteristic that makes the Tiger a challenge off-roading at slow speed. What all this means is that if you want to ride hero sections on the Tiger, you’d better have skills.
Triumph says that the Tiger is for “light off-roading” and they don’t lie. The engine and balance of this bike are designed for 2nd gear and up. But the biggest indicator that this bike is not for serious off-roading is the placement of the spark plugs and air filter, both of which are under the tank. If you’re doing water crossings—and what serious off-roader isn’t—you’d better not swamp the bike or you’re going to be removing bodywork and lifting the tank trailside. Been there, done that. It’s not much fun. To lift the tank, you need first to remove the beak, radiator side panels, indicator panels, and trim. I’ve done this perhaps a dozen times now and have the whole process down to about 20 minutes. Needless to say, for an ADV bike, this is a major design flaw, or at least a serious limitation.
Suspension
The Showa suspension on the XC is a step up from the XR version. Rear travel is 215mm and front is 240mm. That’s more than what I’ll need because I’m not blasting down rocky trails as much as trying to thread my way through them. (The 650GS, for comparison, has 165mm rear and 170 front.) With the Outback Motortek skidplate, ground clearance on mine is about 9 1/4″ or 235mm. The shock has hydraulic preload and rebound adjustment. The forks are a beefy 45mm but with no adjustment. That’s a fairly basic system, but again, sufficient for ADV touring.
Like most ADV bikes off the production line, the Tiger 800 is set up for road use. The suspension is soft and cushy, making a plush ride around town (and during test rides, I should add). But if you want to use this bike for how it’s intended—ADV touring (the XC stands for cross country)—you’re going to have to stiffen the suspension.
The OEM shock has a spring rate of 9.7 kg/mm which, surprisingly, gives me a static sag of 18% (40mm). This means that under its own weight on the OEM spring, the bike is under sag. Rider sag for me is 35%, even with preload fully wound. (Note to newbies: static sag is unloaded with no rider and should be 10%; rider sag is loaded with rider and should be 30%.) At 150 lbs (177 in all my gear), I’m not a big guy, and with about 66 lbs of luggage (56 on the back, 10 on the front), I don’t think I’m overloaded, although I’ll be working over the off season to reduce that weight. Nevertheless, it’s clear to me that the OEM spring on the shock is too soft for anything but solo street riding.
I recently upgraded the suspension and will publish a separate post on that topic, so click Follow if you’re interested in what I’ve done.
Ergonomics and Comfort
The ergonomics on the Tiger are generally comfortable whether you are seated or standing. The wide handlebars are what you’d expect and want on a bike designed for the dirt, yet they don’t feel like ape-hangers when seated either. I haven’t added any bar risers because the bar mounts are already high, and when I stand the bars fall to the right place when I’m in the correct body position with hips slightly bent. (Most people who add risers are seeking comfort while standing erect.)
One unusual feature of the bike’s ergos is the distinct sensation of the fuel tank between your, uh, thighs. It was something I immediately noticed on that brief test ride and something others have commented on when we’ve swapped bikes. The tank is wide, and it forces your knees apart. (No bad jokes here). I find it actually reminds me to squeeze the bike, which is good practice whether riding on and especially off road.
The seat is generally comfortable for long days, although when touring I add a sheepskin pad to improve comfort and airflow. Triumph sell a comfort seat for this bike but I haven’t needed it. Similarly, Marilyn hasn’t complained about the seat on the back. The 1st generation Tigers do not have a heated seat option but subsequent ones do.
My knees sometimes complain over long days but I’m pretty long-legged, so they are bent slightly more than 90˚. I put my Fastway pegs in the low position and the adjustable seat in the high position and this set-up has been pretty good. With the bike now sitting even higher, I’m anticipating improved comfort for my ageing knees. In the raised position, seat height is 34.5″ or 885mm, which is comparable to its BMW competitor.
My biggest complaint about comfort is in the area of wind management. I’ll be doing a separate post on my search for a solution, but let me say here that the OEM windscreens for the Tiger suck! The stock screen is notorious, and the touring screen is little better. Maybe it’s too much to ask of a screen to allow airflow at slow speed when off-roading and a quiet ride at speed on the highway. The best solution I’ve found is the touring screen with a cheap clip-on wind deflector, which helps with the wind but ruins both the lines of the bike and video footage from my chin-mounted camera. Oh well.
Aesthetics
Canadian poet Robert Bringhurst has a collection titled The Beauty of the Weapons and I think the Tiger is a beautiful weapon, especially the all black model. I get a lot of compliments on the bike, even from other riders. You can see in the neoclassic bikes like the new Bonnevilles that Triumph pays a lot of attention to how a bike looks, and they’ve done a great job with the Tiger. Okay, you may say they’ve copied their competitor with the beak, but I think a bike without one looks weird. There are a lot of complimentary parallel angular lines on the bike that thankfully Outback Motortek has followed. Aesthetics is something not everyone is into, but I want a bike that makes me turn around and look at it as I walk away in the parking lot, and the Tiger does that.
Reliability
There are a few known issues with this bike, not surprising given that it’s a first generation model. The shifting mechanism is known to fail, and mine did, but not in the expected way of the return spring or the pin for the return spring breaking. No, it was the selector arm that failed at about 45,000K, so while I was in there behind the clutch, I decided to replace not only the selector arm but also the problematic spindle, the return spring, and the detent wheel, all of which have been redesigned. You can read about that work here. The bike also let me down once in the bush during a water crossing when somehow about 3-4L of water got in the tank. I still think the only viable theory is that water got sucked up through the tank breather tube and I’ve since redesigned the tube to avoid this happening again.
I cut the breather tube behind the airboxand added a T-joint and short length of hose
The other known issue with this bike is the starter motor. There are many accounts of it failing to restart the bike when the engine is hot. It was fine for me the first two years but then started to act up and got progressively worse. I’ll be doing a separate blog post on that too, but I’ll let the cat out of the bag here and say the problem was, at least in part, a dirty main ground on top of the engine block that was causing a voltage drop. If you have the dreaded starter motor issue on your Tiger, clean the main ground and contacts on the starter relay before changing the starter or battery.
That’s it. Clutch, stator, voltage rectifier, water pump, oil pump—all good—and no issues with any of the electronics. That’s not bad, in my opinion, for a bike with over 60,000K on it.
I adjusted the exhaust valves at 45,000K; the intakes were perfect but all the exhausts were tight. There are some reports of the engines, particularly on the 2nd gen Tigers, to start burning significant oil at about that mileage, but thankfully that has not been the case with mine. It burns a little oil now, particularly at high-revs on the highway, but nothing significant. I’ll come back from a tour of a few thousand kilometers and top up maybe 200mL. I’ve been using Castrol Power 1 4T and, more recently, Motul 7100, but when I mentioned my oil consumption to my dealer, he said they put Motul 300V in all the “high-revving bikes.” I thought it was only for racing bikes, but henceforth that’s what will be going in this bike.
I like that the 2011-14 Tigers are still relatively simple and easy to service on my own. There’s no ride-by-wire and rider modes or complicated electronics that require a computer to diagnose and repair, although I wish turning off ABS were easier than navigating menus. The 1st Gen Tigers that ran 2011-14 are at the tail end of an era before things got pretty complicated electronically. Build quality and fit-and-finish are excellent, and the bike is looking as good as new with no rust or corrosion on it anywhere, despite its age.
Summary
Pros
Fun, spirited engine
Smooth gearbox
Agile and planted through corners
Comfortable seat and ergonomics
Good looks
Aside from a few early-model issues, generally reliable
Relatively easy to service
Cons
No tractor-factor; stalls easily in 1st gear
A little top heavy
A tendency for the front end to tuck in low-traction terrain
Poor wind management
Shifting mechanism weak
Some reports of starter issues with OEM starter
Plugs and airbox under the tank
Vulnerability in water if the tank is rapidly cooled
Looking at the length of those two lists, you’d think I’m not happy with the bike, but I am. That’s because the main elements of the bike are good—the engine, the handling, the reliability. The bike has a few issues, like any bike, but they are overshadowed but just how much fun it is to ride, and isn’t that the main thing we want in a bike?
Conclusion
When I participated in La Classique Moto Fest here in Quebec a few years ago, I saw my bike in a long line of other bikes there for the rally. Maybe it was my subjective perspective, but it seemed slightly out of place. It occurred to me that most of the bikes there were set up for off-road riding whereas the Tiger, at least my Tiger, is more an adventure bike, and I was reminded of a comment made years ago on the ARR Raw podcast about this distinction. (I’ll link to the podcast but can’t remember the specific episode.) They were talking about tire choice, if I remember correctly, and one of the guests made the distinction between what they do as RTW riders and what weekend warriors do. He said he’d never attempt half the stuff some guys do off road because, when you’re touring halfway around the world, you can’t afford to break something on your bike and wait weeks, perhaps longer, for parts to arrive. In other words, they ride more conservatively, and that was reflected in his tire choice. I’ll add that it’s also reflected in your bike choice.
Off-road versus adventure bikes. An arbitrary distinction?
As we all know, the adventure bike is the ultimate compromise. It has to be good on road and off road, capable of crunching out miles on the highway as well as getting you down a logging road. It has to be quiet and comfortable for long days in the saddle, powerful enough to climb mountains and carry camping gear, maybe a pillion, yet small and light enough to pick up on your own in the middle of so-called nowhere. It has to be reliable, and simple enough to fix yourself, trailside if necessary, if something does break. With these considerations in mind, the middleweight Triumph Tiger 800XC is a great all-rounder and an excellent choice as a long-distance ADV touring bike. It has its drawbacks, for sure, and may be master of none, but it’s the best Jack of all trades I’ve been able to find.
I used Seafoam to reduce the carbon build-up on my intake valves.
Last year when I had my trouble in the bush, I noticed a significant amount of carbon build-up inside the throttle bodies of my Triumph Tiger 800XC. My buddy and I were troubleshooting why the bike wouldn’t start, and we thought there might be water in the engine. Peering down into the throttle bodies, we could see something glistening inside. Was it water? We even dipped down there twisted pieces of paper to see if they came up wet. But in the end, with the use of a camera, we determined that what was sparkling was carbon.
This was mildly alarming. My BMW 650GS had absolutely no carbon build-up, and I hadn’t noticed it earlier when working on the Tiger. It prompted me to do my overdue valve adjustment, and as some of you know, all my exhaust valves were tight. I don’t know if that led to the carbon build-up, or how normal such build-up is in an engine. I’d heard of the Seafoam heat soak treatment and, being a little housebound at the moment and looking for a project with the bike, I decided to give it a try.
Preparation
Needless to say, the first thing you have to do is get down to the throttle bodies. For me, that means removing a lot of body panels, lifting the gas tank, and removing the airbox cover. You’ll need to keep all sensors plugged in or you’ll elicit an error code in the ECU, so that might involve unscrewing the sensor rather than unplugging it. If you have any vacuum hoses off, you’ll need to plug them with something of similar diameter.
All set to go with the fuel tank propped up with a piece of wood.
Start by adding the full can of Motor Treatment into your fuel tank.
Start your bike and let it warm up to operating temperature. I waited until I heard my fan kick in so I knew it was good and hot.
Bring your engine up an extra 1000 rpm beyond its normal idle and start spraying the Seafoam Top Engine Cleaner into the throttle bodies. You might need a helper to do this or, as I did, you could use a throttle lock to hold the engine just above idle. For a car, you would insert the tube where the air intake boot attaches to the throttle body, but because my bike doesn’t have a boot, I sprayed directly into each throttle body, alternating every 15-20 seconds and trying to spray an even amount into each. It’s normal to hear the rpm drop slightly as you spray, and you will see a plume of white smoke come out the exhaust. Be sure to do this in a well ventilated area!
Hold the tube down inside each horn and spray equal amounts until the can is done.
When the can is completely empty, turn off the bike and let the Seafoam heat soak for 10-15 minutes. Then restart your engine and give it a few good revs. You should see some white smoke still come out. When you get the bike all buttoned up again, go for a “spirited” ride (i.e. give it the ol’ Italian tune-up). The motor treatment you put in the tank will continue to remove loosened carbon and clean the injectors.
Conclusion
So by now you must be wondering if it did anything. Here are some before and after shots using my scope.
BeforeAfter
Is it my wishful thinking or do some of those valves look better after than before? Cylinder 2 for some reason had less carbon build-up to begin with so didn’t have much improvement, but there seems to be some reduction on the valves in cylinders 1 and 3, and definitely cleaner walls. And with the motor treatment in the fuel, hopefully there will be more reduction during the coming rides.
I dunno. It was worth a try, and harmless. According to the company, Seafoam is a petroleum based product and will not harm your engine. I’m not comfortable putting it in the crankcase because then you are thinning the oil, but this top-end treatment seems innocuous.
While I was down there, I lifted the airbox and resynchronized my throttle bodies, which I had done prior to my valve adjustment and Seafoam treatment but now needed a tweak. I also reset the ECU adaptations following all this.
Screenshots in TuneECU before and after
The three cylinder pressures are listed on the left dial. Pressure is less after decarboning, which is to be expected.
I also had the opportunity to check my K & N air filter and was happy to see it’s completely clean; the Unifilter prefilter I installed seems to be doing its job. I took the Unifilter out and gave it a clean and relube.
A clean bill of health
With the bike all back together, the Michelin Anakee Wild tires and the new lower windscreen on, the bike is ready for some dirt. Doggie is making good progress on his rehab so I’m holding some hope I’ll be able to get away for a short tour before it’s back to work.
Legal disclaimer: Any mechanical advice I provide here is offered merely as a description of what I did and a suggestion of what you may do with your bike. I am not a licensed mechanic. Any work done on your bike is at your own risk. The instructions above follow those provided by Seafoam.
Getting ready for the new season this year meant a little more than adding a few farkles.
When I bought my 2013 Triumph Tiger 800XC in May 2022, it had only 14,500 kilometres on it, despite being nine years old. In the following two years, I’ve put another 34,000 on it. I’ve done basic service during that time, like changing the oil, coolant, brake fluid, and cleaning the air filter. I’ve also changed the plugs. But it was time for some major service.
Last fall I did the dreaded valves, swingarm and rear suspension bearings, and cleaned the starter motor. This spring I’ve fixed a problem with the shifting mechanism, cleaned and lubed the steering head bearings, overhauled the front forks, and made a few mods to get it ready for the BDRs. It’s been a long process, but it’s finally ready for the new season.
Valves
It’s the job everyone loves to avoid, and I did too. In fact, when I bought the bike, the dealer said they no longer recommend checking the valves at the manufacturer’s recommended 20,000K because, more often than not, when they get in there at that mileage, the valves are fine. I guess if you’re paying the dealer $1000+ to check them, it’s bittersweet when they don’t find anything out of spec. I was happy to wait. My buddy who rides a Triumph Scramber 1200 XE has never checked his and he’s got I think now over 78,000K on it. “If they’re slappy, they’re happy,” he said, although I always thought you don’t want to hear the valves. At any rate, with now over 48,000 kilometres on the Tiger, it was time to get in there and see how happy they are.
All the intakes were fine, but all the exhausts were tight, some significantly. Here are my calculations. Sorry about the grease.
Highlighted is the amount out of spec. I’m using metric.
As you can see, all the intakes were spot on at 0.15 (specs are 0.10 – 0.20). The exhaust specs are 0.325 – 0.375, so ideally you want them at 0.35. Some of mine were 0.20, so .15mm out of spec. I’m glad I didn’t wait any longer or I might have started causing damage to the valve seat. Live and learn: sometimes there’s reason behind the manufacturer’s recommendations.
An egg carton works well for keeping all the buckets and shims organized.
You want the same bucket to go back on the original valve, so keep any happy dogs with long tails out of your workspace. Nobody likes removing the cams, but just make sure you’ve got it locked at top dead centre and turn the engine over several times by hand once you get it back together to make sure you didn’t slip a tooth on the timing gear. I almost did because I didn’t put enough tension on the timing chain while torquing down the holder. (You have to remove the tensioner.) So you have to find a suitable wedge of some kind to manually tension the chain while tightening. The first two (2!) times I torqued down the holder the chain climbed a tooth.
Timing marks should line up parallel to the crankcase on the inside.
Thanks to MuddySump for his excellent videos. I was following my Haynes manual, but it’s always good to watch someone else do it first, especially when that person has the same bike as you and is a licensed Triumph mechanic! Once I got everything buttoned back up, I checked the valves again and they are now all spot on.
It’s always a little unnerving starting the bike back up again afterward, but it fired right up. I’m hoping the bike will run a little easier now with less tendency to stall.
Starter Motor
A known issue with the Tiger 800, at least the first gens, is a weak starter motor. There is a tendency when the engine is hot for the starter to fail. I’ve had it happen to me a few times. You stall the bike and the starter is reluctant. I’ve managed to fix it by keying off and on, but it was getting worse. Many guys swap out the starter with Rick’s and I considered it, but since I was already down to the throttle bodies, I figured I’d lift them to access the starter and give it a good clean.
I took it apart and there was a lot of carbon dust in there, and some discolouration on the armature. Some 1000 grit emery paper cleaned everything up, including the shoes. The bearing was fine, and I’m hoping I’ve breathed another few years at least of life back into the OEM starter.
Swingarm and Suspension Linkage
The swingarm bearings take a lot of abuse down there right in front of the rear wheel. Even if you aren’t doing water crossings, they’re going to get water and grit and grime thrown up at them. And when there’s crud or corrosion, you won’t feel it as you will with steering head bearings. I remember when I finally did this job on the 650GS, one of the bearings was in very bad shape and I had a bugger of a time getting the pivot bolt out due to the corrosion. This is one you want to do on the recommended interval, and it’s one of the easier ones so why not? You aren’t opening up the engine, just taking the rear wheel off, unclipping all the wiring from the swingarm, then removing the pivot bolt.
Thankfully, it wasn’t that bad this time, but I still left it a little too long. There was some discolouration on the bushings, but the bearings looked fine, albeit missing some grease. I cleaned everything up as best I could using 1000 grit emery paper and repacked the bearings with waterproof grease.
It’s always a good feeling when you restore these crucial components.
Shifting Mechanism
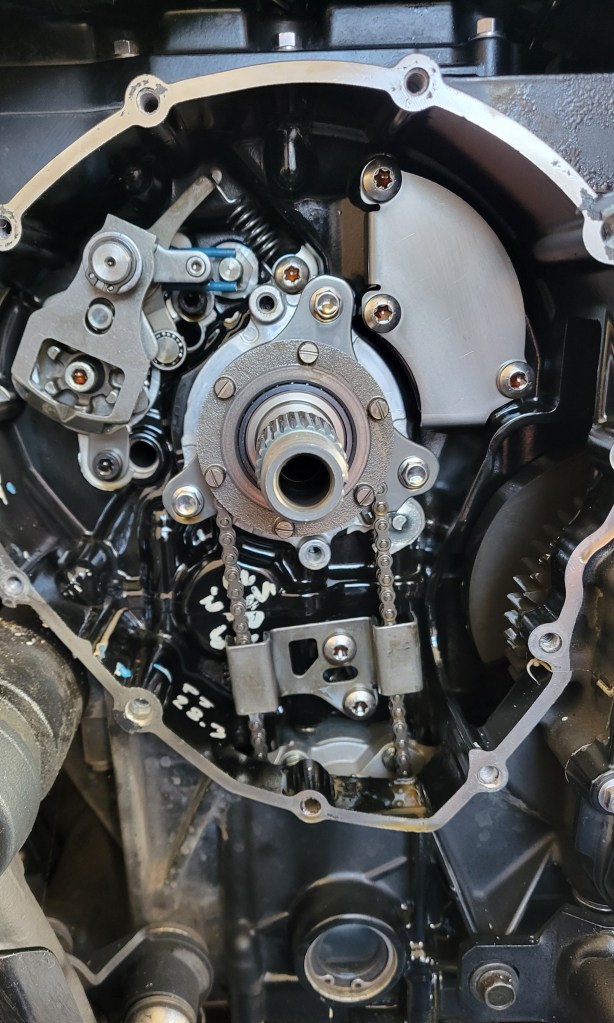
Problematic selector arm is top left. Centralizing spring is blue, indicating it’s been upgraded.
On the last ride of the season last year, the Tiger started being reluctant to downshift. I noticed it as I pulled away from the house and came to the first stop sign. I was heading to Vermont and would have turned around, except I was leading a club ride and there were people counting on me, so I continued.
My first thought was that the clutch cable needed adjustment. It’s normal for those to stretch over time and need to be tightened. But adjustment didn’t help, and as the day continued, the problem got worse. I somehow managed to finish the day, but coming up through Smuggler’s Notch wasn’t much fun and I was happy to get home. That was the final ride of the season. I decided I’d use the remaining nice weather to do maintenance but before I could get to this job the snow arrived, so it had to wait.
I store my bike in an unheated shed, so working on it over the winter wasn’t an option. As you can imagine, my curiosity nagged at me all winter. Was it the clutch, the shifting mechanism, the gearbox? Some research online revealed that there are some known issues with the shifting mechanism on this bike. There’s a pin on the shifter spindle that holds the centralizing spring and it’s known to break. When that happens, the shift lever doesn’t return to centre, ready for the next downshift, but flops down. You can still shift the bike, but you have to lift the lever first with your foot.
That didn’t appear to be my problem because, while there was a little play in the lever, it wasn’t flopping down. But I wondered if it was starting to break. Also, there was a recall to upgrade the centralizing spring, which is known to fail, and I didn’t know if my bike had the old or new spring. I also wondered if the problem was as simple as a worn clutch.
At the first warm day, I finally got in there to see what is happening. To get to the shifting mechanism, you need to remove the clutch. That was fairly straightforward, and the plates looked good. In fact, the stack measures 42.25mm and the tolerances are 41.54 to 42.54, so I’ve only burned .29mm of my clutch over 48,000 kilometres. I’m happy about that.
I had some trouble removing the bushing and bearing but with a friend’s help, we got them and the basket out. What we noticed is that on a downshift, the shifter arm slips off the pins of the detent wheel. A close inspection of the arm revealed wear on the respective pawl.
Wear in the corner of the pawl where it engages with the detent wheel pins. This arm is under tension from a spring (behind, out of view) and it’s also possible that the spring was fatigued.
There has been a redesign on this part as well as the detent wheel that engages with it. I decided to change the whole spindle because Triumph has also redesigned the problematic pin for the centralizing spring. Here are comparisons of the crucial parts, old (on top) versus new.
Old and new selector arms. Triumph has squared the pawls.Old and new detent wheels. Strengthening webs have been added. Original pin was riveted. New pin is machined.
Dear reader, do you care? If you are a mechanical engineer or just a mechanical nerd like me, maybe you do. If you have a 1st gen Tiger 800, you should. These are the wrinkles that were ironed out sometime during production. I’m glad to have the stronger parts in my bike, and it’s shifting great again. Here in Canada, the spindle unit is under $200 and the detent wheel and selector arm come as a kit for under $100, so the hit wasn’t too bad.
Forks Overhaul
I don’t think the fork oil or seals have ever been changed on this bike. I’d never done inverted forks before. They are a little more difficult and require a seal driver. (You can’t use plumbing ABS pipe to drive the seals because the outer tube is in the way.) Figuring this would not be my last bike, I went with the adjustable kind that will work on a variety of bikes but are a little more trouble to use.
Everything came apart easily enough, once I bought a set of thin spanners. (Every job requires at least one trip to Canadian Tire.) There isn’t much room between the spacer tube and the top cap, and you have to get a wrench in there to hold the lock nut while you remove the cap. That was the only snag on the disassembly.
Laying everything out in the order it came off.
The bushings were discoloured with wear, but I didn’t want to wait for new parts so cleaned them up as best I could with fine grit emery paper. For the new seals, I decided to go with SKF because I’d read good things about them. Thanks to Triple Clamp in Toronto for stocking these. A neat trick I learnt from Tusk is, when using those tricky adjustable fork seal drivers, use safety wire to avoid driving your fingers instead of the seal. Nice!
Driving the new sealsRefilling the fork in The World’s Smallest Workshop
The only weirdness of this job was that the amount of oil listed in my manual was way off. It said 619mL for the XC and 107mm from the top of the tube, but I had to pour out about 100mL to get the correct height. Yes, I drained all the old oil, and yes, I pumped the damper rod several times to dispel all the air when adding the new. I asked my dealer about this and he said they only use the height measurement. When I tipped the old oil into a measuring beaker, it was about 1L for the two forks, so with loss, 519mL sounds about right. Anyway, fresh oil, seals, and socks will help the front end this summer.
Steering Head Bearings
This one too had never been done. You can see in the image above that there isn’t much of the factory grease left in there. For this one, I didn’t use the waterproof general lithium grease but bearing grease. The only difficult aspect of this job was avoiding paying for the Triumph tool for accessing the head-stock. Instead, I used a C-spanner and Ryan F9’s tip on using a luggage scale to get the correct torque. The initial preload once you get everything back together is 40Nm, then you back it off and tighten the bearings to 10Nm, which is a little over 7ft/lbs. My C-spanner is about a foot long with a hole at the end of the handle, so all I had to do is convert Nm to ft/lbs.
After having the forks and triple-T out, I needed to align everything again. Thankfully, Delboy’s Garage just put out a video on how to do that.
Fuel Tank Breather Tube Fix
In my last post, I talked about how I ended up with about 3 litres of water in my fuel tank after a failed water crossing. In the post, I presented the theory that the water was sucked up from the tank breather hose when the tank had negative pressure. I considered rerouting the breather tube to keep it out of potential water, but my friend Mike came up with a better solution. While servicing his Africa Twin, he noticed that the tank breather on that bike has a Y-fitting with a length of hose staying high on the bike and the other draining down.
My buddy Mike’s Africa Twin. He’s pointing to the Y-joint with the piece of red wire. The short tube fits into that little cup, presumably to keep it clean. That’s the battery area.
So I picked up a set of assorted vacuum T-connectors and a length of rubber tubing at Canadian Tire and did the same on the Tiger. I cut the tank breather tube and inserted the T-connector, then added the extra tubing. I haven’t decided yet where it will terminate but for now it comes up the siderail and loops across under the fuel tank and is tucked in the other siderail. I think I will shorten it and add a loose end cap like on the AT.
Back right corner of the airbox
If you have a Tiger and want to do this mod, just be sure to cut the right hose. There are two leading out of the tank. One is the drain tube and one is the breather. The drain tube has a check valve on it so doesn’t allow water to come up. The breather tube is the larger of the two where they attach to the tank.
A Few Mods for Dirt
Fender Extender
I saw MotoBob add a front fender extender to his Triumph Tiger and thought it would be a good modification, given the dirt I plan to ride this summer. It keeps a lot of mud off the front header pipes and radiator, not to mention rain water off your pants. He used the Pyramid Plastics version, but my dealer, Montreal Moto, actually had a Triumph one in stock so I snapped it up.
Some extenders come with sticky pads, but I was advised to use silicone. I decided to make things easy for myself and remove the fender. Sounds reasonable, right? I could have done this mod just by removing the front wheel, but I decided to give myself some extra room and removed the fender. It was three bolts on each fork, so how hard can it be, right?
Little did I know that someone had used red threadlocker on the bolts, and one snapped off in the fork. Perhaps someone at Triumph can explain to me how a front fender is a permanent install?
Bolt broken in the fork foot.Yes, that’s definitely red threadlocker.
So I lost a day there. I drilled it out and was retapping it when I got distracted and broke the tap inside the old bolt. Ugh! What a mess, going from bad to worse. I bought some carboy drill bits (after some research on what the hardest, sharpest drill type is), but even a carboy bit wouldn’t touch the tap. Fortunately, my friend Mike, whom I’ve already mentioned a few times, came to my rescue. (He was the guy who refinished the bodywork of my old GS.) He has a proper workbench on a cement floor and drove the tap out with a punch, and then we could re-tap. The thread was a little loose from the abuse it had taken, but he showed me a trick to strengthen it with some 5 minute epoxy. Apply the epoxy like threadlocker but coat the bolt in WD40 so it doesn’t glue inside. Thread it in and after a few minutes remove the bolt and let the epoxy harden to the old threads. Neat! When I reinstalled the fender, I used blue threadlocker.
Lowering Footpegs
My Fastway Adventure footpegs give you the option to mount them standard or lowered. I mounted them standard so I wouldn’t have to adjust my foot levers, but with the dirt coming up, I thought I’d swap to the lowered position. Fortunately, Fastway provide a tool to use to press the pin out. Then you simply press it back in from the other side—from the top of the peg.
Out with the oldand in with the new.
Unlike the fender extender and most other jobs, this one went smoothly and I had the pegs back in again in no time. It was easy to adjust the height of my brake lever; just undo the lock nut and screw the adjuster into the master cylinder. Because I was screwing in, I didn’t even need to bleed the brake. And when I put the shift lever back on, I rotated it slightly from its previous position. This set-up lowers my pegs 8-10mm, which may not sound like much, but I suspect will be significant for knee comfort on long days and lowering centre of gravity when off-roading. The downside is that the pegs are a little closer to the road, but I don’t think I’ll be dragging them anytime soon. Or so we’ll see.
Before I reattached the brake lever.
Sidestand Extender
Another mod for the dirt. I’ve always gotten by without one of these, although it’s sometimes a pain to find a stone or stick to use instead when you are forced to stop in mud or soft grass. I went as far as to install a Touratech one on the GS once, but it lasted all of one ride. I got hung up on some rocks and when I got home I noticed I had an extender no more . . .
Needless to say, I was skeptical about buying another from Touratech, but different bike, different design. Besides, I got this one half price. One of the benefits of riding a discontinued bike is that if you keep your eye out you can sometimes snag accessories at discontinued prices. We’ll see how long this one lasts.
Now I remember what I don’t like about sidestand extenders: they interfere with the centre stand. Oh well, I’ll just have to put the sidestand down first before using the centre stand. No big deal, and maybe it will help stop my centre stand from rattling so much. Or maybe now there will be two stands rattling together. Anyway, I’m not wedded to this accessory and we’ll see how long it lasts.
Oil Filter Guard
The Outback Motortek skidplate for the Tiger 800 does not protect the oil filter. Some would say that’s a design flaw, but I suspect OM did it that way so you can change the oil without removing the guard. (They put a cutout in the guard for the sump plug.) But it does leave the oil filter a little vulnerable at the front of your engine. Triumph make a push on metal guard. It’s a simple design with indents that engage with the filter for an interference fit. Easy to remove when it’s time to change the filter, which I will do after running the bike a bit this spring. The engine’s been open for some time as I worked on everything, but with oil being so damn expensive (it costs me now over $80 for an oil change), I will just change the filter. Anything that might have strayed in will be captured in the filter.
It’s been a long haul but I think I’m ready now for another season and another 50,000K. I took the Tiger for a test ride yesterday and it’s shifting smooth again and the clutch feels great. The engine is running well, and I’m happy to be back on the road.
Here in Montreal, it’s Easter Monday and I think I can safely say we’ve had our last snowfall. Crocuses are pushing up and there are buds on the trees. Geese are returning and everywhere the signs of spring are upon us, including the sound of motorcycles back on the roads. For Canadian riders, it’s the best time of year. I wish everyone, wherever you are, a safe and enjoyable 2024 season.
Please leave below any comments you have and consider following. What mods and maintenance did you do in the off season? What are your plans for the coming season? I love hearing from readers, so drop me a line.
Paired with an OBD-II reader, this app is an essential tool for DIY’ers.
When I had my BMW GS, there was only one OBD diagnostic tool and it was called GS-911. At over $800 for just the Enthusiast (WIFI) version, it was always a little too much for me to swallow, even though I knew you really shouldn’t be riding anywhere remote without one; there are just some issues that require you to be able to communicate with the ECU to solve.
Now that I have the Tiger, there are more options available, and a popular one is an app called TuneECU. I recently used it to balance my throttle body, but it can be used to do so much more.
Background
TuneECU began because of a fuel mapping problem on some Triumph bikes. One owner was so annoyed at Triumph’s unwillingness to fix a gap in the rev range, he took matters into his own hands and created an app that can read and write fuel maps to the ECU. I’m happy with the mapping on my 2013 TigerXC, but I had noticed a little buzz in the right hand-grip and a forum post advised to check the balance of the throttle body.
For those who might not know what that means (I didn’t, having come from a thumper), as I understand it, it’s basically getting all your cylinders to fire with the same force. If one is more powerful than the others, it destabilizes the engine and creates vibration up into the handlebars. Sure enough, when I checked mine, the third cylinder was a little out of sync with the other two.
Tools Required
an Android phone
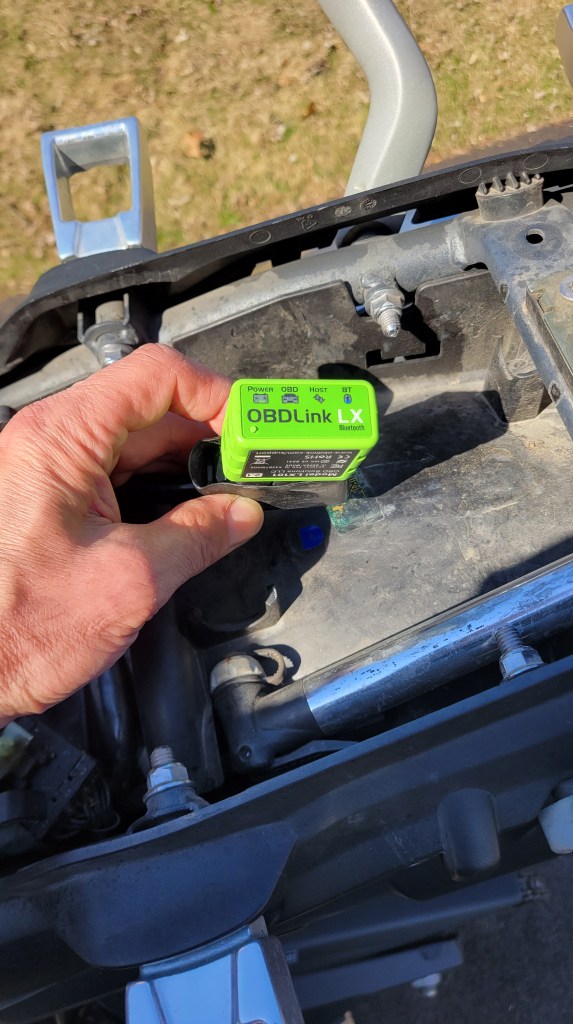
a WIFI OBD-II reader (OBDLink LX recommended)
TuneECU (Doh!)
The hardest part of this job is getting down to the throttle body. On my Tiger, I have to lift the tank and remove the airbox, and that requires removing a lot of body panels first. I won’t go into that because it’s bike specific, but just follow your service manual (you have one, right?), photograph everything before it comes off, and lay parts and hardware out methodically in the order they came off. And because you might have to unplug a sensor—at least temporarily—it’s probably a good idea to remove the cable from the negative terminal of your battery.
You’ll be required to run the engine to do this, so be sure to keep all sensors plugged in or you’ll get an error code. (You can clear codes in TuneECU too, but more on that later.) On the Tiger, that meant unscrewing the sensors from the airbox and throttle housing and laying them out of the way. You also have to ensure that hoses essential to the correct running of the engine are plugged, for the same reason. This may require some creative solutions since you have to find things with just the right diameter. (No bad jokes here.)
Bike Set-Up. Tank lifted to expose throttle body but all sensors and hoses plugged. Actually, I should have left the breather tube unplugged. (That’s the one with the drumstick in it.)
Connect your scanner
Once you are ready to go, replace the ground on the battery but don’t start the engine just yet. First, plug in your OBD-II reader. There are lots of them available, some for as little as $25 on Amazon, but you take your chances with the cheap ones. You might find that it can’t read your bike or communicate with TuneECU. I’d heard that the one to get is OBDLink LX. It’s a little more expensive, but it works without issues.
You need to know where your OBD-II connector is. On the Tiger, it’s under the passenger seat. When you plug in the scanner, you’ll see its power light go on, indicating that it’s already getting power from the battery. Now get your phone and open TuneECU and select Select from the ECU menu. You’ll see a long list of motorcycles and hopefully yours is there. If not, select Other.
By the way, for Triumph bikes, there are two ECUs: Sagem and Keihin. You’ll see both options under the ECU menu. I wasn’t sure which ECU my bike has, but I figured 50/50 odds were pretty good, guessed Keihin and got lucky. I’m not positive, but I think TuneECU can autodetect if you choose the wrong one.
Once you’ve selected your bike, click Connect. (Later, you can simply choose Connect from the ECU menu.) You’ll see some flickering, both on the scanner and in the bottom right corner of the TuneECU screen, and when it turns green, you are connected.
Make your adjustments
Now start the bike and let it warm up to running temperature. You’ll see the three cylinders listed in the Adjustments screen. Cylinder 1 is the left-most cylinder on the bike (facing front, when seated on the bike), and Cylinder 3 is right-most. Cylinder 2 is not adjustable but is the baseline to which you adjust the other two. In the photo below, the adjustment screws are circled in red. Triumph have thoughtfully added a stripe of yellow paint to each screw so you can keep track of where you are.
Go slowly! Do small adjustments one at a time, blipping the throttle and waiting for the engine to settle back into idle after each adjustment to see what it has done. It didn’t take me long before I had all three relatively the same. They should be within 10 hPa of each other.
The pressure will jump around a bit but the cylinders should stay relatively the same.
Run tests
When you’re satisfied you’ve got it as close as you can, slide the screen right to left to get to the Sensors screen. Under the List menu, select which sensors you want to test. This is where TuneECU becomes an excellent diagnostic tool! You’ll see what voltage is getting to each sensor. You can also see and clear error codes, run specific tests, reset the ECU adaptations, and reset the service reminder. Normally the latter can only be done at a dealer, but TuneECU can also clear it. If you do your own maintenance, you no longer have to see that annoying little reminder (wrench symbol) every time you start your bike.
While I had the airbox off, I added a Uni Filter pre-filter to my bike. It replaces the snorkel and apparently removes 95% of the dirt, and since I have to remove my fuel tank to service my main air filter, I was all over that. The pre-filter sits under the seat so access is a lot easier, and I think it will keep my engine cleaner too. Some people swear by K&N filters; others say they’re not trustworthy (I’ve written about this earlier), but with two filters in there, I think I’m good.
Final adjustments
Because I added the pre-filter, I decided to reset the ECU adaptations so it would learn the new parameters. When you do this, just beware that the bike may act a bit weird at first afterwards. For example, my idle was low, and the bike in fact stalled once. But after a short ride, it was back to normal.
I had another small issue that will be of interest to other Tiger owners and perhaps others. Once I put everything back on the bike and went for a test ride, my fuel gauge was showing empty and my gas light was on. I thought I hadn’t plugged in the fuel level sensor correctly so off came all the plastics again and up came the fuel tank. But I had, and a little Google research reminded me that you have to ride the bike a few kilometres for the level to be updated. I’d noticed this after filling the bike—how it seems to take a long time before the display adjusts—but forgot in this context. Every job requires at least one “mistake,” but I’ve come to look upon mistakes as “opportunities to learn.”
TuneECU is a powerful tool, so just a word of caution and a disclaimer to use at your own risk. Writing to the ECU is no small thing, and I don’t like second-guessing Triumph engineers, so be careful. I have a minimalist approach to this stuff, and now that the throttle body is adjusted, I’ll be using it primarily as a diagnostic tool.
TuneECU is €24.99 and OBDLink LX is about $100, depending on where you live. That’s a price I’ll gladly pay to have the silky smooth Triumph triple running even smoother, and for the peace of mind of having an excellent diagnostic tool with me while on tour. It’s small enough to fit easily in my kit and can give me a ton of information about all the mysterious electrics of the bike. As motorcycles become increasingly complex and computerized, it’s nice that there are tools like TuneECU and OBDLink LX at an affordable price for DIY mechanics.
Here in Montreal, the 2023 motorcycle season has officially begun. As of March 15th, we can legally be back on the road. The reality, however, is that no one is stupid enough to do so. I saw—or rather, heard—a scooter on the road yesterday, but I wouldn’t want to take a bigger bike out yet. In fact, I can’t get my bike out yet; there’s still several feet of snow blocking the doors to my shed.
Nevertheless, the air is filled with anticipation as it won’t be long now. Motorcyclists are scurrying about like squirrels uncovering nuts, or birds building nests. I’ve seen a few Facebook posts about preseason maintenance and, for the Harley riders, preseason cleaning and polishing. T. S. Eliot wrote that April is the cruelest month, but for motorcyclists in northern climates, it’s these last few weeks of March during The Big Melt (aka dog shit season) that are the most painful. To ease the pain, we undergo a ritual process of preparation for the season to come. Here is what I do to get ready to ride.
Bike Prep
The first thing I do is undo everything I did last fall to prepare the bike for storage. That involves removing whatever I’ve used to block the intake and exhaust ports, removing the wax I left on the bike to protect it through the cold winter months, replacing the battery and saddle, lowering the bike off the jack-stand, and topping up the tires. The bike is now ready to run, and I might start it up, just to hear its familiar exhaust note and reassure myself that all is well in the world.
Depending on the mileage, I change most of the fluids on the first warm day of spring. (I don’t have the luxury of a heated garage, so all maintenance is done outside.) I changed the oil before putting it into storage, but apparently oil ages even if unused, so I’ll do an early oil change, maybe not right away but soon. For this reason, some people put a cheap oil in the bike in the fall just for storage purposes, then change to the good stuff in the spring. I think that’s a little over-kill, so I put the same top quality synthetic oil in before and soon after storage. And no, I’m not going to start an oil thread by revealing what I use, as much as I always enjoy a good oil thread.
I change the coolant and brake fluid every two years or 20,000 kilometres, whichever comes first. I also remove the brake pads, clean them up with a wire brush, and clean and lube the callipers, paying special attention to the calliper pins. The brake cleaning might be over-kill too, but I like to know the pins are moving freely and generally to keep the brakes free of grit and grime. They’re just one of those essential moving parts that is exposed to road debris. If you’ve never done your brakes before, it really isn’t difficult.
I’m fortunate to have MuddySump’s channel to follow for routine maintenance. He’s an excellent mechanic and has the same bike as me.
I change the air filter, or in my case, because I use a K&N, clean and re-oil it. This year I’ll be adding a Uni pre-filter to my bike. On my Tiger 800XC, the OEM filter is under the tank, so adding a pre-filter will not only help protect the engine but also significantly cut down on the service intervals for the filter in the air box.
Then the fun begins: I add all the mods I’ve bought through the winter.
Gear Prep
If you didn’t launder your gear and wash your helmet liner in the fall, now might be a good time to do it. I also get out the leather conditioner and go a little crazy with it. First I do my leather jacket, then my gloves. Then while the rag is damp I do my satchel, my shoes, my wallet, my fountain pen cases, my belt . . . like I said, I go a little crazy. I do this once in the fall when I put my jackets away and once in the spring. We have baseboard heaters which pull all the moisture out of the air in the house, so I do this at least twice a year.
My favourite brand of leather conditioner? This might start a thread as long as an oil thread, but I’ll say that someone who works at the high-end store in Montreal where I bought my satchel once graciously confided that Armor All Leather Care Gel is just as good as the expensive stuff they sell. That was my brand until Canadian Tire stopped selling it. Then I switched to Simoniz, which I didn’t like as much, and lately it’s been Chemical Guys, although this year I’ve noticed that it’s leaving a white film on the leather once it dries. So after doing a little research, I’m going to try Cobbler’s Choice. Like I said, I’m a little obsessive about moisturizing my leather goods. The best moisturizer, however, is good ol’ beeswax, although it leaves the jacket sticky for a few days.
So with every leather item in my house sufficiently moisturized, my gear is almost ready for the season. I squirt a little WD40 on the buckles of my ADV boots, some Pledge on my helmet, wipe some silicone onto the rubber that seals the visor, and polish my visor with Plexus. Yeah, this stuff costs a lot, but Ryan F9 has done a video showing that it’s the best. If the visor is old and too badly scratched to restore, this is when I get a new one; there’s no sacrificing when it comes to vision on the bike.
Treat your tent fly to Kiwi Camp Dry Heavy Duty Waterproofing. The name says it all.
I also get out my camping gear and give it some love. Last fall, I treated the tent with Kiwi Camp Dry Heavy Duty Waterproofing Spray. I like this stuff because it’s non-toxic and doesn’t leave an after-smell. I also clean my stove and make sure anything that needs replacing is replaced, because there’s nothing worse than a temperamental stove when on tour. The one that I use runs on liquid fuel and requires maintenance from time to time.
Body Prep
Touring for weeks on end and crawling in and out of tents, as I’ll be doing this summer, requires some fitness and flexibility. The long days in the saddle are easier if you have some cardio fitness, so I’ve been running fairly regularly. I do a 5K loop with the dog 2-3 times a week, and when I’m inspired, I run a little longer. Now that the warmer weather is almost here, I’ll be bumping that up and doing some 10K and even longer runs. Running has always been easy for me and it’s my go-to exercise for body and mind.
With all that running, I need to do stretching or my legs get tight and my back becomes prone to injury. This year I invested in some athletic therapy which gave me a set of stretches to do, and as Robert Frost said, that has made all the difference. I used to pull my back a few times a year, often at the worst possible time, laying me up for a week, but with this stretching, I haven’t had an incident in a while. I think I’ve found the answer to my back issues.
In addition to the cardio and stretching, I work on strengthening my core, so some Pilates, yoga, and generally, abdominal work. Sitting on the bike all day is like sitting on a stool with no backrest, so you need a strong core. When you start doing any off-roading, there are even bigger demands on your muscles. I’ve already done a blog about fitness and strengthening, so if you’re interested in the specific exercises I do, check that out. One thing I’ve added since making that post is to work on balance. You can do that with a wobble board, but a simple way to improve your balance skills is to stand on one foot . . . with your eyes closed. Try it. This develops all those nerves in the foot that are essential to good balance, and according to Jimmy Lewis, off road riding is all about balance.
This year, to account for the extra weight of the top-heavy Tiger, I started doing some strength training with kettle bells. I may be a natural runner, but I’ve always had the upper body of Pee-wee Herman. I really like kettle bells and I think they will become a regular part of taking care of myself. The main reason I like them is that you get cardio, strengthening, and core work all in the same workout. Because kettle bells are asymmetrical (unlike barbells), you’re always working your core, and if you string reps together EVOM (Every Minute On the Minute), you also get your cardio workout. Best of all, you really only need a couple of kettlebells to get started and can do it in a small space in the house. I’ve been doing kettlebelling for the past month or so and am loving it! I’m following Mark Wildman’s YouTube channel. He’s excellent and has a series of videos specifically for people like me just starting out.
If that sounds like a lot, it kind of is, and I’m trying to figure out how to fit it all in. At my age, recovery time is not what it used to be, if you know what I mean. At first, I tried staggering running and strengthening on alternating days, but that didn’t leave me any days off to recover. Currently I do a run after my long days at work to run off the stress, then a double workout of kettlebelling followed by a light run when I can, which wipes me out but then I take a full day off with just some stretching. In other words, I listen to my body and adjust accordingly, keeping in mind that you need to do an activity 3-4 times a week to see benefits.
Finally, the only other muscle I exercise is . . . eh, hem . . . not what you’re thinking but my clutch hand. I keep one of those spring grip devices on my desk all winter and pick it up from time to time. Works better than a stress ball and helps avoid arm pump when off roading.
One hand on the mouse, one hand on the grip strengthener.
Eye on the Prize
It was the best of times, it was the worst of times . . . it was the spring of hope, it was the winter of despair. Charles Dickens wasn’t a motorcyclist, but in describing the Victorian era he caught something of the spirit of this intermediary period. As I come to the end of my March Break and head back to work tomorrow, I keep in mind that at least I’ll soon be able to commute by bike, and before I know it, the semester will be drawing to a close and we’ll be getting ready to leave for Newfoundland. Marilyn and I booked our ferry crossing the other night so that trip is a go! 18 days together on the bike camping through Gaspé, Gros Morne, and across The Rock. It’s going to be epic.
Keep your eye on the prize, folks, whatever that may be for you. Have a safe and enjoyable season.
In the penultimate post in a series on gear, I discuss what I carry when touring.
The Container of Last Resorts
The first major tour I did was to Cape Breton to ride the Cabot Trail. As you cross the border from New Brunswick to Nova Scotia, heading east, you see at the side of the highway a mini-lighthouse advertising Tourist Information. I naturally pulled off for maps and a rest. In the parking lot, I noticed a burley, bearded, rider on his back beneath his Harley, trying to tighten an oil filter with a pair of pliers.
“Hey, can I help in some way?,” I offered. None of his fellow riders seemed either able or willing.
“Not unless you have a 14mm socket,” was the reply that emanated from beneath the bike.
I rummaged to the bottom of a pannier and emerged with the requested item.
“Here you go,” I said, and handed it down to him.
Every touring group should include at least one ADV rider. Because we venture into remote areas, we have to be self-sufficient, and that means being prepared for anything. Anything. Mechanical problems, medical emergencies, security issues—we need to carry on the bike into the bush the tools, spare parts, first-aid materials, and safety items required to get us back out of the bush.
The basis of my touring kit is my tool roll. I use the Kriega roll because I like the little pouch at the side for all the odds and ends that don’t fit anywhere else.
Kriega Tool Roll
That includes an assortment of hardware and fuses, pipe cleaners, emery paper, safety wire, thread lock, a valve stem tool, picks, and a tool for removing pins from electrical connectors (viewed far right above). The latter contains two tubes of different diameters, one on each end; hopefully one is the perfect diameter to slide over the pin but inside the hole in the connector. The tool pushes the barbs of the pin in so the wire can be extracted out the back of the connector.
I once had a flasher that had a break in the wire inside the connector plug, so I couldn’t simply splice the wire. Every time I put on the flasher, I’d blow the fuse to the circuit that included my dash, so no speedometer, tachometer, and other instrumentation. The only way to fix it, other than getting a new connector and splicing wires, was to remove the pin from the connector using a tool like this. Since then, it’s become part of my toolkit.
Left to right above in my roll is a telescopic magnet, zip ties, various Allen keys particular to my bike, needle-nose pliers, slip-joint pliers, a 1/4″ T-handle, reversible screwdriver (standard/Phillips), 3/8″ ratchet, socket extensions, various wrenches. I like the stubby wrenches from Home Depot because they are lighter—not as light as titanium wrenches, but my wallet is heavier for it. I indulge myself with a ratcheting 10mm wrench.
Why the 1/4″ T-handle? Some of those sockets are 1/4″, but with the Motion Pro T6 adapter, I can use all my 3/8″ sockets on the T-handle.
Where are the vice-grips, you ask? They are in my other tool kit since they don’t fit in this one. As I’ve said elsewhere, I don’t use vice-grips very often when working, but they are handy in a pinch, so to speak (sorry).
Sockets, etc.
In a Dollar Store pencil case, I have my sockets, some hex bit sockets (3/8″ and 1/4″ stubbies), an elbow socket, spark plug socket, a couple of crowfoot sockets (again, particular to my bike), a spoke wrench, and said vice grips (aka locking pliers). I used to carry torx bits with the BMW, but since switching to Triumph, I now carry hex bits.
There’s some redundancy here, for sure. I probably don’t need both Allen keys and Allen sockets, but the keys don’t take up much space, and sometimes one tool is better than the other for a particular purpose.
I also carry:
Tubes. I know you can get by with one, the front, and cram it into the rear if needed, but I carry both a front and rear tube.
A chain breaker, spare links, and a master clip. I like the Motion Pro Chain breaker for on the road. It doesn’t do rivets like the DID one does, so I have both. I use the DID at home when changing my chain, but take the smaller Motion Pro one on the road with a clip master link.
A digital multimeter for troubleshooting electrical problems. Don’t ask me how to use it beyond the basics because I’m still learning The Dark Arts, but I take one nonetheless. I have the Neoteck NT8233D Pro, which is cheap enough to get wrecked while ADV riding but still decent enough quality and reasonable in size. I’ve considered getting a smart meter, but wondered if it would be reliable enough. Anyone have any experience with these?
Tools, sockets, tubes, multimeter, and chain tool all go in Giant Loop Possibles Pouches that attach to my crash bars at the front, helping to keep the bike balanced front to back.
In one of my panniers, I carry a plastic box that contains other items and spare parts (see image at top). The spare parts have gone with the sold BMW so need to be replenished, but they were a spare clutch cable, spare levers, and a spare water pump. If I were doing a RTW tour, I’d carry more spare parts than this, but so far my tours have been in North America, where parts are readily available.
Also in that container:
JB Weld Steel Stick, for fixing engine casing.
JB Weld Plastic bonder. I’ve use this to fix body panels and broken mirrors.
Self-sealing tape. This stuff is amazing and can seal a high-pressure hose.
High-temperature electrical tape for wrapping electrical wires.
An assortment of electrical connectors, including Posi-Lock, and heat shrink.
More hardware, more fuses, assorted copper crush washers, cotter pins, O-rings, velcro.
Various gauge wire
Gasket maker
An extra buckle for my Wolfman tank bag.
Finally, to round out my emergency preparedness, I carry a first-aid kit and bear spray. The kit I put together myself. I took a look at what you get in those prepared kits and it didn’t look like much for the cost, so I bought another trusty Dollar Store pencil case and filled it myself. I won’t go through all that I have in there, but will say the few things you won’t get in those commercial kits:
Carbon capsules. Eaten something that doesn’t agree with you? Take two, wait half an hour, take a dump, job done.
Arnica Montana. Homeopathy for any trauma to the body.
Robax. I have a vulnerable back, which tends to go at the most unexpected times.
Antihistamines. These are great for any inflammation from bee stings or allergic reactions.
Triple Action Polysporin
These items, along with the essentials I always carry on the bike, round out my touring kit. They say an ounce of prevention is worth a pound of cure, and all this stuff adds up to a quite a few pounds, so I think I’m covered. The challenge is always to find the right balance between taking what you need while keeping the weight down. I’d rather sacrifice some creature comforts like a camp chair, but I rarely sacrifice when it comes to tools and other items needed to keep the bike running (although the camp chair would come in handy if stranded in the middle of nowhere).
I’ll add one more item this winter to my tools: a satellite communicator. I’ve been meaning to get one for a while, and it really is silly to travel into remote areas without one. I’ve considered them all and almost bought a Garmin inReach Mini, but I’m leaning toward getting a Zoleo at half the price. Any thoughts, anyone? I don’t see what the Garmin does that the Zoleo cannot. Am I missing something?
Have I missed anything in my touring kit? As always, your kit is personal to you, so let me know in a comment if there’s something you carry that I do not. Like I said, I’m a self-confessed gear weanie, so I’m always interested in learning about a tool I have to buy. Buying gear is one of the ways we riders in the North get through the off-season, and yesterday I put the Tiger into storage, so I’m all ears.
I’ll wrap up this series in my next post on the navigation apps I use. If that interests you, click Follow and you’ll be notified of it and future posts when they are published.