The BMW f650GS. It’s not just a starter bike.

P1000195

2006 BMW f650 GS twin spark. 

The BMW thumper is an iconic bike with a huge following for good reason. 

I’ve been reluctant to do a bike review of Bigby. For one, I still consider myself a novice. In fact, aside from a few bikes at my training school, Bigby is the only bike I’ve ever ridden, so I don’t have much to compare it to. Doing a review, I thought, would inevitably lead to the faulty comparison, a logical fallacy I warn my students to avoid. (i.e. “Gets your clothes cleaner!” Ugh, cleaner than what?) Second, I’m still learning about the bike. Although I’ve owned it for almost three years, I’m still finding my way around the engine and mechanics and still discovering its potential. Passing judgment now would be like bailing out of a relationship after the second date. It would be, in the literal sense of the word, prejudice.

So why have I decided to do it? Well, after watching a lot of reviews online, I’ve come to realize that most are not very good, so the bar is set pretty low. They are usually more product descriptions than reviews, and Ryan at Fort Nine has blown the whistle on the nepotism of corporate reviews, how they are always positive because the big bike companies offer a lot of treats to the reviewers, like paid vacations in exotic locations. And those reviewers ride the bike for, what, a day, a couple of days, max, so at least I can say that after three years with Bigby, I know more about this bike than they ever will. So with my concerns made explicit, let’s jump in.

* * *

The three things I like the most about the f650GS are three things I noticed within the first five minutes of riding it: ergonomics, suspension, and balance. Okay maybe you don’t need to have ridden a bike for long before you discover its essence. Let’s look at each in turn and then move on to other stuff.

Ergonomics: At the school, we’d learnt on cruisers—Suzuki Boulevards and Honda Shadows. The ergonomics of the GS are very different. Being a dual-sport bike, it’s capable of going off road, and you need the pegs beneath you in order to stand. This placement also results in your weight being distributed evenly between the seat and pegs, with knees bent at roughly 90 degrees. It’s the ideal sitting position and how every office chair should be set up, thus making the GS also a very capable touring bike. The dual-sport, according to its name, involves compromise, but there’s no compromise when it comes to ergonomics: the GS provides the perfect sitting position, and the capability to stand when you leave the asphalt.

The other thing I like about the ergonomics is that you can flat foot this bike. The standard seat height is 30.9 inches, so super low. This is confidence inspiring once you take it off road; I know I can easily dab a foot if needed. In fact, since I am rather long-legged, the seat was a bit too low; my knees were bent more than 90 degrees and I felt a bit cramped after several hours in the saddle. So when I upgraded my seat (more on this later), I went for the high version to allow a bit more room, and that has made all the difference. If you are long-limbed, you might want to look at the Dakar version, which has a 34.3 inch seat height, or swap the saddle for a taller one. Despite these issues in my lower half, I haven’t had to add bar risers, and when I stand, the grips fall perfectly to where I need them, maintaining my standing posture.

Suspension: As I rode off on my first ride, the second thing I noticed was the suspension. This bike is smoooth, at least compared to those cruisers. And what better place to test a bike’s suspension than Montreal roads! Of course it makes sense that a dual-sport bike would have very capable suspension; it’s designed to be able to handle some pretty bumpy terrain. But just before I went for my riding test, I hired a private instructor for a class. He rode behind me and commented on things he saw. Now here is someone who has a lot of experience with bikes and has seen a wide variety from behind. Ironically, the first thing he remarked when we first stopped had nothing to do with my riding but how impressed he was with the rear suspension of my bike. “I wish you could see what I see from behind,” he said. “It’s amazing!”

In fact, I’ve wondered if the suspension is a little mushy. I’ve only bottomed out a few times while off-roading, and the front end dives a bit under hard braking. I’ve considered upgrading the suspension, but frankly, at only 140 lbs, I’m actually underweight for this bike. Front suspension travel is 170 mm and rear is 165 mm.  Since ideal SAG is roughly 30% of total travel, SAG for the 650GS is 49.5 mm.. Even with the pre-load completely backed off, all of my 140 lbs is putting a little more than 45 mm on the suspension. Which brings me to another plus of this bike: the pre-load adjuster. Okay, it’s not electronically controlled like the new Beemer’s, but the ability to adjust with the turn of a knob when you are two-up or have gear on the back is a nice feature.

Balance: The thing I like most about the 650GS is its balance. This is accomplished mainly due to the gas tank being under the seat instead of high on the bike where it normally is. Where this is most noticeable is in how the bike corners. At the school, we were taught to countersteer to initiate a turn and to accelerate at the end to straighten up, and this was necessary with those cruisers. But I quickly discovered that on the GS you can manage an entire sweeping curve simply by leaning in and out. It’s hard to describe, but the bike feels like it straightens up itself with the subtlest weight shift.

The balance also shows when riding at slow speed, like in parking lots or technical sections off road. I’ll challenge anyone to a slow race any day! The bike is easy to move around by hand and to turn in tight spaces. With a little practice, I was riding figure-eights full lock. You can add all the accessories you like to a bike, but getting the balance right is something that happens at the design stage. BMW got it right on this one, which is why I was surprised to hear that they’ve moved the tank to the traditional location in the hump on the 2018 750s and 850s.

* * *

The engine is a Rotax, 652 cc single-cylinder, water-cooled, DOHC with twin spark plugs and four valves. It provides 50 HP @ 6,500 rpm and 44 lb/ft torque @ 5000 rpm. What these numbers mean is that it’s not the gutsiest engine. I’m up for a slow race but I won’t be challenging anyone to a drag soon. When I did my research, I kept hearing how this bike is a good beginner bike. There’s not a lot of power to manage, and you don’t have to worry about losing the back end by getting on the throttle too hard. On the other hand, it’s got lots of torque down low in the first two gears for hill climbs off road, and still some roll on in 5th gear at 120 km/hr. I’ve never maxed it out, but I’ve had it up to 140 km/hr and that’s fast enough for my purposes. And since we’re talking about gearing, 3rd and 4th are wide enough to enable me to navigate a twisty piece of road pretty much in one gear, depending on the type of road: roll off going into a corner, roll on coming out.

Single-cylinder engines have their advantages and disadvantages. One advantage is this wide gearing. My dad often talks about how he loved this aspect of his 350 Matchless. In heavy traffic, you can stay in 2nd and just ease the clutch back out when traffic picks up again. He once road his brother’s parallel twin and said it was horrible in stop-and-go traffic; you had to work twice as hard to prevent the engine from bogging. I suspect it’s this same quality that allows you to maintain your gear through a twisty section of road with slight variations in speed.

Another advantage of singles, I’ve recently discovered in this article in Cycle World, is that they offer a kind of traction control. As Kevin Cameron argues, “no other design produces such forgiving power delivery under conditions of compromised traction without elaborate software.” This is due to the millisecond duration of the exhaust stroke with big-bore engines, when there is relatively little power delivered to the tire, allowing it to regain traction if it begins to break loose. It’s like anti-lock brakes, the theory goes, but in reverse. Compare that to the constant power delivery of multi-cylinder engines, which makes managing power and traction more challenging.

A disadvantage of single-cylinders is the vibration. The Rotax engine is about a smooth as a single comes, I’ve heard, but it can still make your throttle hand go numb, especially if it’s cold, so you might want to invest in a throttle assist or throttle lock. I have the Kaoko and it works great. Unfortunately, the Rox Anti-Vibration Risers don’t fit my particular bike due to the configuration of the triple-clamp, but then I’ve heard those can make the steering mushy, which can be unnerving when riding off road. And it might be my imagination, but it seems that there are less vibrations when using the BMW oil. It certainly seems that the engine runs quieter and smoother, perhaps not surprising given that BMW design and test the oil specifically for their engines. Speaking of oil, the Rotax engines do not burn oil. Ever. Don’t believe me, go ask the inmates at The Chain Gang, a user forum devoted to the BMW 650s.

On the other hand, it’s a major pain in the ass to do an oil change on this bike. Because the engine uses a dry sump system, there’s an oil tank on the left side of the hump where a gas tank normally would be (an airbox is on the right side), so draining the oil involves removing the left body panel and draining that holding tank, plus draining the pan by removing the sump plug at the very bottom of the engine. If you have a bash plate, as I do, you have to remove that too, which, if it’s attached to the crash cage . . . and so on, until you’ve stripped the bike halfway down. Or you can drill a hole in your bash plate as I did, which makes that job a lot easier. You’re still going to get some oil on the plate, and you’re going to get some on the engine when you remove the oil filter due to its recessed placement, so just have plenty of shop towels on hand.

My 2006 650GS does not have rider modes and sophisticated electronics. It doesn’t even have anti-lock brakes. At first I was concerned about this and it was almost a deal-breaker for this newbie. But I spoke to a few experienced riders and they all agreed: better to learn how to control traction and perform emergency braking using proper technique than rely on electronics. Since I’m rather a purist in most things, I understand that. If you learn to emergency brake by grabbing a handful of brake lever and letting ABS do its thing, you aren’t going to develop the feel needed to control sliding in off-road situations. And not having all that sophisticated electronics makes the bike easier to maintain.

The 650GS is fuel-injected so there is an ECU. A 911 diagnostic code reader is available to help you troubleshoot the electronics, but it’s expensive. One advantage of fuel injected bikes is that there is no choke to deal with, and the ECU adjusts the fuel-air mixture according to altitude, meaning you can literally scale any mountain without having to change the jets of a carburetor or risk running your engine hot. The downside is that the throttle can be a little choppy so easy on the roll-off.

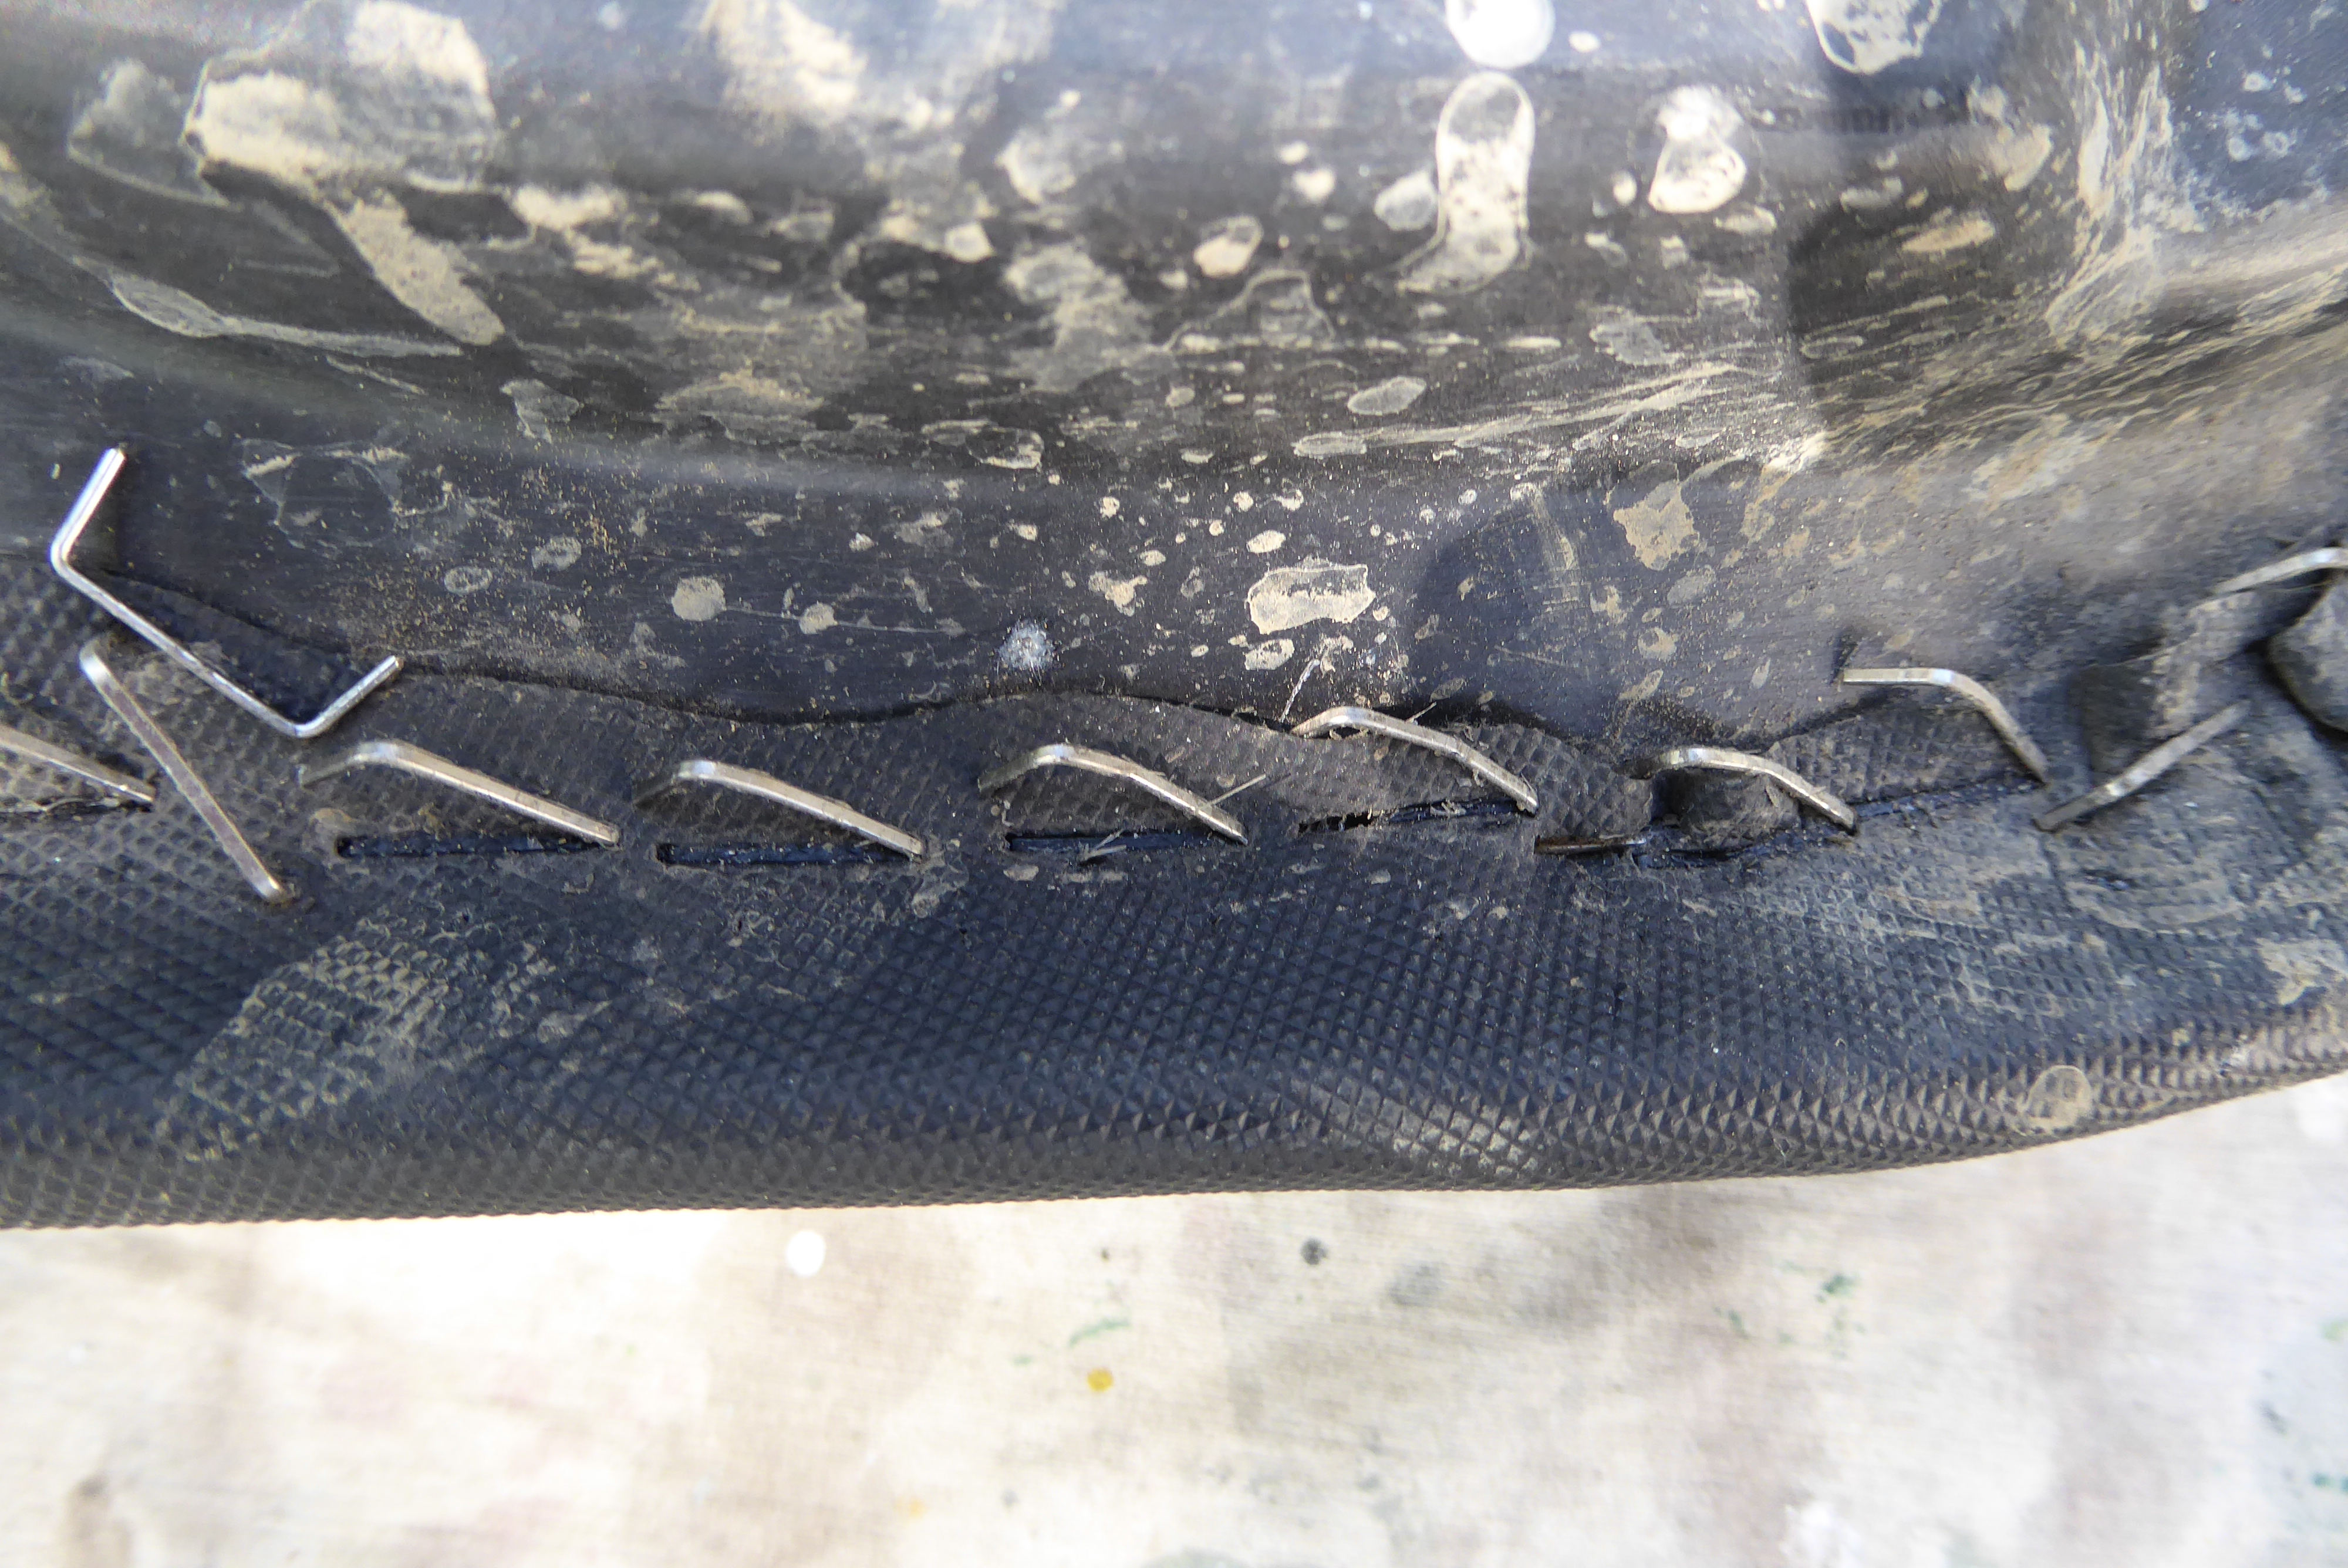
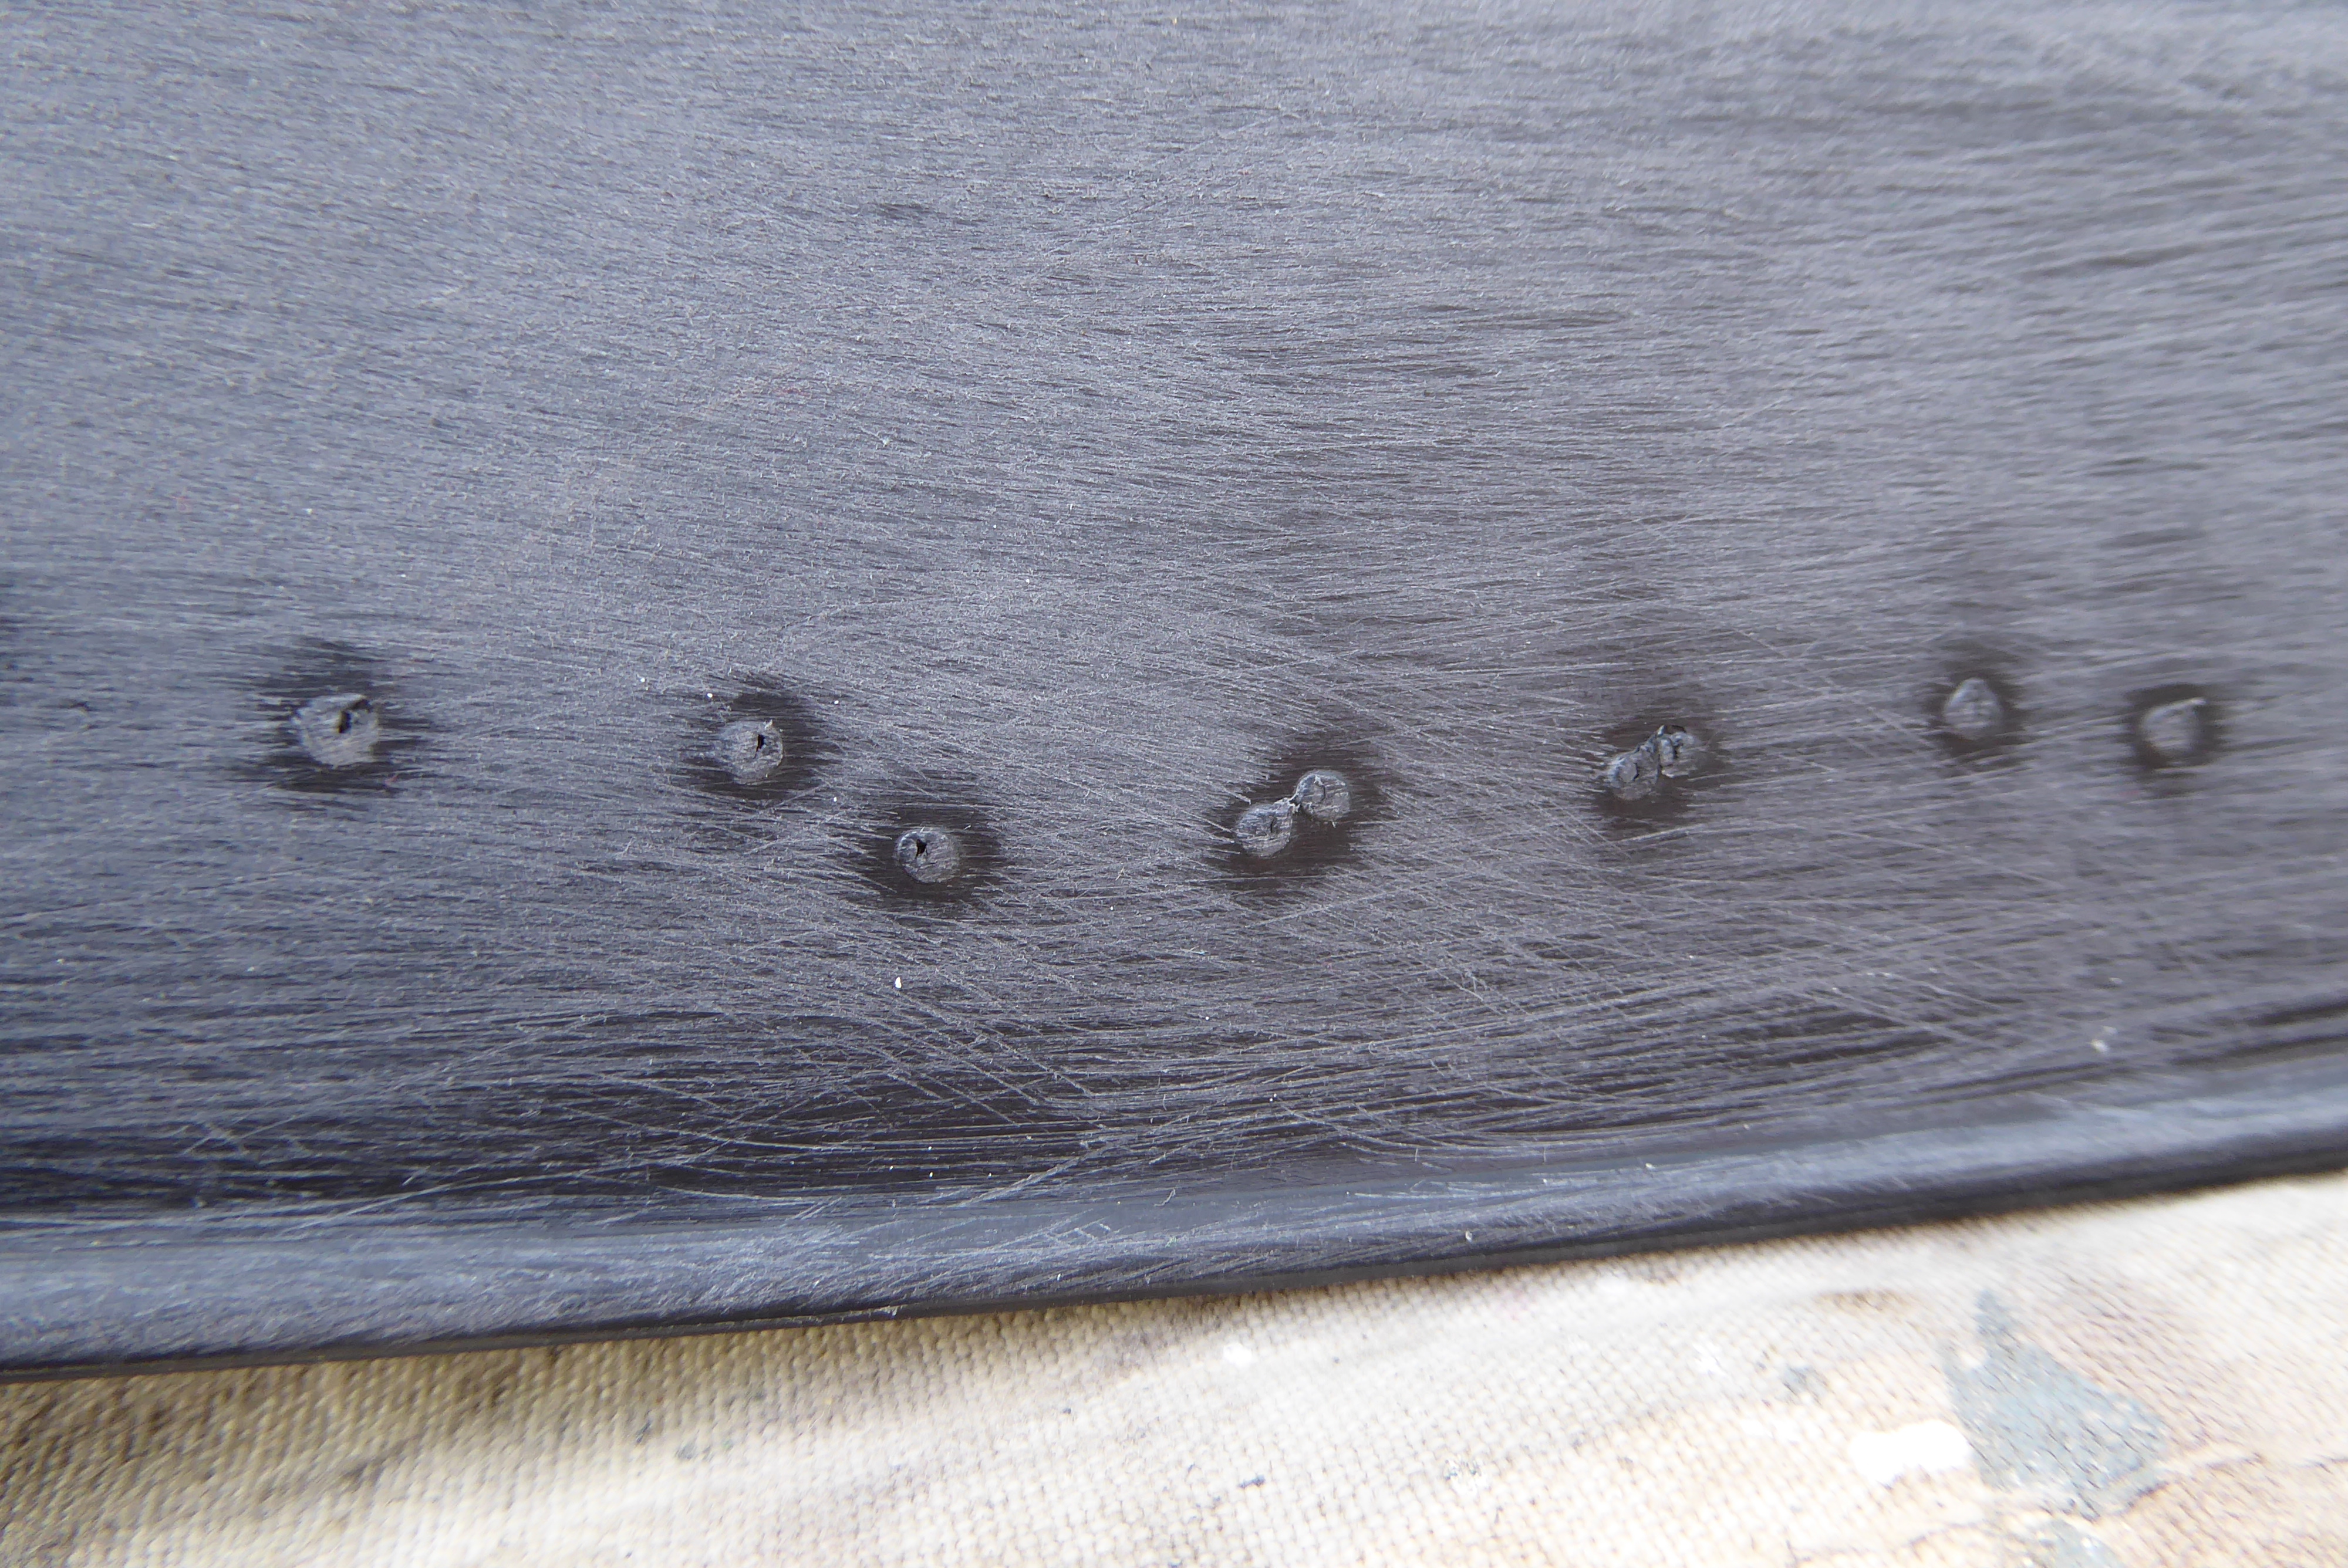
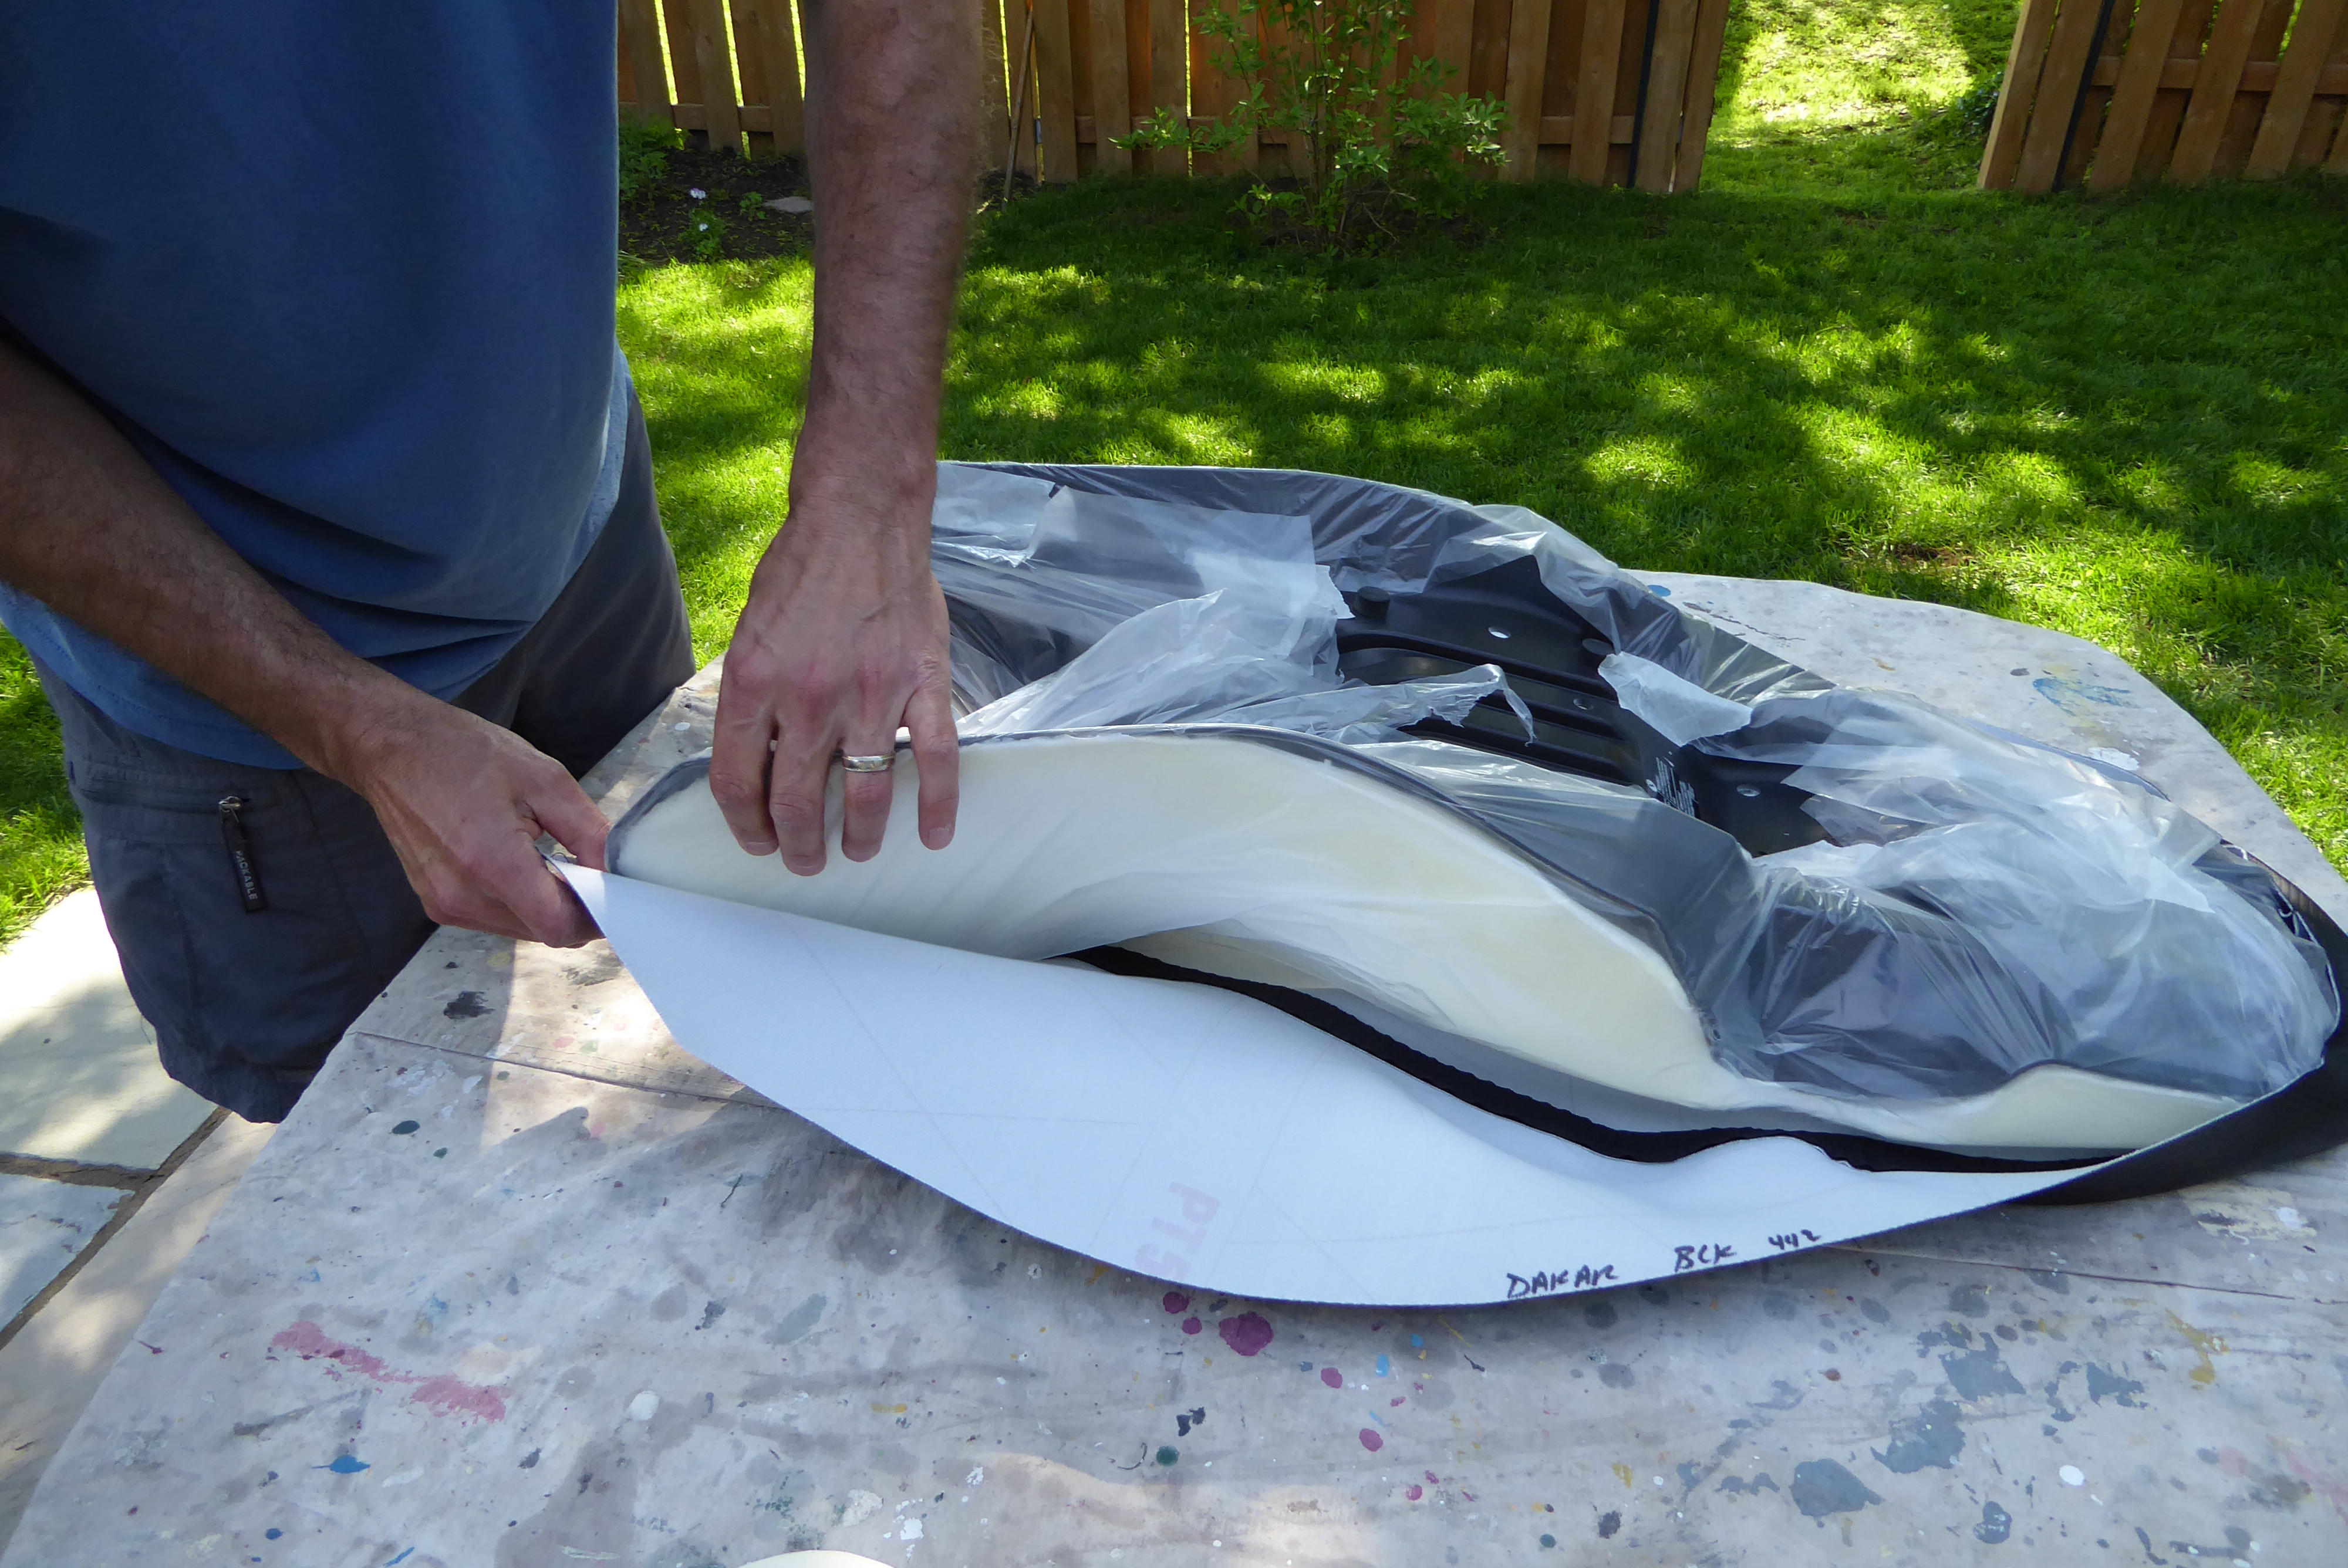
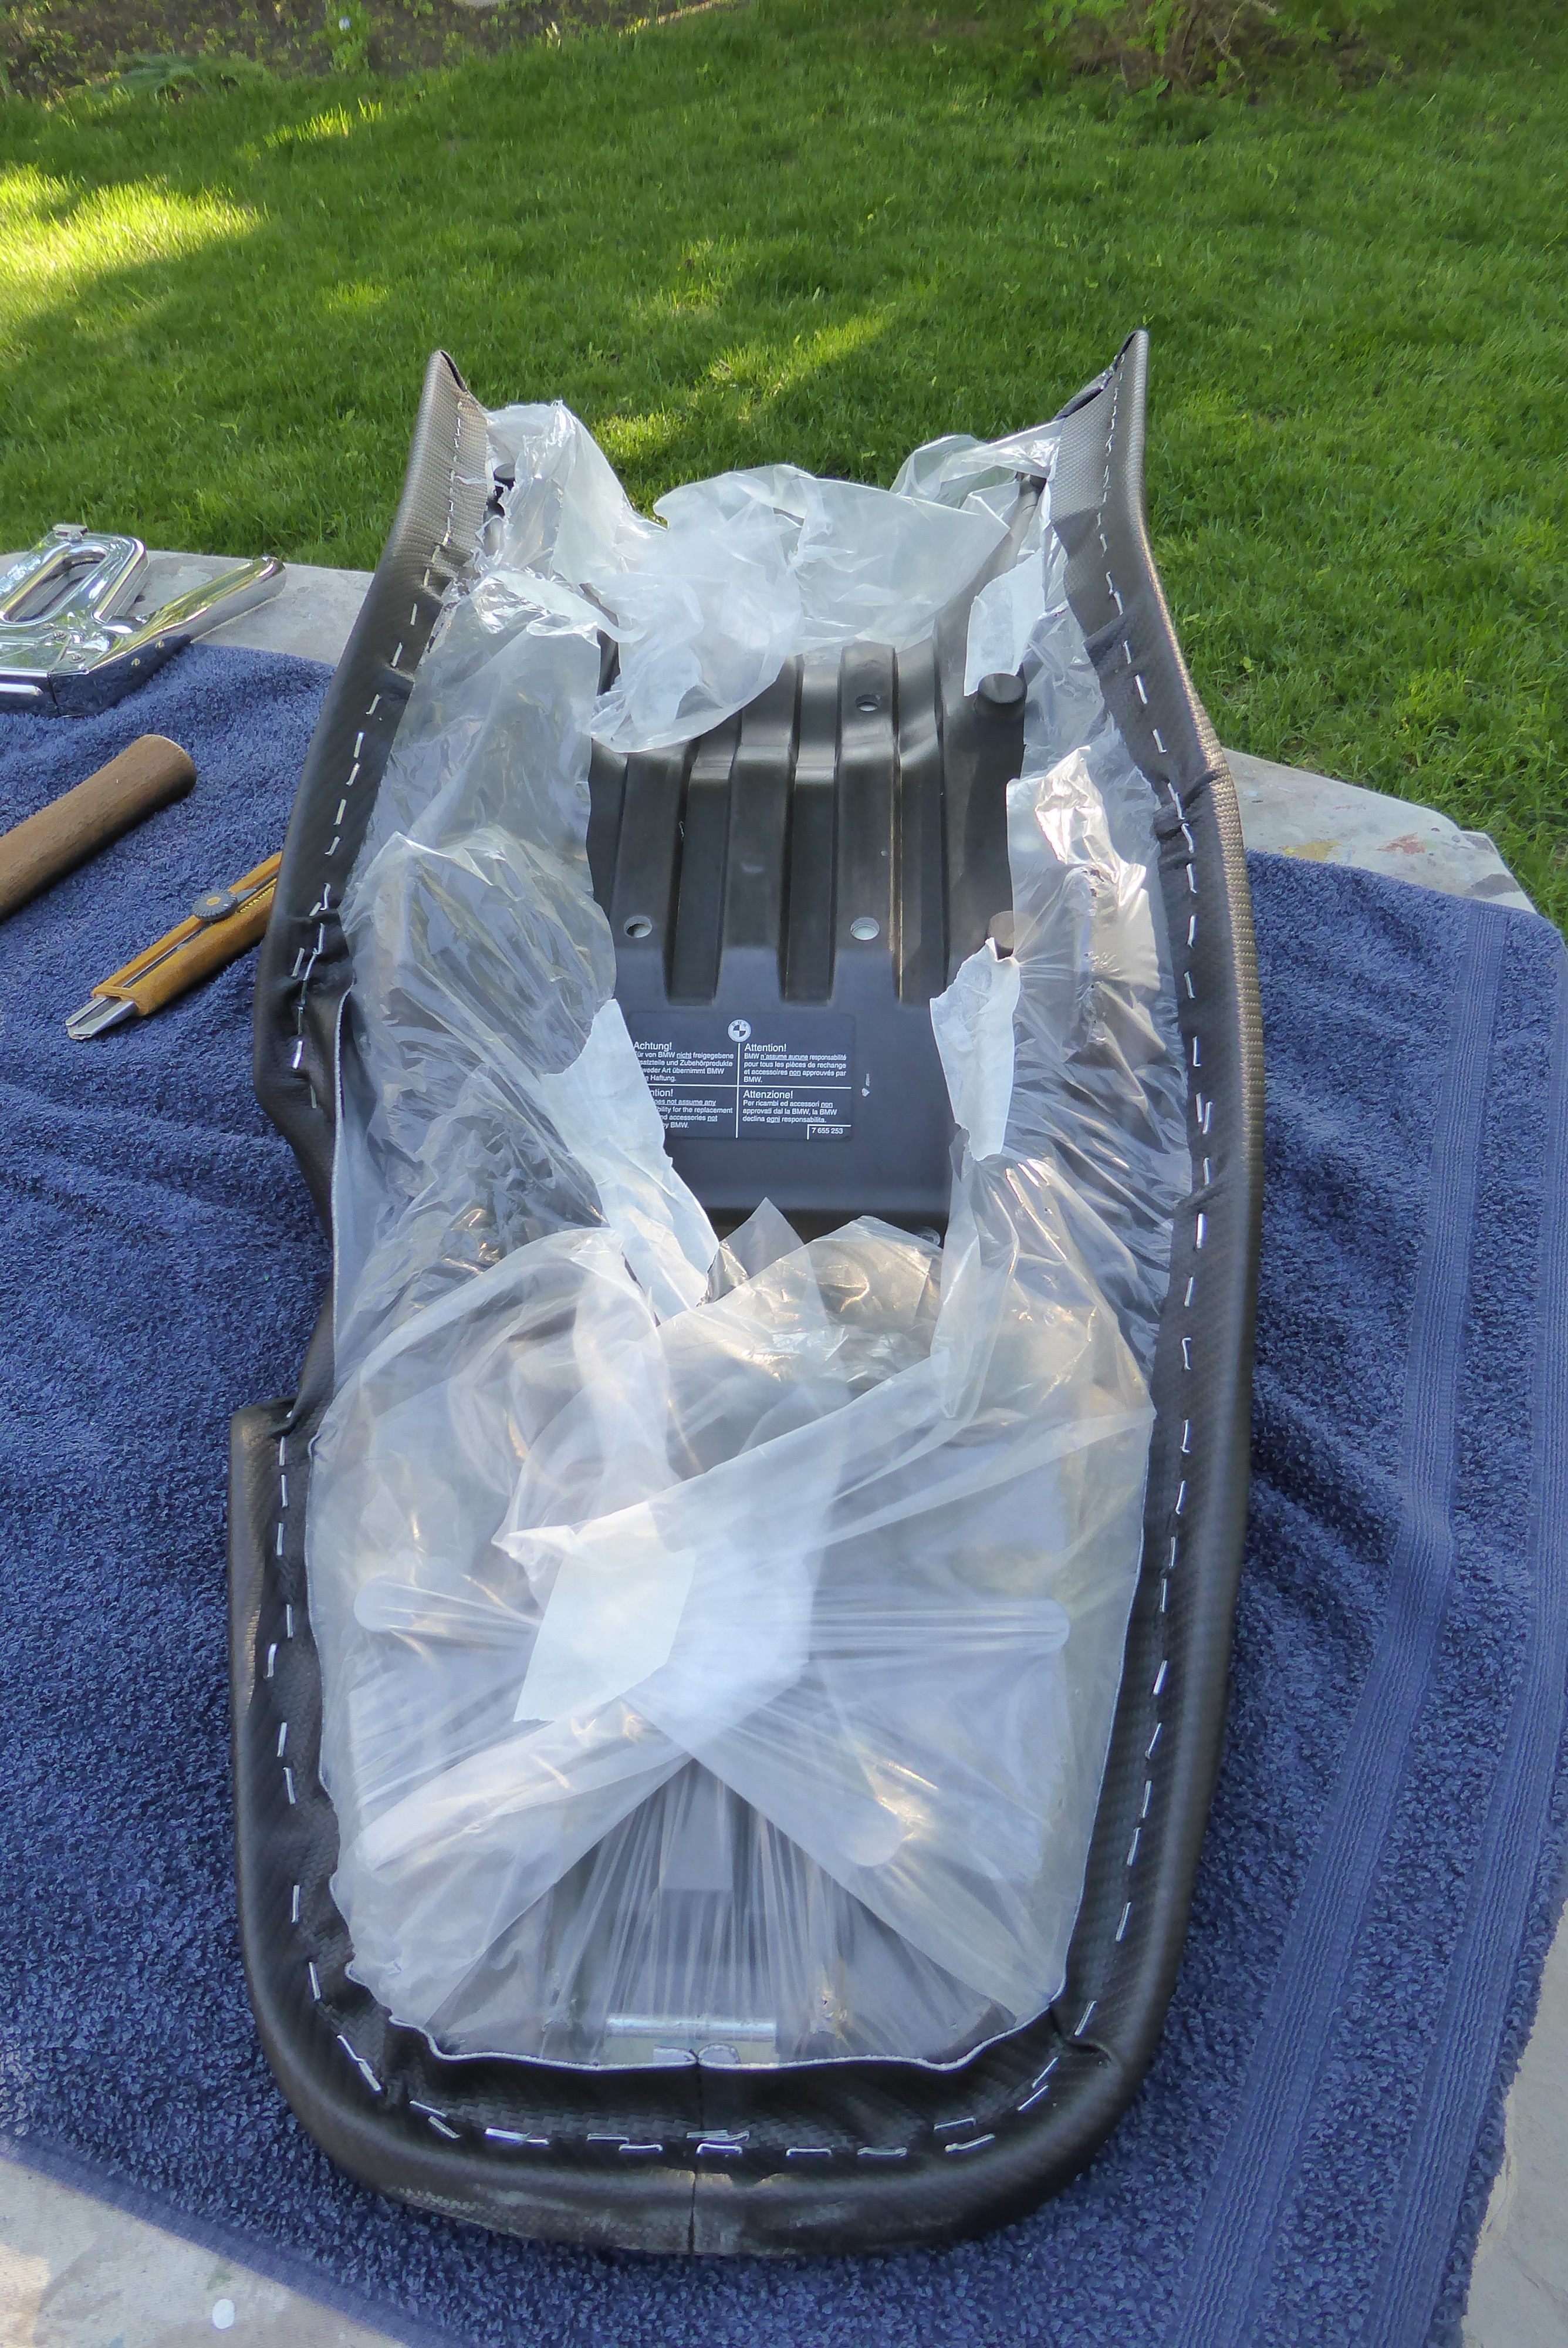
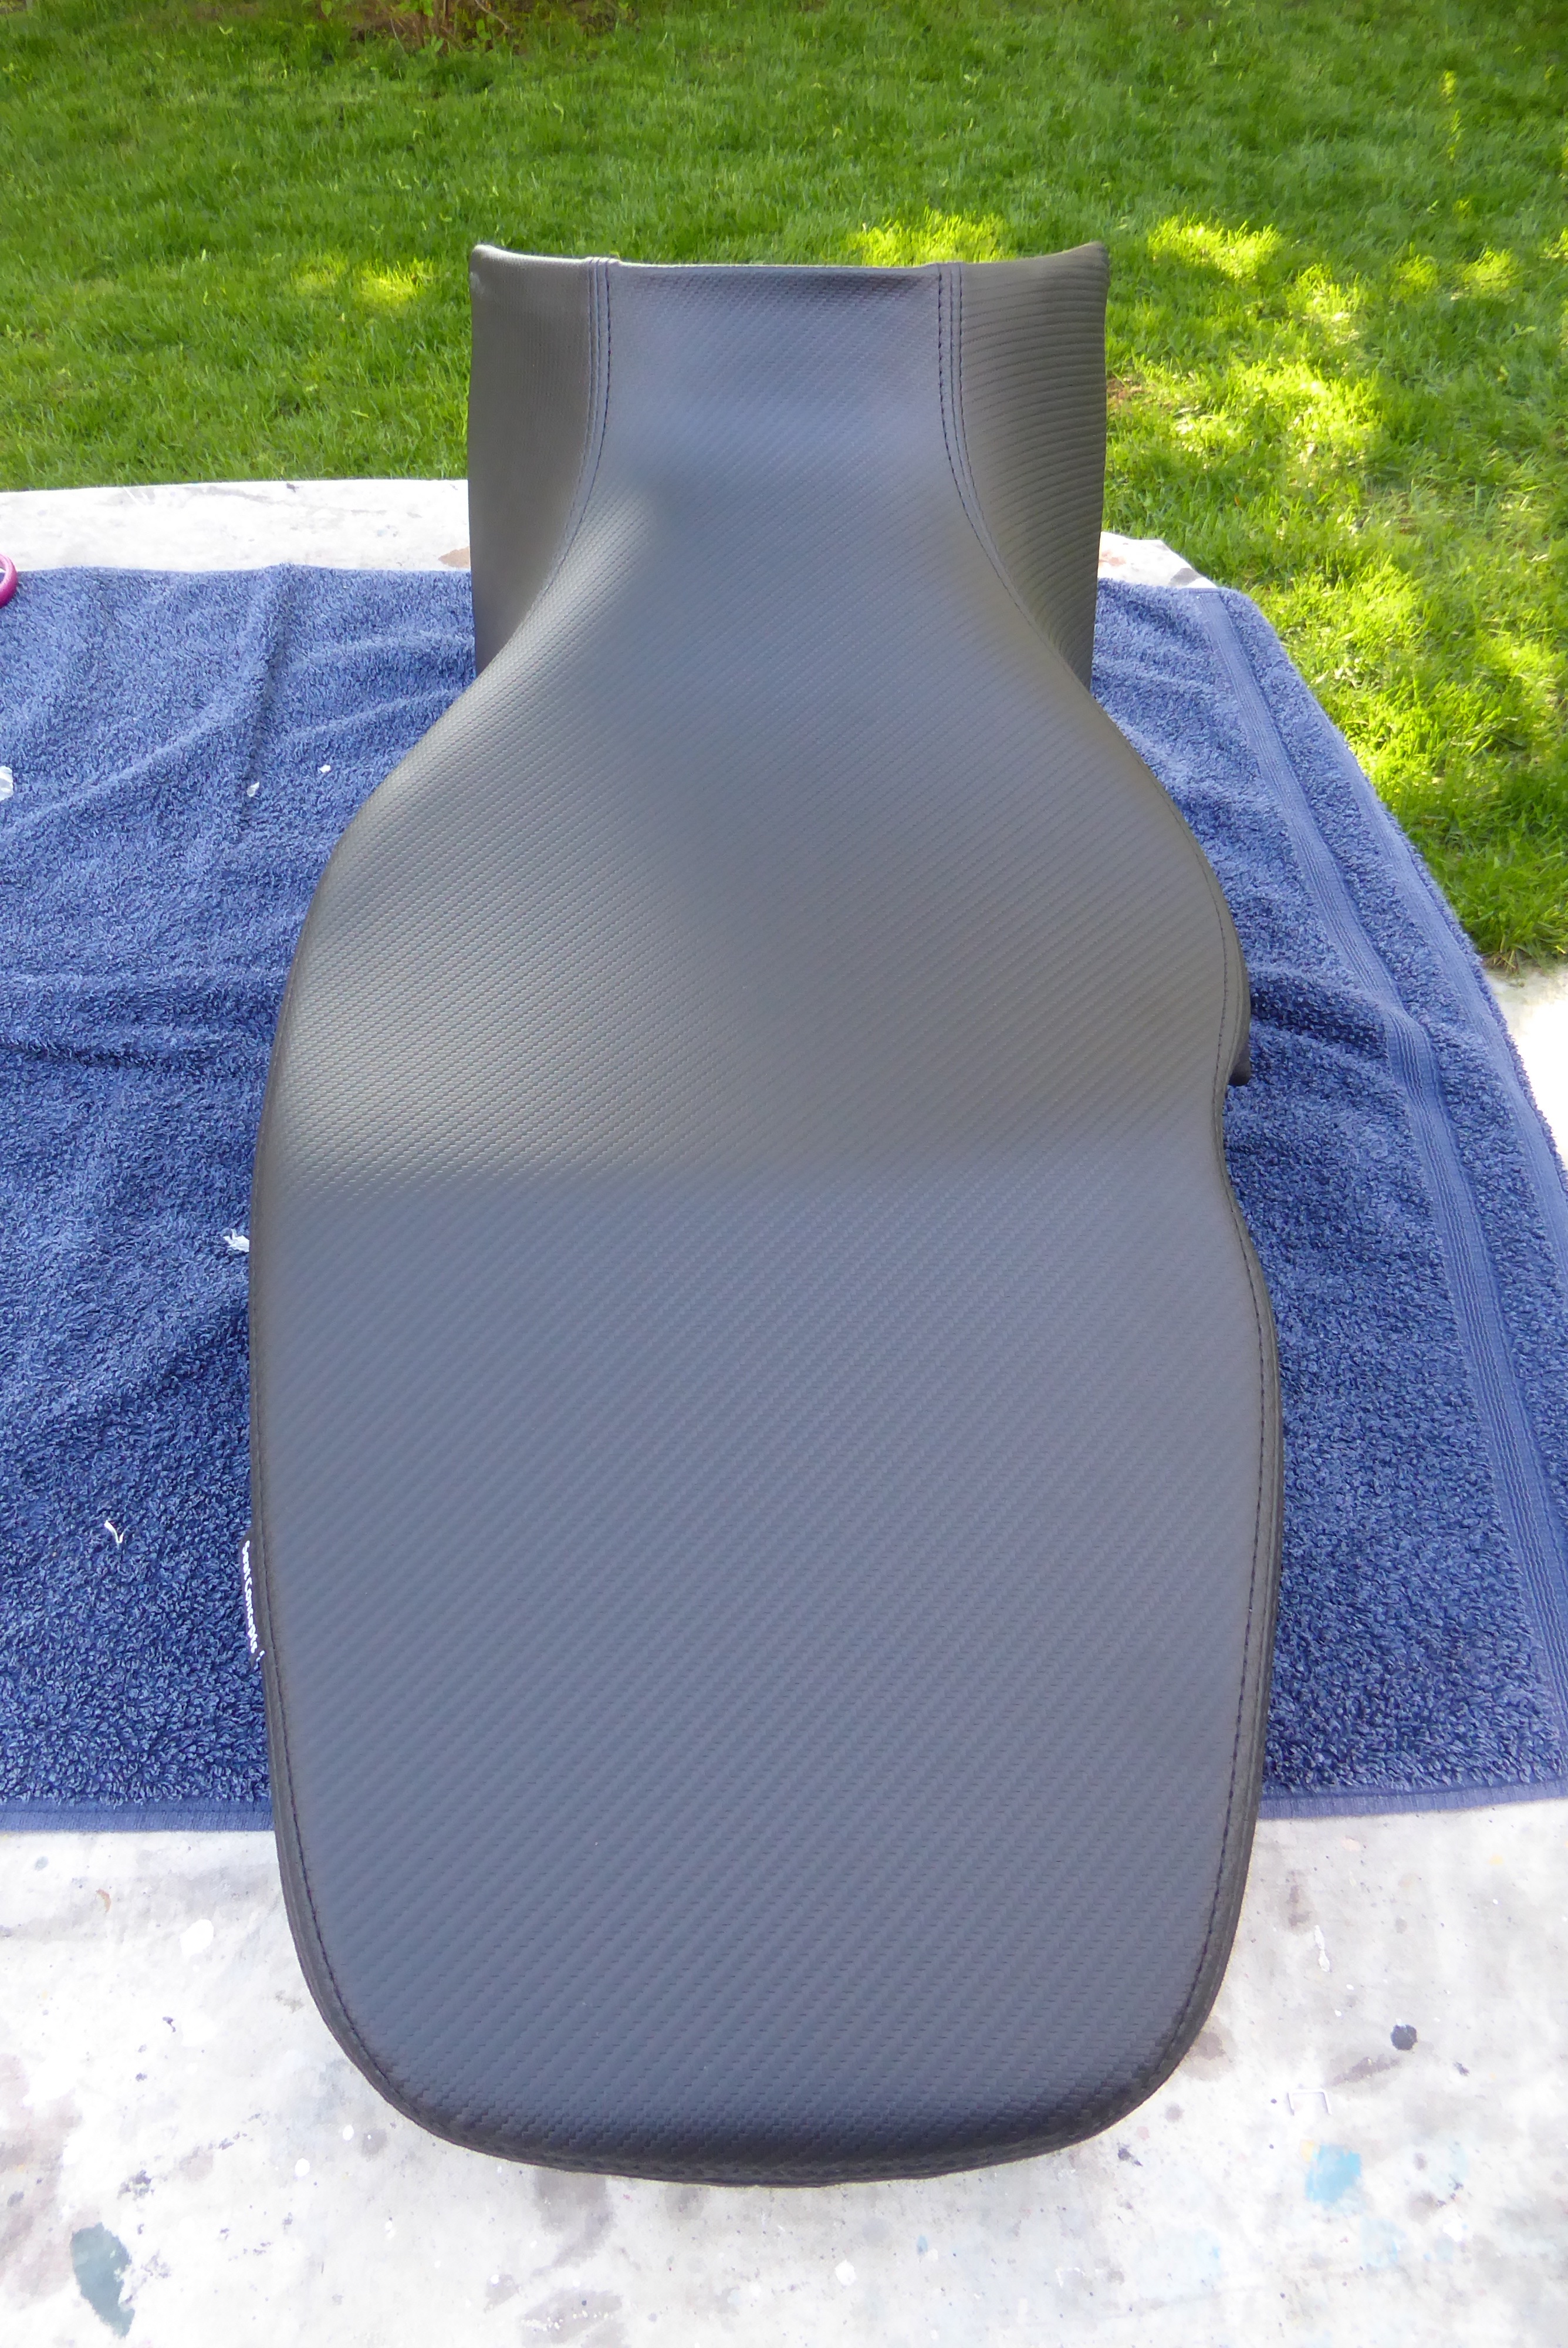
Two areas where the 650GS is lacking are the saddle and the windscreen. The saddle is hard and slopes downward, so you always feel like the boys are jammed up against the airbox. If you plan on using your GS for long day trips, you’ll want to upgrade the saddle. There are many aftermarket models available, including BMW’s own Comfort Seat, but I decided to go with Seat Concepts which, for about $250 CAF, they will send you the foam and cover and you reupholster it yourself using your original seat pan. I’ve done a blog on this job so won’t repeat myself here.

One issue with this era GS is the windscreen. The OEM screen is so small it barely covers the instrument dash. There are many aftermarket screens available, but finding the right one is a difficult matter of trial and error. The windscreen issues on this bike are well documented, and if you have sadistic leanings, just search at f650.com for aftermarket windscreens, sit back, and enjoy. The reading is almost as entertaining as a good oil thread. In my own experience, the bike came with a 19″ National Cycle touring windscreen, which was a bit high for off roading and was directing loud air buffeting directly onto my helmet. I swapped it for a 15″ but that too was loud, so I added a wind deflector and that solved the buffeting but I thought ruined the bike’s aesthetic, so I ultimately landed on a 12″ sport screen by National Cycle that protects my torso but keeps my helmet in clean air. The problem is the shape of the front cowling that the screen screws into. It angles the screen too much directly toward the rider’s helmet, instead of the recent bikes that have the screen more upright. The quietest screen on the aftermarket is the Madstad screen. It has an adjustable bracket that attaches to the cowling, allowing you to adjust the angle of the screen. It also has that crucial gap at the bottom of the screen, preventing a low pressure area that causes the buffeting developing behind the screen. Unfortunately, it’s a little pricey, but the real deal-breaker for me is that Madstad use acrylic, and acrylic screens don’t stand up to the abuse of off-road riding. National Cycle screens are polycarbonate.

Aesthetics: I love the aesthetics of this bike! Even ugly babies are adored by their parents, but sometimes I’ll look at a more modern luxury touring bike with the engine completely covered in plastic and I’m glad my bike has its guts hanging out like a proper bike. And I like that it has spoked wheels, which are stronger for off roading and have a more traditional look. Someone once said to me, “I love your old-fashioned bike.” Hmm . . . I hadn’t thought of it as old-fashioned but didn’t mind the comment. There definitely is a raw, real motorcycle quality to the bike, yet has refinements like heated grips and the quality control and reliability you’d expect from BMW. It is the ultimate hybrid dual-sport: part dirt bike, part luxury tourer.

In conclusion: The f650GS is a confidence-inspiring little bike that is perfect for not only beginners but also anyone who prefers a smaller, lighter bike. There’s a movement these days toward smaller bikes, with many people looking at the big adventure bikes with derision for their impracticality off road. I say it really depends on the type of riding you want to do and where you plan to take the bike. Due to its size and weight, the 650GS can go some places that the larger bikes can’t, but the cost is in vibration and rpms at speed on a highway. If you’ve got large areas to traverse but want the capacity to go on dirt roads when needed, then yeah, go for the big 1200GS that is so popular. But if you’ve got time and want to explore deeper into those remote areas, then the 650GS is an excellent choice. I plan on keeping mine as long as possible.

* * *

Pros:

Ergonomics for dirt and touring; smooth suspension; very well balanced; reliable Rotax engine; sufficient hp and torque for light off-roading; fuel injected intake has automatic temperature and altitude adjustment; classic aesthetics

Cons:

Cost (upfront and maintenance; even parts are expensive for DIYs); saddle is hard and uncomfortable; windscreen is useless, hard to find a good aftermarket replacement; engine can be vibey; only 5 gears

* * *

Modifications:

With the help of my son, I’ve created two walkaround videos describing the modifications I’ve done to the bike for dirt riding and street riding. 


Walkaround Mods for Dirt
Walkaround Mods for Street

How’d I do with my first review? Please comment and click the Follow button if you liked this post.

The Mother of Invention

Last fall while practising some off road skills, I broke my radiator. I was working on power slides using two cones and riding hard in a figure eight. In a power slide, you brake slide into the corner, then at the apex crack the throttle, break the rear end loose, and slide the back end around as you accelerate out of the corner. In one attempt, I must have angled the bike too much or not cracked the throttle enough (you’re aiming for the right combination of both) because the bike just plopped down on its side. It was already at a steep angle and didn’t fall far, and onto sand, no less, so I didn’t think much of it. But a few minutes later the temperature light came on and the bike overheated. At over $600 for a new radiator and no used ones available on eBay, I decided to put the bike into storage early and deal with it in the spring.

This gave me a whole winter to think about what happened. Was it just bad luck? I decided to buy some upper crash bars to protect the faring and radiator in the future. I have lower crash bars and even some makeshift ones that I’ve had welded onto those, extending out past the pegs and which I thought would be wide enough to protect the upper part of the bike in a fall. But this happened on sand, not asphalt, so they simply sunk into the sand and didn’t stop the impact on the radiator. Ironically, if the bike had fallen on asphalt, I’d be $600 richer. So yeah, bad luck. But I also got to thinking about the Dakar riders and how they dump their bikes all the time on sand and don’t end up with busted radiators. What saves their rads on impact and not mine?

Two winters ago, I was considering a trip to Blanc Sablan, QC, which would have required riding the Trans-Labrador Highway. It’s 1,500 kilometres of gravel road, and without cell service (only satellite phones placed periodically along the highway) and logging trucks barreling past you, it’s imprudent to be without a radiator guard. One errant stone thrown or kicked up into the fragile fins of the rad and you are stranded in the middle of . . . not nowhere, but Labrador, and that’s not good. So I  installed a radiator guard.

From the beginning, I wasn’t entirely happy with it. For one, it required removal of the OEM (Original Equipment Manufacturer) shrouds to install. One look at the shrouds and you can see they’re designed to funnel air into the radiator as well as offer some protection from flying stones. In addition to concerns about adequate cooling, the guards (there are two, one for each side) are also a little flimsy. They are thin aluminum, designed to be light, but because the body panels snap into grommets on the guards (or, originally, the shrouds), they serve another important purpose in supporting the structural integrity of the bike.

Looking at the guard that came off my bike, I could see that it had buckled upon impact.

And this is after some initial straightening. My guess is that the body panel bent the guard and the weight of the bike torqued the radiator. (The leak is in a bottom corner.) It might even be that the guard was shoved into the radiator upon impact because some of the fins are damaged. The OEM shrouds, although plastic, are stronger and might have prevented the damage. Ironically, it’s quite possible that my radiator guard led to my radiator breaking! The lesson here is beware of altering OEM parts on your bike. Sometimes those German engineers know what they are doing. And these bikes, all bikes today, are thoroughly tested before going on the market. Swap out OEM parts for aftermarket ones with prudence!

So I decided to go back to using the OEM shrouds. I wasn’t completely happy because my new radiator would still be vulnerable. The only other major manufacturer of guards for my bike also requires that you remove the shrouds. I therefore had no choice but to try making my own, some that would fit inside the openings of the shrouds.

When I was a kid and was working on my bicycle (or some other project) and needed something very specific, I’d just walk around in my parents’ basement until I found it. I’d have a vague idea in mind of what I needed, and since my parents’ basement was filled with stuff of all kinds, it was just a matter of time before something that would do just the trick presented itself. Walking through a home renovation warehouse is a similar experience. You don’t know exactly where to find what you envisage or even what section it might be in, but keep walking. In my case, I found my new radiator guards in the eavestroughing section.

I started with some aluminium grill that goes in your gutters to keep leaves out. It was cheap and perfect width and even pre-painted black. Most importantly, the openings were the right size—not so big as to let small stones through but big enough to allow sufficient airflow. It was also strong enough to withstand the shake, rattle, and (unfortunately) roll of off-roading. stretched aluminum

Then I carefully measured the openings of the shrouds. MeasuringI used some cardboard and created templates that I could fit into the openings. They were basically squares but with the edges folded about 1/4″. I would use those edges to fix the grill to the shroud, but more on that later. I had to cut the corners so when folded they became like a box (or half a box). One opening on each side was a little tricky because one side of the square is not straight but has a jog. Carefully measuring and fiddling is necessary, but better to do this with cardboard before cutting into your grill.templates

When I had the four templates, I held each up to the grill and cut using tin-snips. CuttingThis is a little messy and you have to vacuum carefully afterwards to collect all the sharp bits of discarded metal. I then held the template against the cut metal and used my Workmate, my vice, and some blunt-nosed pliers to fold and shape the guards.Folding I offered each into its opening and tweaked. FittingThis requires patience, but if you follow your templates as a guide, which you know fit well, you’ll eventually get there. Use the tin-snips or pointed-nose pliers to trim off or bend in sharp edges that can scrape the plastic as you fit them. If you do scratch the plastic a bit, use some Back to Black or Armour All to lessen the visibility of the scratch.

Finally, I wrapped each edge with electrical tape to give it a finished look and prevent the sharp edges from scratching with vibration. TapingFortunately, those clever German engineers had the foresight to drill two holes in the opposite side from the mounting points, probably with something like this in mind. When the guards are done, you can fix them into the shrouds using the mounting screws on the inside and either zip ties or 1/2″ 10-24 machine screws and washers on the outside. I decided to go with the screws just to be sure everything stays put.

Here’s the finished product. I’m happy that I’ll get the cooling effect of the OEM shrouds plus protection for my new (expensive!) rad.Finished covers

These guards are particular to my bike and unless you have a 650GS you’re going to be facing a different situation. Maybe there is a good guard or any other add-on for your bike on the market. But if there isn’t, or if you’re not entirely happy with the product or the price, don’t overlook the option of making it yourself. With a little ingenuity, time, and patience, you can sometimes do better and save yourself some money in the process.

The Wish List, 2017

santa_motoIt’s that time of the year again, when we get to dream big with empty wallets. In an ideal world, one where either Santa exists or bank accounts are bottomless, what would you get to prepare for next year’s riding season? Here’s what I’ve been hankering for.

Let me say at outset that there are already a few goodies either arrived or en route for my BMW f650GS. I busted my rad in a stupid tip-over in sand so figure I should have listened to my intuition and bought those upper crash bars earlier in the season. I’ve looked at them all and, given that I’ve already got lower engine protection with my BMW engine guard (the cage), the only ones that would fit are by Touratech or by Holan. TT have only one anchor point at the front, so the bar is kind of floating and kind of useless. Fortunately, Holan make one that anchor front and back, and their customer service is excellent. After a lot of back and forth, I managed to negotiate a slow, cheaper shipping option from Poland, where they are made. Holan_bar

It’s those upper two bars that are currently somewhere over the Atlantic. They fix onto the centre spine and at the back on the frame by the preload adjuster. They will protect the fragile radiator and the faring without getting in the way of my leg position.

The other thing I got is an inline fuel filter. My bike’s filter is supposed to be changed every 40,000 kilometres, but since the filter and the fuel regulator are one unit, it costs over $200 to change. So I’m adding a Golan (no connection to Holan) Inline Peak Fuel Filter ahead of the OEM filter, which should mean I never have to change the expensive unit.

golan_peak_flow_mini_fuel_filter_750x750

Mine is the mini on the far right.  It’s not available in Canada so I had to order from Revzilla, and whenever I do that, I add a little something else to make the shipping worthwhile. In this case, it was a pair of Baja Designs turn signals. flashers

Seems whenever I drop the bike, those front flashers get the worst of it, and I’ve already glued them back together a few times, but they still look a little worse for wear. The Baja signals have a flexible stalk, which makes a lot of sense. And being designed for the Baja Rally, they are built tough. They look the same as OEM, but should stand up better when I and the bike do not.

I’m also building a more comprehensive travel took kit based on a great thread at ADVRider.com. I won’t bore you will every item, but just say I’m gathering sufficient tools to fix just about anything on my bike in the field. I figure if I’m going to ride to remote regions, I have to be able to fix pretty much anything that might break. The tools actually is the easy part; the tricky bit is deciding what spare parts to bring along. You can’t bring a spare of everything!

tire-wrenchSo I’ve already bought this wheel lug wrench/tire iron in one. It’s light enough to carry everywhere but is good to 90 ft/lbs. T-handles, steel-reinforced epoxy putty, a tow strap, etc. — I love tools!

chain kit

The one item that was a little out of my budget so went on the wish list is the Motion Pro Light Weight Chain Breaker and Chain Press Tool.

When your bike is chain-driven, like I said, you have to be ready for anything that can happen in the bush.

Okay, tools aside, I need a 50/50 tire on the front. I’m still riding a Metzler Tourance, which is fine for dirt roads but not for too much more. I’ll get and mount Heidenau K60 k60-scout-dual-sport-front-tireScout on the front to match the back, and this will allow me to GO ANYWHERE! Yes, I’m that confident that once I get this tire, no more tip-overs in mud and sand. Nature in all its awesome power and trickery will bow down before me and my machine.

Next up is some body armour. I know, I know: what happened to Nature bowing. Well, I may win the war, but that’s not to say the trail won’t win a few battles along the way. My new Klim Tourance jacket that I bought for off-roading is just a shell and comes with no padding. That suited me perfectly because I decided I’d rather get full-on armour for those spills, something like the Leat Body Protector, than the wimpy pads that are in most motorcycle jackets. Leat Body Protector

The nice thing about this option is you can wear it under a motorcycling jersey on those really hot days. That should complete my off-road gear necessities. I now have boots, Klim Dakar pants, the Tourance jacket, a LS2 Pioneer helmet, goggles, and gloves.

Montana

The other fairly big ticket item I need is a good, dedicated motorcyle GPS, or as they call them in Europe, a navsat. I’ve been making do with a combination of Google Maps on my phone while in Canada and an old car (i.e. non-waterproof) GPS while in The States, but neither is perfect. I’ve tried apps but none work reliably, and lord knows, navigation is an important part of any ride. The one on my wish list is the Garmin Montana, a unit designed specifically for off-road use. 

As you can see, it includes topographical maps, a glove-friendly colour touchscreen, access to both GPS and Glonass satellite fixing, HD camera (with the capability of taking geotagged pictures), a smartcard port, Basecamp, geocaching, wireless capability . . . it’s got it all and is the GPS of choice by most adv riders. It’s also got a price tag to match these capabilities, so I’m going to have to be extra good for Santa to spring for this baby.

seatosummit
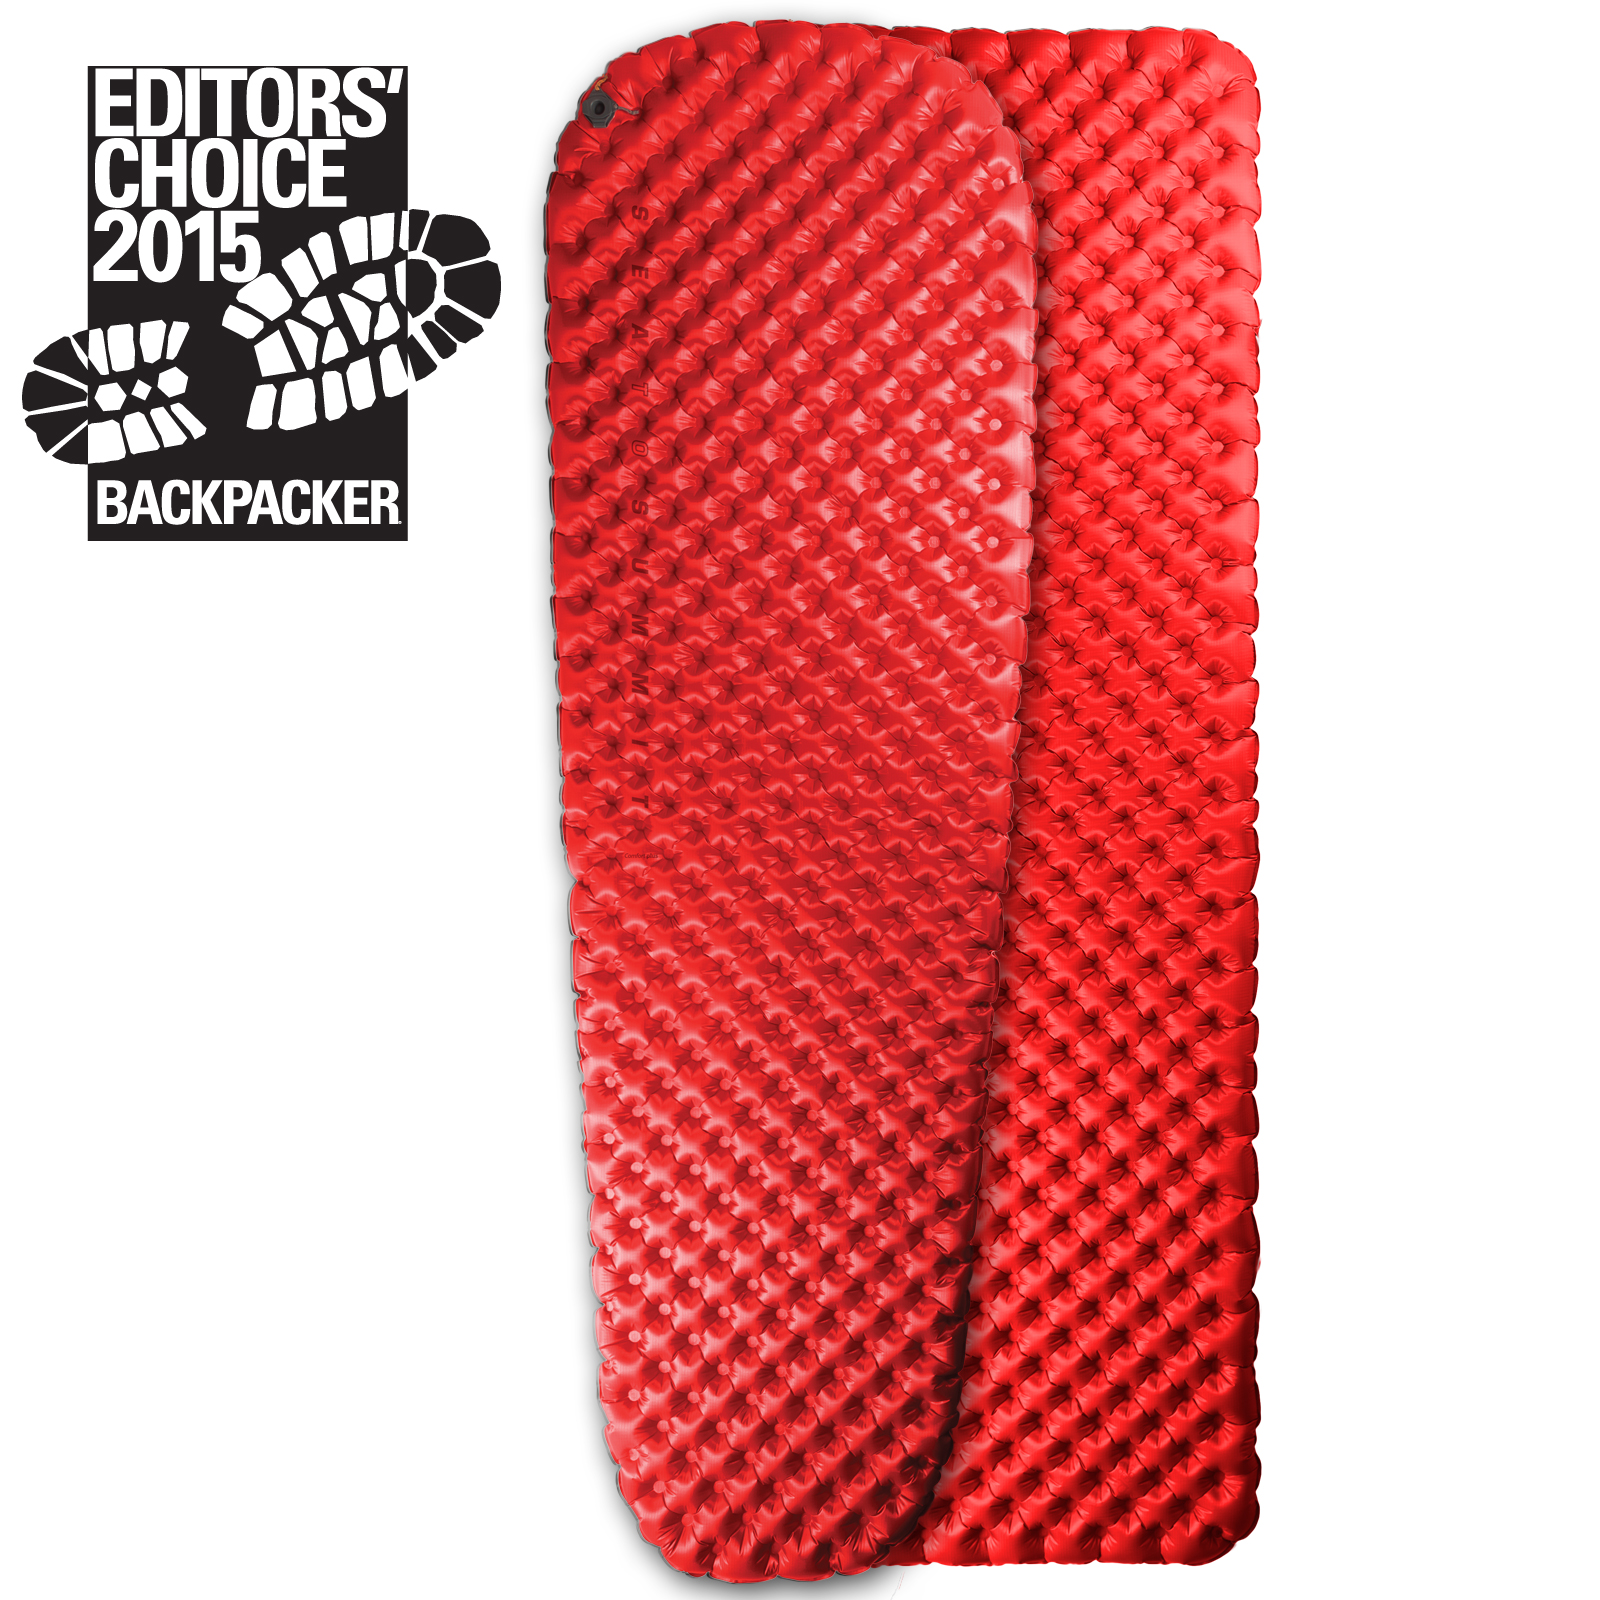
And really, that’s about “all” I need. One luxury item is a Sea to Summit mattress, something that was on my wish list last year too. Yeah, my Thermarest is pretty good and at the end of a long, hot day of riding, a bed of nails feels pretty good. But eventually, for the long tours, this premium outdoor mattress would be pretty nice. This insulated mattress has a dual layer construction, allowing you to inflate the top layer to comfort and the bottom layer to even out uneven ground. That jagged tooth of a rock under back will feel like a pea, and the whole thing weighs less than 1 pound 12 ounces and packs up to 5″ x 9″. And as I’ve said before, when you’re roughing it and saving money on accommodation costs, why not have the best camping mattress money can buy?

So that’s my list: some tools, a new front tire, a better GPS, and some body protection. But the main thing I wish for is another year of health and safe riding. That is all that anyone can ask for, and with God’s grace, receive if one is so lucky.

Got a few items on your wish list? Don’t be shy. Stick them in a comment and maybe there’ll be a few things there we haven’t heard of.

Merry Christmas to you and yours and safe riding in 2018.


My Favourite Motovlogs

I didn’t know what a vlog was before I started riding. As a writer, I was more interested in blogs, and YouTube was a place where you could see your dear friend’s child act in the school play, a compilation of the sexiest ice-bucket challenges, or the footy game you missed last weekend (if you were willing to follow the sketchy link). Then GoPro entered the market and it changed everything. Suddenly you could get a rider’s-eye view in HD with sound that didn’t seem like the guy was riding underwater, or through Hurricane Katrina, or both. Companies also woke up to the idea of advertising for free under the guise of providing product reviews, and a generation of unemployed video editors found work. The video blog, or vlog, was born.

Perhaps I’m already thinking of those long winter months when the bike is up on a jack in the shed with a 40 watt bulb pointed at it. If you’re like me, product reviews midwinter is like a balm to a wind-chapped itch to ride, and a helmet-cam is the closest thing there is to throwing a leg over said motorcycle stored in the shed. I spend a lot of time during the winter on YouTube, learning stuff, buying stuff, or planning on buying stuff once spring hits. In prep for those regrettably not too distant months ahead, here are my favourite motorcycle vlogs and YouTube channels. Enjoy!

Because I subscribe to the free (i.e. cheap) version of WordPress, I can’t embed videos. You’ll have to click on each hyperlink to have a sample vlog open in a separate tab.

Weekly Rides With Rueben was my entrance into not only vlogging but also motorcyling in general. Before I even had my full licence, I went searching one day for tips for newbies, and after a few scattered hits, I stumbled upon Reuben’s vlogs. Reuben (I don’t know his last name) worked for Competition Accessories in North Carolina, and they decided his vlogs would be a good way to generate traffic to the store, I guess. A new video was uploaded every Wednesday and together they were, as he says at the beginning of each video, “a random collection of motorcycle adventures, life on two wheels, and product reviews.” If that sounds eerily familiar, I guess Reuben’s videos heavily influenced my thinking about this blog. Topics covered included riding in the rain, riding at night, avoiding obstacles, and preparing for fall riding, for examples. Then his store started partnering with a nearby dealership and he started doing bike reviews. Reuben also did product reviews from the store in front of the camera, but I think he was more comfortable behind the camera. He never seemed at a loss for words, and was articulate and knowledgeable. I learnt a lot from Reuben over his 74 posts. The posts abruptly stopped without notice because, as rumour has it, the store was bought out. A new guy from another location took over, but it was never the same. Hope you’re doing well, Reuben!

The ancient Roman poet Horace wrote that poetry should both “delight and instruct.” The same could be said for a good vlog, so while I might find it “delightful” to watch Rosie Gabrielle ride through Oman or Ottawa, if I want to learn how to ride, I go where the experienced riders are. Sorry Rosie! Zack and Ari, co-editors at Motorcyclist Magazine, have been riding together for a long time! (Like, since childhood.) They are good riders. In fact, I’ve watched Ari break a track record on a KTM 390, and Zack is no slouch either. Just watch his MC Commute, where he rides a different bike to work each day and gives a review en route. Their show On Two Wheels (again, a rip off from yours truly) is a lot of fun with their humour keeping things light but rarely stupid, and always the bikes are front and centre. One of my favourite episodes is the one on the BMW GS, yeah, the bike that opened up the adventure touring market and spawned my f650GS. But even more than On Two Wheels, I love MC Garage, where Ari walks us through some simple maintenance of our bikes. I have a lot of respect for people who are both good riders and good mechanics. I’ve used some of Ari’s tips to fix not only my bike but also my car. I think Horace would agree that instruction for a hungry audience is also a delight.

If Ari and Zack are good riders, Lyndon Poskitt is a great rider! How great? Dakar great. Podium finisher in Baja great. And he knows his way around a bike too. In fact, he built his bike from the frame up. In Races to Places, Lyndon travels around the world, stopping at various rally races like the Mongolian Rally, The Baja Rally, and of course the Dakar, to try his luck and skill. His key sponsor, Adventure Spec, put together the vlogs of his adventures. Production quality is high, which is especially impressive since Lyndon does all his own filming. I’ve done enough adventure riding to know that when times get tough, the last thing you want to do is stop for a photo (or cutaway, or take 20 minutes to set up a 20 second shot), but Lyndon is committed loyally to his project and followers. I’ve also learnt a lot about different countries vicariously from Lyndon. I’ve followed him across eastern Europe, down into Asia, and now over to Australia. I’ve really been enjoying this series, now starting its 7th season. I’m trying to savour them because I’m almost entirely caught up and will soon have to wait for each new episode.

If you are more into street riding, or rather street racing, you want to check out Lockk9 TT Racing’s channel. Nobody does video editing as well as this guy. I can’t get enough of this video: great editing, great music, not bad riding. It’s a shot of adrenaline on a cold mid-winter morning to get you out the door and to your job.

For product reviews, I go to two sources: Fort Nine and Revzilla. I love Fort Nine because the reviews are thorough and I know that whatever RyanF9 talks about I can get from this Canadian-based online store without the hassle of cross-border issues. I bought my 50/50 tire based on his rave review of the K60 Scout (i.e. “I’m not even going to say this is my favourite pick of the video because the K60 is my favourite tire on the motorcycling market right now”). He’s knowledgeable and funny, and tells it like he sees it, which is not always the case with product reviews. Usually they end up being positive, pointing out only the merits of a certain product. In fact, many so-called “reviews” are really just product descriptions, with very little if any evaluative comments thrown in. Ryan also does pretty good vlogs. In his vlog about how to legally ride off road in Canada (his split infinitive, not mine), I found out about Chemin Scotch north of Hawksbury, and checked it out, and had a blast. In a recent vlog, he talks about having a degree in Art History (Art History!) which really is evidence that what you study in school doesn’t have to be what you do in life. And no one does bike reviews like Fort Nine. They are creative works of art. Apparently Ryan writes the scripts and some guy named Steve handles the editing. Just check out this review for example, in rhyme, of the new BMW 310R. I’m so old I can’t say exactly what he’s parodying, but I think it’s hip hop videos. In another, he says he’s heading back west to BC to start a new chapter with Fort Nine. I hope that includes more vlogs.

For more in-depth product reviews, I go to Revzilla. I don’t know what Anthony drinks in the mornings but I know I want some. A 19′ review of the Klim Badlands jacket? Really? He strips that bad boy down inside and out. Meanwhile, world population has increased by 4,750 by the time he’s done. It’s thorough! How much do Klim pay him to represent their product? How long does it take him to learn all the details of that jacket? Because of the currency conversion and cross border brokerage (motorcycle gear is duty-free, however), Revzilla is not always the cheapest option for me, but I never buy a product without checking out the Revzilla review and user reviews there. Thanks guys! And just to show my appreciation, sometimes I do buy there and have it shipped to Burlington and ride down to pick it up. I especially like their Gear Guides, where they compare a number of select products in the same review. You can salivate all winter long, and drop Christmas hints to loved ones by sharing, or create a wish list of your own for when you’re stinking rich.

I’ve saved the best for last, but I’m going to cheat because it’s not even a vlog. It’s a podcast, but I’m including it because I’ve probably learnt more about the adventure touring experience from Adventure Rider Radio than from any other single source. Yeah, the show caters to adventure riders, but host Jim Martin is always careful not to exclude other types of riders and riding, and much of the information is relevant to motorcycling in general. I’ve learnt everything from the esoteric (e.g. the nitty gritty of motorcycle chains) to the mundane (how to prepare tasty meals in camp, or first aid). One of my favourite things to do during the winter is run a hot bath and listen to ARR on my iPad while I soak away the chills. I’m always keen to learn new skills, especially if it’s from the comfort of a hot bath, and one of my favourite segments is the rider skills segment with Bret Tkacs of PSSOR. The show functions on a donation and sponsor basis and it’s pretty impressive that Jim and his wife churn out a show every week. I’ve been meaning to send a token of my appreciation, and will, because while the show is obviously a labour of love, these kinds of shows don’t survive if not supported by those who enjoy and profit from them.

There are a few others I cruise past from time to time, but I’ll stop there. Drop a comment about your favourite motovlog or channel and I’ll check it out. Or let me know what you think of some of these. Happy fall riding, while it lasts.


Seat Concepts: 650GS Dakar Install

What’s the most important contact area in biking? Some say it’s the two patches of rubber, one on the front tire, one on the back, that touch the road. Some say it’s the four contact areas of control—two hands on the handle-grips, two feet on the pegs. I say the most important contact area is your butt on the saddle. I come to this conclusion after a season of riding with an OEM BMW seat. The Bavarian Motor Works, as the name suggests, are renown for their engines, not so much for their upholstery. The guys in my club know that after around 200 kilometres I start to squirm. By 300 I can’t take it any longer and stand up, even if we’re at highway speed. After my 800 km day last year, I had a new understanding of the term “saddle sores.”

There’s nothing worse than ruining a day’s ride by being uncomfortable on your bike. For that reason, on my Wish List last Christmas was a new seat. My old seat was not only uncomfortable but the vinyl had cracked with age. It was due to be changed. cracks
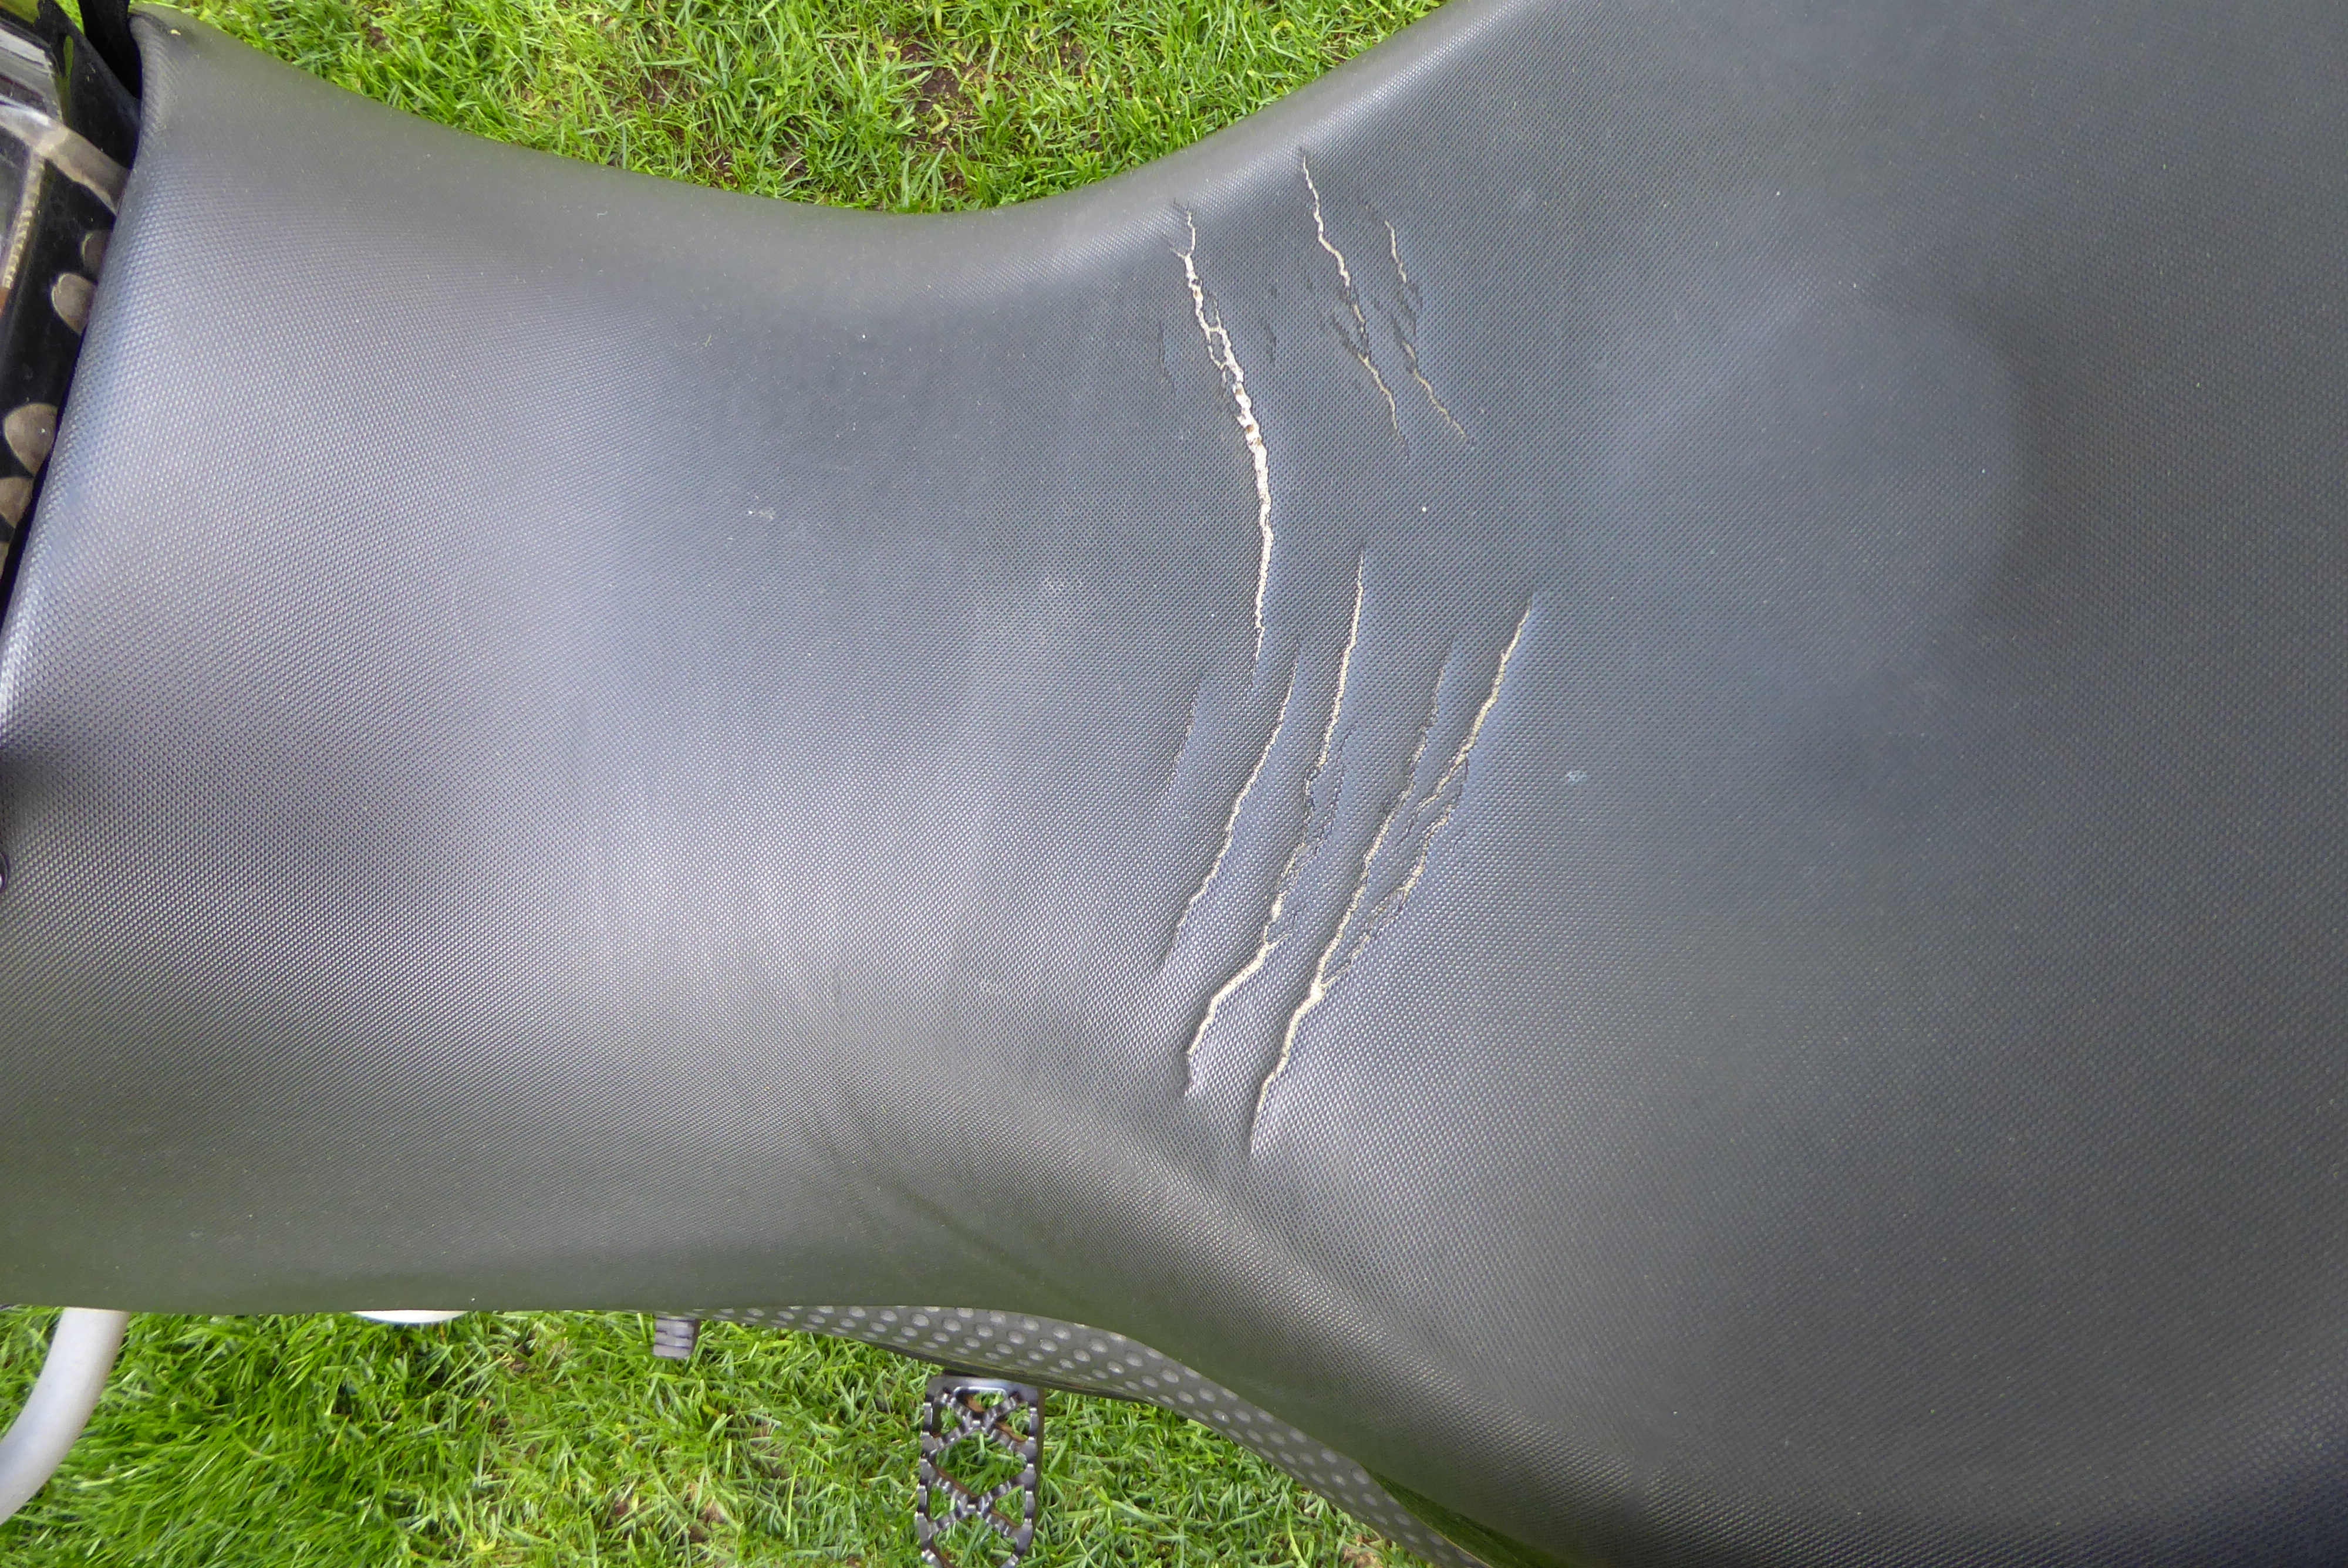
The only problem is that both BMW’s and Touratech’s comfort seats are about $700 CAN. My butt was telling me to spend with abandon, but my mind (and my wife) was reminding me of our budget. Then I heard about Seat Concepts, a company that ships you the foam and cover and you re-upholster the seat pan yourself at a fraction of the cost. For my bike, it was about $250, or close to 1/3 the price of the other comfort seat options.

Seat Concepts is an American company, so I ordered through MX1Canada in BC and let them handle all the cross-border issues. The standard foam is for people 160 lbs. and up, and since I’m 145 soaking wet, I custom ordered the foam to my weight. There are four options for the cover: gripper top/carbon sides, all carbon, embossed top/vinyl sides, and all vinyl. There’s also a swede option but that’s not practical in geographical areas that rain, which is pretty much everywhere except the desert. I was interested in the gripper top, but it’s not recommended for people who sometimes ride in jeans, including me, so I opted for the all carbon option, which is their second-most popular covering. I also decided to choose the Dakar height since I was feeling a little cramped on the bike. It all arrived in the mail this past spring and all I needed was a warm day to do the work, since they recommend placing the cover in warm sunlight to heat it up. That day finally came last Sunday, so I got to work. Here are the tools I used.

There are some excellent video tutorials offered by the folks at Seat Concepts, but here is how my install went.

I started by removing the staples in the old seat. I used a flat-head screwdriver and dug them out. stapler_remove1

Don’t worry if only one side of the staple comes out . . .

staple_remove2

. . . because you are going to grab the staple and pull it out with blunt-nosed pliers.

pliers

Once all the staples are removed, you just peel back the old cover and separate the foam from the seat pan. On mine, it came off easily. Apparently on others, you have to coerce it a bit.

seat_pan

You will have a bunch of holes in your seat pan from the old staples. They have to be sanded down with a medium sandpaper or they might puncture your new seat cover.

sanding

Now you’e ready to glue your new foam to the pan. I used 3M’s Super 77 aerosol spray and it worked great—so great, I asked my wife to assist by separating the sides at the front while I positioned the back. The glue is tacky at this point, so you want to get one section straight and right before another touches. A second set of hands helps at this crucial stage. Note that I laid the foam upside-down on my workspace and placed the pan onto it; it was easier that way.

This is what the seat looks like before covering.

new_foam

Meanwhile, like I said, your cover has been basking in the hot sun and is pliable. Heating it first also helps because when it cools it will shrink and tighten up. Seat Concepts provides some thin plastic to waterproof the foam. It’s recommended you use it under the cover. So I began by wrapping the seat and taping the plastic to the underside of the pan. (The tape is temporary and will be removed later after all the staples are in.) There were some small wrinkles in the plastic but it is impossible to not have any and I figured the plastic is so thin I’d never feel them under the cover.

Then I started the part that gives most people some stress. It actually was not hard at all. I started by putting two stables at the back and one or two in each corner at the front. Make sure the cover is centred by examining the seams closely. Then I just started wrapping and stapling the cover from the middle outward toward the front and back. I pulled the cover over the lip and stretched it just a little more and put in a staple. I worked both sides at the same time, ensuring the cover stayed centred and taut. cover_beginning

I borrowed an electric stapler from a friend, but as it turned out, my hand one was just as effective and I used it for tight spots in combination with the power stapler. I used 1/4 in. T50 staples. As with any stapling of this kind, it’s important to stabilize both the item being stapled and the stapler from recoil or the staples will not go in all the way. Any that did not, I tapped in fully later with a hammer. Yeah, a second set of hands is helpful at this stage too, but it doesn’t take long. cover_end

Then I just used an Olfa knife to trim the excess cover and plastic. The finished product looks great!done

Finally, I reinstalled the seat. It needed some coaxing because the Dakar seat is a little wider at the back than the standard, but well worth it if you can afford the extra height. I took measurements before and after and the Dakar is about 1.5 inches higher than the standard. It also has a flatter front shape with less sloping into the tank. Here are the two seats side-by-side, before and after pictures for comparison.

height_old

height_new

It’s surprising what that 1 1/2 inches does. Everything feels different. I feel more upright on the bike, seated on it rather than sliding into it. Controls feel different too. And while I can still flat-foot, I feel that extra height at each stop. Most importantly, my knees are now bent at 90 degrees, which is the best ergonomically, according to technician at my work who helped me set up my new office chair.

I haven’t done any long rides yet with the new seat, but I’ll follow up here with a comment once I do. Next weekend I’m going to a rally in NY State where I’ll be going on some day-long rides, but my early indication is that the seat is very comfortable. I’m also happy with the money I saved by doing it myself.